|
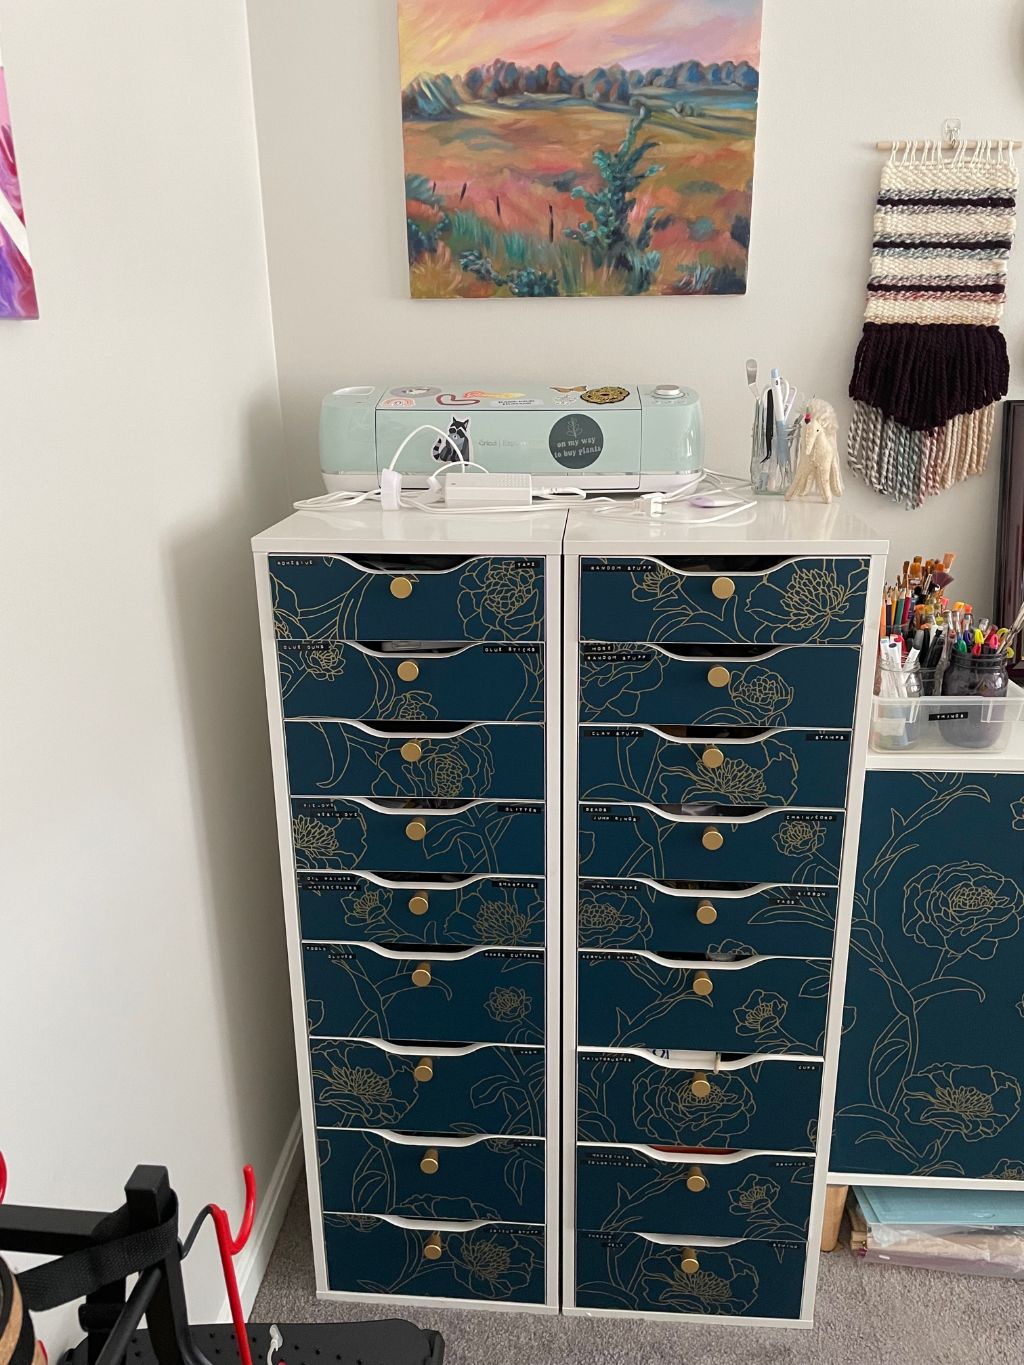
Hi everyone! So I realized I have not given a tour of the craft room/office since it was last redone so we’re going to do that today! Here is the blog showing what the craft room looked like right after we moved into our apartment last July: www.thepatternedpaperplate.com/blog/weve-moved We’ve made some changes since then and I’m here to walk you through them! I’m always trying to make this room more efficient, so it gets changed up pretty often. I’m really happy with it as it is right now! So when you first walk in and look to the right, we have my husband’s desk. This has not moved, but some décor and shelves were added to the wall to make it look less empty. The fronts of the drawers and doors were also covered in peel-and-stick wallpaper and have had knobs attached to match the other white furniture in the room. His desk is usually where we keep papers before they need to be shredded so it gets a bit messy at times! (I covered up any personal info just in case.) To the left of his desk is another small piece of IKEA furniture that has our printer on top of it. 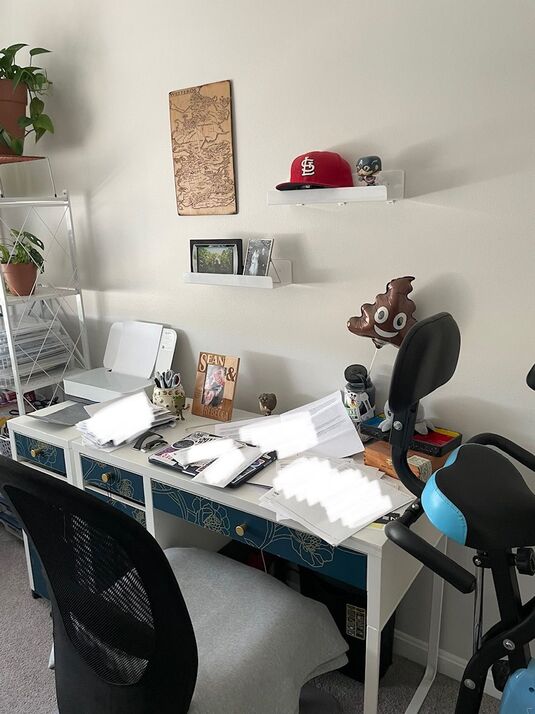 If you are looking straight in from the door we have my IKEA drawer units that I have had for a long time as well as a new piece that I got from my parents. That piece has also been covered in wallpaper and knobs have been added. This is where the bulk of my craft supplies are kept and it has been working well for me!
I also took the time to label each drawer so that I could remember what was in each one. 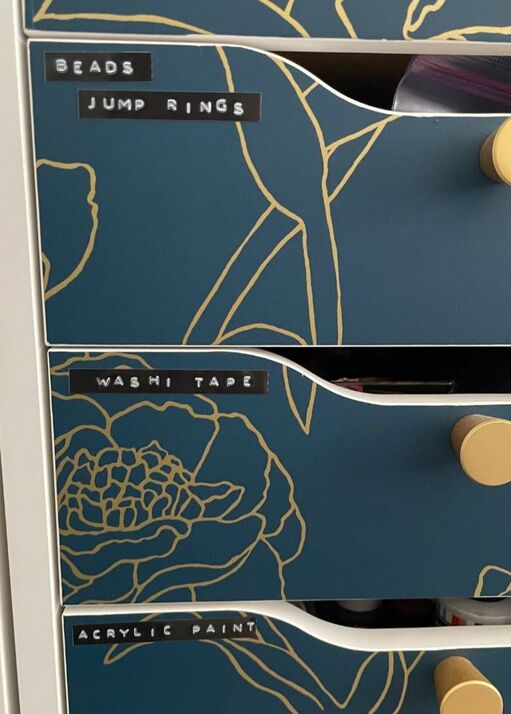 To the left when you walk in is a weight rack that we bought for all of our workout equipment. We used to just have all of our weights on the floor, but this looks much nicer and gives everything a place to be. 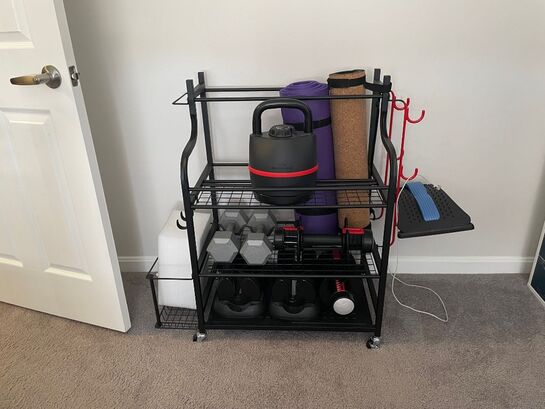 I also added some sheer curtains to the window. It really made a difference to the room and looks cozier now. 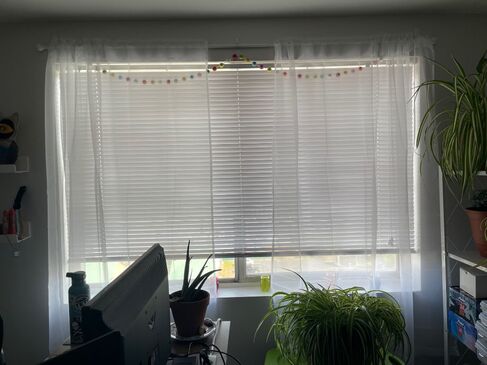 In the far corner near the window we have this white metal bookcase we got from Home Depot. It works great as a place to hold all of our plants as well as some additional craft supplies that don’t fit in the other units such as paper, sanders, big bottles of paint and sealer etc. I also have tubs full of completed crafts over here ready to go for any future craft fairs. 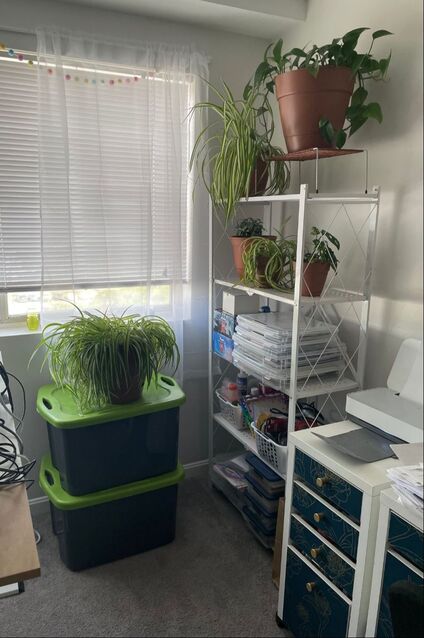 And finally, we have my work desk. This used to be on the other side of the room, but I moved it closer to the window and I love being able to see outside during the day. It is a motorized sit/stand desk and I am really happy with it! 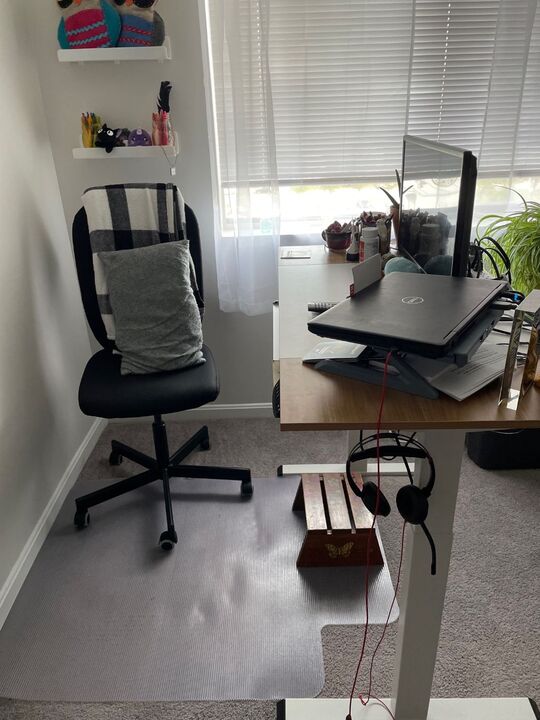 This room serves many purposes, but it is more organized now than it has ever been and I'm really happy with it. What are some tips and tricks you all use in your own crafty spaces? Let me know in the comments below!
- Rebecca P.S. Today's picture on the homepage is from Pexels user Anete Lusina: www.pexels.com/photo/art-supplies-on-shelves-in-studio-7256933/
0 Comments
Hi Friends! It's Suzanne, Rebecca's momma, and I'm happy to be back here on the PPP to share some ideas of what you can do with a fun but humble crafting supply - washi tape. First, what is washi tape? It's a low-tack rice paper tape that comes in a variety of widths, styles and colors. It is also known as Japanese masking tape. You can get washi tape at craft stores, from online retailers, and even at the dollar store, though the decorative tape at the dollar store stretches the definition of washi tape as it's a little thicker and less translucent than traditional washi tape. I've gathered a fairly large collection of washi tape over the years because it's a cheap thrill. A roll of washi tape is generally less than $2 and since it comes in so many beautiful colors and patterns it's always fun to pick up a few rolls when it feels like my craft supplies are feeling a little flat. I’ve gotten some in sets and as single rolls from Michaels and Stampin’ Up!. Some comes from the Dollar Store, some from Staples, some even from IKEA. The large wide black rolls are chalkboard tape that can be used for labeling. 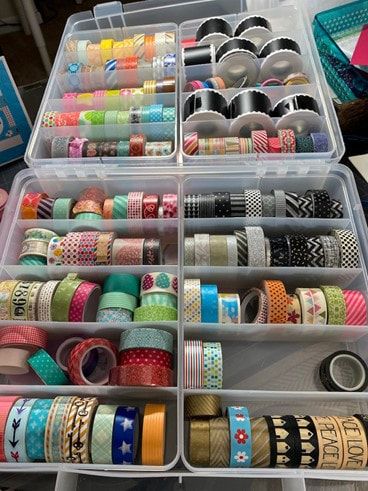 First and foremost, washi tape is used in paper crafting. I've used it on several greeting cards as you can see here. I started with basic white card bases and a piece of 12 by 12 embossed cardstock which I cut into 6 4 by 5 ¼ inch mats. I selected coordinating washi tapes and laid them on a white piece of cardstock to use as a focal image on my card. 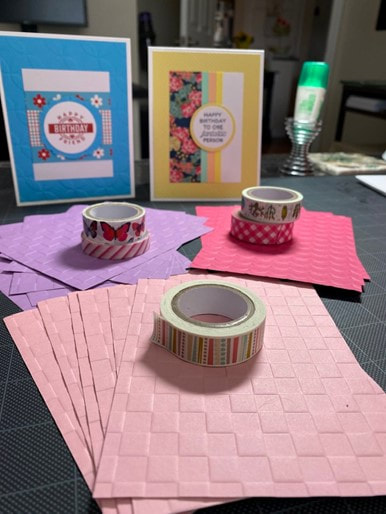 Since washi tape is low tack I extended the washi over the edge of the card and stuck it down on the back so that when I glued the focal image on the card it would be held in place. A simple stamped sentiment finishes the card. Because the washi tape is so thin, there's no added bulk to cards made with it so they are very mail friendly and requires no extra postage. You can see that I punched out the mat for the sentiment of my card before laying down the focal image so that the mat of the sentiment would match the mat of the card. 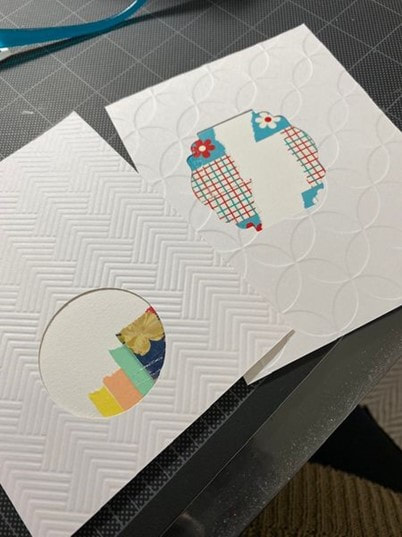 I've begun working on the third set of these cards and decided this time to add my washi tape directly to the embossed mat. My first choice of washi tape was the one with butterflies on it, but after laying down the first strip I decided I didn't like it. This shows one of the great things about washi tape. 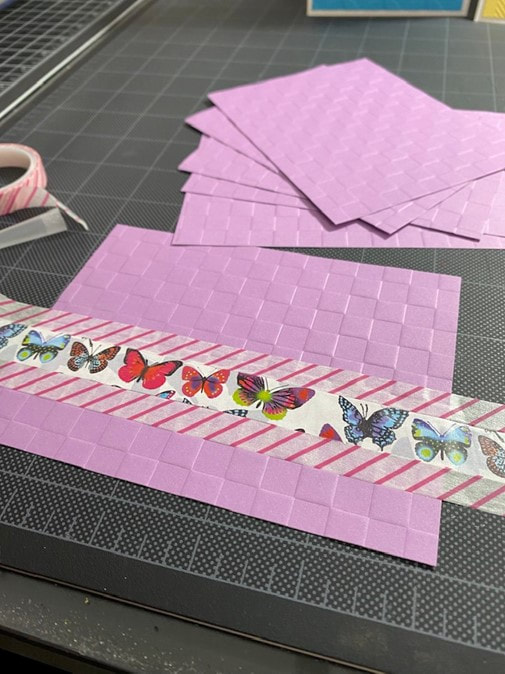 I was able to pull it up and put another tape down without ruining the embossed paper. This is because the tape is so low tack that the tape does not immediately bond with paper that's it is adhered to. 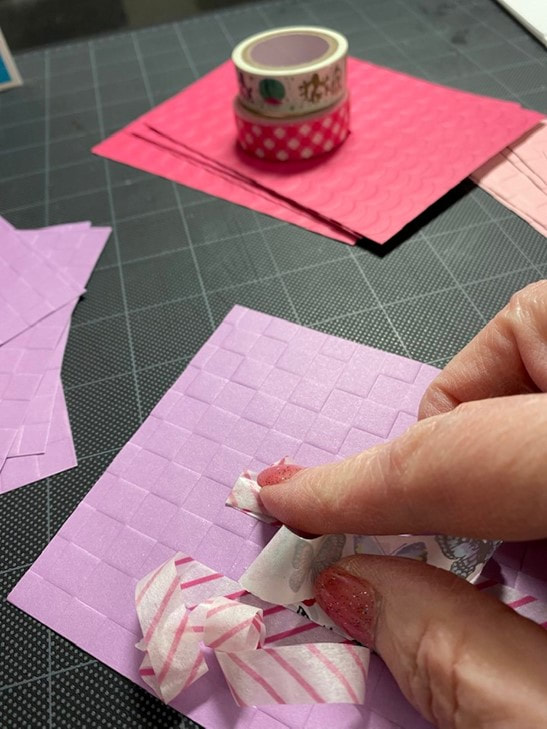 Paper crafts is not the only thing that you can do with washi tape. On Easter, I realized I’d forgotten to buy decorative napkins. I did however have some pink napkins and some washi tape with Easter eggs on it. Voila - Easter napkins a few moments later! 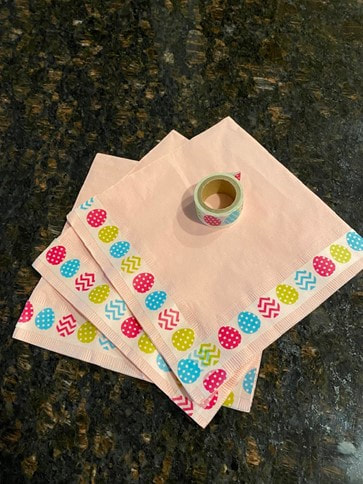 Here’s an incredibly wonderful smelling but incredibly boring looking candle made a whole lot cuter with a little bit of washi tape in matching colors to the wax. 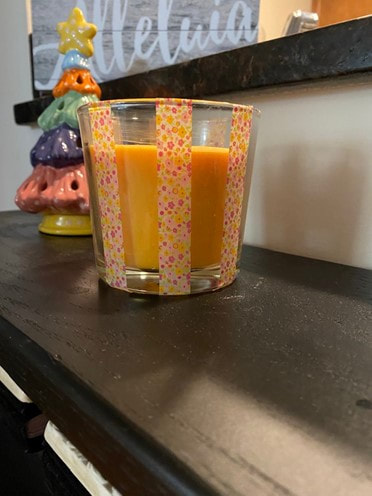 A kalanchoe plant from Trader Joe’s adds a beautiful spot of color to the dining room table but the pot it came in leaves a little to be desired. Sliding into this glass cylinder vase with some Spanish moss in the bottom and a few stripes of this wood grained tape really elevates the look. 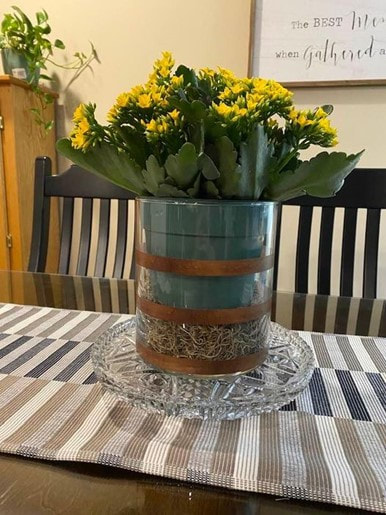 Finally, as renters, we can’t make any permanent changes to our apartment. We can add a little personality, though, with a few stripes of washi tape across a very plain bathroom mirror. The washi helps to bring a little of the shower curtain color over to the other side of the bathroom. 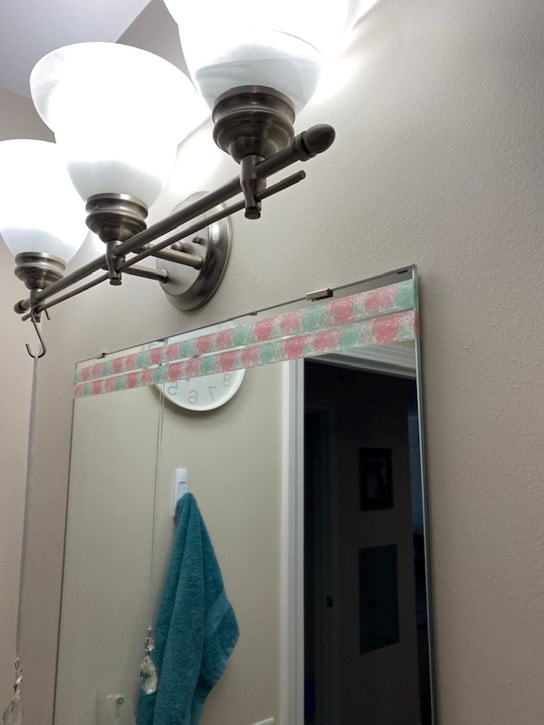 I hope this post has given you some ideas on how you could add some life and color to some dull spots in your home. See you next time!
Rebecca here: today's photo on the homepage is provided by the website building program I use, Weebly. Hello everyone! Today we have the tiniest of blogs as I was a bad craft blogger these past few weeks. I did not take any photos of this craft in process as it is really easy to do, but I will explain as best I can! If you are trying to do this craft yourself, I would go to the Cricut website (link below) and follow their directions for how to use iron-on vinyl as that is what I did! My little blog today is more just an opportunity to give you some inspiration :) help.cricut.com/hc/en-us/articles/360009378254-Everyday-Iron-On-Instructions (This link takes you directly to the page for their "Everyday Vinyl" instructions but on the left-hand side you will see all their other options such as Glitter, Foil, etc. The Cricut brand vinyl I had specifically was Foil.) So when my lovely husband bought my Cricut for me, it came with a few sample rolls of vinyl, one of which was iron-on vinyl. I had not used it yet and decided that it was time to give it a try. I bought some small 6 inch by 5 inch canvas tote bags from Hobby Lobby, as well as a few other colors of iron-on vinyl. I bought some Paper Tree brand vinyl to see how it compared to the Cricut vinyl I already had. Both worked really well! There are a few important things to remember when cutting out iron-on vinyl as opposed to cutting out adhesive sticker vinyl. When cutting a sticker, you want the vinyl face up so that the image is cut out and the backing is left in tact. Iron-on vinyl has the backing on the front so you need to flip the vinyl over so that the good side is down. This will ensure that the back side of the vinyl, which is actually the iron-on part, is cut and the front backing will remain in tact. For iron-on vinyl. you peel the backing off the front once it is ironed down, as opposed to peeling the image of a back sheet like you would for a sticker. You with me? It's also important to remember to mirror your image if it's something that has one clear orientation like writing. My images for this project were all simple like a sun, flower, butterfly, etc. so the image being flipped was not a problem. But if you are using writing or your image needs to go in one particular direction, use the mirror option so that everything is correctly oriented when you flip it over and get ironing. The mirror option can be chosen when you get to the printing screen in the Cricut Design Space. Two small things I did which the Cricut instructions did not mention was to use parchment paper when ironing and to add a piece of cardboard inside my bag. Using cardboard allowed a flat base that I could press the iron onto and parchment paper honestly just made me feel better. According to Cricut, you should be able to iron directly on the protective backing for the iron-on vinyl but I was a wee bit stressed so I added a sheet of parchment paper in between. I have blabbed on enough with no images to help you understand so here are the 8 bags I have made! hopefully the images will help it all come together. When the iron-on vinyl was adhered, I also made some cute little letter bead and small glass bead charms to hang from the strap. Although you are only seeing one side of the bags, I did cut out 2 of the same images so the front and back have the same iron-on image in the same color. 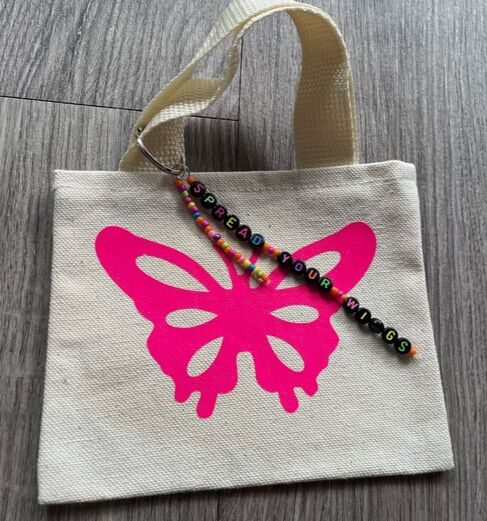 Next we have foil gold crown with "shine like gold" charm. 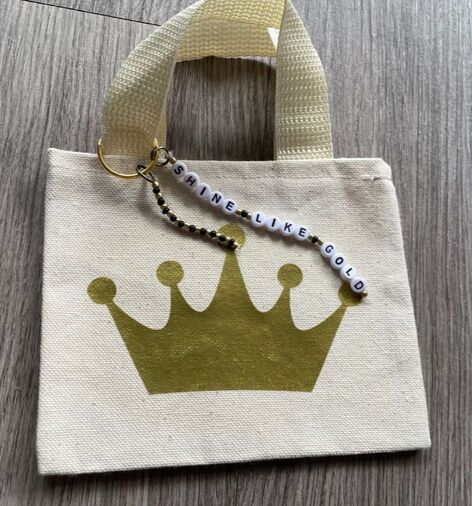 And black galaxy with "reach for the stars" charm. 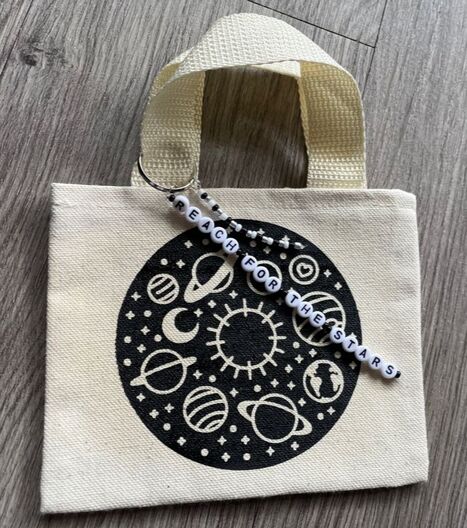 Neon orange sun with "shine bright" charm. 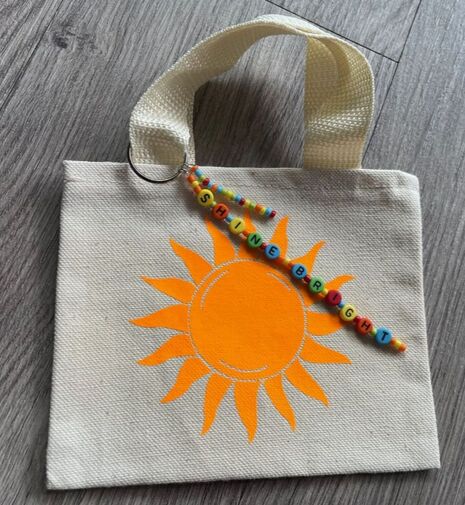 Foil purple flower with "time to bloom" charm. The next 4 are all foil and the lighting is not doing a great job of showing the true color of the vinyl! All colors are much brighter than they appear. 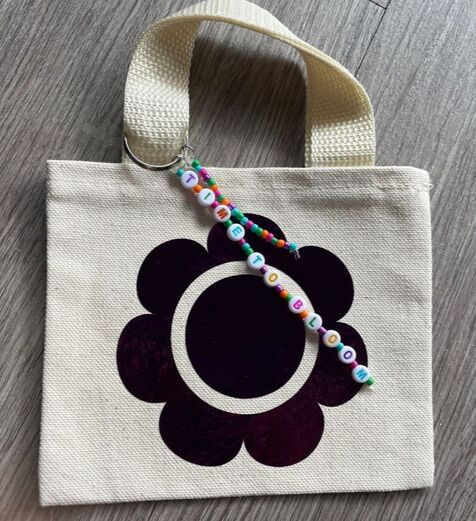 Foil red heart with "love yourself" charm. 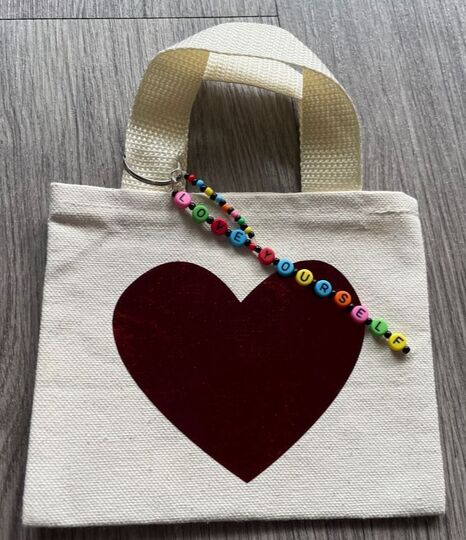 Green foil trees with "grow tall" charm. 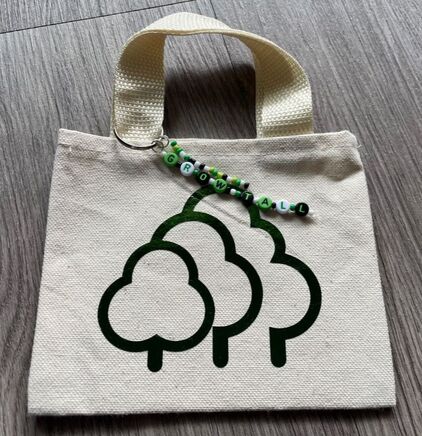 And finally, blue foil star with "you are a star" charm. 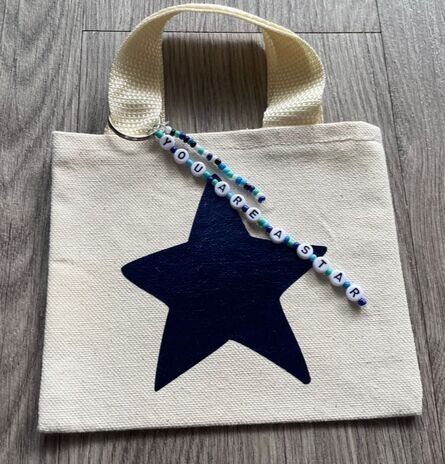 I also bought some small zipper canvas bags, some pencil case size and some slightly smaller so I will be working on those soon too! 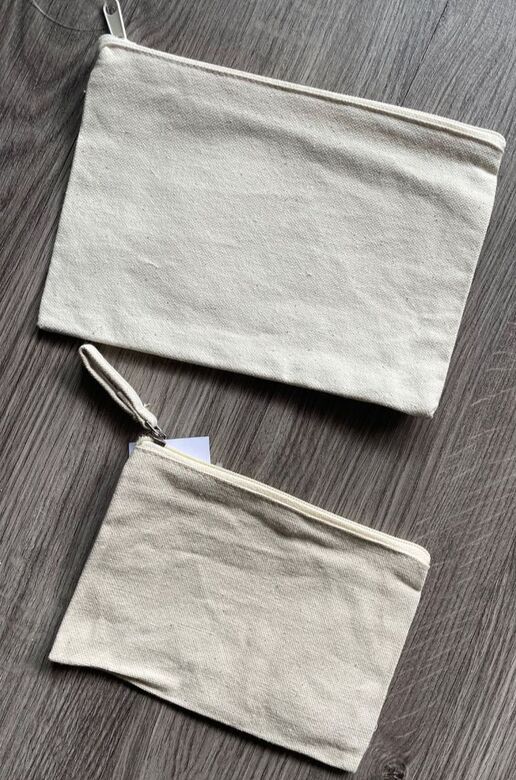 And that's all folks! Sorry this blog was not so in depth, but hopefully this gives you a little inspiration if you are looking to try out some iron-on vinyl! Get crafting everyone!
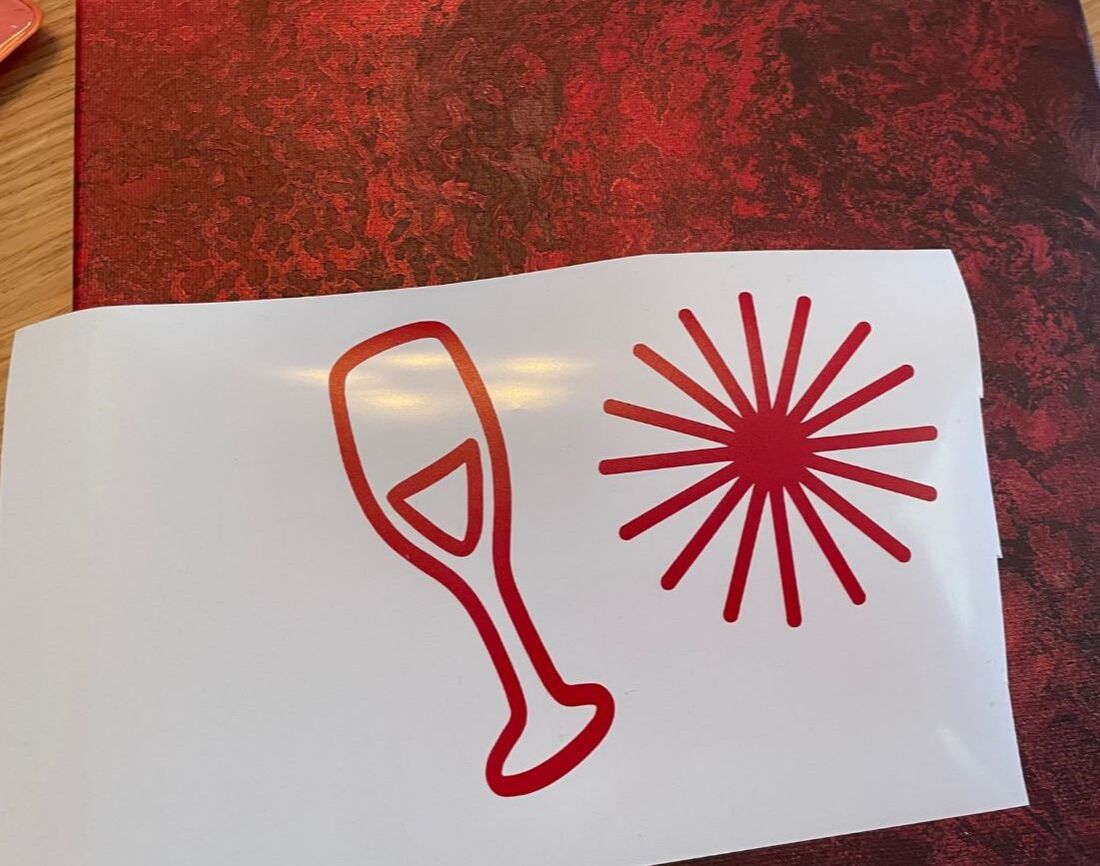
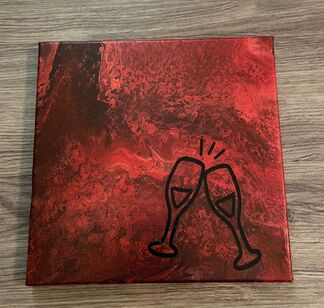
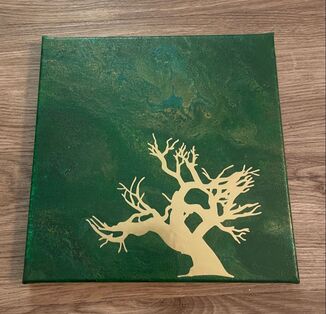
- Rebecca Today's photo on the homepage is from Pexels user Pixabay: www.pexels.com/photo/green-white-philips-iron-53422/ Happy Saturday friends! Hope you all are having a great weekend so far and enjoy this slightly early blog! Sooooo if you are sick of pour painting this may not be the blog for you. But this one is a little different, I swear! Anyways, I had picked up a pack of 8 10 inch by 10 inch canvases from Michaels a while ago and decided to give something a try on 6 of them. I did some pour painting on them and then let them dry overnight. 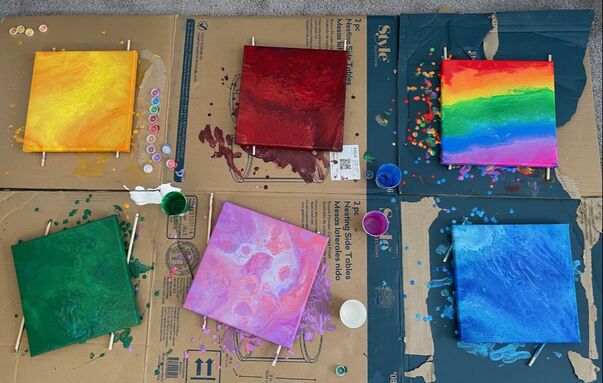 I tried a new approach with the rainbow one and just added lines of the paint to the canvas as opposed to putting all of the colors in a cup. I was not in love with how it turned out and wished I could have been able to get the colors to blend a little more so the lines were not so harsh. Besides even that, one of the paints I used in that one ended up not having been mixed up enough and dried with some unpleasant chunks that I did not enjoy. So I put that canvas aside and you will not see it again in this blog! I'm trying to see if maybe I can salvage it but that's a problem for another day. I wanted to try something different and add some stickers to the top of these canvases for a bit of a mixed media effect. I used my Cricut to cut out different stickers for each canvas from adhesive vinyl. Two quick notes: I forgot to take a picture of the sticker I used on the pinky/purpley canvas before adding it so you will just have to see that in the finished project. Please just know that I picked the most tedious design of all time and it took forever to work with! Secondly, you will see a red wine glass and starburst below. I ended up cutting out the exact same shapes in black vinyl because when I tried the red stickers on the canvas they were meant for, there was not enough contrast and the red blended right in.
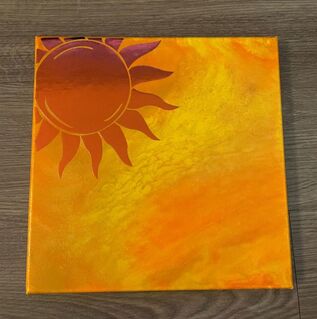
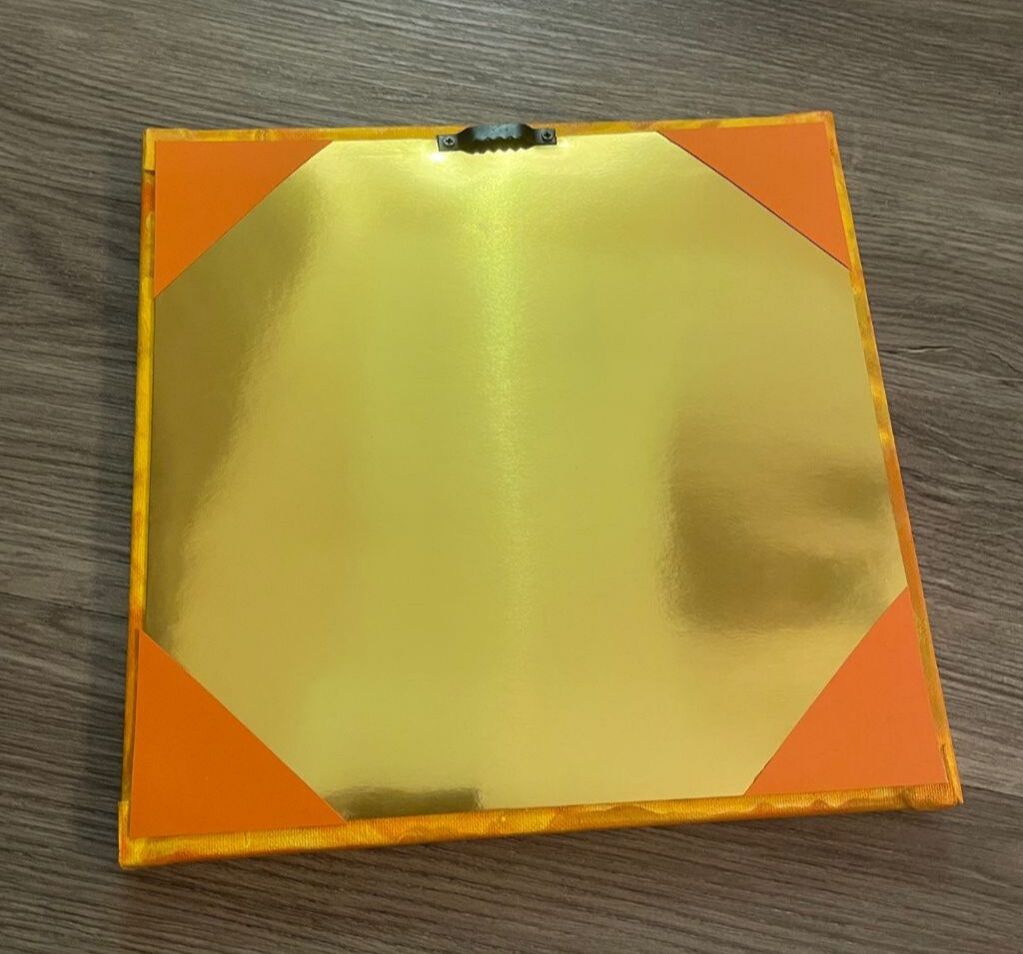
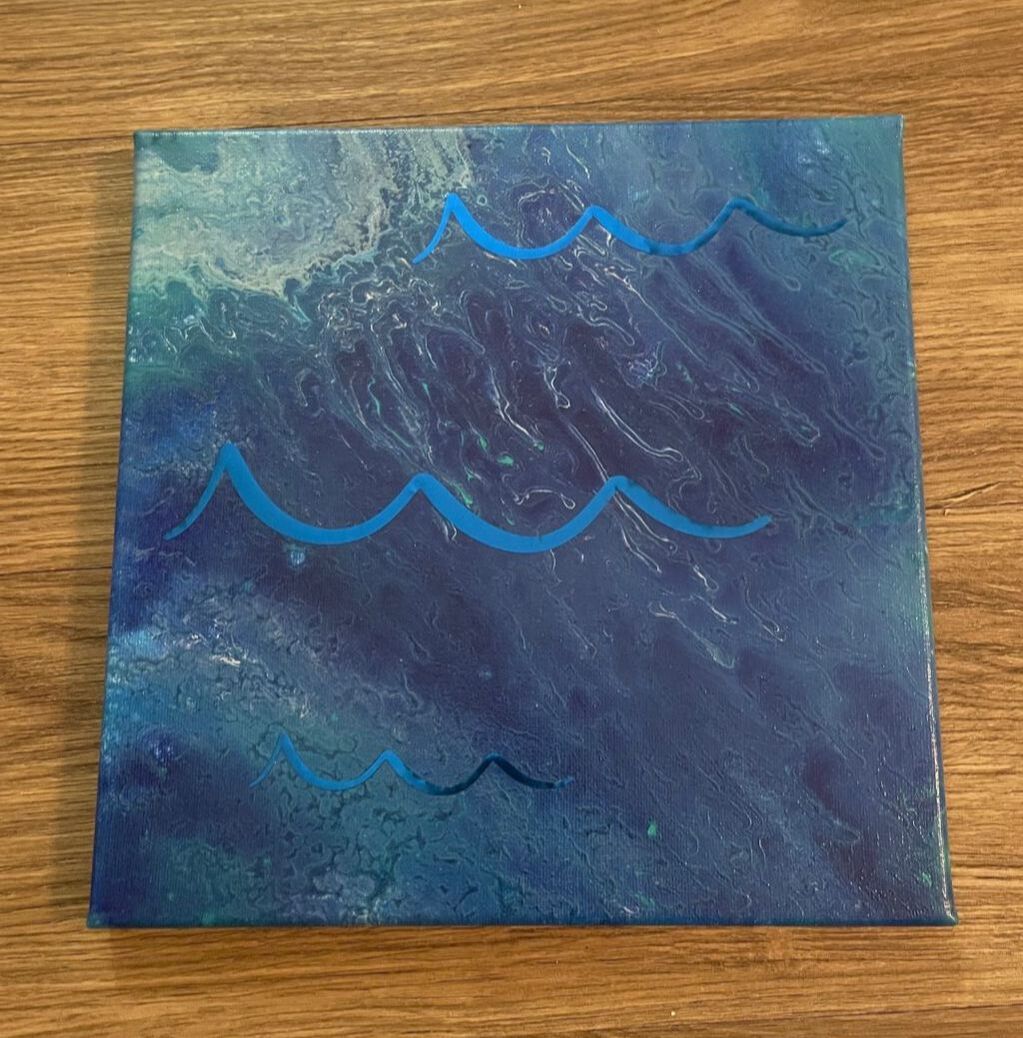
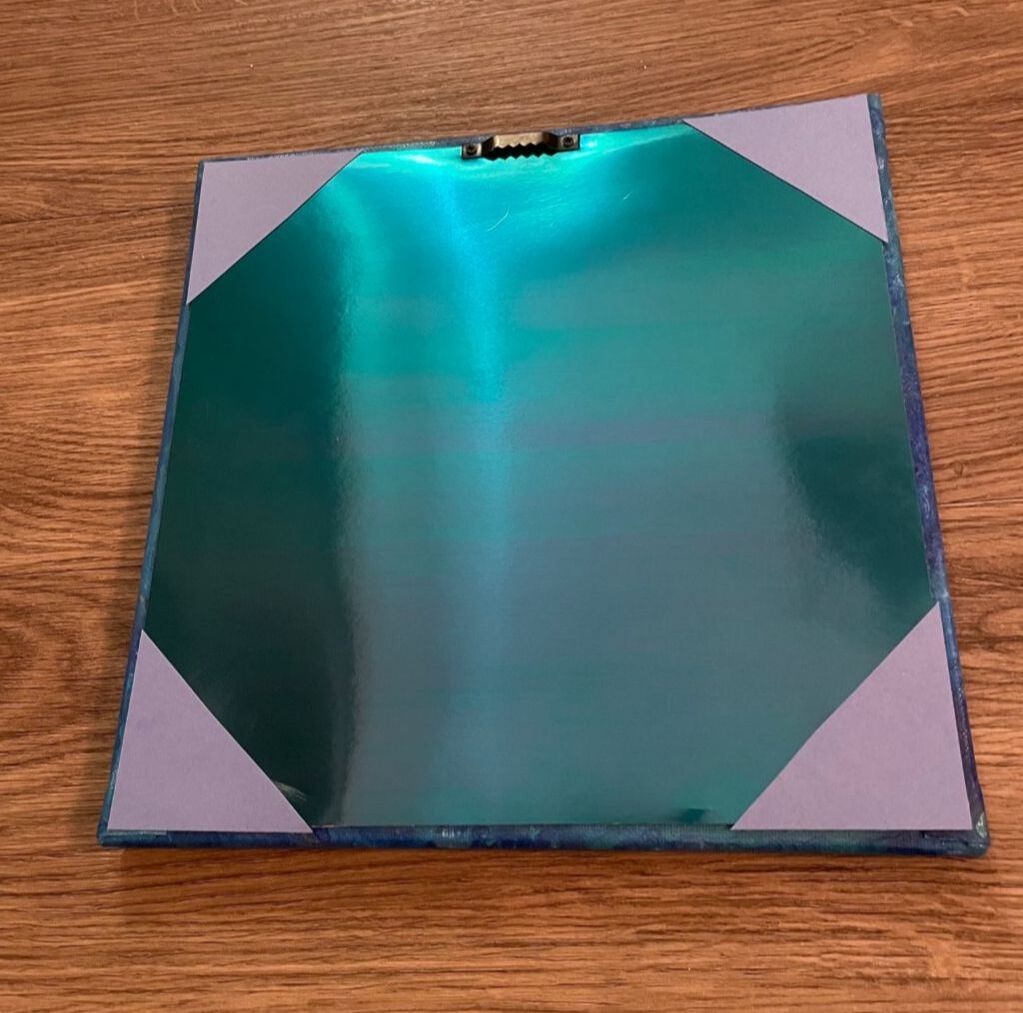
Once the canvases were dry, I stuck on the stickers and then immediately went over with a fairly thick coat of clear satin varnish. As the canvases have a bit of texture I wanted to seal in the stickers very well so they wouldn't curl up on the edges. I ended up giving each canvas about 3 coats of varnish. Once they were dry I wanted to finish the backs as pour painting often leaves the backs of canvases looking very messy. There were some white areas on the back edge where the paint had not reached so I ended up using some regular acrylic paint to fill in those areas with a similar color. 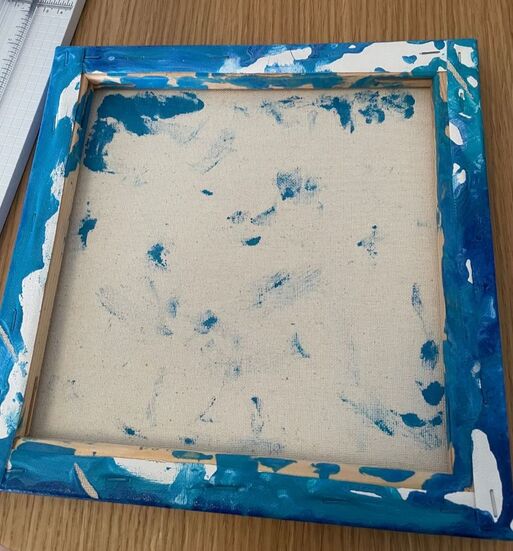 I then grabbed some shiny and glittery thick cardstock that I had in coordinating colors for each canvas. 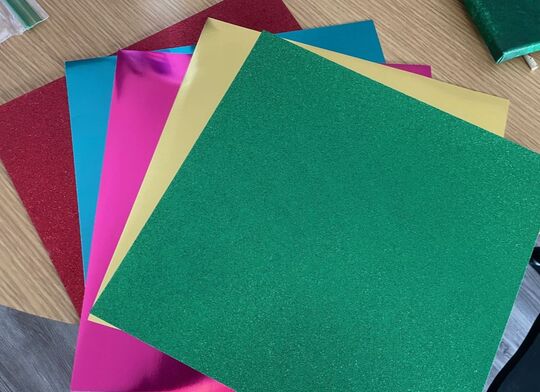 As the canvases were 10 by 10, I cut the cardstock into 9 1/2 by 9 1/2 squares. I first used some SuperGlue around the back edge of the canvas and stuck the cardstock down. I wanted to ensure that the cardstock did not eventually peel up so I ended up using some small screws right into the wood frame of the canvas to secure it in place. I had originally tried a small nail instead, but the nail went right through the paper while the screw did not. 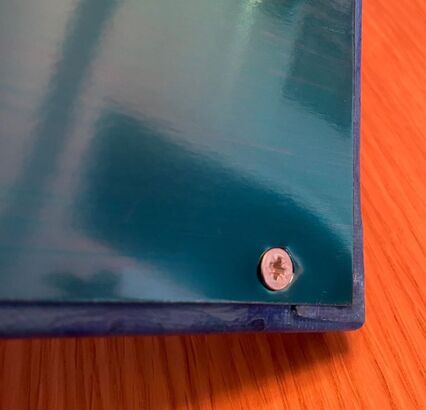 Now I needed to cover the screws in each corner so I cut out some coordinating paper into 2 1/2 inch squares and then cut those in half diagonally to get 2 triangles. I did that twice for each canvas to end up with 4 triangles, 1 for each corner. I adhered this with some liquid glue that is good for paper to paper adhesion. Finally, I added a sawtooth hanger to the top back of each canvas. Here they all are, front and back!
I ended up putting the sun sticker in the corner and cutting off the edges. I wasn't loving how it would look centered on the canvas.
This one has actually already been claimed by a coworker who is going to purchase it and hang it in her basement. Thank you Stephanie!
This is the one that took ages. None of those little lines and flowers are connected so it was painstaking! I love how the finished product looks though!
This one is much better with the black stickers!
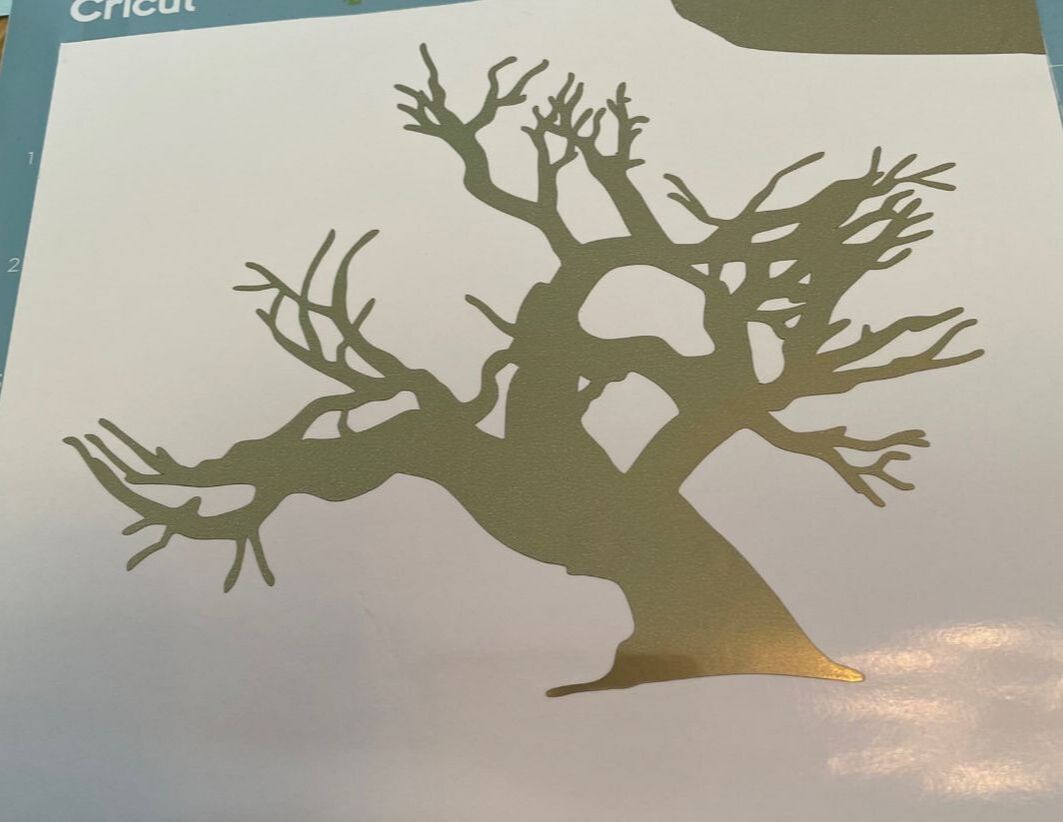
This one I am on the fence about. Sometimes I think it looks elegant and you can tell that its supposed to be the leaves of the tree and sometimes I feel like it looks a bit weird but I'm just trusting that it will speak to someone!
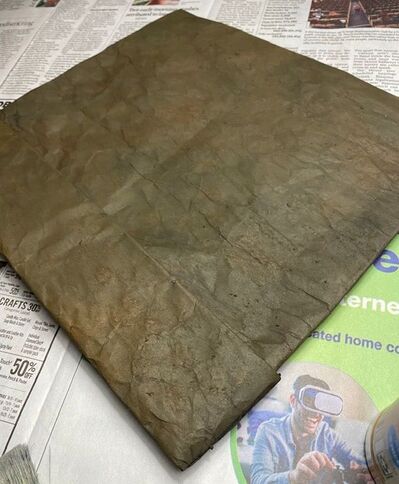
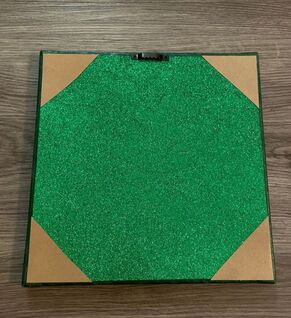
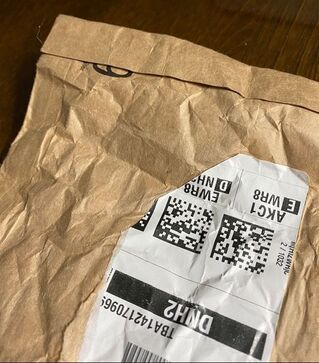
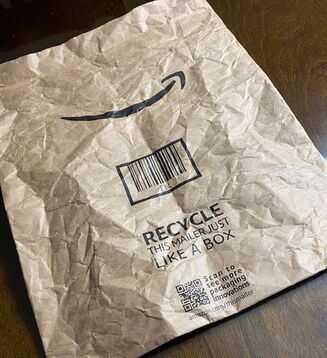
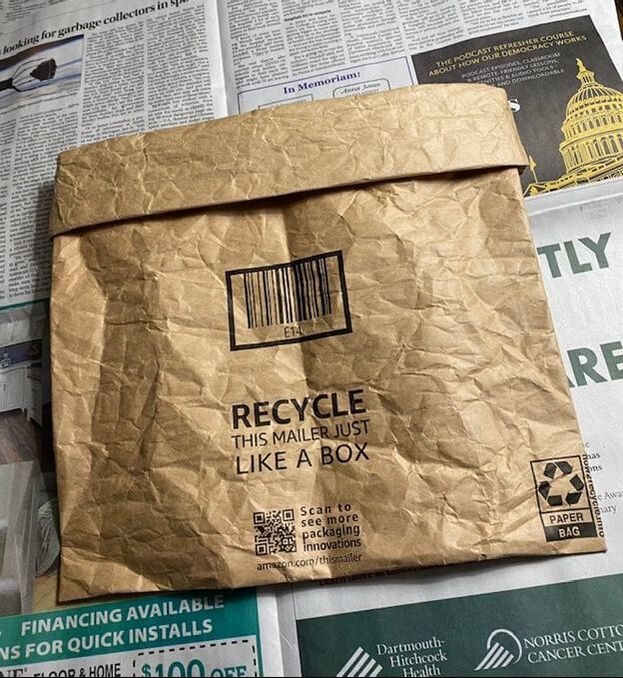
I had 2 more canvases from the pack and decided to make 2 more paintings. These are not done yet but I am working on a pastel one which will have some cloud stickers to look like a sunrise and a bright green/teal one with some vine stickers to be a bit jungley. What do you guys think of the combination of pour painting and stickers on the canvas? Let me know in the comments below! - Rebecca P.S. The photo on the homepage today is from Pexels user Steve Johnson: www.pexels.com/photo/paint-bottles-989008/ Hi friends – It’s Suzanne and I am happy to be back on the PPP with a recycled craft idea for you today. When Rebecca’s dad and I sold our home a while ago, I divested of most of the home décor we had, opting to see what our new place needed and knowing it would give me the chance to craft some new things. One of the things I’ve been looking at some local shops and thrift stores is a rusty metal pocket, a little something like this . . . 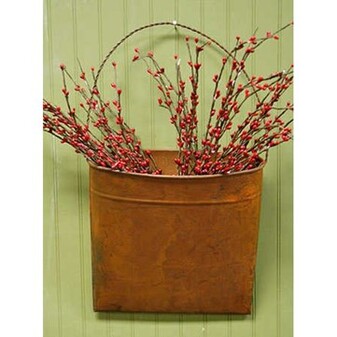 I haven’t been able to find anything but did receive an Amazon package recently that came in a brown paper envelope instead of the usual plastic. The color, texture and shape got my wheels turning. First, I cut the top of the envelope even across the top, crumpled it and spread it back out, to give it a little texture. Then I folded the sealed edges to the back of the envelope and glued them in place. After that, I folded the opening of the envelope over twice to hide the cut edge and give the pocket a bit of a collar.
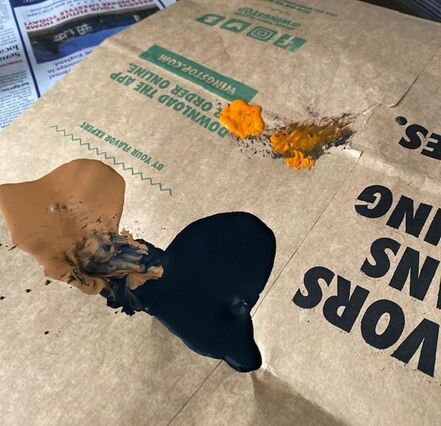
Now it was time to paint. Using a stiff brush, I brushed on some brown paint, dabbed in some black and then orange to mimic rust. This wet on wet technique allows all the of paint colors to blend in to each other with no visible lines between them. I started on the back of the pocket so I could get a feel for how much paint was needed, then moved on to the front. After completely painting the pocket, I came back over with more orange paint, blending in it to the still wet paint until I got the look of rust I liked.
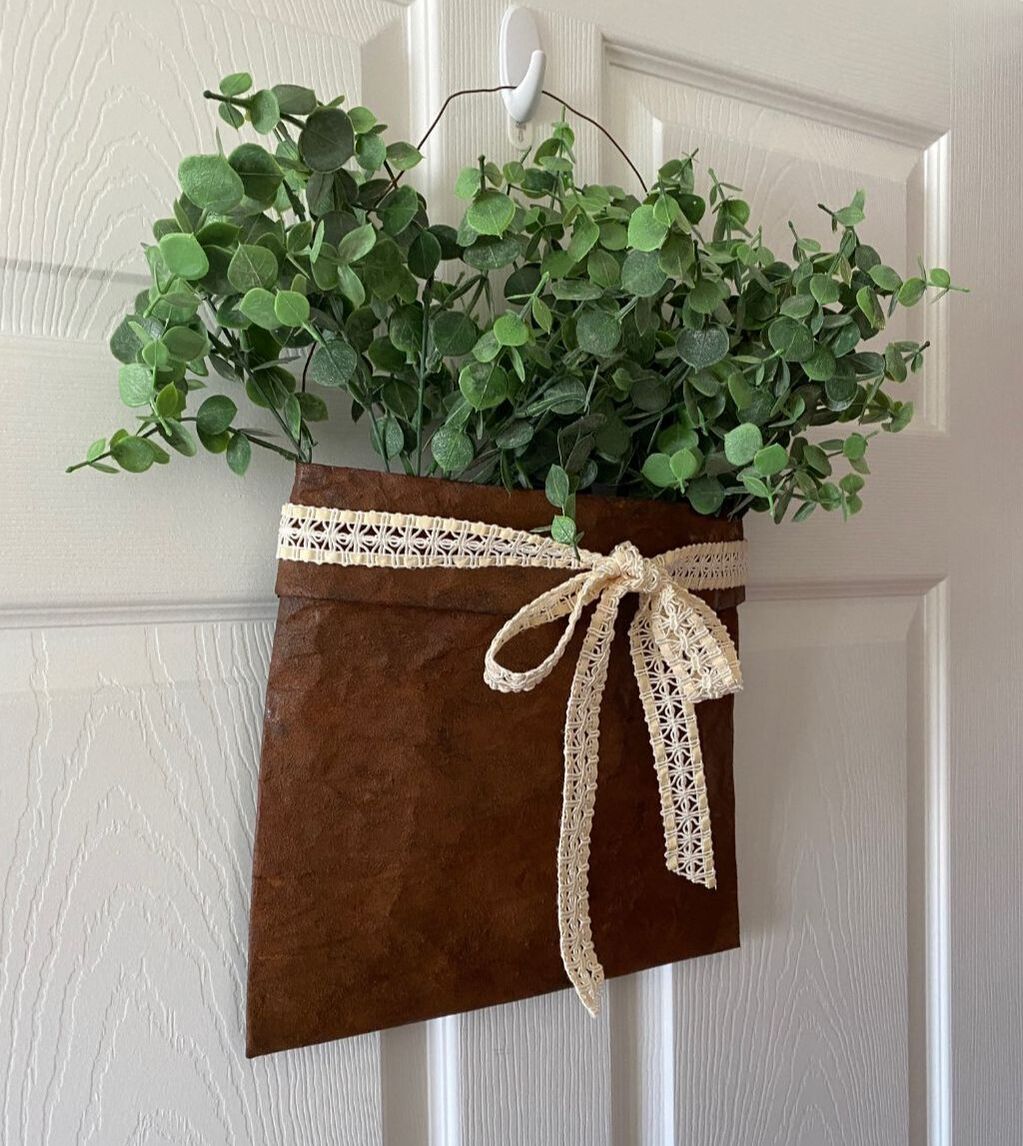
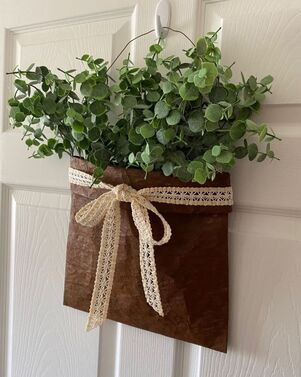
 Once the paint was dry, the pocket was still a little too brown and not really rusty looking enough for me, so I moved on to another “how to mimic rust” technique – some more paint and cinnamon. I dabbed on some appropriately named “Rusty Red” paint, mixed in a tiny bit of brown, and when the paint was still wet, sprinkled cinnamon over the whole thing. Now I was getting somewhere! 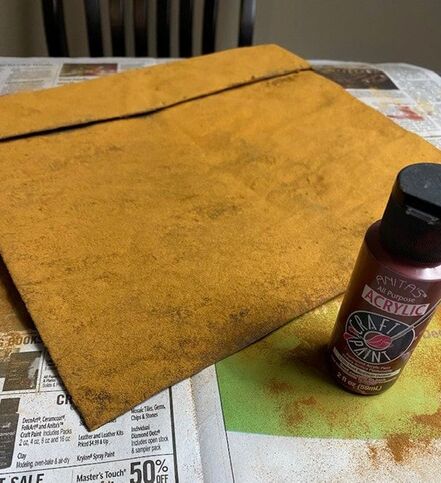 The texture of the cinnamon really mimics the uneven texture of rust (and smelled delicious). After the whole thing was covered, I tapped off the excess cinnamon and let the pocket dry for about 15 minutes. I wanted to seal the cinnamon in place, so I used some satin varnish over the cinnamon. 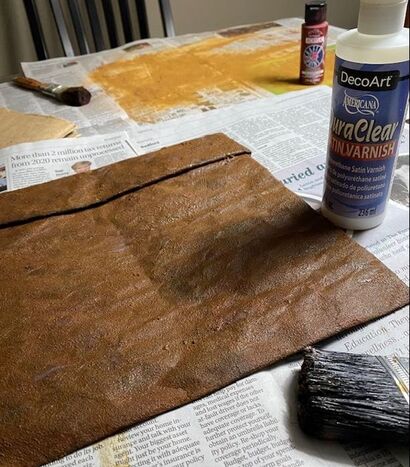 Once the varnish was a bit dry, I used a heat tool in a couple of spots to bubble the varnish and add to the rusty patina. 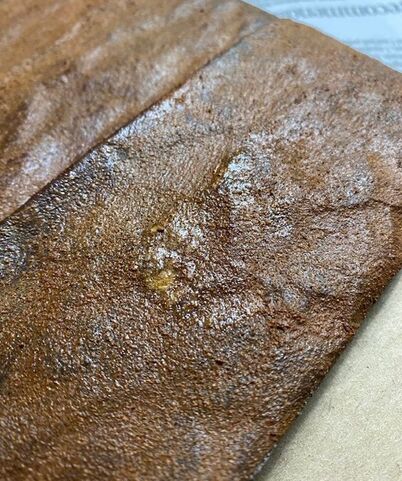 I added a fair amount of hot glue into each edge and pushed in a length of rusty wire as a hanger. 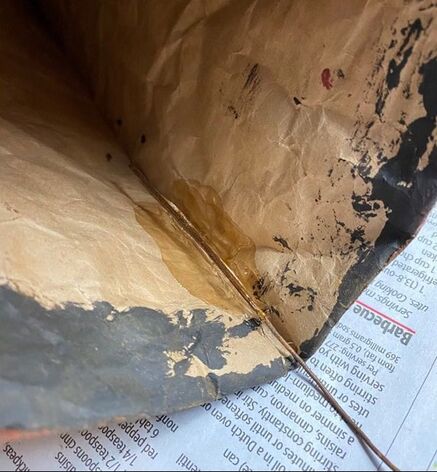 Since the many coats of wet paint and varnish left the pocket a little soft, I cut a piece of cardboard (also recycled from another delivery box) and slid that inside the pocket.  I pushed the edges of the pocket into the cardboard liner, sandwiching the wire between the liner and the inside of the pocket. This made the front and back gap just a little. To make the back lie flat, I folded and hot glued a little pleat into the pocket. I left the front with its gap.  Note: I only cinnamon’d the front of the pocket – the back just got a quick coat of the original black/brown/orange combo. I added a vintage lace trim bow and some eucalyptus branches, and this project was ready to hang on our door!
Rebecca here: Thank you to my mother for this clever, upcycle craft idea! What do you guys think? Let us know in the comments below!
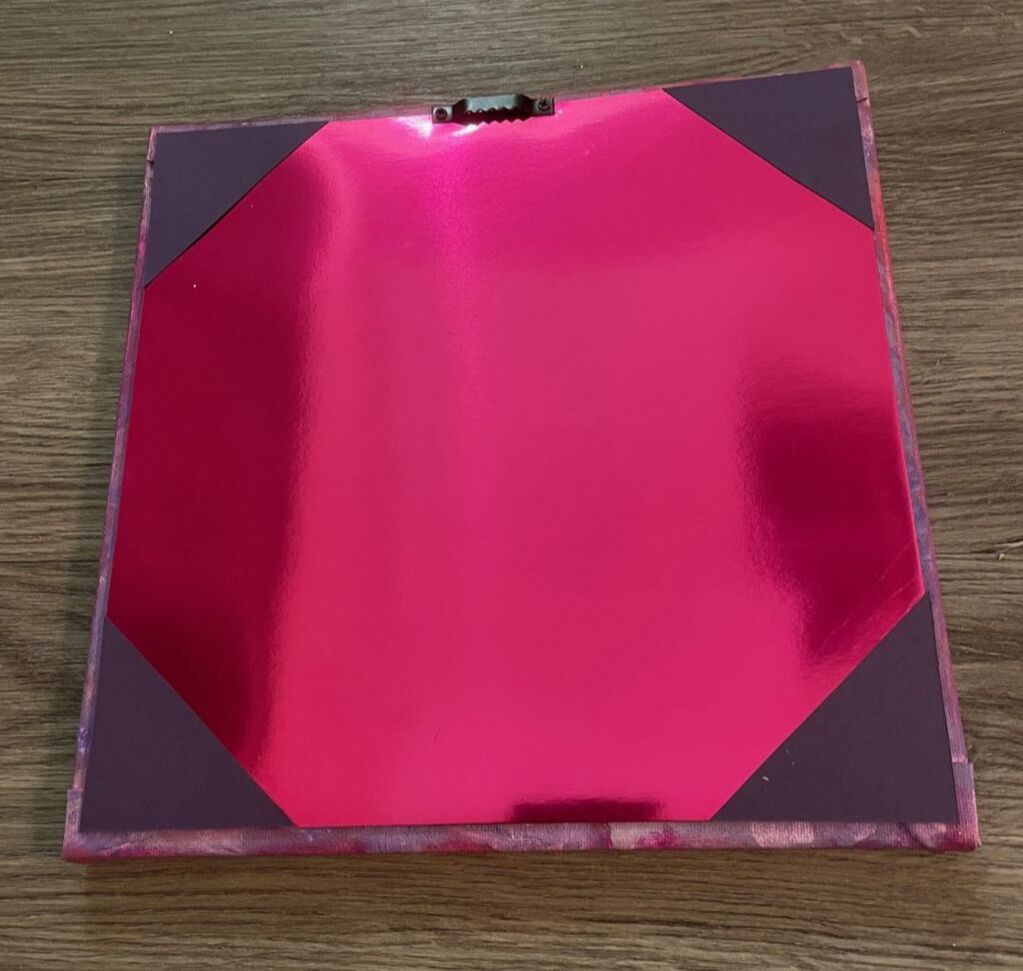
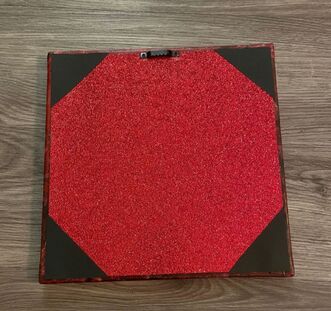
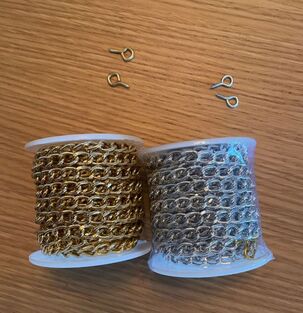
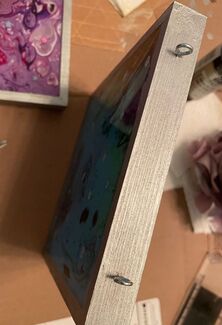
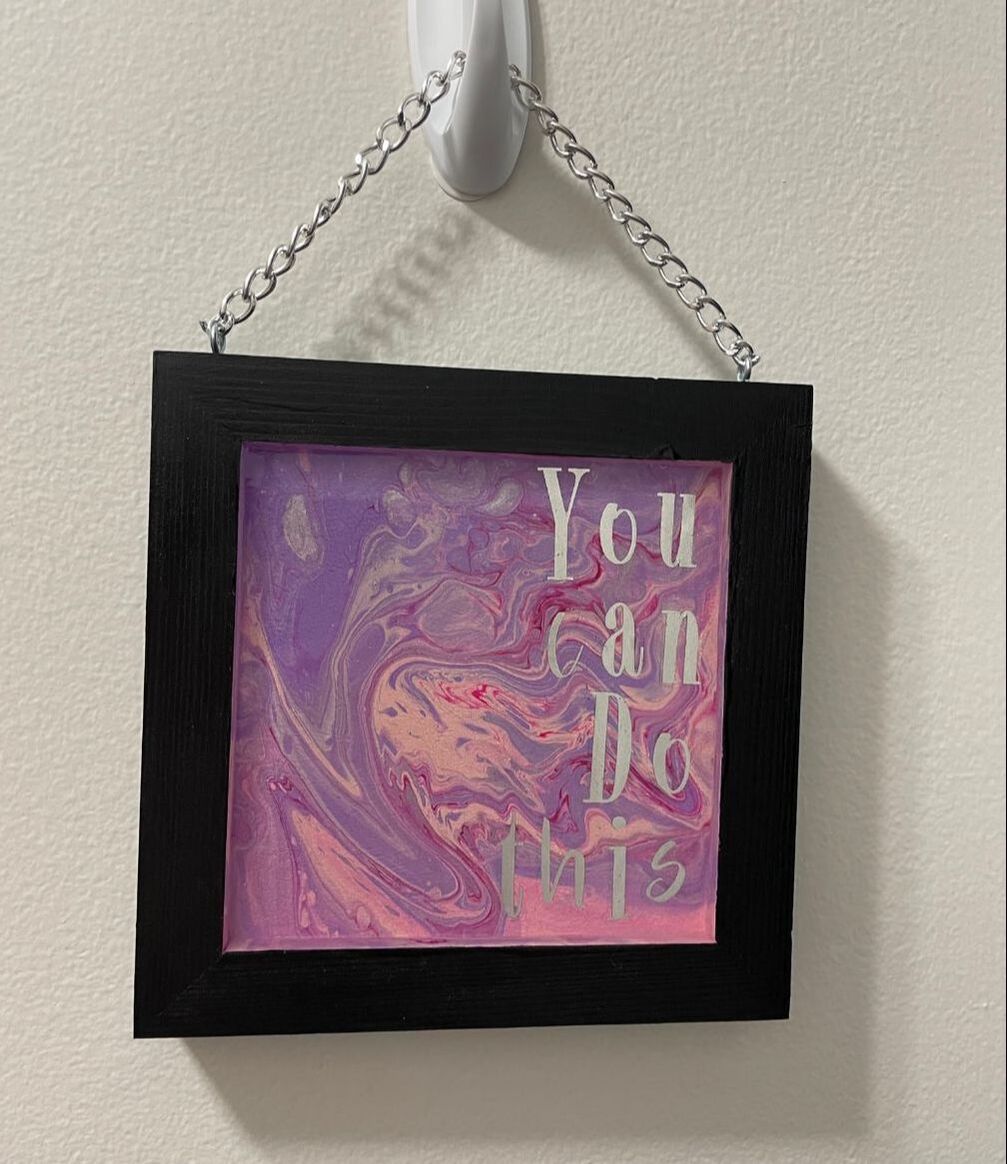
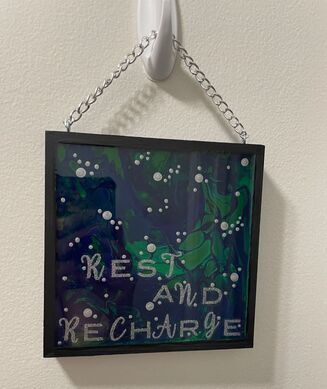
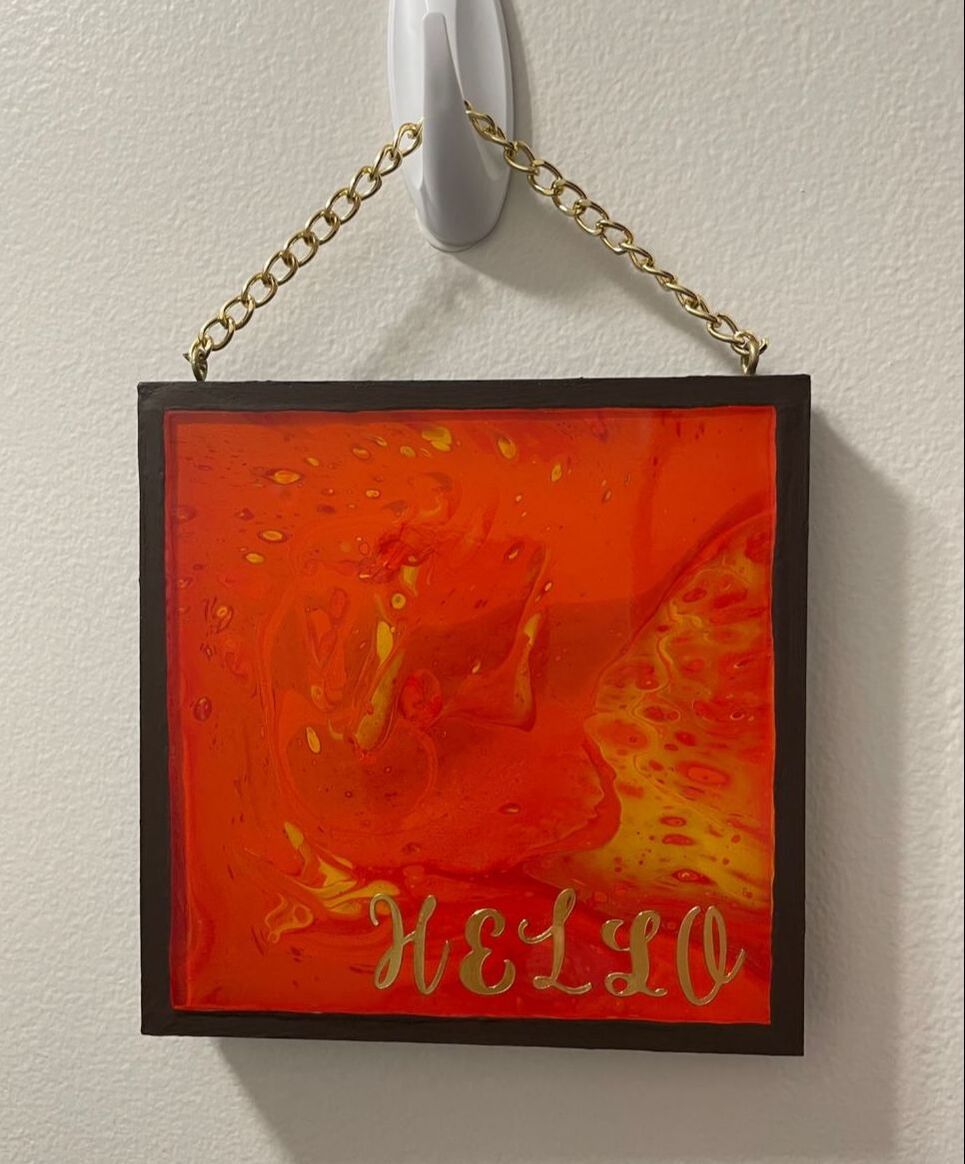
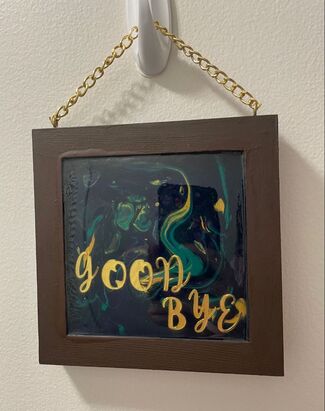
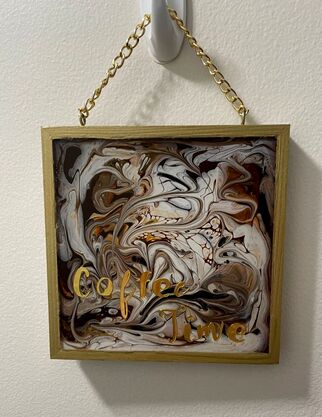
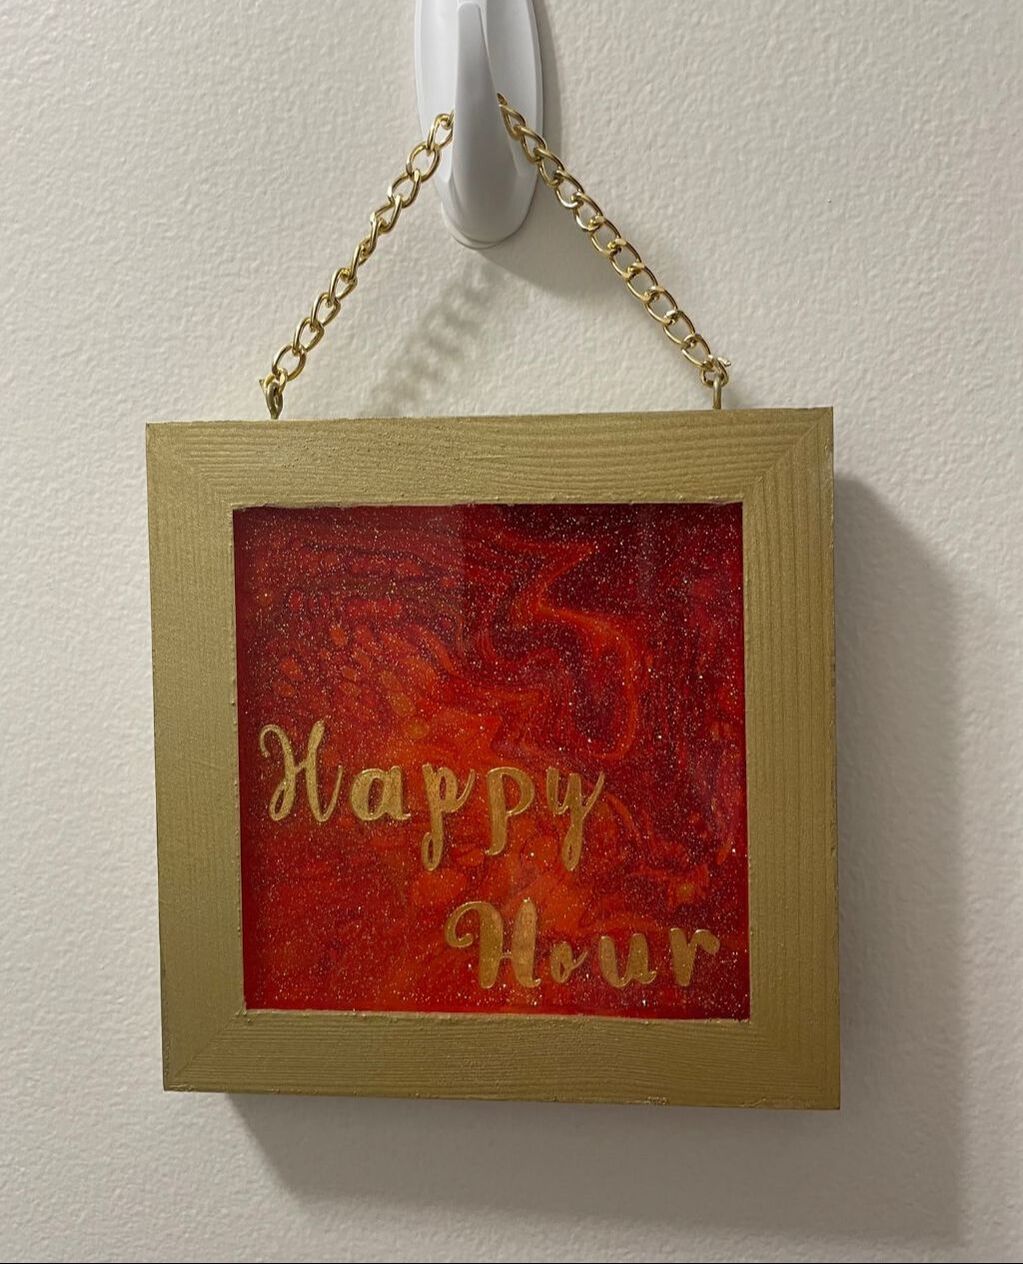
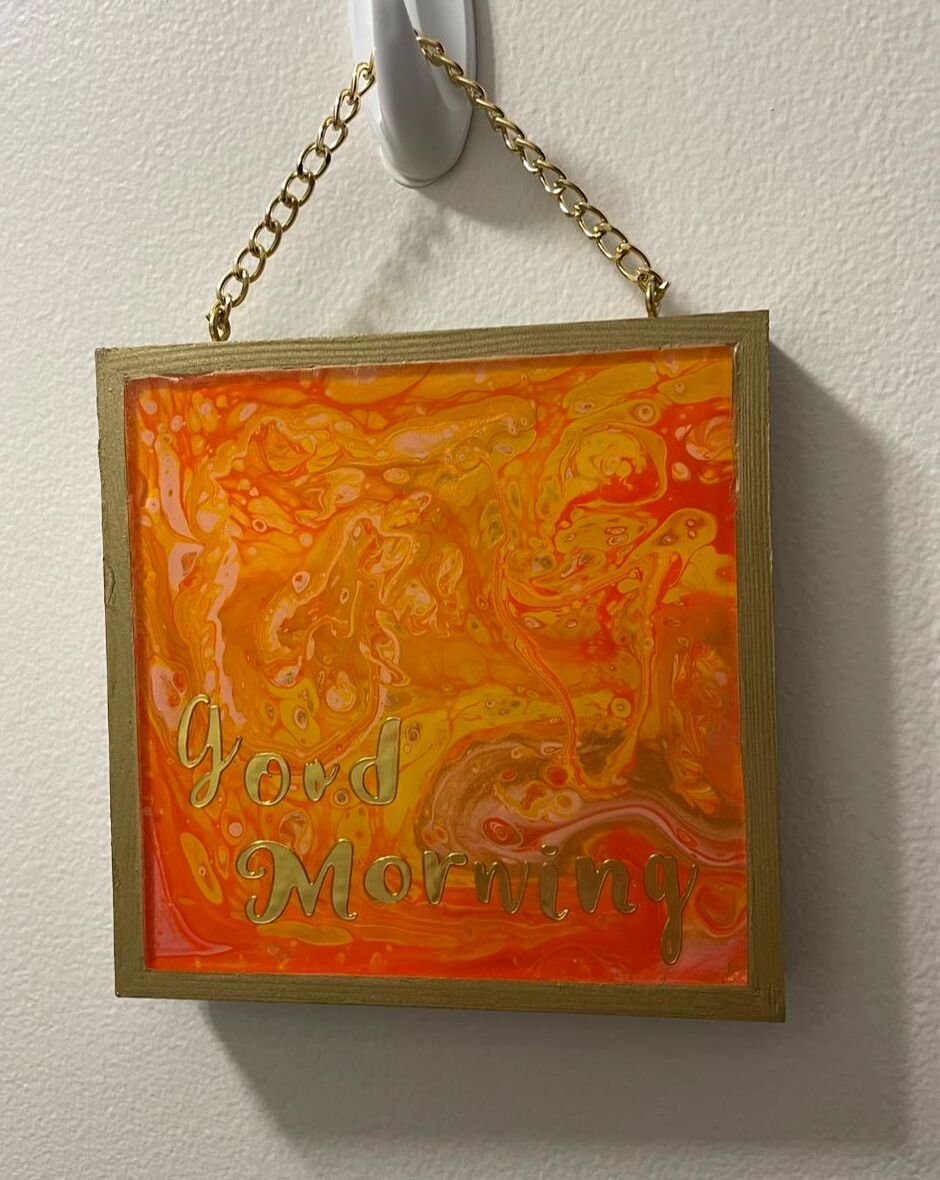
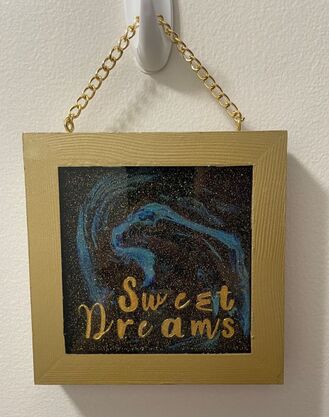
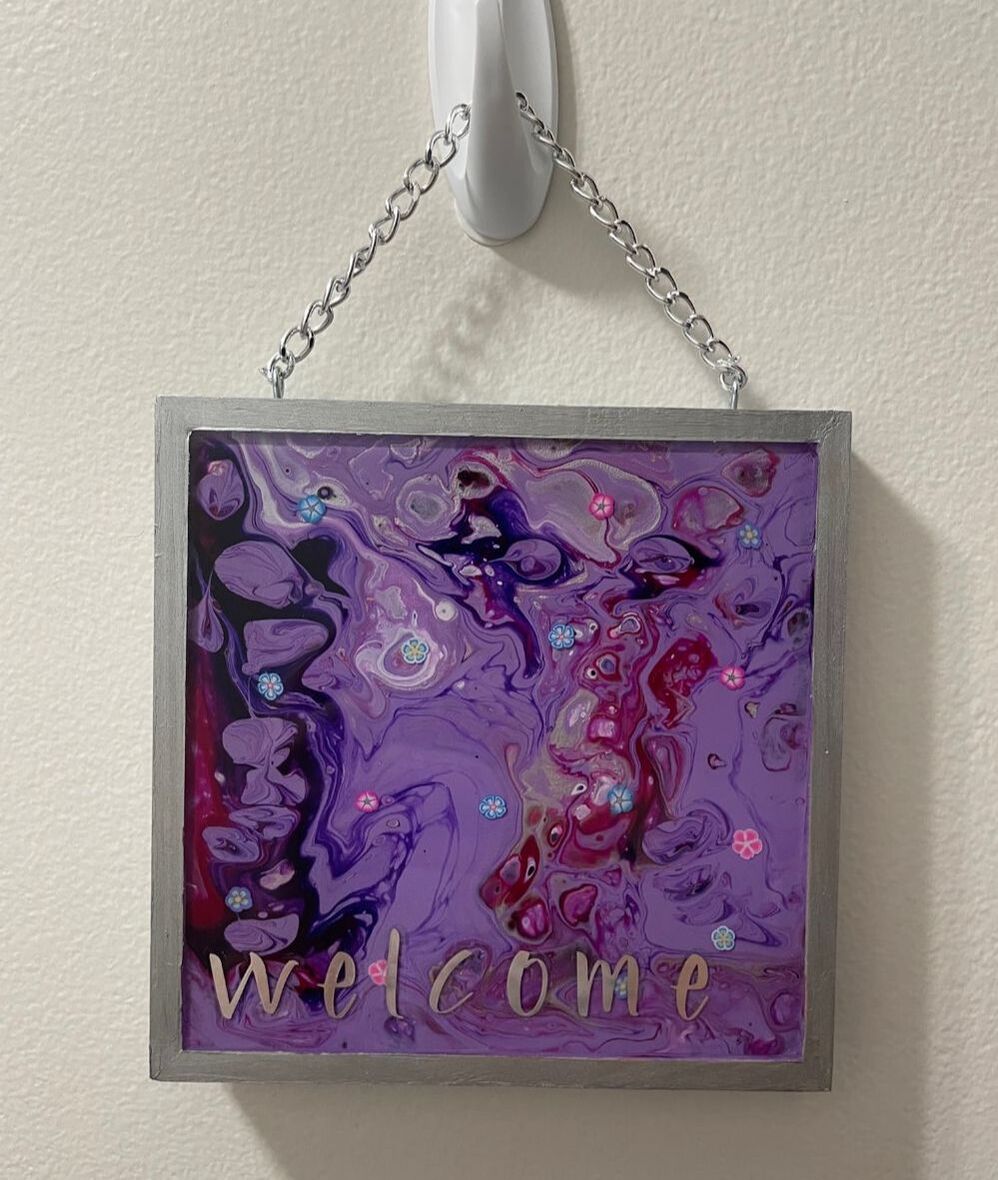
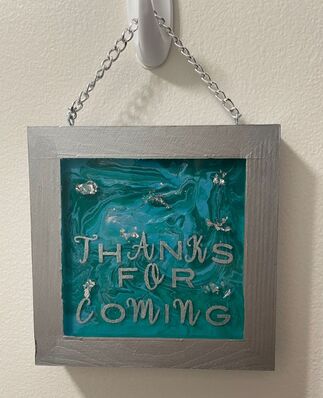
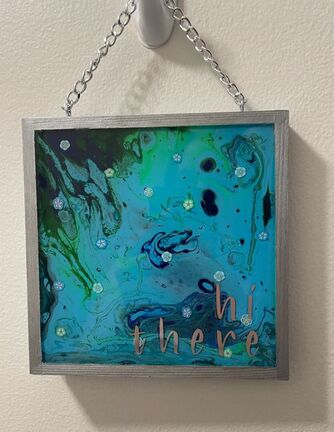
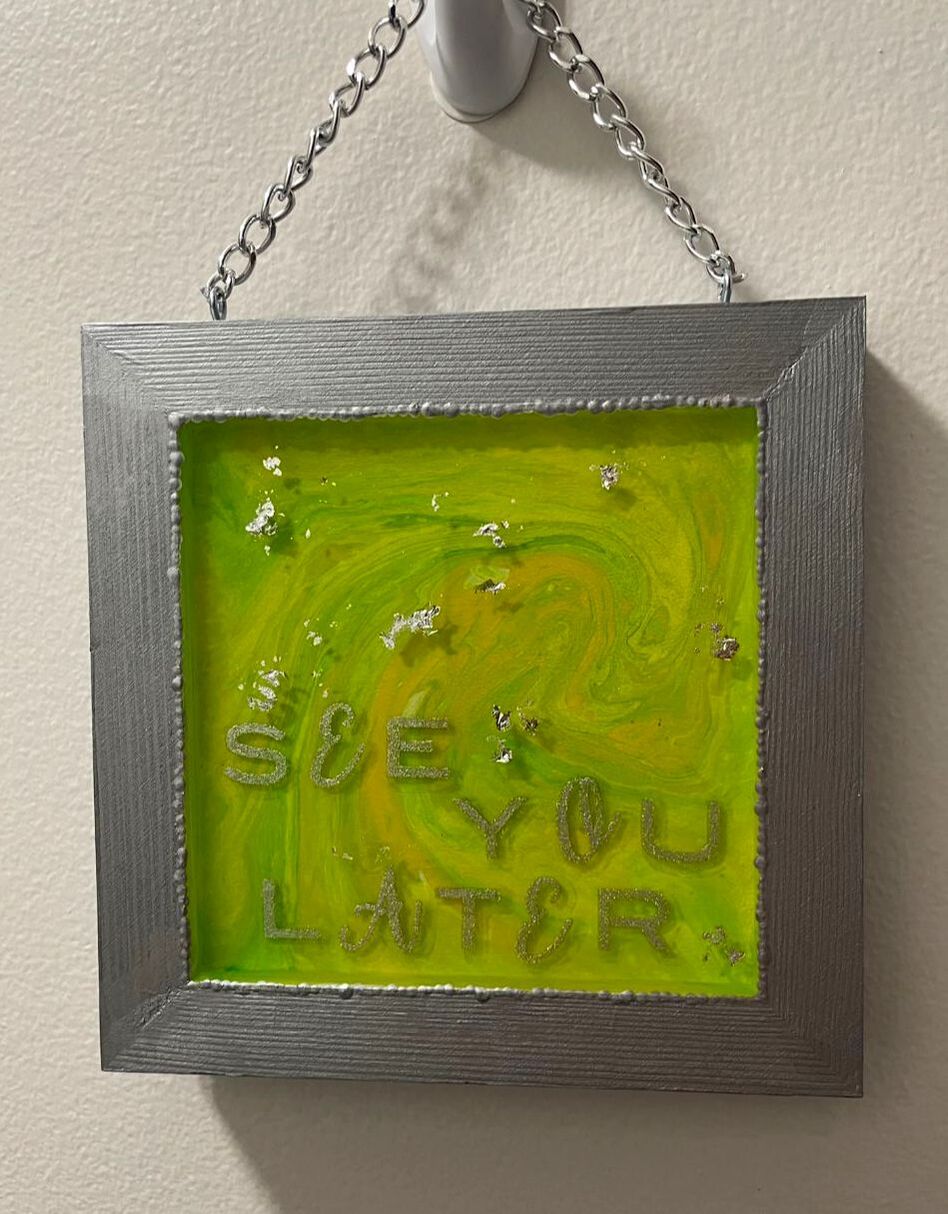
- Rebecca P.S. Today's photo on the home page is from Pexels user Pixabay: www.pexels.com/photo/access-antique-bolt-close-277574/ Hi there friends! So we are back to finish up the pour paint resin project, Where we left off last time I showed you what I had done to 4 frames, but also mentioned that I had bought 8 more. Well ..... I went crazy and made 4 more! I'm not going to go too deeply into the pour painting or resin process as I did cover that in the first blog: www.thepatternedpaperplate.com/blog/pour-paint-resin-frames-part-1 I will say that I tried a slightly different approach with the resin for a few and added some sparkles which turned out really nice! You will see the finished product at the end, no worries! 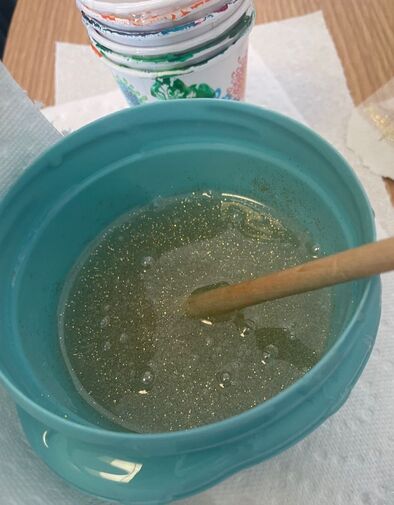 So basically with each side of each frame I did the pour painting, let that dry, added some letter stickers and other details as I saw fit and covered in as many coats of resin were needed to fill the frame indent. I then painted each frame. Of the 8 frames, 2 I painted silver, 2 gold, 2 black and 2 brown. I used some painters tape over the dry resin to help create straight lines when painting. 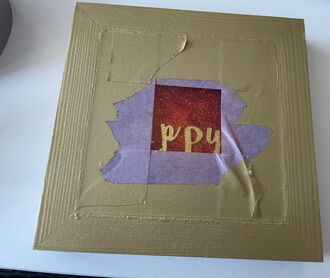 Once that was all complete, it was time to make these hangable! I acquired some little eye hook screws from my mother and bought some chain off Amazon. I spray painted half of the eye hooks gold and left the other half silver. I then used a very small drill bit to make pilot holes and screwed two eye hooks into the top of each frame. I used pliers to open up links of the chain to the length I wanted and then attached it to the eye hooks.
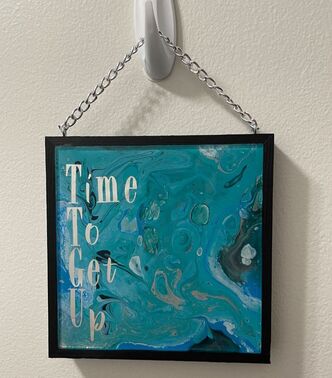
And now, the thing you've all been waiting for ... the finished frames! I'm going to show you all 8 and will show you both sides of each. Sit back and relax! Also please don't judge for how you can see my camera in some of the photos. It is nearly impossible to take a photo of a shiny surface like resin without seeing something reflected back! Frame 1:
Frame 2:
Frame 3:
Frame 4:
Frame 5:
Frame 6:
Frame 7:
Frame 8:
There they are everyone! I am honestly so proud of these. They were a labor of love and took a while to get finished, but they were worth it! If you have any specific questions about any frames and how they were made, feel free to leave them in the comments below!
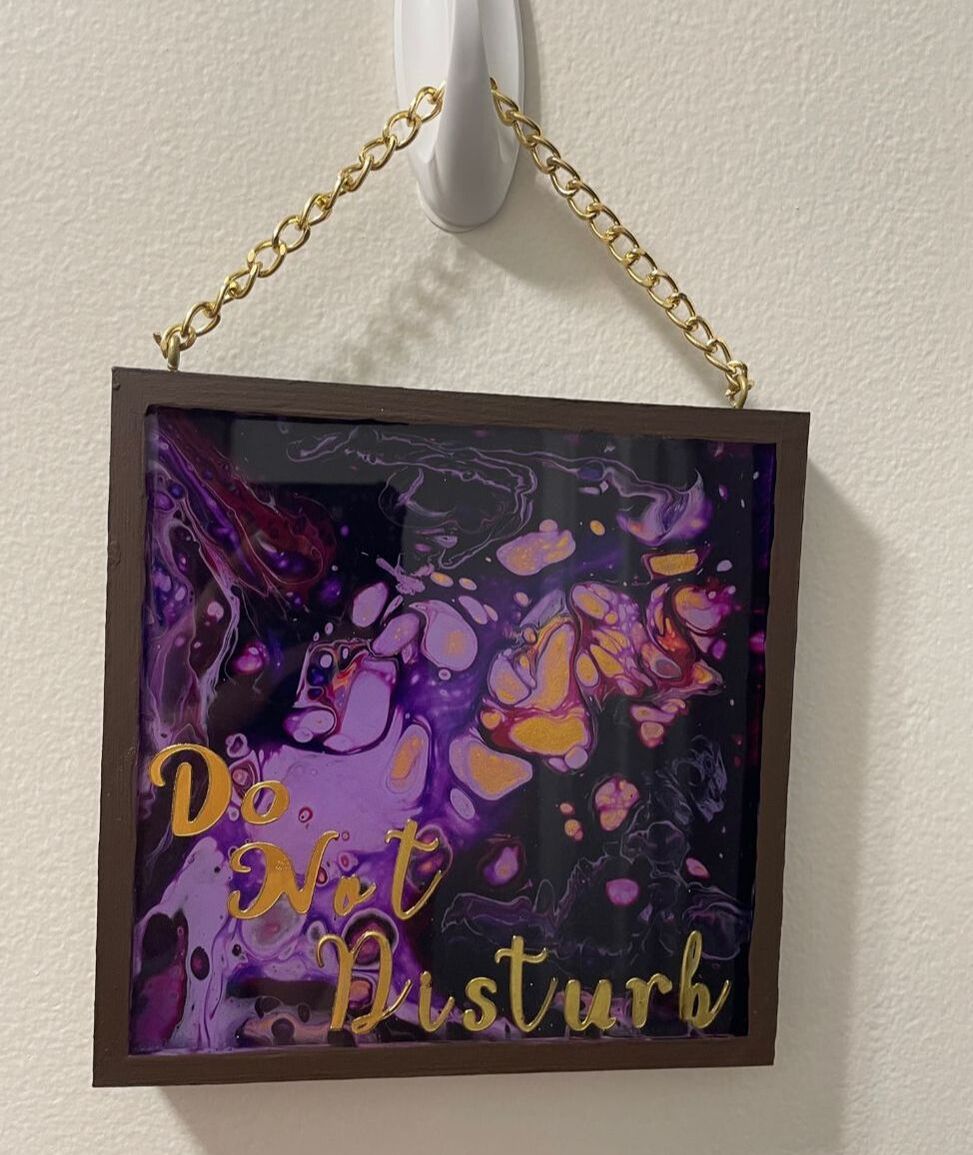
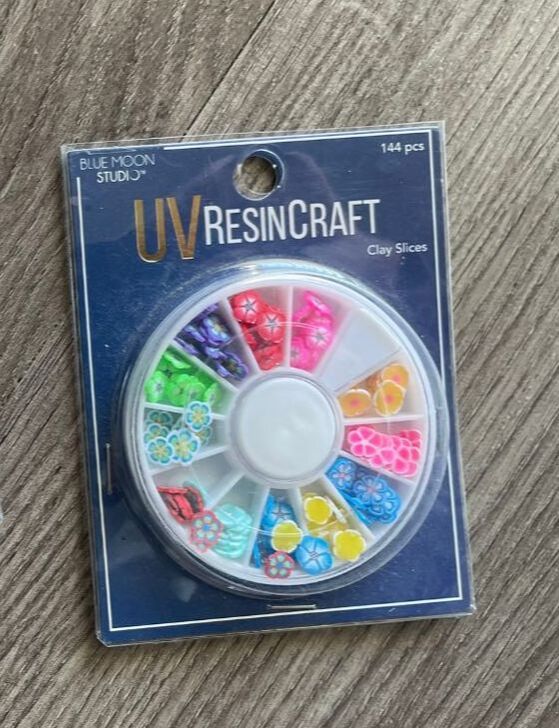
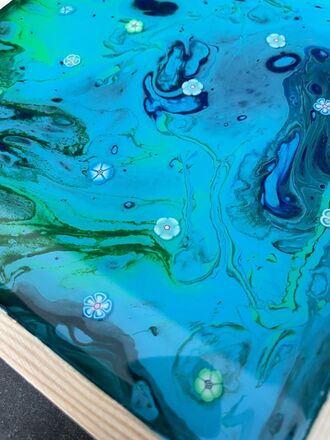
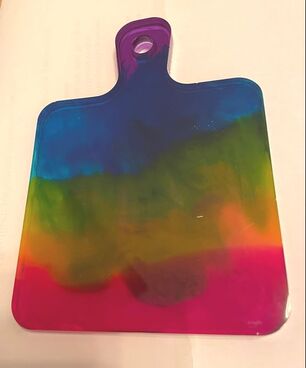
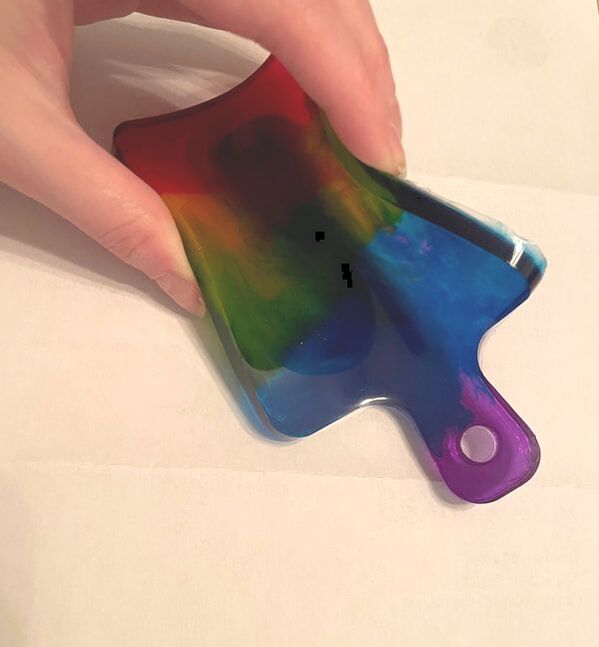
And, as always, I'd be happy to sell these if anyone is interested! Feel free to email me at rebecca96@comcast.net if you would like to know more. I would be happy to do sales in the greater Manchester, New Hampshire area. I am still trying to hype myself up to make an Etsy shop and we are not quite there yet :) Talk to you soon friends! - Rebecca P.S. Today's photo on the main blog page is provided by Pexels User Thirdman: www.pexels.com/photo/glass-health-research-treatment-7256261/ Happy February everyone! So last blog I decided to give epoxy resin a try for the first time. This week I am starting on a project that combines resin with one of my all time favorite crafting techniques: acrylic pour painting. If you are a consistent reader of the blog, perhaps you are sick of pour painting, but it never fails me and I will not ever stop doing it. That is all. End of story. Soooooo I was at Michaels and stumbled upon these wooden frames that are exclusively meant to be used for pour painting and resin art. I also bought some additional resin as I had none left over from my first resin craft. Quick update for those unaware: resin is kind of expensive. But besides that, these frames were very cool as they are double-sided, with one side being deeper with a wider frame while the other side is shallower with a thinner frame. 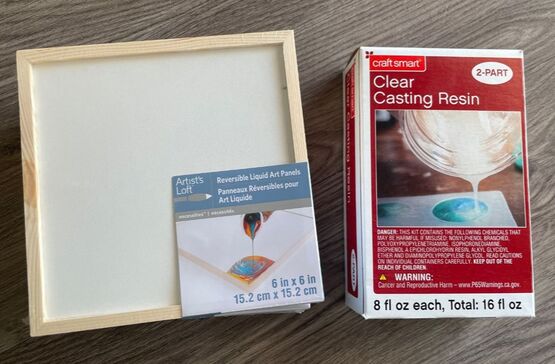 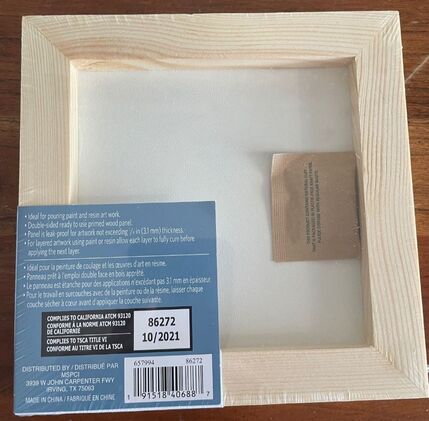 I am not going to give you yet another explanation of how I pour painted, but the SparkNotes version is that I used my tried and true pre-mixed acrylic pour paints and made sure to move the paint around so that it fully covered the inner sides of the wood frames. I started off with the shallower sides of the frames. If you want an actually helpful tutorial on how to pour paint, I have several blogs about it. This one was my first attempt at pour painting and used a method that involved having to mix each paint with a pouring medium that thinned it out: www.thepatternedpaperplate.com/blog/acrylic-pour-painting This one gives an example of how to pour on something other than just a canvas and uses the pre-mixed pour paints that I have come to know and love: www.thepatternedpaperplate.com/blog/pour-paint-coasters-part-one 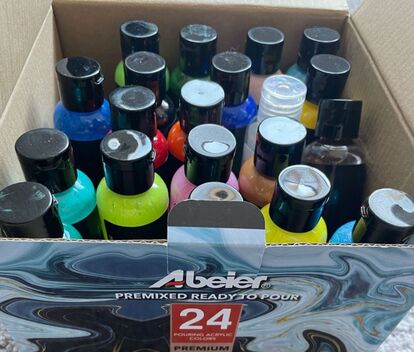 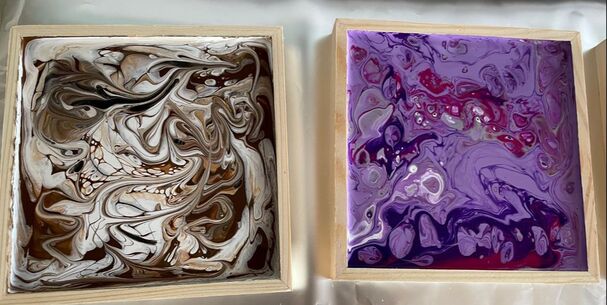 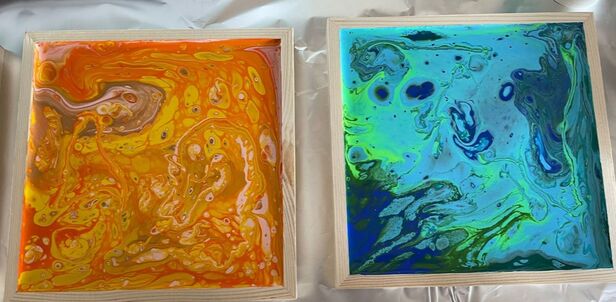 I let the paint dry for about 24-36 hours as it was a fairly thick layer and then I got started on the details that would be encased by the resin. The brown/white and yellow/orange frames both had some gold mixed in so I decided I wanted to add some gold stickers spelling out some simple phrases. I love the look of mismatched fonts so I used two different gold alphabet sticker sheets and cut out letters that I liked to spell out each phrase. I also want to give a quick shout out to the Dollar Tree for the amazing letter sticker selection. If you are looking for letter stickers of any kind, Dollar Tree has a really good selection, particularly of gold/silver foil stickers, and they are some of the thickest, highest quality stickers I've ever used. I would highly recommend! Also, please ignore how my little demonstration of my words below looks like a ransom note .... 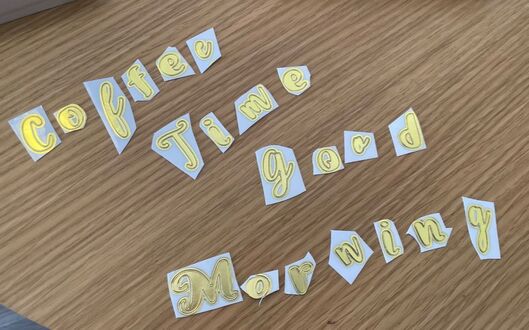 I had watched a few videos about using stickers in resin and I saw that a common concern or issue was that the stickers would become somewhat damp from the resin and would warp or shift around. To help prevent this, I used a tiny bit of SuperGlue on the back of each letter sticker before sticking it down and covering the whole piece in resin. Here are how they looked without the resin once the stickers were glued down. 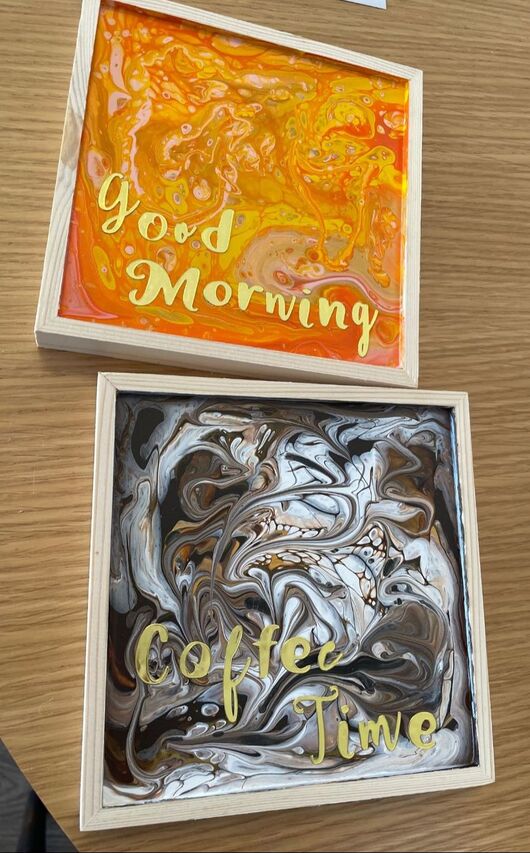 These frames ended up needing two layers of resin and I used clear resin to really let the pour painting shine through. I thought that I had used enough the first time, but once it settled and dried, the resin layer was not even with the edges of the frame like I wanted it to be. I did some research and learned that there are really two ways to layer resin effectively: you can either pour a second layer only a few hours after the first when the first layer is still a bit tacky or you can wait a full 24 hours until the first layer is fully dry, then sand and scuff up the first layer before pouring the second. The second layer just needs to have something to grip onto so that the layers don't separate so pouring onto tacky resin or onto a scuffed up layer achieves this. As my first layer was already dry, I went for the sand and scuff up method. I will say that this was somewhat scary as the sanding left very visible marks and scratches in the resin, but once the second layer was poured, these marks disappeared. I will show you how these turned out with the resin added in part two of this blog :) For the blue and purple frames, I had originally thought that I did not want to do phrases and opted for adding some little clay flower decorations to the first layer of resin.
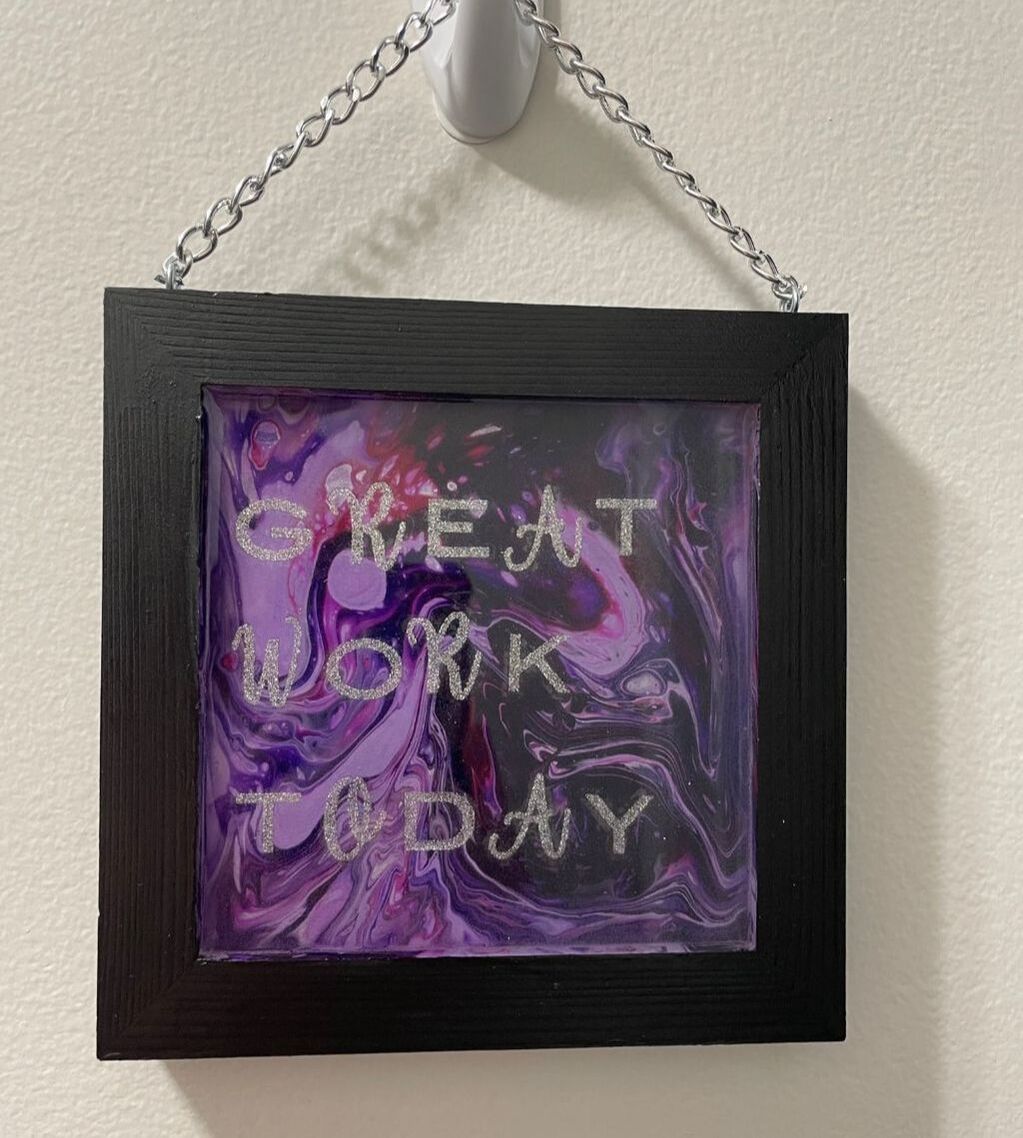
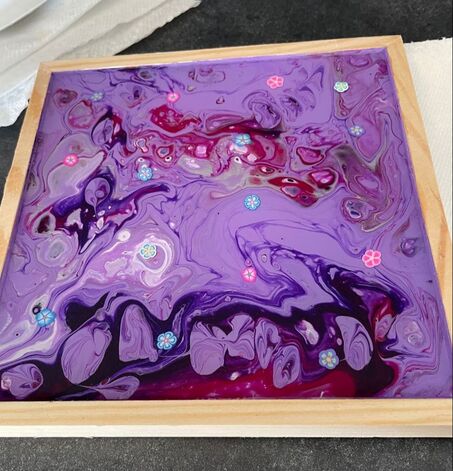 Once this first layer with the flowers dried and I realized that I had to do another layer on these as well, I decided that I wanted these to have some phrases too. For these I used some silver stickers all of the same font and did the SuperGlue application again. The purple frame shows what it looks like in between resin coats when everything is sanded down and scuffed, while the blue frame shows how it looks with both coats of resin done. 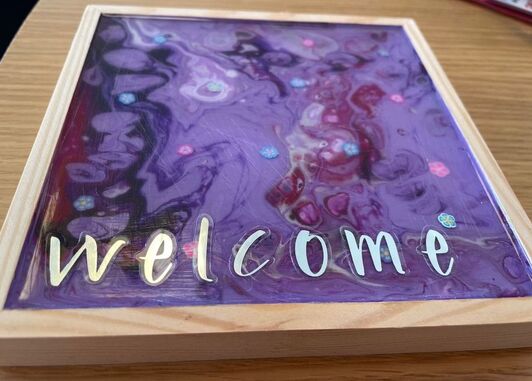 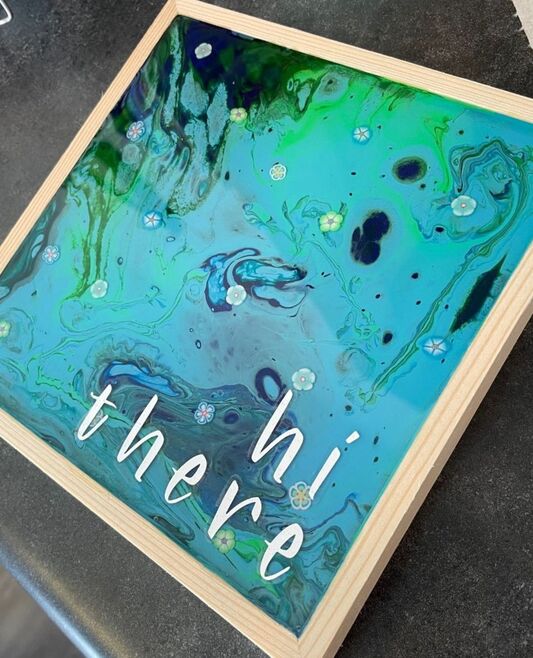 And this is where I will leave you on this project! Part 2 is going to cover what I did to the other sides, what I did to the bare wood frames themselves and what I used to make hangable pieces of art actually hangable.
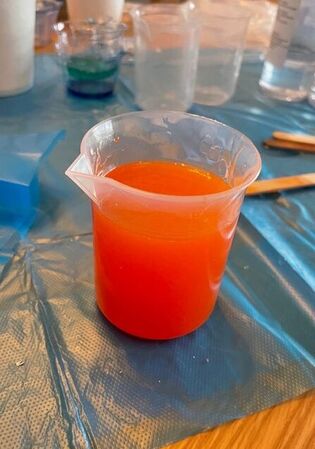
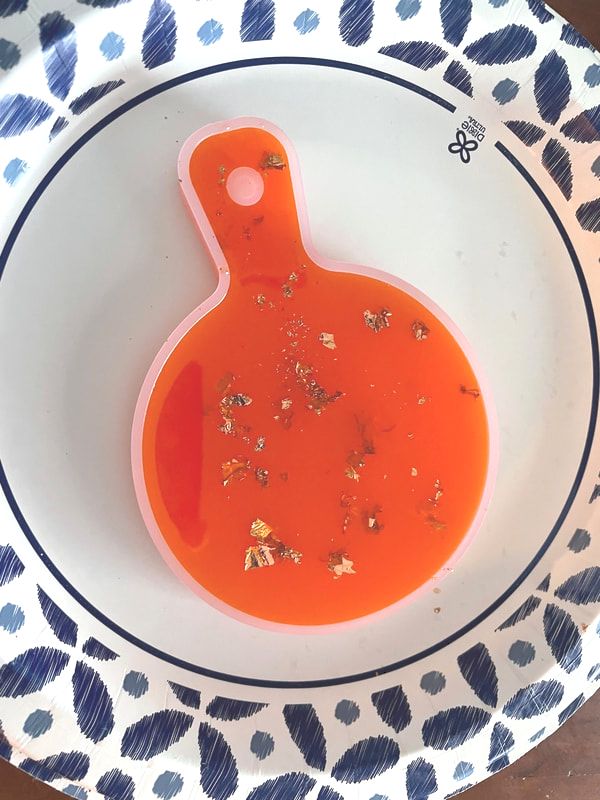
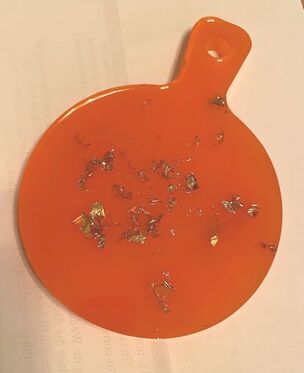
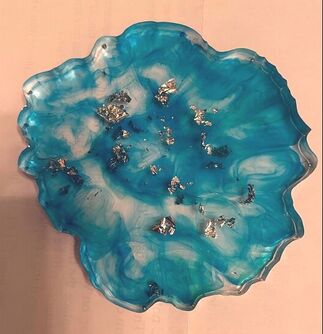
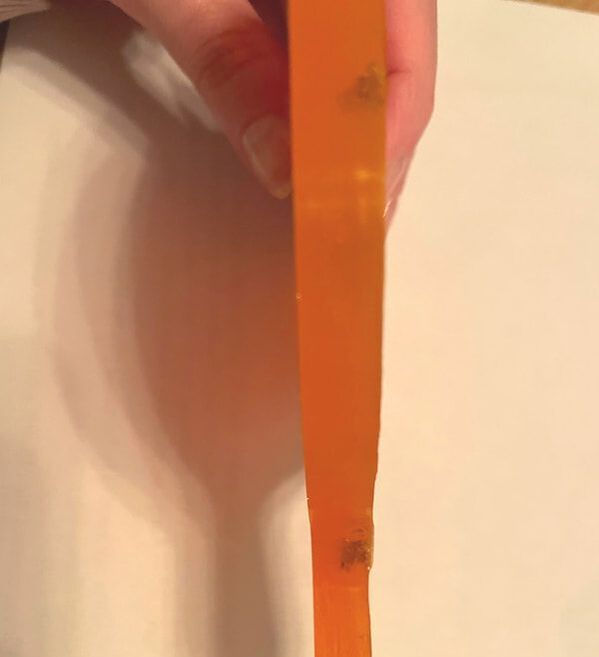
I am so happy with how these are turning out and I will admit that I already bought four more of the frames from Michaels to make more. As I mentioned at the beginning of this blog, if you are getting a little bit bored with seeing pour painting so much, I really don't have anything to say as I don't think I will ever stop doing it :) I have always loved painting and making larger scale art/wall decor, but as someone who is not really that good at drawing or painting actual things like landscapes/people etc., pour painting is such a good way to achieve what I want. It is also a form of painting that really centers on imperfection and uniqueness which is good for me as someone who gets a bit too focused on perfection. It has become a really therapeutic kind of art form for me and I love it! My mother has told me that cutting paper does that for her and she finds it very calming and meditative; for me, that thing has become pour painting. Also one quick final point: the first few times I actually mixed and poured the resin, I did not wear a mask because I have a general attitude of "screw it" when it comes to my personal safety. However, I would highly recommend actually wearing a mask as resin basically smells like a high school science classroom when its frog dissection week. Very formaldehyde-ish. Once I started wearing a mask while pouring, I did not end up getting a headache. Imagine that. I would even say that a mask, gloves and goggles/some kind of eye wear are your best bet to ensure that you are fully protected. Let me know what you all think of the start of this project in the comments below. I can't wait to show you the finished results! - Rebecca P.S. Today's photo on the homepage comes from Pexels user Thirdman: www.pexels.com/photo/a-person-mixing-a-resin-soloution-7256844/ Hello friends! Okay, I know we've done coasters approximately 47 times here on the PPP, but something we have not tried is resin! I have been intrigued by resin for a long time and have always wanted to give it a try. I found this kit on Amazon and thought I would walk you through the whole experience. 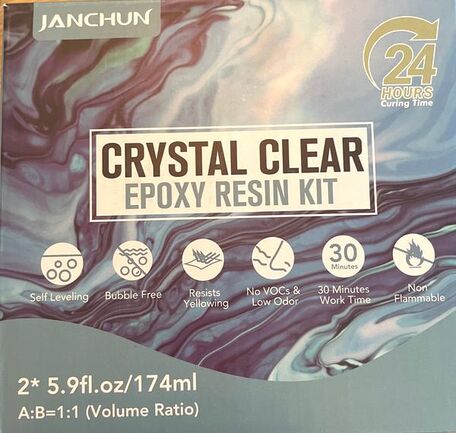 Here were the contents of the kit: 3 silicone molds, an apron/table cover, some gloves, many bottles of resin dye, some beaker/pour cups, the epoxy hardener and clear resin, mixing tools, tweezers, droppers and some shimmer metallic foil in 3 colors. 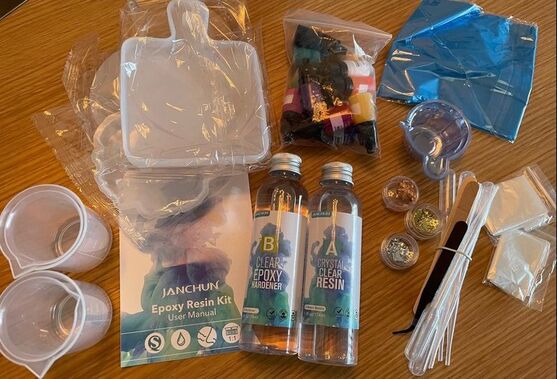 This epoxy resin is a 1:1 ratio meaning that it is equal parts hardener and resin for each project. The amount given was meant to be enough for 3 coasters, one in each mold. So I started with the mold that looked kind of like a geode slice. I mixed up some clear resin in the 1:1 ratio and once it was fully combined, I poured out a little bit into two containers and added some dye to make one blue and the other green. 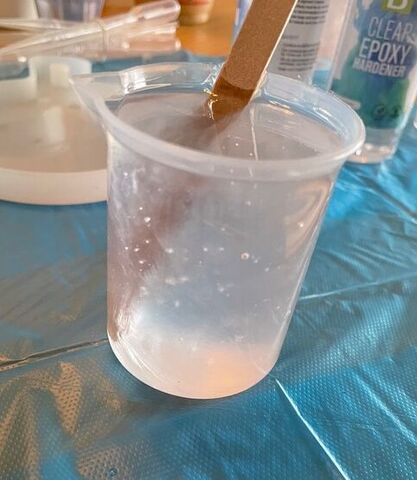 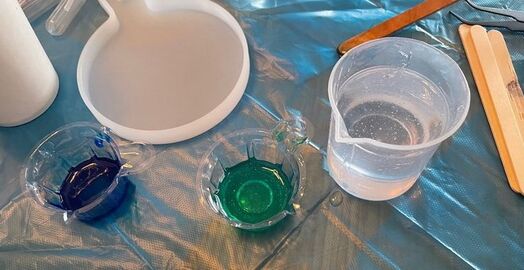 I then added most of the clear resin to the bottom of the mold, drizzled in each color and used a stirrer to create a swirled effect. I also used tweezers to add some of the silver foil and poured the remaining clear on top. 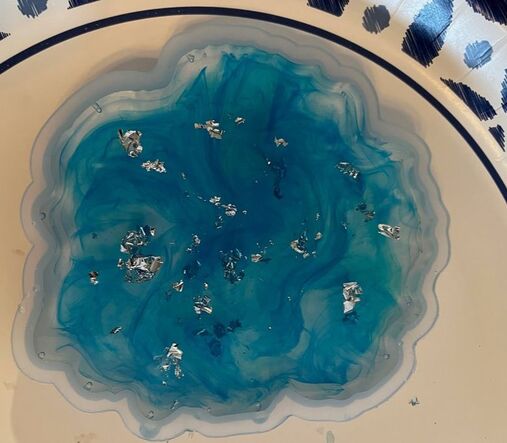 Although the directions did say that this was not necessary, I used a heat gun gently over the top to pop any bubbles that formed in the resin. For the second coaster, I decided to try a solid color so I mixed up some vibrant orange resin and added some bits of the coppery foil. I used the heat gun on this one as well.
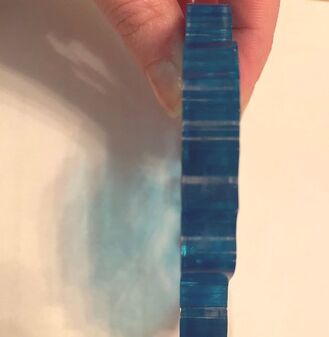
On my final coaster, I decided to go crazy and attempt a rainbow ombre effect. To do this, I mixed up 6 different colors of resin. I did have a small spill that meant my final mix was not a perfect 1:1 ratio of hardener and resin. As I had more hardener than resin, I made a completely uneducated assumption that it would be fine. SPOILER: It was not :) But we will get to that later! This coaster was somewhat stressful as I had to pour each color very fast so as to not let the one before it spread too far. I then swirled the colors around until I was happy with how it looked. On this one, I did not use the heat gun as I was afraid it would move the colors around too much. 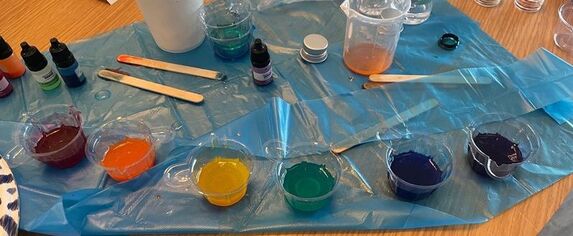 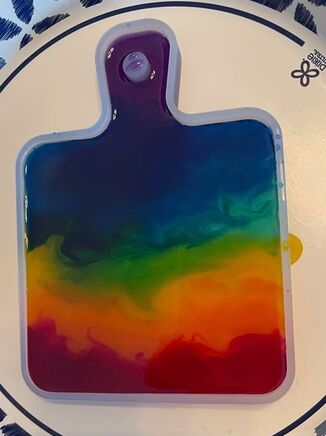 I let all 3 dry for about 24 hours and the first 2 were good to go and dried solid. The geode one ended up being my favorite!
Shockingly enough, the one that did not have the correct 1:1 ratio dried to a point where it was no longer wet, but did not fully harden. That's on me!
I think I will use this floppier one as a base to rest my glue gun on so that any glue drips do not damage my table top. The geode coaster is now being used as a coaster in my bedroom and the orange one is a base for a candle I have on my work desk. 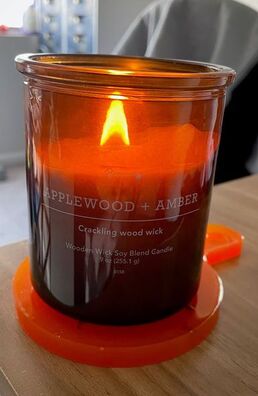 So final thoughts on the resin experience: The kit was very easy to use and the only error that occurred was because I blatantly ignored the very simple directions given to me. It is also nice that the kit came with reusable molds and a lot of color dyes so I could make more resin projects in the future if I just bought some more of the hardener and resin. It was a good little project that helped me to see if I liked resin and could do it.
I do think that I want to do more and might buy more smaller kits or some more resin/hardener to use with the supplies I have left, but I will say that the clean-up from it is pretty hard. The kit did come with some sturdy plastic mixing pots that I ended up having to throw away as I was not sure how to clean them out properly. I assume that you could wash them out, but I was wary for any amount of resin to go down the drain as I did not think my property manager would have been super thrilled about that. I would definitely want to do more research on how to clean all the tools used so that everything would not have to be thrown out after the project. So what do you guys think of this resin first try? Have you ever used resin before? Let me know in the comments below! - Rebecca P.S. Today's image on the homepage is from Pexels user Thirdman: www.pexels.com/photo/person-pouring-resin-in-plastic-cup-7256264/ Hi friends! Happy 2022! Today I am back with a shorter blog as this project is not quite complete. I am still waiting for a crucial component to come from Amazon! Last week I was hanging out with my mother and was feeling craftily uninspired so we went on a little shopping trip. Obviously one of our stops was the Dollar Tree. I am a big fan of tiny little things so I was immediately excited by these little glass bottle charms. 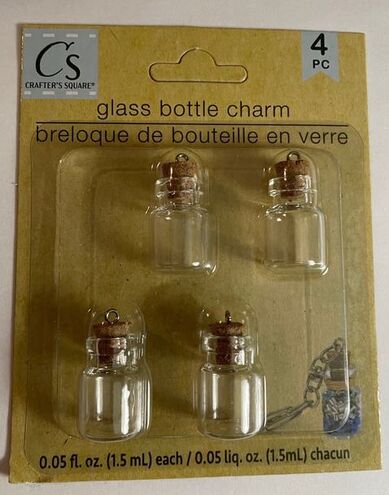 Right next to them were some fun beads and stretch cord and an idea started to take shape.
When my mother and I have an opportunity to do craft fairs, I like to make sure that I have a range of things that would appeal to adults and children. I don't usually make jewelry, but these supplies above really seemed to lend themselves to a cute necklace/bracelet combo. I don't care how old you are, letter beads are always adorable! I started by filling each little glass charm with some of the beads. I then put some Super Glue on the rim of the glass before pressing the cork topper back on to make sure it would stick. I also put a tiny dot of Super Glue on the place where the little eye bolt was pushed into the cork at the top to ensure that wouldn't slide out.  Next I used the variety of beads and stretchy cord to make some cute words that matched the color scheme of the bottle they would be going with. 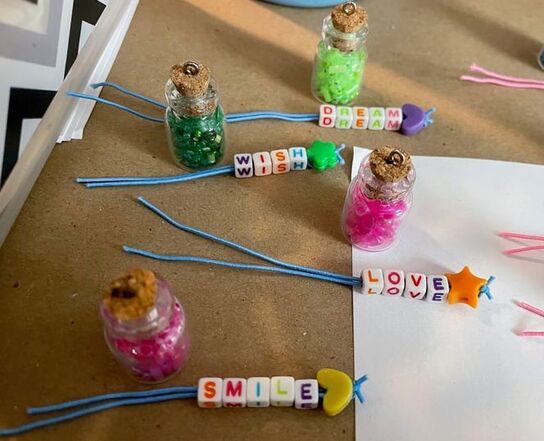 The plan is to tie up the stretchy cord onto a jump ring and also attach the bottle to the same jump ring so that they can hang from a necklace chain together. I bought these silver necklace chains, but also want to try it out on the colored stretchy cord to see how that looks. The thing I am waiting on is appropriately sized jump rings so I can get started on putting everything together when those come! 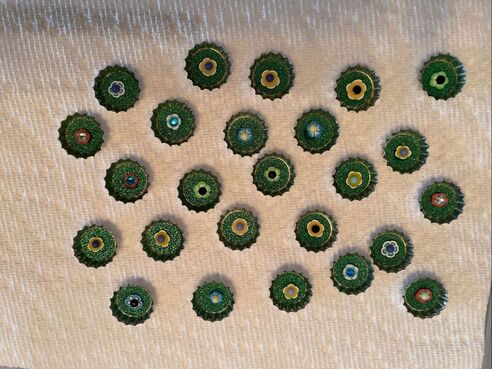 I also made some bracelets to match each necklace. The plan is to keep them untied so that they can be tied to the perfect rightness for whoever is wearing them, but I also might try my hand at some of those slidey knots that you can tighten. 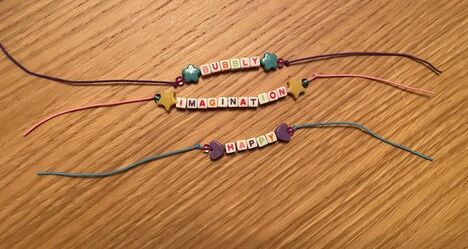 Finally, I made some simple monogram strands and some matching bead strands. The plan is to use my jump rings when they come and attach each pair to one of these silver clips to make cute little monogram keychains. 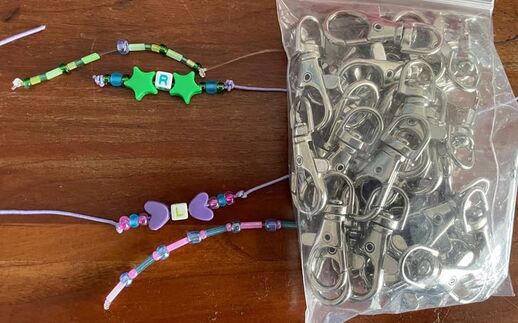 And that's it on this simple project! Along with the jump rings, I also have a larger variety pack of letter beads coming from Amazon as I've been having a really great time making things with them. I even made myself a little keychain with a not so safe for work swear word on it and I think there could be a niche market for bracelets, keychains or necklaces with some sassy phrases although I'm feeling like that may not be appropriate for the blog :)
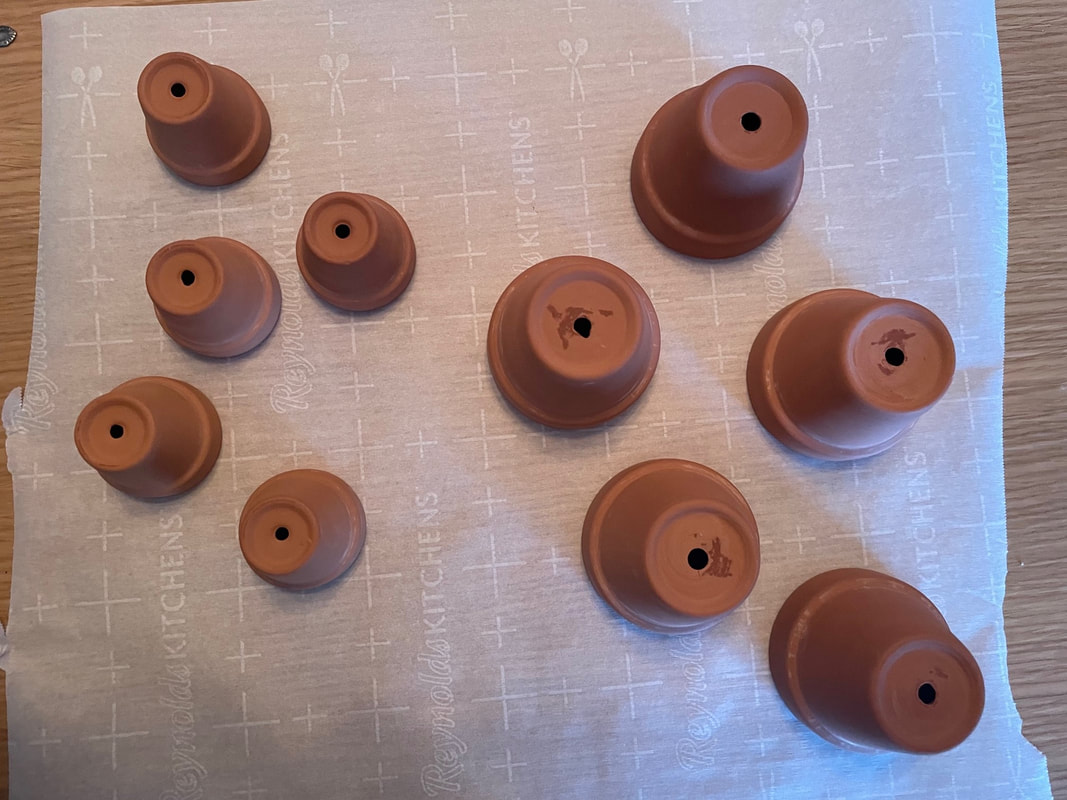
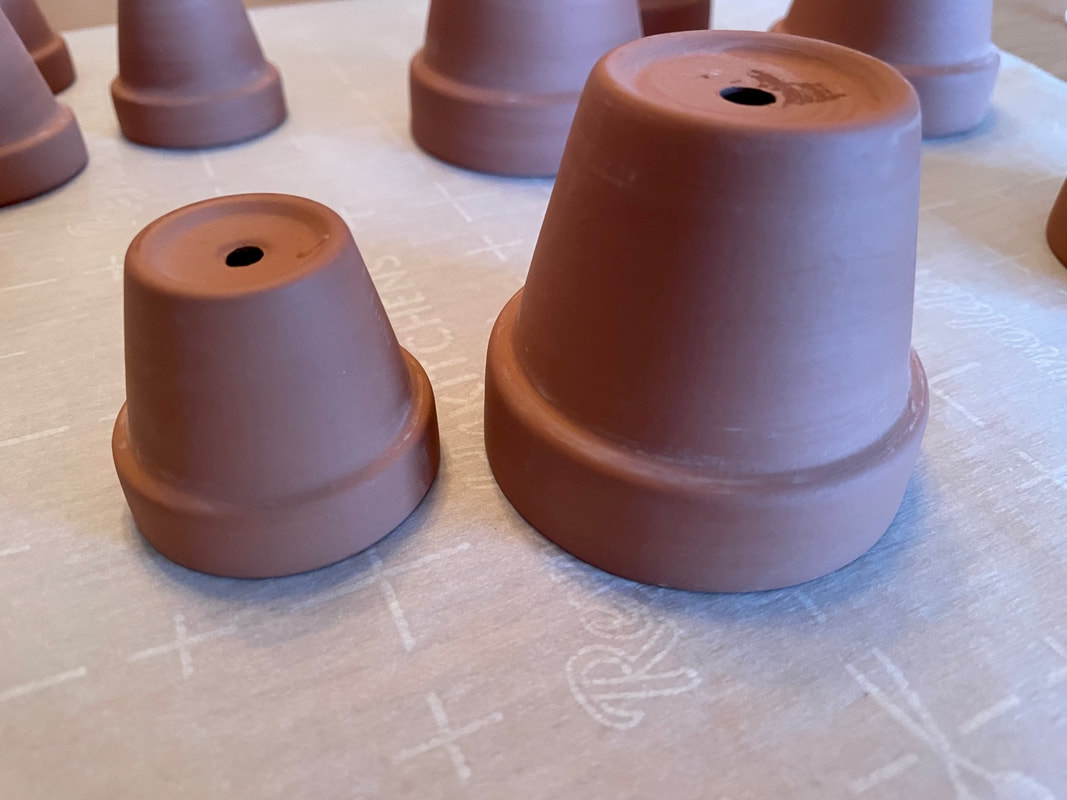
I hope you guys have a happy Sunday! Let me know what you think of these bracelets and necklaces in the comments below! - Rebecca P.S. Today's image in the blog front page is from Pexels user Magda Ehlers: www.pexels.com/photo/assorted-color-beads-1331705/ Hello everyone! So today I am here with some cute DIY décor that can carry you through the winter season. I want to preface by saying that this is not an original idea and you can find countless varieties of it on Pinterest, but this is my version of the cute little snowman pot DIY. First, you need to buy two sizes of terra cotta pots that will sit on one another. I went for the two of the smaller sizes that they had at Michaels.
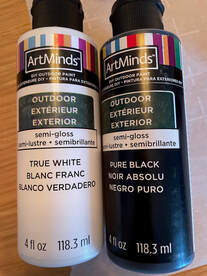
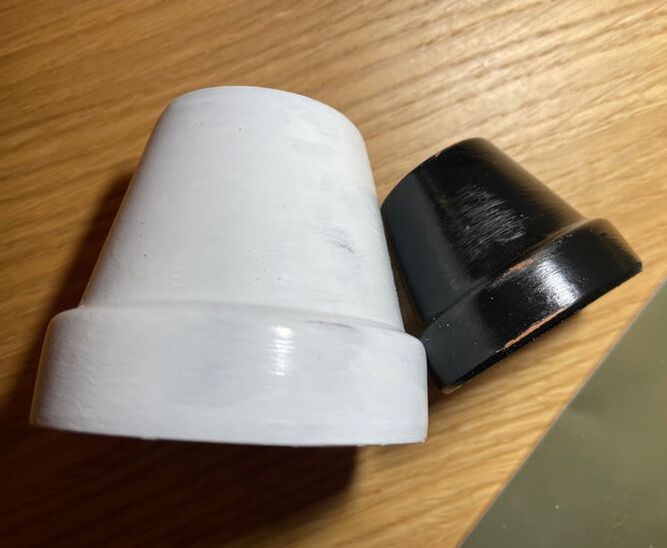
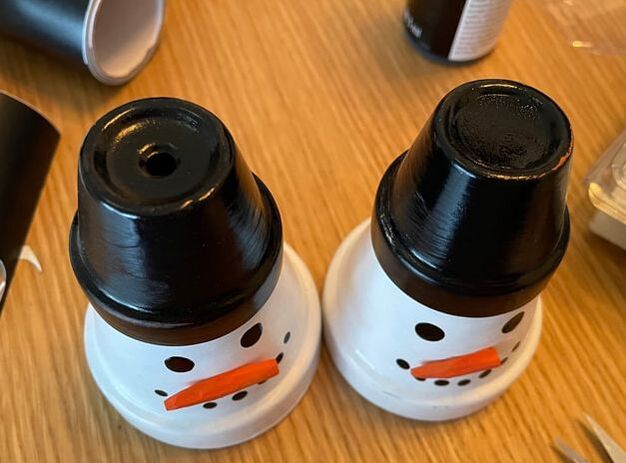
I then bought some outdoor acrylic paint to ensure that it would adhere well to the pots. I painted the smaller pots black for the snowman hat and the larger pots white; I did two coats for each color. I used some sandpaper to scuff up the pots after the paint had dried to give them a worn look.
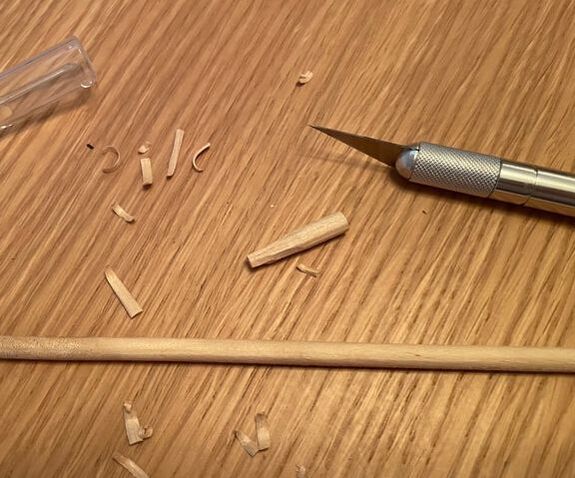
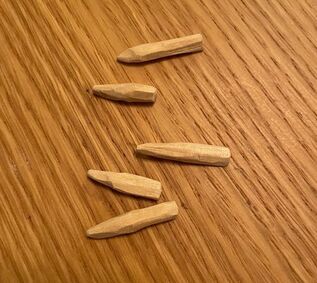
I then dipped the handle of a paintbrush in the black paint to make the snowman eyes and mouth on the white pots. After that was dry, I glued the two pots together, with the smaller black pot on top. I tried using both hot glue and liquid Gorilla Glue and found that hot glue worked better as it dried almost immediately while the liquid glue was very drippy and I had to keep wiping it away to avoid glue streaks down the white pot. 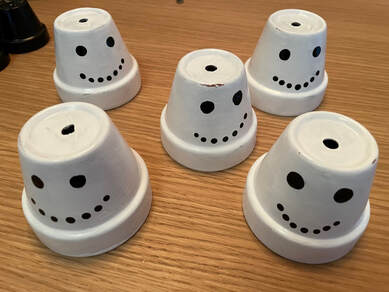 As that was drying, I worked on the snowman noses. I cut down some thin wooden dowels that I had with an X-acto knife and carved them to look like carrots. Then I painted them orange and let those dry. Once they were dry, I attached them to the front of the snowman face with Super Glue.
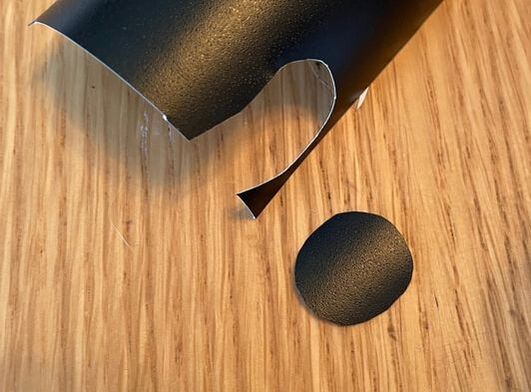
I was bothered by the fact that the top black pots had a hole in the top, so I cut out a small circle of some black adhesive vinyl that I had and glued it down to make it look more like the top of a hat.
Finally, I cut out some lengths of twine that I had, as well as some thin strips of felt to use as hat decoration and as scarves. I attached both with some hot glue here and there to keep them in place. And here they are! There was some wait time as things dried, but overall these were very simple little crafts and they came out so cute! 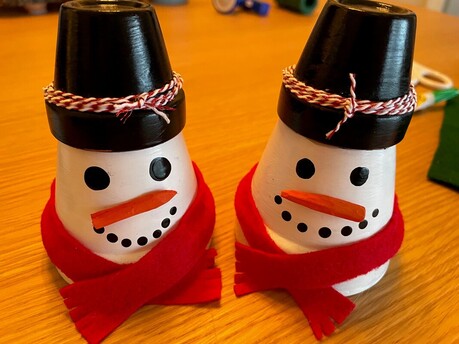 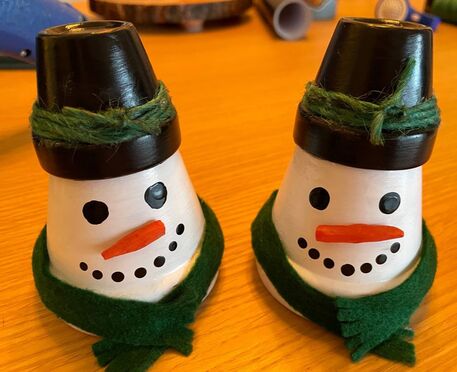 What do you guys think of these little snowmen? Let me know in the comments below!
- Rebecca P.S. Today's image on the homepage for this blog comes from Pexels user Jill Wellington: www.pexels.com/photo/snowman-holding-shovel-3334473/ |
AuthorI am a 27-year-old crafter and baker from New Hampshire! Archives
April 2024
Categories |


 RSS Feed
Proudly powered by Weebly