|
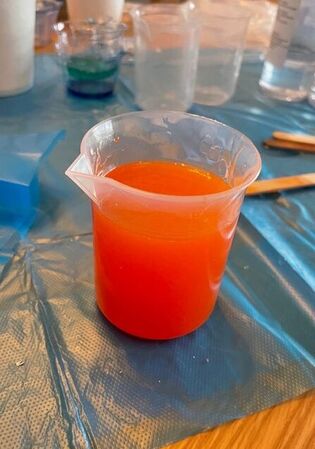
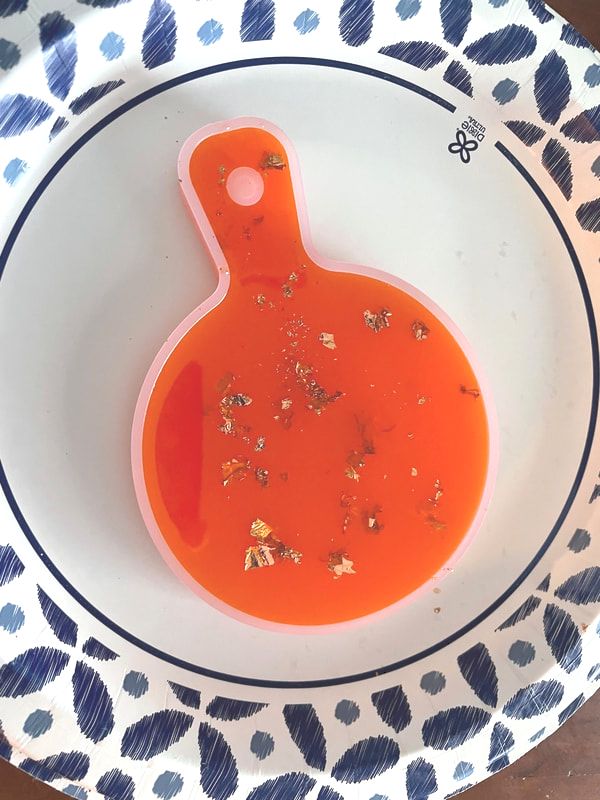
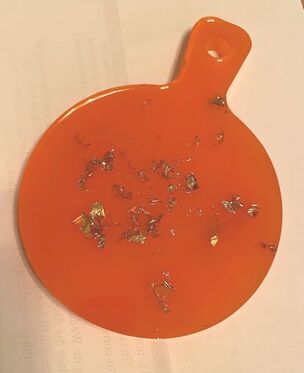
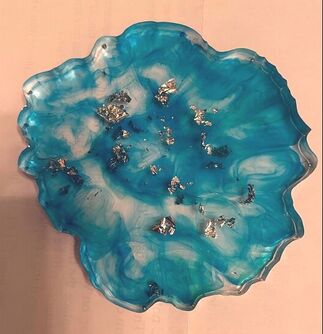
Hello friends! Okay, I know we've done coasters approximately 47 times here on the PPP, but something we have not tried is resin! I have been intrigued by resin for a long time and have always wanted to give it a try. I found this kit on Amazon and thought I would walk you through the whole experience.  Here were the contents of the kit: 3 silicone molds, an apron/table cover, some gloves, many bottles of resin dye, some beaker/pour cups, the epoxy hardener and clear resin, mixing tools, tweezers, droppers and some shimmer metallic foil in 3 colors. 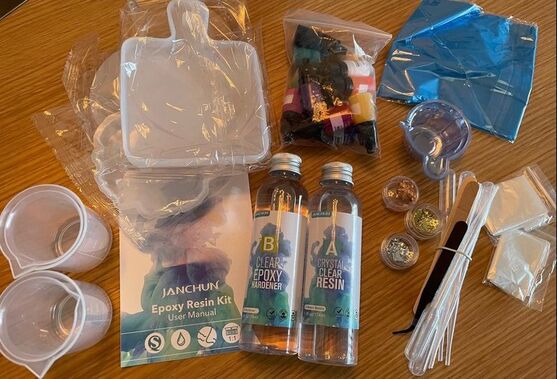 This epoxy resin is a 1:1 ratio meaning that it is equal parts hardener and resin for each project. The amount given was meant to be enough for 3 coasters, one in each mold. So I started with the mold that looked kind of like a geode slice. I mixed up some clear resin in the 1:1 ratio and once it was fully combined, I poured out a little bit into two containers and added some dye to make one blue and the other green. 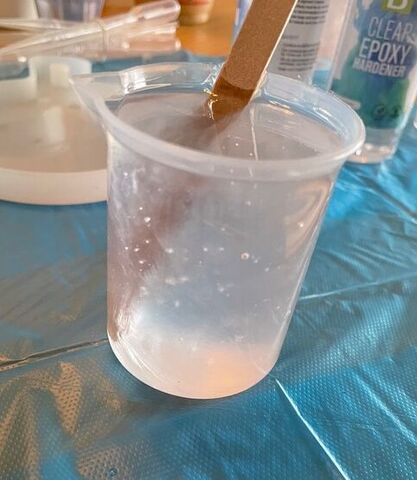 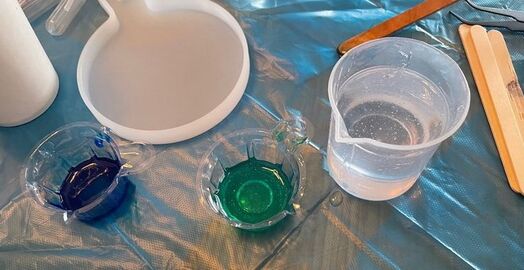 I then added most of the clear resin to the bottom of the mold, drizzled in each color and used a stirrer to create a swirled effect. I also used tweezers to add some of the silver foil and poured the remaining clear on top. 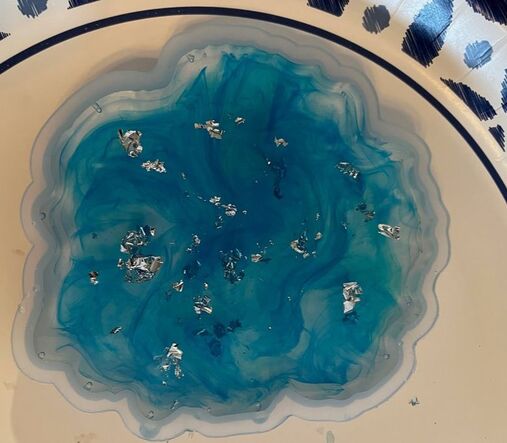 Although the directions did say that this was not necessary, I used a heat gun gently over the top to pop any bubbles that formed in the resin. For the second coaster, I decided to try a solid color so I mixed up some vibrant orange resin and added some bits of the coppery foil. I used the heat gun on this one as well.
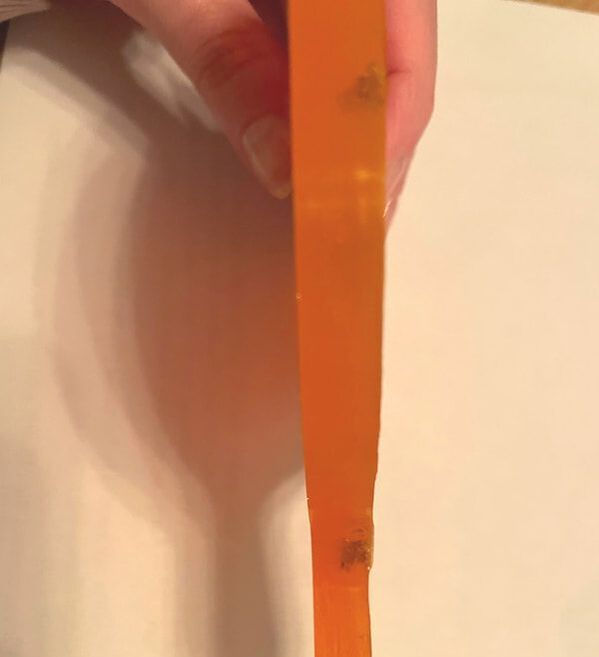
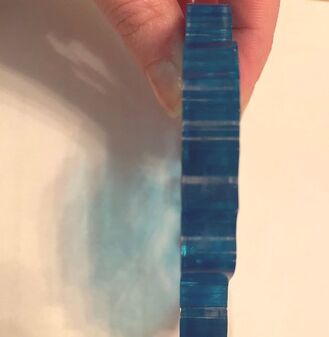
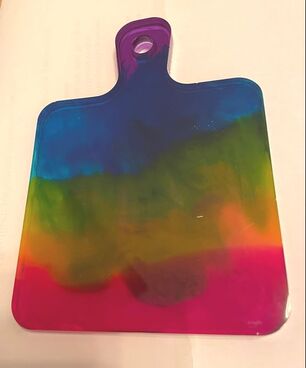
On my final coaster, I decided to go crazy and attempt a rainbow ombre effect. To do this, I mixed up 6 different colors of resin. I did have a small spill that meant my final mix was not a perfect 1:1 ratio of hardener and resin. As I had more hardener than resin, I made a completely uneducated assumption that it would be fine. SPOILER: It was not :) But we will get to that later! This coaster was somewhat stressful as I had to pour each color very fast so as to not let the one before it spread too far. I then swirled the colors around until I was happy with how it looked. On this one, I did not use the heat gun as I was afraid it would move the colors around too much. 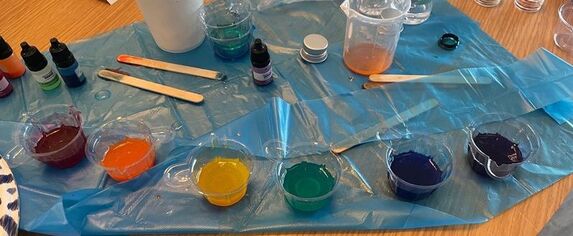 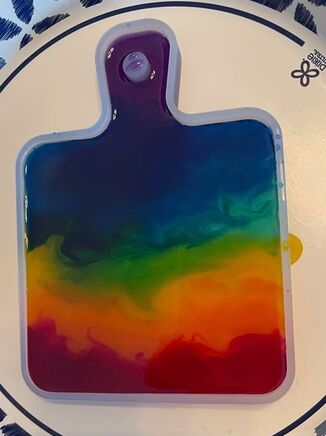 I let all 3 dry for about 24 hours and the first 2 were good to go and dried solid. The geode one ended up being my favorite!
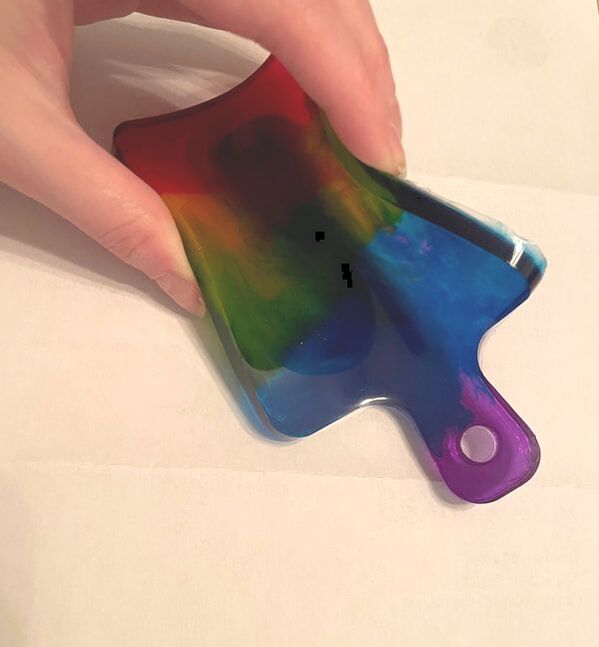
Shockingly enough, the one that did not have the correct 1:1 ratio dried to a point where it was no longer wet, but did not fully harden. That's on me!
I think I will use this floppier one as a base to rest my glue gun on so that any glue drips do not damage my table top. The geode coaster is now being used as a coaster in my bedroom and the orange one is a base for a candle I have on my work desk. 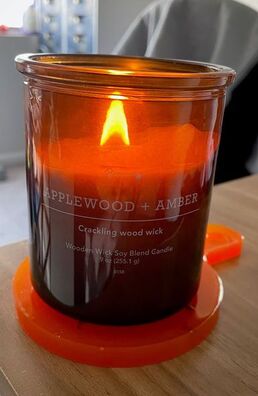 So final thoughts on the resin experience: The kit was very easy to use and the only error that occurred was because I blatantly ignored the very simple directions given to me. It is also nice that the kit came with reusable molds and a lot of color dyes so I could make more resin projects in the future if I just bought some more of the hardener and resin. It was a good little project that helped me to see if I liked resin and could do it.
I do think that I want to do more and might buy more smaller kits or some more resin/hardener to use with the supplies I have left, but I will say that the clean-up from it is pretty hard. The kit did come with some sturdy plastic mixing pots that I ended up having to throw away as I was not sure how to clean them out properly. I assume that you could wash them out, but I was wary for any amount of resin to go down the drain as I did not think my property manager would have been super thrilled about that. I would definitely want to do more research on how to clean all the tools used so that everything would not have to be thrown out after the project. So what do you guys think of this resin first try? Have you ever used resin before? Let me know in the comments below! - Rebecca P.S. Today's image on the homepage is from Pexels user Thirdman: www.pexels.com/photo/person-pouring-resin-in-plastic-cup-7256264/
0 Comments
Hi friends! Happy 2022! Today I am back with a shorter blog as this project is not quite complete. I am still waiting for a crucial component to come from Amazon! Last week I was hanging out with my mother and was feeling craftily uninspired so we went on a little shopping trip. Obviously one of our stops was the Dollar Tree. I am a big fan of tiny little things so I was immediately excited by these little glass bottle charms. 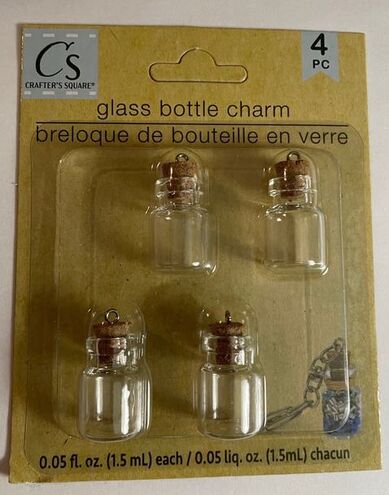 Right next to them were some fun beads and stretch cord and an idea started to take shape.
When my mother and I have an opportunity to do craft fairs, I like to make sure that I have a range of things that would appeal to adults and children. I don't usually make jewelry, but these supplies above really seemed to lend themselves to a cute necklace/bracelet combo. I don't care how old you are, letter beads are always adorable! I started by filling each little glass charm with some of the beads. I then put some Super Glue on the rim of the glass before pressing the cork topper back on to make sure it would stick. I also put a tiny dot of Super Glue on the place where the little eye bolt was pushed into the cork at the top to ensure that wouldn't slide out.  Next I used the variety of beads and stretchy cord to make some cute words that matched the color scheme of the bottle they would be going with. 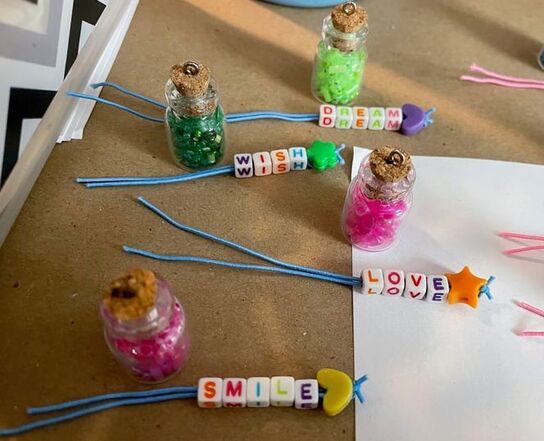 The plan is to tie up the stretchy cord onto a jump ring and also attach the bottle to the same jump ring so that they can hang from a necklace chain together. I bought these silver necklace chains, but also want to try it out on the colored stretchy cord to see how that looks. The thing I am waiting on is appropriately sized jump rings so I can get started on putting everything together when those come!  I also made some bracelets to match each necklace. The plan is to keep them untied so that they can be tied to the perfect rightness for whoever is wearing them, but I also might try my hand at some of those slidey knots that you can tighten. 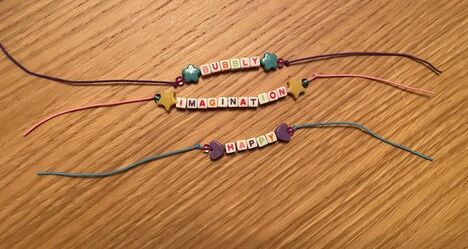 Finally, I made some simple monogram strands and some matching bead strands. The plan is to use my jump rings when they come and attach each pair to one of these silver clips to make cute little monogram keychains. 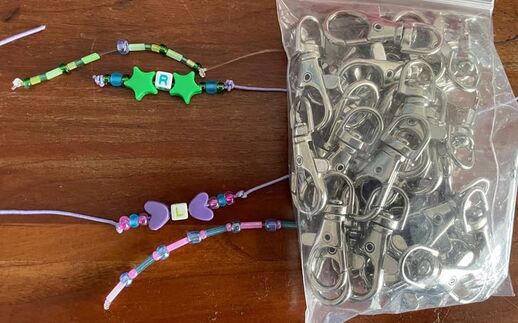 And that's it on this simple project! Along with the jump rings, I also have a larger variety pack of letter beads coming from Amazon as I've been having a really great time making things with them. I even made myself a little keychain with a not so safe for work swear word on it and I think there could be a niche market for bracelets, keychains or necklaces with some sassy phrases although I'm feeling like that may not be appropriate for the blog :)
I hope you guys have a happy Sunday! Let me know what you think of these bracelets and necklaces in the comments below! - Rebecca P.S. Today's image in the blog front page is from Pexels user Magda Ehlers: www.pexels.com/photo/assorted-color-beads-1331705/ |
AuthorI am a 27-year-old crafter and baker from New Hampshire! Archives
July 2024
Categories |

 RSS Feed
Proudly powered by Weebly