|
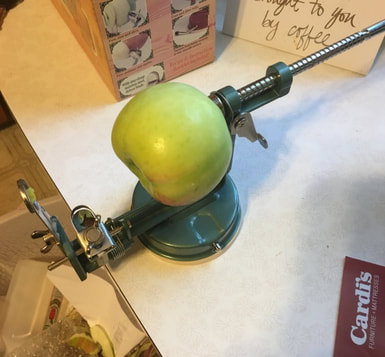
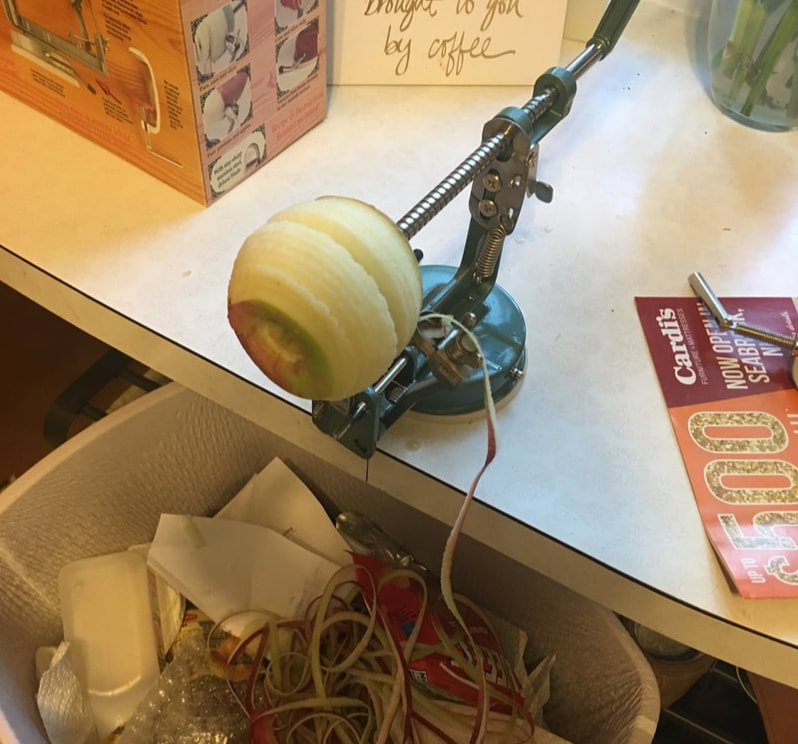
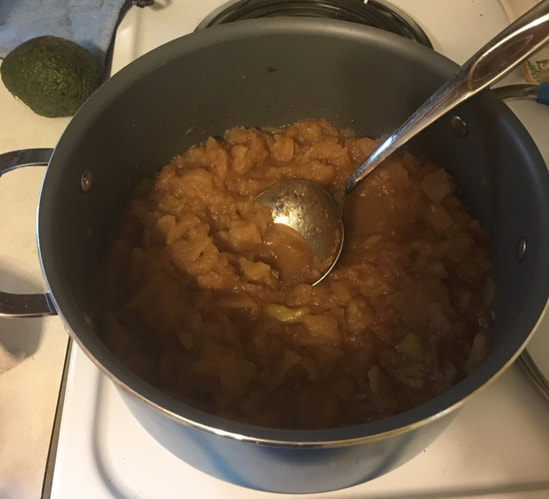
Why hello! So today we are journeying back to the world of baking again. Well, not really baking because we are talking about applesauce. But you know what I mean! So to start things off, if you are here looking for a very precise measured recipe for applesauce this is the wrong place for you! I don't follow any recipe when I make applesauce, I just go for it. I decided that it would be a great time to make some applesauce since my boyfriend and I went applepicking with both of our parents last weekend and I disregarded the fact that my boyfriend and I live alone and he's gone 5 days a week at the police academy and went ahead and bought about 50 apples. Not even a joke. So I'm gonna eat apple stuff for weeks but thats fine because I'm one of those annoying people who adores fall. Anyway, applesauce. Start with a big pot. A nice big pot. All of your ingredients are going to go in said pot. I use whatever apples I happened to pick for applesauce. For eating, I typically prefer Pink Lady apples, but for applesauce I'm really not too picky! For apple cutting, peeling and coring I happen to have a glorious apple cutter, peeler and corer. If you do not have one of these, you can obviously cut and peel those apples yourself! Don't you worry! But I would recommend using one of theses miraculous contraptions if you can get your hands on one. They often have them at antique/consignment shops. Look at how fancy this is! I know! You stick your apple on the little spikes, and then twist it through the round blade which cores and slices it while the little blade on the side peels it. This glorious machine does sometimes have an issue if you put an extremely large or very misshapen apple on it, but overall it works really well. Whether you are using this machine or not, just cut your apples into fairly small pieces so it's easy for them to cook down. Add your apples to the big pot along with some lemon juice and water. The amount of either depends on how tangy and soupy you like your applesauce, but just put enough so that your apples don't burn at the bottom of your pot. Keep the heat on the burner just above medium the whole time you are cooking the applesauce. At this point I add some brown sugar, regular granulated sugar, vanilla, cinnamon and butter and mix it all up and let it sit for maybe 20 minutes on the heat. I add more brown sugar than granulated sugar, a huge amount of cinnamon and not very much butter. All of this depends on your taste. Put some in and try a spoonful and see how you feel! Its always easier to add more; you can't really undo it once you've added too much sugar or butter. This is usually what I want my applesauce to look like before I call it done. I like my applesauce chunky so at this point all I would do is squish it up a little with a potato masher or the back of a big spoon, but if you prefer smoother apple sauce you can feel free to let it cool a little and pop it in a blender or use an immersion blender right in the pot.
So basically thats all! As I said above, I didn't want this to be an in-depth recipe for applesauce since I'm stubborn and often don't follow recipes. I just wanted to show the basic way that I make applesauce and help you see how easy and versatile it can be! Enjoy! - Rebecca
0 Comments
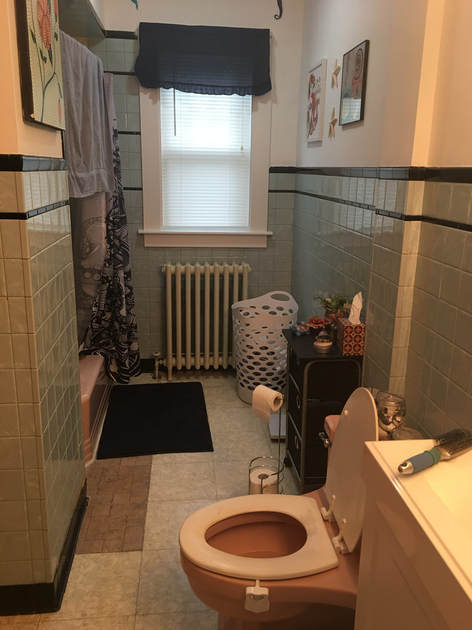
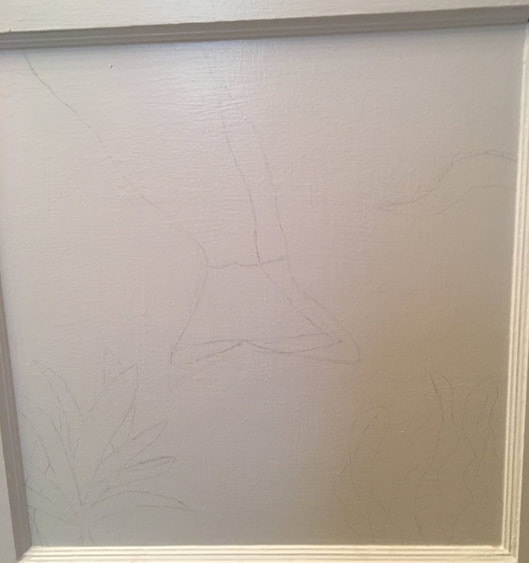
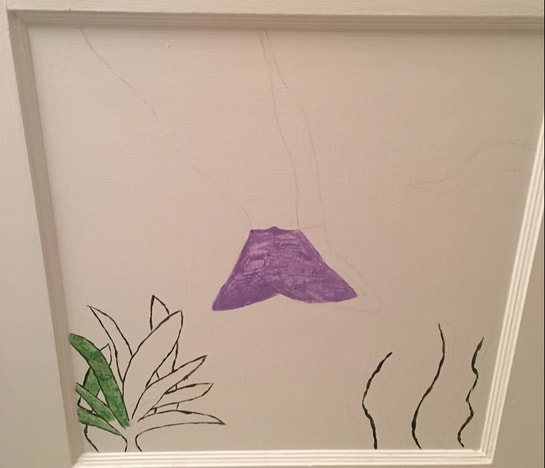
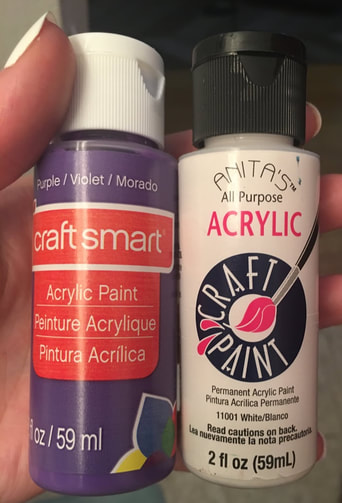
So today I want to give a little look at a project I just started. I have no idea how long this will take me or exactly what it will look like once it's finished, but sometimes those are the best kinds of projects! I am going to be painting a mural on the bottom half of our bathroom door. To give some background, our bathroom looks like it come out of the 50s-60s. We've got aqua tile on the wall, a pink toilet and tub and several different types of linoleum on the floor. Don't believe me? Take a look. So my boyfriend and I decided to steer into the skid a little bit and just go for an ocean themed bathroom with decor full of blues and pinks. Hey we tried and it's pretty cute! I even added some painted tentacles as a border at the top of the wall. So to give the bathroom a little more fun I decided to paint some sort of a mural in the bottom section of the bathroom door that goes with our beach/ocean creature vibe. Here's my first sketch on the actual door. It's a little hard to see as I used pencil but keep squinting and you'll find some outlines of plants, a mermaid tail and an octopus tentacle. As you can see I originally made the mermaid tail a little heftier than I end up wanting so I had to slim her down a bit! I haven't gotten very far yet with the actual painting, but as I said above it is and will be a work in progress! I anticipate myself working on this every once and a while over the next few months when I need a little crafting rush! Here is the color we have so far. I will continue to post about this project as I work on it and make some progress and hopefully everyone is as interested to find out how it looks as I am! If anyone wants to know the kind of paint I use, it's basic, acrylic craft paint. I don't have a particular brand that I love. I just use whatever is cheap and available. For example, I currently have the two brands below; I think one is from Walmart (not a sponsor) and the other is from Hobby Lobby (also not a sponsor because why would someone sponsor a blog started 2 weeks ago) but I can't remember which comes from where. So there you have it! The start of a project. You don't always have to just sit down and completely finish a project all at once. I almost never do that and sometimes I think it's important to take a step back from something and see it again a little later with fresh eyes. We will see where this little mural takes us!
- Rebecca So today lets actually get into some crafting! I wanted to write a (very) short post today about just how simple a craft project can be. We are talking Christmas cards! My boyfriend and I just moved into our own apartment and I am extremely excited about being able to send our own Christmas cards this year. Making Christmas cards may seem like a time-consuming task, but it can actually be a very quick project! It is so easy to repurpose old Christmas cards you have been sent or buy deeply clearanced pre-made card sold in after-Christmas sales and make them into something fresh for the upcoming holiday. Below are some examples of Christmas cards I've freshened up! Also please feel free to use this simple technique for giving new life to cards for any holiday you celebrate! 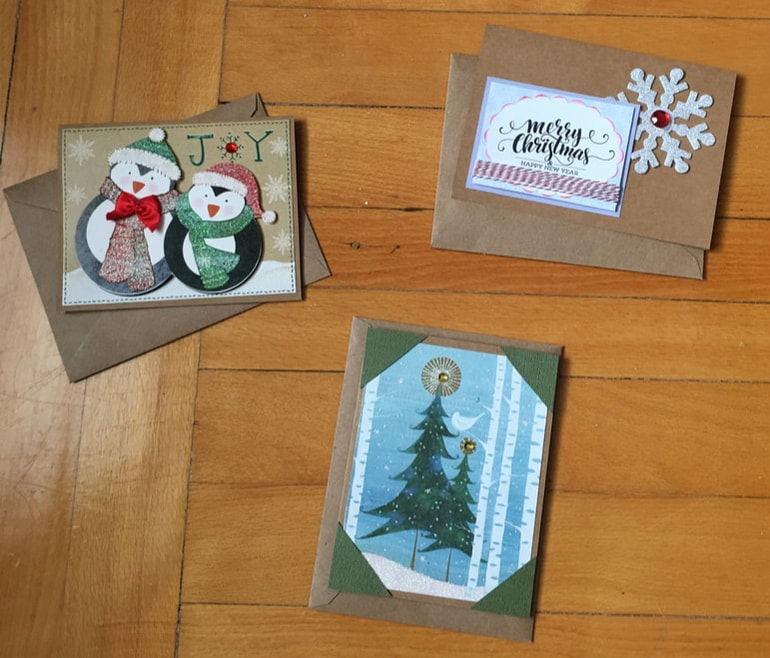 The snowman and tree cards are excellent examples of pre-made cards that I had been sent and gave new life. For these two, I cut the fronts of the original cards off and trimmed them down, then stuck them on some plain, brown card bases I had. A few extra touches here and there and they were done! The Merry Christmas card had been handmade by someone else and I reused it in a similar way, cutting and pasting the pieces I wanted to add to the new card. Doing something as easy as cutting out the image you want and adding it to a new card base can make a huge difference and make your Christmas cards look like something you spent a lot of time on. In theory, this is all you would need for this quick project: - Old/Cheap Christmas Cards - Paper that can be folded into solid card bases and some envelopes that match (an 8 1/2 by 11 inch piece of cardstock can easily be made into 2 card bases OR I recommend buying solid card bases and envelopes that are already made and folded for you; they are cheap and worth the price especially for a quick project!) - Scissors or a paper cutter - Double-sided tape or craft adhesive - Any embellishments you want to add such as ribbon, sparkles etc. That's really all I have for today, but just wanted to write something quick to show how simple a craft project can be. You don't always have to start from scratch to make something exciting! - Rebecca Why hello again! My first post focused on some of the basics of a crafting space so I thought that today I could dive a little into the other side of The Patterned Paper Plate: baking. There are a few essentials that every young home baker needs, but it doesn't take much! I should preface this by saying that this list is coming from the brain of someone who is not vegan or gluten-free and does not have any food allergies. Please feel free to adapt this list to account for any of your needs!
Lets start with the obvious. Ingredients: - Flour (I personally use your basic, run of the mill, all-purpose flour unless a recipe is painfully specific and can only be made with another type such as bread or self-rising flour, but I almost never have those on hand and would have to purchase them specifically for a baking project.) - Granulated Sugar - Brown Sugar - Baking Soda - Eggs - Vegetable Oil - Baking Powder - Salted Butter (Okay we have to have a small talk here about butter. I have NEVER in my whole baking life used unsalted butter. I am religiously opposed to it. I don't care if a recipe calls for unsalted butter. Just use salted butter. You already buy salted butter for spreading on your toast so why buy a whole different kind of butter for baking? Trust me friends.) - Salt - Vanilla - Cinnamon - Chocolate Chips - Baking Cocoa - Chopped Nuts (Obviously unless you are allergic. Use your brains on this one.) - Boxed brownie/cake mix (Gasp! Yes I did just say boxed mixes. I am not fancy. I am a HUGE proponent of fancying up a basic mix and giving it new life. I am perpetually on the fence about canned frosting because they've got some awesome flavors out there and its so easy to just pull that plastic cover off and spread it on. But its also really not hard to put some butter, vanilla and confectioner's sugar in a bowl and mix it up and I think the homemade taste is worth it 9 times out of 10.) - Yeast??? (This one deserves some question marks because it is a baking essential, but really depends on the type of baking that you like to do. I bake things that require yeast such as breads or cinnamon rolls maybe 2-3 times a year so usually just buy yeast when I need it. If bread is your thing then yes, please have it in stock!) I think the ingredients listed above are more than enough to get yourself started. I consider myself slightly above an amateur baker and even I don't have much more than this in my cabinet. Now lets move on. Some supplies: - 9 by 13 baking pan (This is the typical size you would make brownies or a box cake in; I personally prefer non-stick metal bakeware, but if glass is your thang then go crazy!) - Baking Tray - Silicone flexible spatula (Like the kind you would use to scrape batter out of a bowl.) - Long, flat metal spatula (For spreading frosting) - Mixer (This one may be pushing it for some people, I know. Either a hand mixer or a stand mixer would be amazing, but if that is just not in your price range or you seriously don't care, a whisk will do. But don't come crying to me when you are trying to whip up buttercream by hand.) - Cooling rack - Bowls - Spoons - Measuring Cups And finally for the FUN STUFF! Decoration stuff: - Sprinkles (Listen to me. You can NEVER have too many sprinkles.) - Cupcake Liners (You can also never have too many of these. Get all the fun colors and patterns!) - Food Coloring (I personally prefer gel food coloring because it's very concentrated and typically provides a stronger color with less dye than liquid coloring would.) - Frosting Piping Tips (To start off I would say just have one star tip and one round tip. These are two simple, but different frosting looks to get you started.) - Frosting Piping Bags (These may also seem a bit much, but a regular plastic bag just won't cut it, especially if you have a thicker frosting. Piping bags are meant to withstand the tension of frosting being forced through them. Sandwich bags aren't.) There you have it! So I'm sure this list is not exhaustive and there will definitely be things you will need to go out and buy for specific baking projects, but this seems just enough for a baker starting out at home. You don't need much to be able to start baking! - Rebecca So, when I was thinking about what I wanted my first post to be about, I was initially stumped. Do I go for something baking-related? Do I go for some crafts? Do I give more insight into my life which people probably really don’t care about all that much? Eventually I settled on a nice introductory dive into the world of crafting: your craft space. Here are some important things I have learned about creating a craft space.
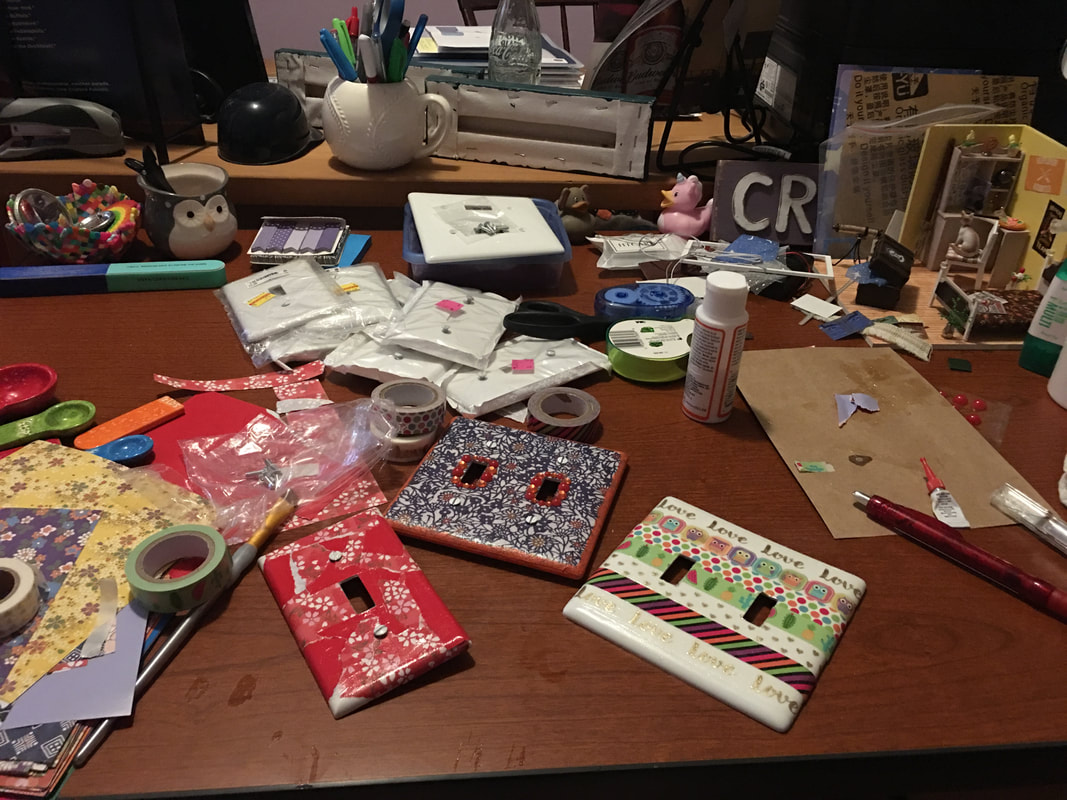
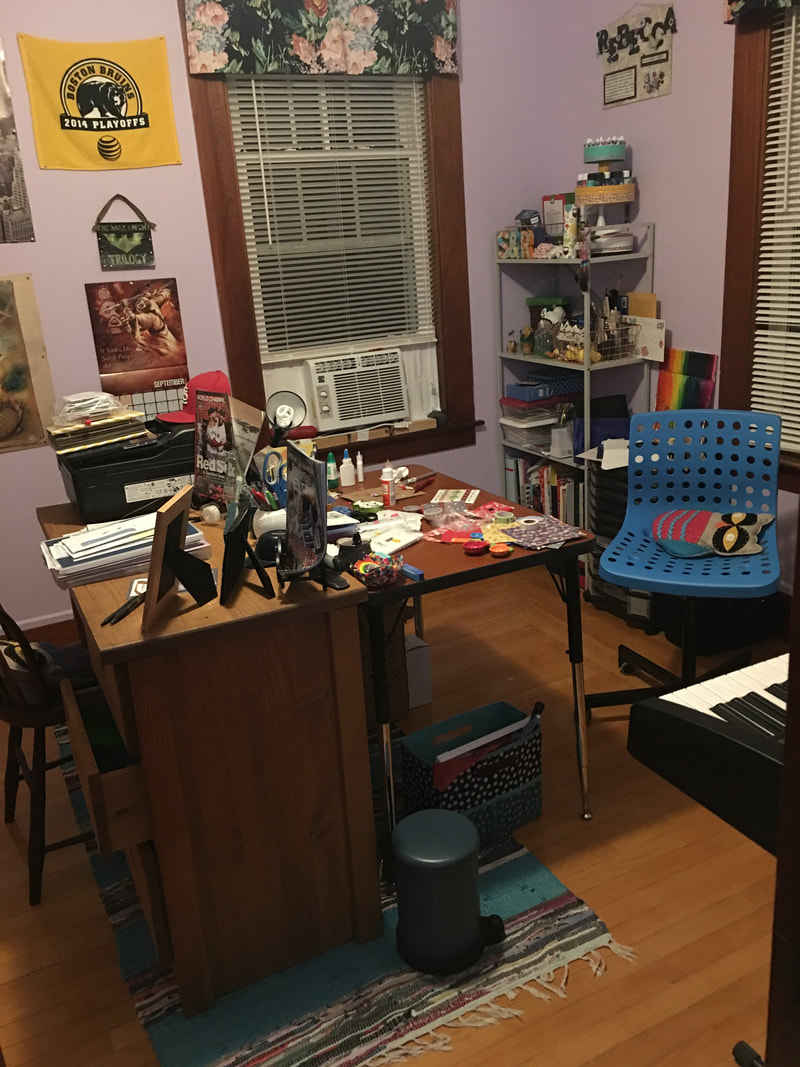
And while we are on the topic of craft spaces, here is a little look into mine! This is my crafty desk. My dad scavenged the wood for me from his previous job. It was in the garbage pile! I considered cleaning it up, but if I’m going to start this blog I might as well be honest from the start! As you can see, I have kind of disregarded my own Rule 4 by not cleaning up between projects. In the back right I have a Harry Potter themed dollhouse I'm working on and in the middle are some light switch covers I am fancying up to hopefully sell at a craft fair in November. Such mess! Here is what you see behind my desk. A bookcase full of storage as well as some small drawer storage to hold paper, stickers etc. 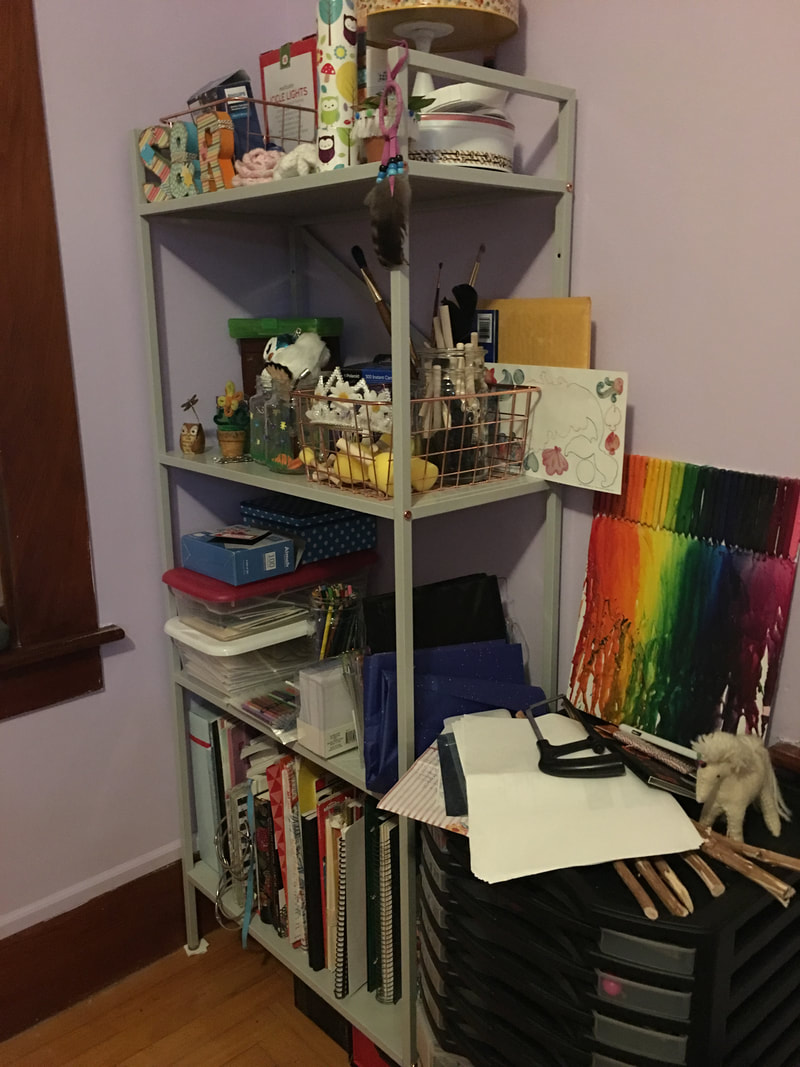 And last but not least, here is what my little half of our craft room/office looks like from the door; the other desk is my boyfriend's! Its not really much space, but I've managed to turn it into something that works for me right now. So there you have it, a little insight into what it takes to get your craft space started. It really doesn't take much! So go sit down at the kitchen table or the couch or your fancy white Instagram ready craft table and get crafting!
- Rebecca |
AuthorI am a 27-year-old crafter and baker from New Hampshire! Archives
July 2024
Categories |

 RSS Feed