|
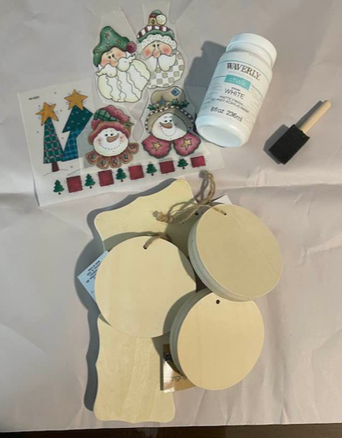
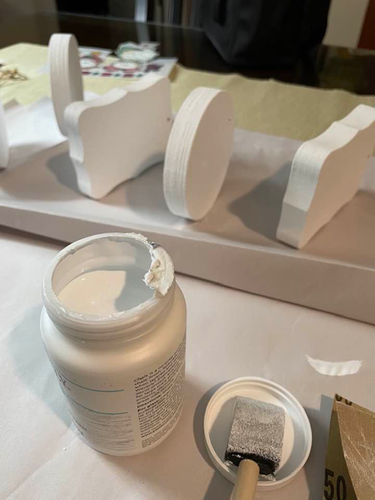
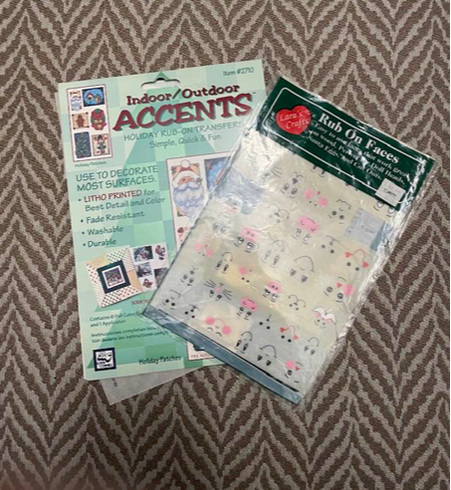
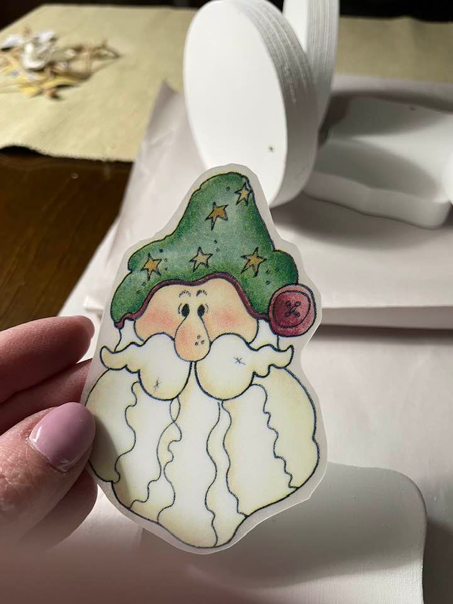
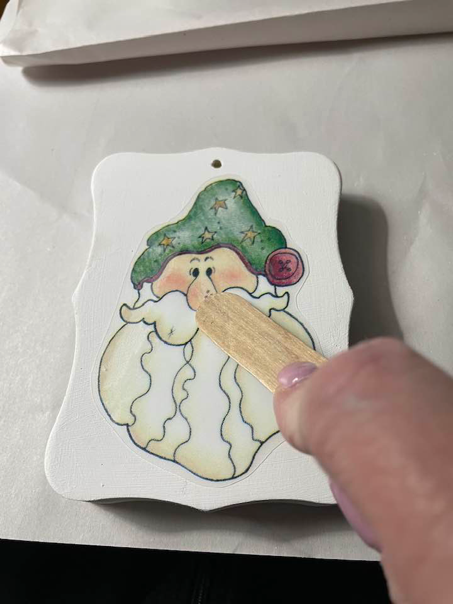
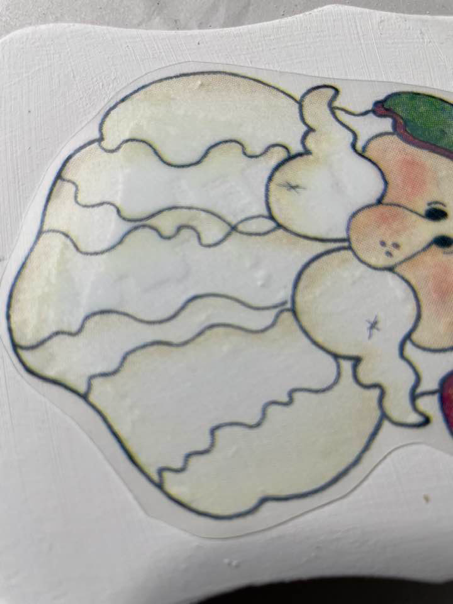
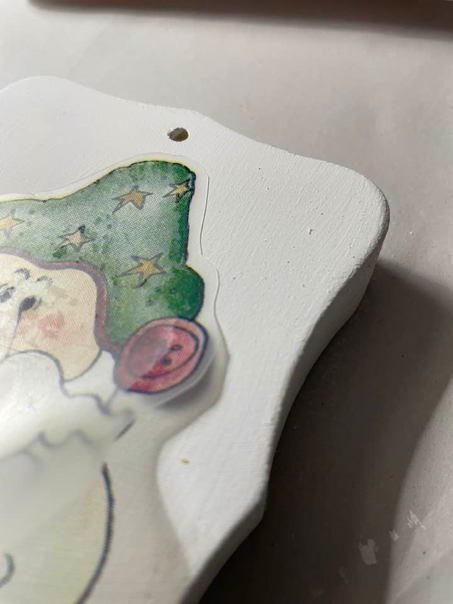
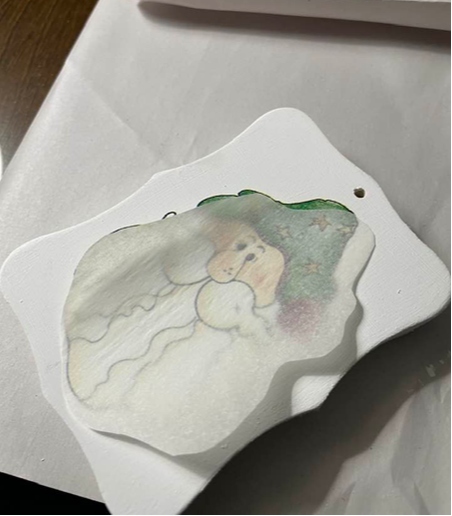
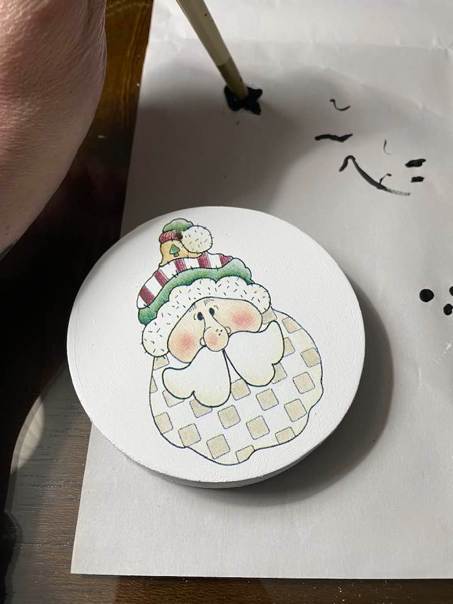
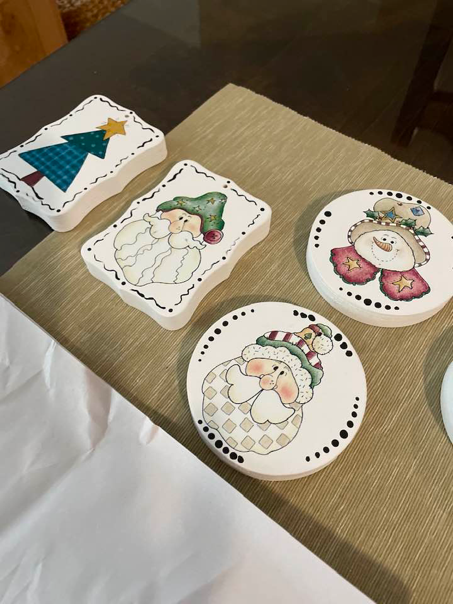
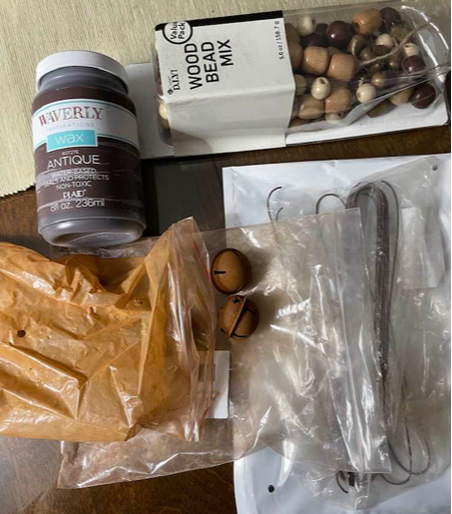
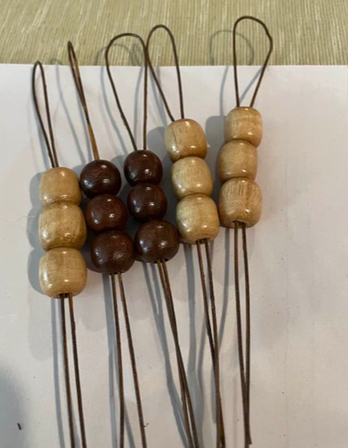
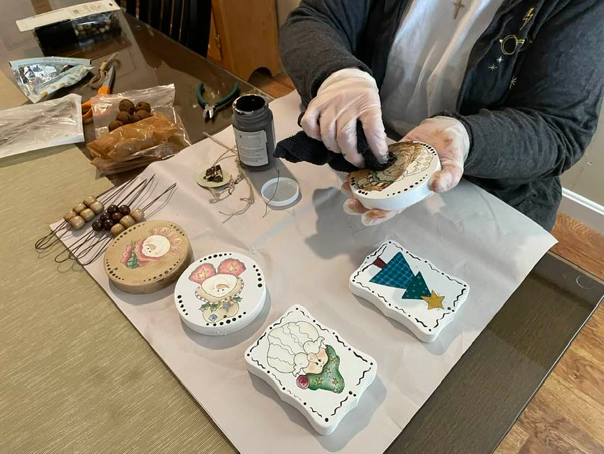
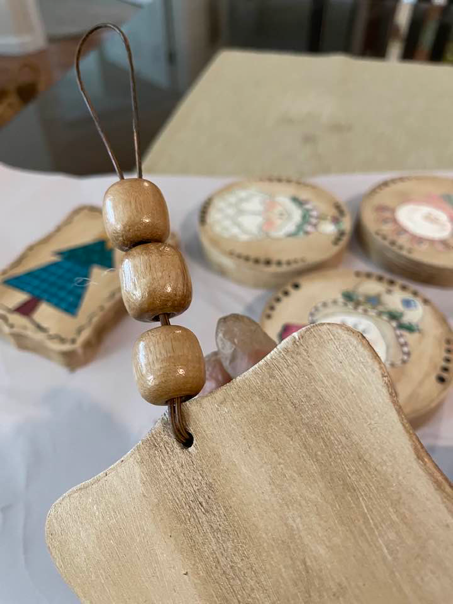
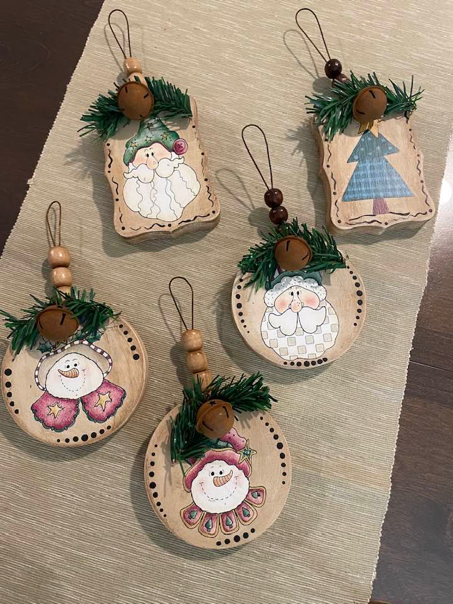
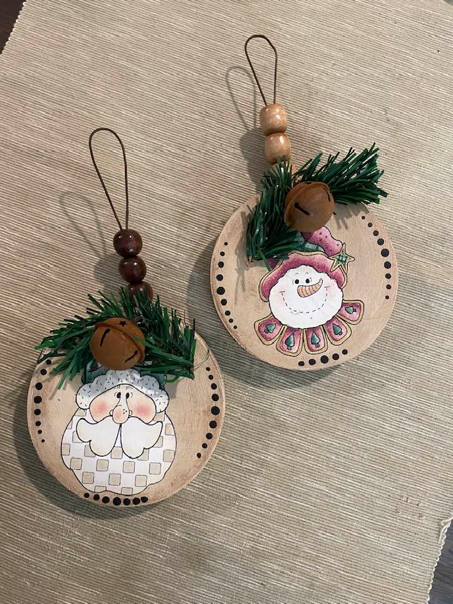
Hi friends! This is Suzanne, Rebecca's mama, happy to be back with you on the Patterned Paper Plate. For today's craft I'm going to highlight some products that we have never talked about before. Though the finished product has a definite Christmas/Winter feel, the products I'm using can be adapted for any season or holiday. To begin this craft, I have some chunky wooden pieces that I picked up at the dollar store quite a while ago. I also have some chalk paint, a foam brush and some rub on decals. I’ll talk a little more about the chalk paint and the rub on decals because these are extremely versatile craft items to have in your stash that can be adapted to so many different kinds of craft projects. To begin I removed the labels and jute hanging string from my chunky wood pieces and gave them two quick coats of Waverly chalk paint. Chalk paint differs from regular acrylic craft paint in that items to be painted require no preparation. As long as the item is clean and dry, chalk paint will stick to the existing surface and instantly transform it. No primer needed and no sanding needed (as long as the surface is relatively smooth and intact). Wood, plastic, even fabric can be painted with chalk paint. The only surfaces it doesn’t do great with are metal or something quite slick, like laminate. Another real plus of chalk paint is that it is quite thick and dries very quickly. Often just one coat of chalk paint is enough to give good depth of color and coverage. Because my wood pieces were quite dry, I opted to give them two coats but since chalk paint dries so quickly, I was able to give the first one its second coat immediately after finishing painting the last one. You can also make your own chalk paint by mixing unsanded grout (as you would use in tiling) into regular acrylic paint, but the real thing is relatively inexpensive and readily available at most craft stores. Let's talk a little now about rub-on transfers. Rub-on transfers are basically a painted image that is complete and can be transferred from its carrier sheet directly onto your painted surface with just a little bit of pressure. Rub-on transfers are also readily available at craft stores and even the dollar store. To apply the rub on transfer, you should trim fairly close to the outline, peel off the backing parchment paper and lay your transfer down on your piece. The back of the transfer is slightly adhesive so it will stay where you put it down. Rub gently over the front of the transfer to disengage it from the carrier sheet and adhere it permanently to your item. You may be able to see from the picture below the change in color when you rub on your transfer. The image will go from being clear and crisp to being slightly milky. That's a good indication that it is released from the carrier sheet and is now adhered to your item. When you've completely rubbed the transfer slowly start to peel up the carrier sheet to be sure that you have the entire image completely transferred. If you have areas that are not completely transferred, carefully lay the carrier sheet back down and continue to rub to ensure a full transfer. Once you've completely adhered the transfer and pulled the carrier sheet off, put the backing parchment over the image and give it another gentle rub to ensure complete adhesion to your item. Rub-on transfers are great for people, like me, with limited artistic abilities. They give items a hand painted look and because the transfer itself is paper thin, once adhered to your item, everything is as flat as a painted image would be. Once I adhered the transfer to each of the five pieces of wood, I got out some black paint and added a little detail to the edges of each piece. For the rectangular pieces I used dots and a small squiggle between them to outline the piece and on the round pieces I used dots made with the end of a paintbrush to define the edges. These graduated dots are easy to make - dip the tip of your paintbrush into the paint and continue to make dots without loading paint back on to the tip. As you use more and more paint the dots will become smaller in size. After adding the black details I let the items dry completely overnight and it was time to decorate them. To decorate, I pulled out another great product called Waverly antiquing wax. I also grabbed some beads, some rusty wire and some rusty bells from my stash. For each hanger I cut a length of the rusty wire and strung three beads on it, pushing the beads up as far as they could go to create a small hanging loop. Before adding the bead hangers, I wanted to knock down the brightness of the white on my items, so I used a bit of the antiquing wax. Antiquing wax is a thin brown wax that rubs on and buffs off very easily. Because the transfer itself is somewhat glossy the wax did not really stick to the transfer but did give the white surface a nice antique feel. I then pushed the end of my wire hanger through the hole in my chunky wooden piece from the back, put the ends through the bail of the rusty bell and before twirling the ends of the wire to keep the bell in place I added a small piece of greenery behind the bell to add interest. That's it! Five super cute little holiday decorations that will go into my craft fair box ready for the next season. While these items are more wintery, you could do this same process with transfers applicable to any season and look like you have prodigious painting skills - even if you don't. I hope you've enjoyed this look at a couple of new products and will go do something crafty today.
Thank you to my mother for her lovely blog today! - Rebecca P.S. Today's photo on the homepage is from Pexels user Jessica Lewis Creative: www.pexels.com/photo/red-fruits-on-table-699380/
0 Comments
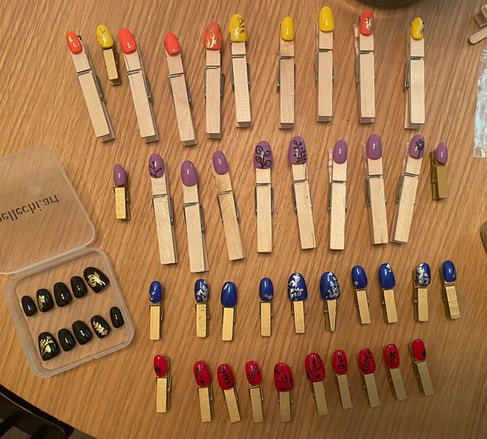
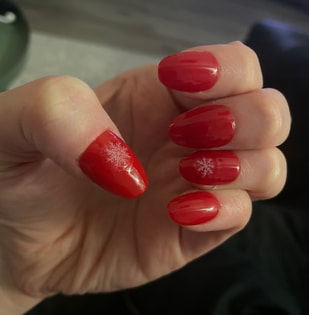
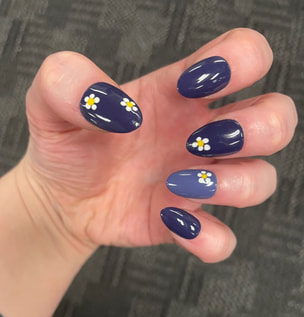
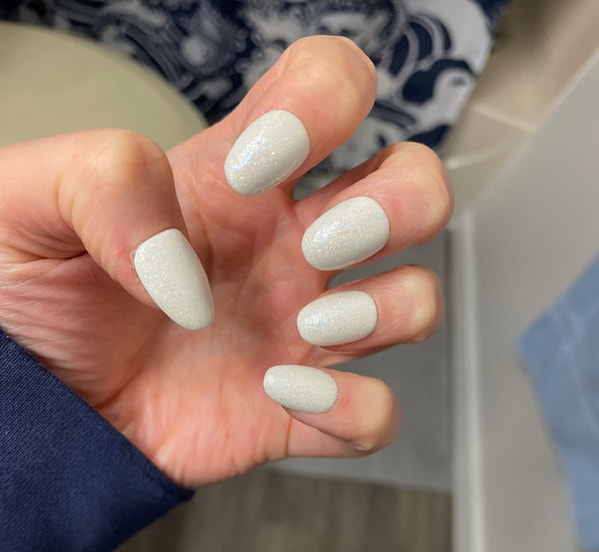
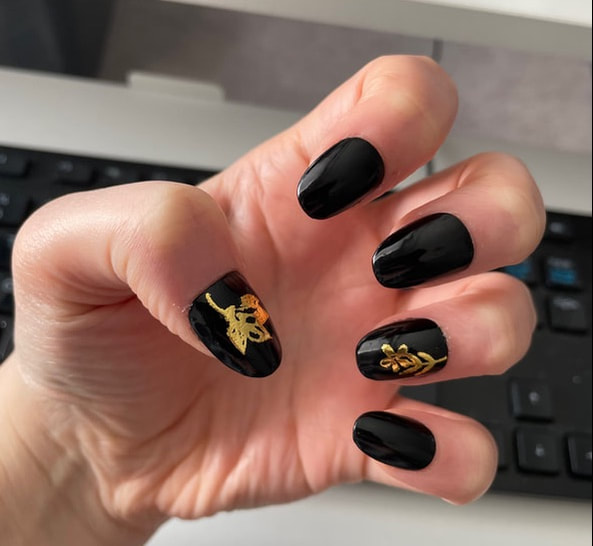
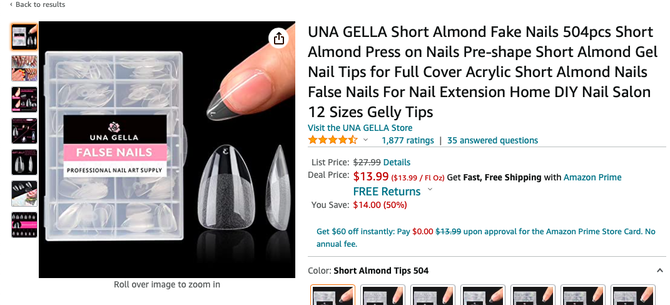
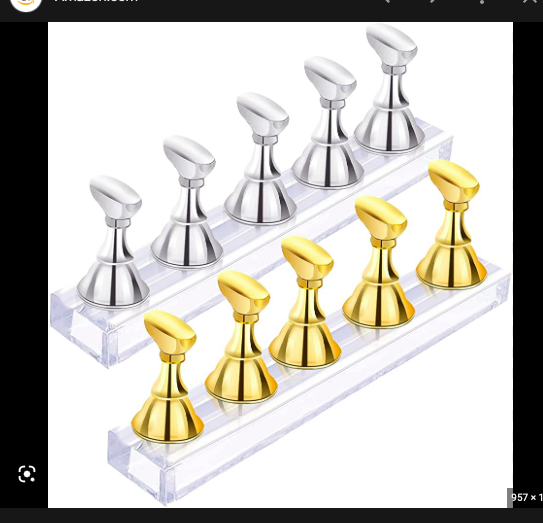
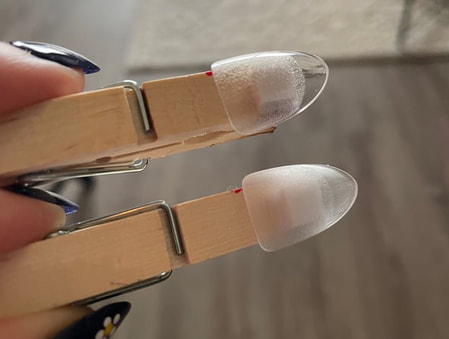
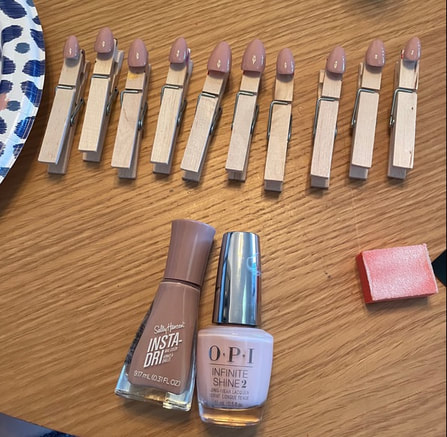
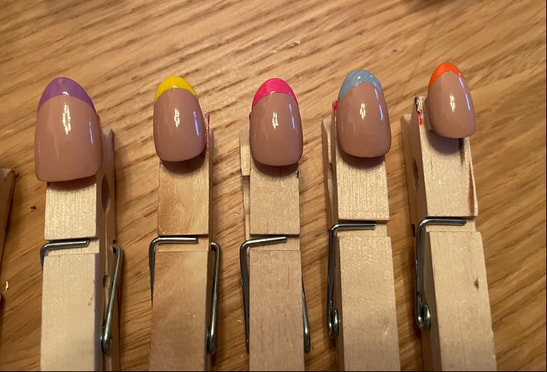
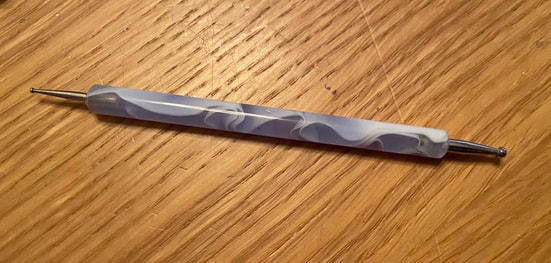
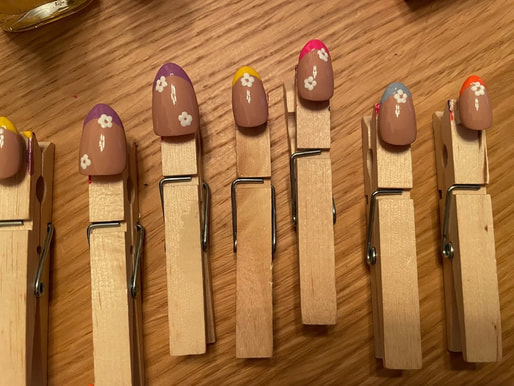
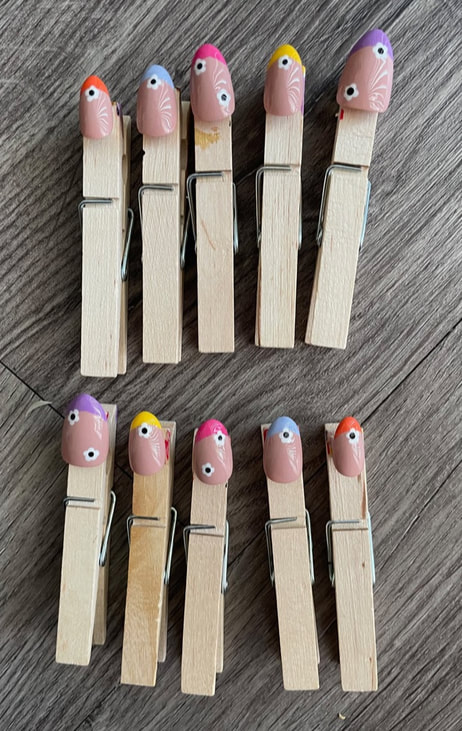
Hello everyone! I hope you all are having a lovely Easter, if you celebrate! Today I wanted to share something a little different and talk about how easy it is to make your own nails at home if you wanted to give it a try. I go through phases with my nails where sometimes I want them to be natural and other times I want colorful talons so I have spent some time teaching myself how to make my own fake nails for the occasions when I would like them. Here are some examples of ones I have made in the past: To start off, I got myself a large set of false acrylic nails off of Amazon. You can get boxes of about 500 nails for under $15 dollars. The brand that I bought most recently was called UNA GELLA and I went for a short almond shaped nail. I sometimes cut down the nails to make them even shorter, but lately have been keeping them a bit longer, the length that they originally come. You could also buy a holder that is specifically meant for painting nails, but, as you can see in some of the photos above, I use wooden clothespins instead as a cheaper option. I put a few little squares of foam adhesive on the clothespins and then stick the nails on top. This provides enough stick to keep the nails in place as I work on them, but they are also easy to remove once I am done. I test the size of the nails against my natural nails to be sure I have a set that fits me properly. You may even find that the same finger on each hand is not the exact same size. Once I have picked the nail sizes that work for me, I then start by using a nail file to buff the nails up a bit as I feel like this helps the polish adhere better. I'm not sure if you can tell in this photo, but the bottom nail is buffed and the top one is still shiny. Once all of the nails have been buffed, I then go in with whatever base coat I would like. For these nails, I wanted to try a colorful French tip so I just went for a nude color. I mixed a darker nude and a light pink together to get the shade I wanted and then did 2 coats. Once the base coat was dry, I then went in and freehanded some French tips in different colors. You can also find some French tip sticker templates if you want to make sure your French tips are very precise, but frankly I am too impatient for that. If you only have a few nail polish colors, you can always mix them together just like paint to get some variety in your shades. Once the tips were dry, I then went in with some white nail polish to start making some flowers. One nail tool that I do have is this little metal tool with balls at the end to help make dots. These can be found at any drug store and make adding details much easier. I used the smaller side of the tool and did 5 little dots to look like a flower on each nail. I also ended up putting a little black dot in the center of the flowers as you will be able to see in the final pictures! I then gave the flowers a good 2 hours to dry before doing a top coat. Something I have learned is don't do too many stokes on the top coat as there is always a chance you can make the lower nail polish wet again and smudge your designs. I ended up doing 2 coats of clear top coat. I also always let my nails dry overnight fully before putting them on to make sure there is no chance of smudges. I do not have a specific brand of nail glue or nail adhesive tabs that I use so find what is best for you!
And that is how I make some false nails at home when I feel like wearing them! It is not too hard to do and can be relatively cheap once you have the base set of supplies required. Let me know in the comments below if this is something you would ever try! - Rebecca P.S. Today's photo on the homepage is from Pexels user Lisa Fotios: www.pexels.com/photo/woman-with-black-manicure-holding-white-and-grey-floral-ceramic-cup-851219/ |
AuthorI am a 27-year-old crafter and baker from New Hampshire! Archives
July 2024
Categories |
 RSS Feed