|
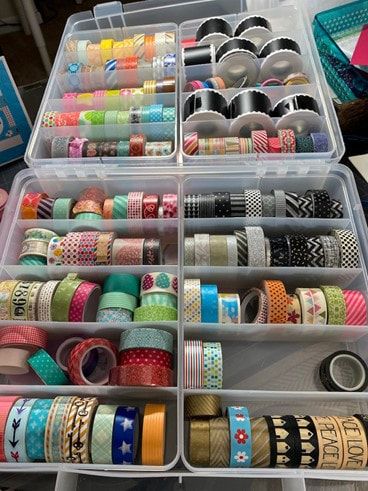
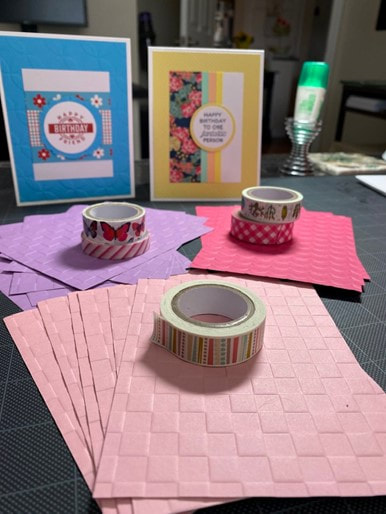
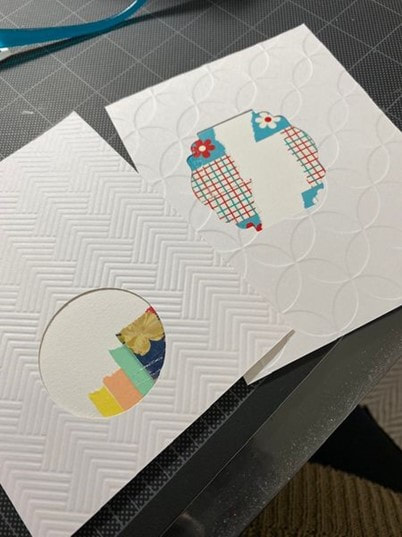
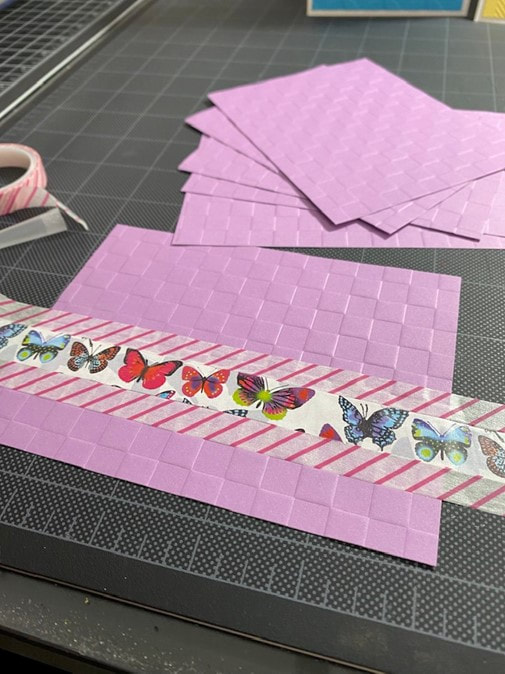
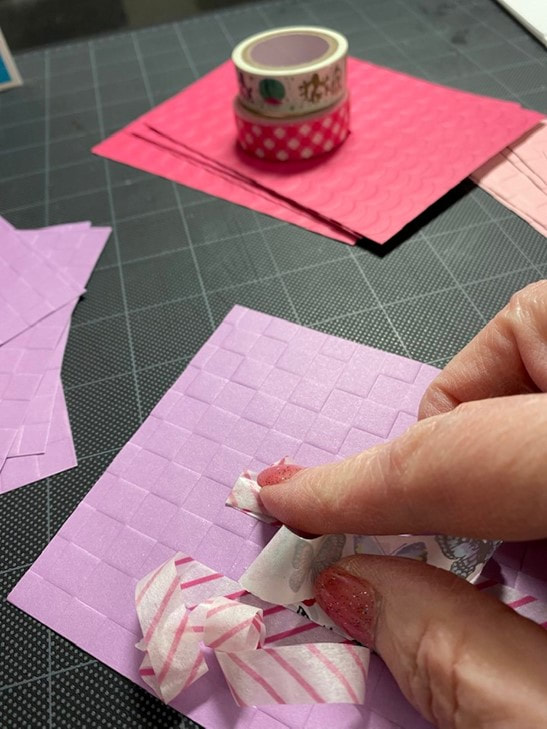
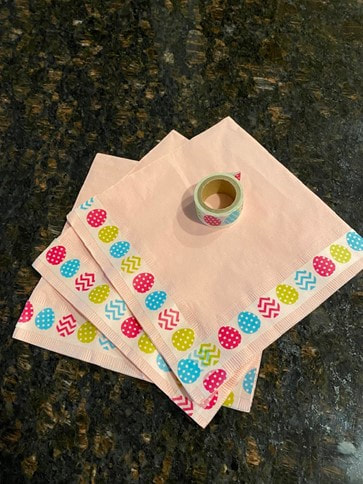
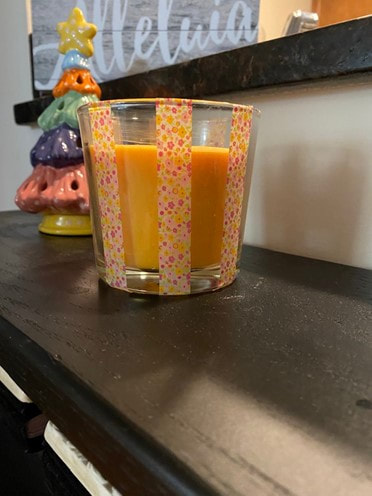
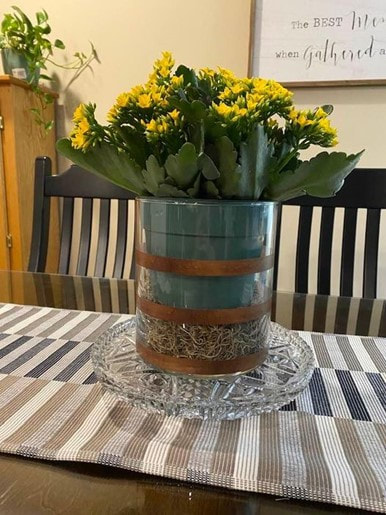
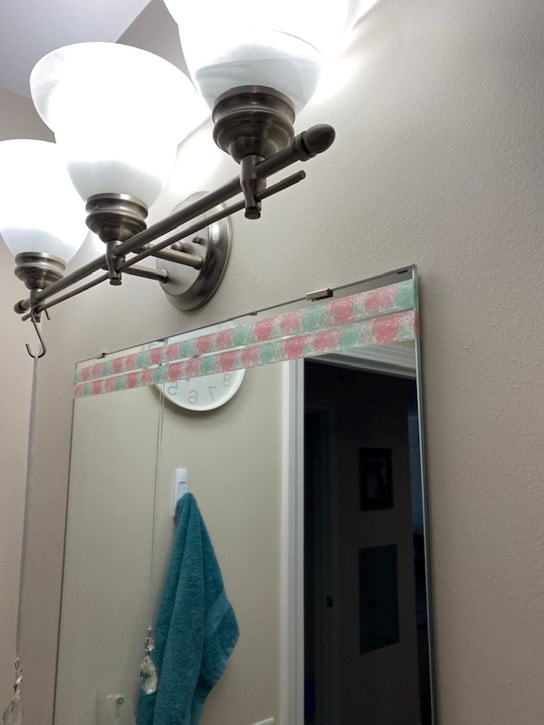
Hi Friends! It's Suzanne, Rebecca's momma, and I'm happy to be back here on the PPP to share some ideas of what you can do with a fun but humble crafting supply - washi tape. First, what is washi tape? It's a low-tack rice paper tape that comes in a variety of widths, styles and colors. It is also known as Japanese masking tape. You can get washi tape at craft stores, from online retailers, and even at the dollar store, though the decorative tape at the dollar store stretches the definition of washi tape as it's a little thicker and less translucent than traditional washi tape. I've gathered a fairly large collection of washi tape over the years because it's a cheap thrill. A roll of washi tape is generally less than $2 and since it comes in so many beautiful colors and patterns it's always fun to pick up a few rolls when it feels like my craft supplies are feeling a little flat. I’ve gotten some in sets and as single rolls from Michaels and Stampin’ Up!. Some comes from the Dollar Store, some from Staples, some even from IKEA. The large wide black rolls are chalkboard tape that can be used for labeling. First and foremost, washi tape is used in paper crafting. I've used it on several greeting cards as you can see here. I started with basic white card bases and a piece of 12 by 12 embossed cardstock which I cut into 6 4 by 5 ¼ inch mats. I selected coordinating washi tapes and laid them on a white piece of cardstock to use as a focal image on my card. Since washi tape is low tack I extended the washi over the edge of the card and stuck it down on the back so that when I glued the focal image on the card it would be held in place. A simple stamped sentiment finishes the card. Because the washi tape is so thin, there's no added bulk to cards made with it so they are very mail friendly and requires no extra postage. You can see that I punched out the mat for the sentiment of my card before laying down the focal image so that the mat of the sentiment would match the mat of the card. I've begun working on the third set of these cards and decided this time to add my washi tape directly to the embossed mat. My first choice of washi tape was the one with butterflies on it, but after laying down the first strip I decided I didn't like it. This shows one of the great things about washi tape. I was able to pull it up and put another tape down without ruining the embossed paper. This is because the tape is so low tack that the tape does not immediately bond with paper that's it is adhered to. Paper crafts is not the only thing that you can do with washi tape. On Easter, I realized I’d forgotten to buy decorative napkins. I did however have some pink napkins and some washi tape with Easter eggs on it. Voila - Easter napkins a few moments later! Here’s an incredibly wonderful smelling but incredibly boring looking candle made a whole lot cuter with a little bit of washi tape in matching colors to the wax. A kalanchoe plant from Trader Joe’s adds a beautiful spot of color to the dining room table but the pot it came in leaves a little to be desired. Sliding into this glass cylinder vase with some Spanish moss in the bottom and a few stripes of this wood grained tape really elevates the look. Finally, as renters, we can’t make any permanent changes to our apartment. We can add a little personality, though, with a few stripes of washi tape across a very plain bathroom mirror. The washi helps to bring a little of the shower curtain color over to the other side of the bathroom. I hope this post has given you some ideas on how you could add some life and color to some dull spots in your home. See you next time!
Rebecca here: today's photo on the homepage is provided by the website building program I use, Weebly.
1 Comment
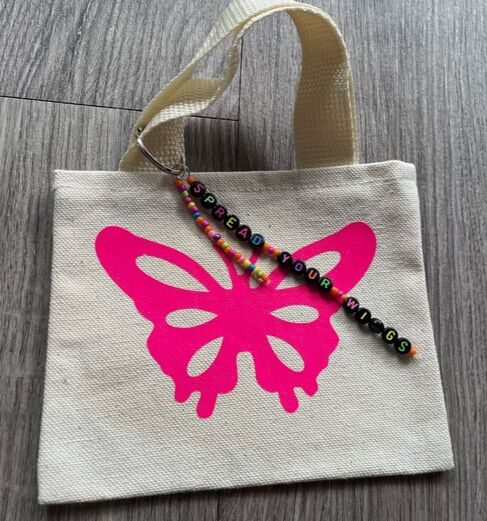
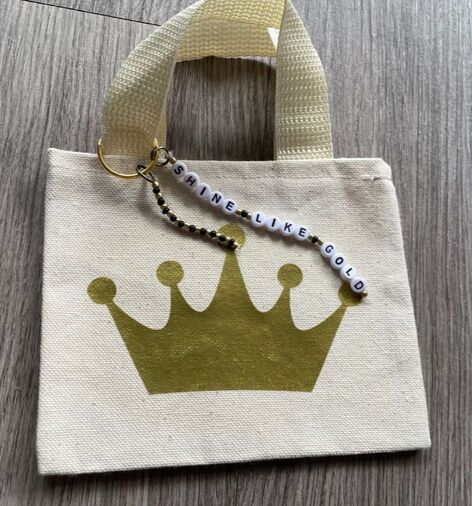
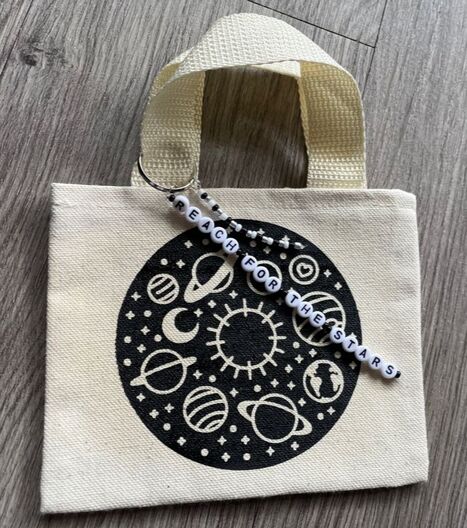
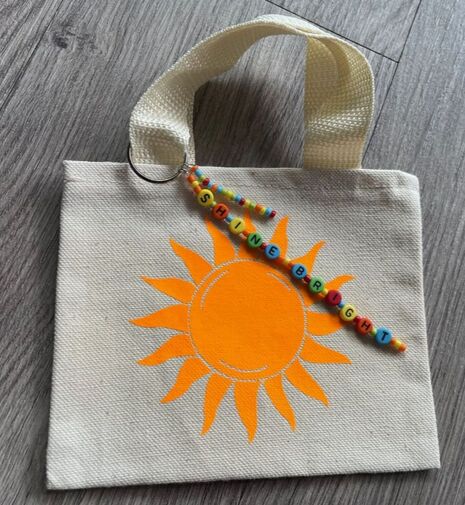
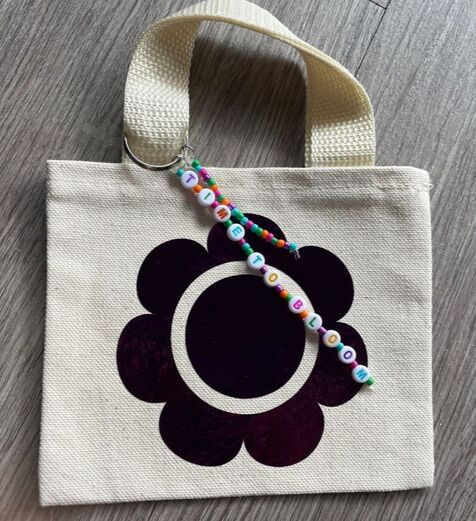
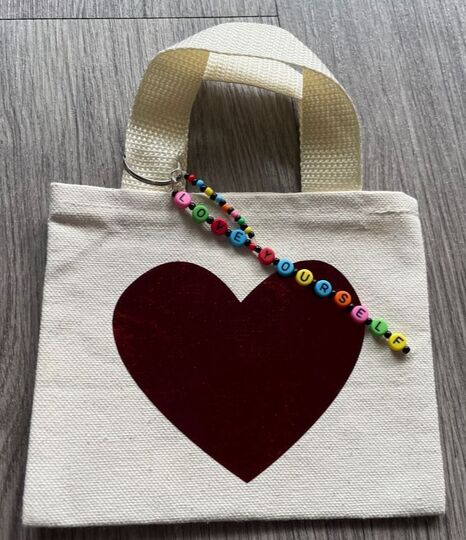
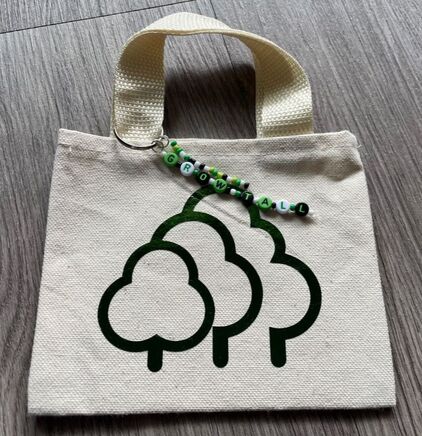
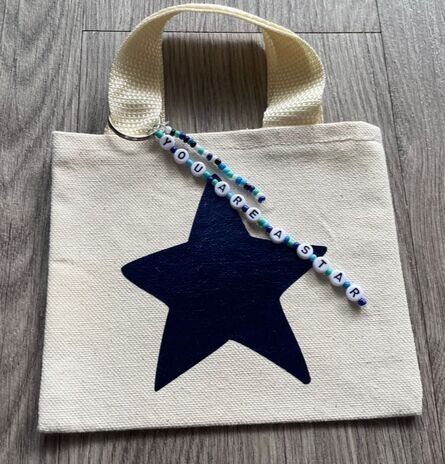
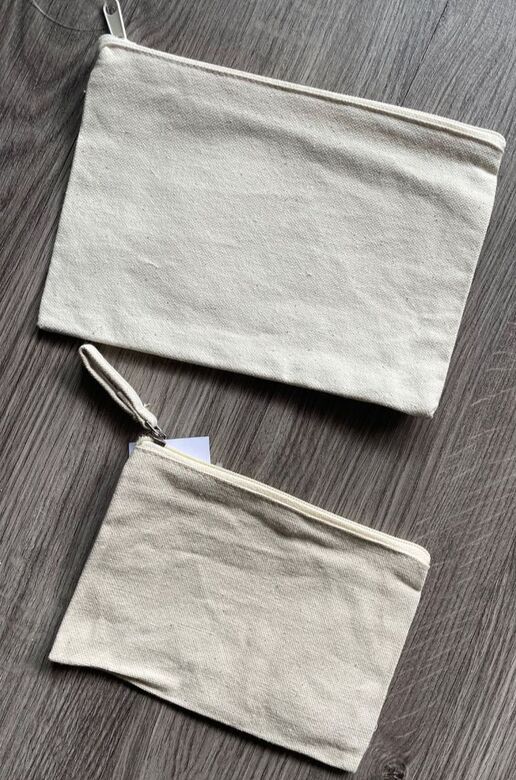
Hello everyone! Today we have the tiniest of blogs as I was a bad craft blogger these past few weeks. I did not take any photos of this craft in process as it is really easy to do, but I will explain as best I can! If you are trying to do this craft yourself, I would go to the Cricut website (link below) and follow their directions for how to use iron-on vinyl as that is what I did! My little blog today is more just an opportunity to give you some inspiration :) help.cricut.com/hc/en-us/articles/360009378254-Everyday-Iron-On-Instructions (This link takes you directly to the page for their "Everyday Vinyl" instructions but on the left-hand side you will see all their other options such as Glitter, Foil, etc. The Cricut brand vinyl I had specifically was Foil.) So when my lovely husband bought my Cricut for me, it came with a few sample rolls of vinyl, one of which was iron-on vinyl. I had not used it yet and decided that it was time to give it a try. I bought some small 6 inch by 5 inch canvas tote bags from Hobby Lobby, as well as a few other colors of iron-on vinyl. I bought some Paper Tree brand vinyl to see how it compared to the Cricut vinyl I already had. Both worked really well! There are a few important things to remember when cutting out iron-on vinyl as opposed to cutting out adhesive sticker vinyl. When cutting a sticker, you want the vinyl face up so that the image is cut out and the backing is left in tact. Iron-on vinyl has the backing on the front so you need to flip the vinyl over so that the good side is down. This will ensure that the back side of the vinyl, which is actually the iron-on part, is cut and the front backing will remain in tact. For iron-on vinyl. you peel the backing off the front once it is ironed down, as opposed to peeling the image of a back sheet like you would for a sticker. You with me? It's also important to remember to mirror your image if it's something that has one clear orientation like writing. My images for this project were all simple like a sun, flower, butterfly, etc. so the image being flipped was not a problem. But if you are using writing or your image needs to go in one particular direction, use the mirror option so that everything is correctly oriented when you flip it over and get ironing. The mirror option can be chosen when you get to the printing screen in the Cricut Design Space. Two small things I did which the Cricut instructions did not mention was to use parchment paper when ironing and to add a piece of cardboard inside my bag. Using cardboard allowed a flat base that I could press the iron onto and parchment paper honestly just made me feel better. According to Cricut, you should be able to iron directly on the protective backing for the iron-on vinyl but I was a wee bit stressed so I added a sheet of parchment paper in between. I have blabbed on enough with no images to help you understand so here are the 8 bags I have made! hopefully the images will help it all come together. When the iron-on vinyl was adhered, I also made some cute little letter bead and small glass bead charms to hang from the strap. Although you are only seeing one side of the bags, I did cut out 2 of the same images so the front and back have the same iron-on image in the same color. Next we have foil gold crown with "shine like gold" charm. And black galaxy with "reach for the stars" charm. Neon orange sun with "shine bright" charm. Foil purple flower with "time to bloom" charm. The next 4 are all foil and the lighting is not doing a great job of showing the true color of the vinyl! All colors are much brighter than they appear. Foil red heart with "love yourself" charm. Green foil trees with "grow tall" charm. And finally, blue foil star with "you are a star" charm. I also bought some small zipper canvas bags, some pencil case size and some slightly smaller so I will be working on those soon too! And that's all folks! Sorry this blog was not so in depth, but hopefully this gives you a little inspiration if you are looking to try out some iron-on vinyl! Get crafting everyone!
- Rebecca Today's photo on the homepage is from Pexels user Pixabay: www.pexels.com/photo/green-white-philips-iron-53422/ |
AuthorI am a 27-year-old crafter and baker from New Hampshire! Archives
July 2024
Categories |
 RSS Feed