|
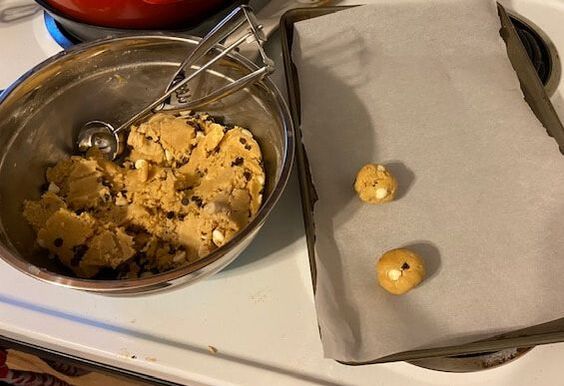
Hello friends. Wherever you are in the world, I assume that you are trying to stay at home as much as you can to help stop the spread of COVID-19. Let’s not beat around the bush: this is a crappy time and most of us are spending almost all of our time indoors. Even introverts such as myself are struggling with the general lack of social interaction. I have come to realize that I don’t necessarily like being alone, but I like being alone with other people. I like to be in my own zone and focused on my work, but have the option to talk to one of my coworkers if I want to. Anyways, we are all doing what we need to do to help shut this thing down and we need to make the best of it that we can. For today’s blog I wanted to focus on some of the little creative things that you could be doing whenever your mind needs a break. I understand that for many people who have the option to work from home, your kitchen table or your home office or your crafting area or your coffee table has been turned into your makeshift workspace. My company is having us all work from home until at least early May so my craft desk has been turned into a workspace for the time being. 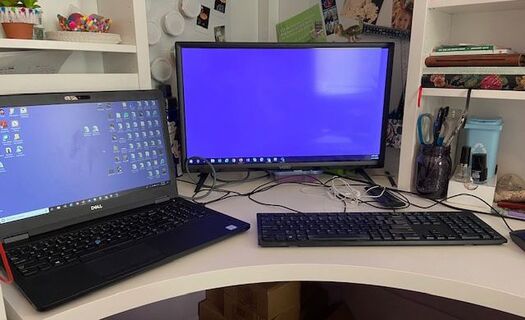 Even if your work area feels like it is crowding the places where you usually go to express your creative side, it is important to find ways to let your brain do something besides work. Below are some examples of things that I am doing to pass the time: 1. Use up any craft kits that you have stored away. In the picture below, my mother and I are working on a card kit that she recently got. Go ravage your closets and find the random sewing, pottery, painting, or color by number kit that you bought once because you thought it would be fun and then never did it. If you have children, look through all of the kits they may have received as gifts and see if there is anything that you could do together. 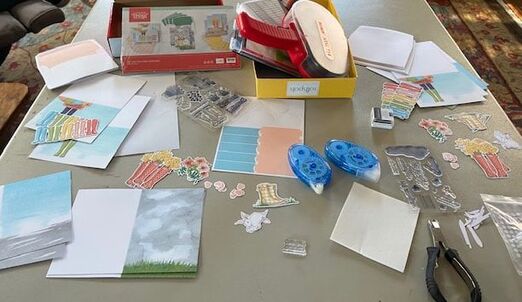 2. Send someone a card. For those of you that do not necessarily have a large pile of craft supplies to fall back on, this takes almost nothing at all. Grab a piece of cardstock, construction paper or even white printer paper and some pens or markers and go to town. If you have stamps or stickers, go wild and add those on there! This is a great way to expel some creative energy while also putting a smile on the face of someone that you aren’t able to see in person for a while. My grandmother is in a nursing home which is not currently allowing visitors in so this is a card that my fiancé and I wrote in and sent to her to hopefully make her smile. 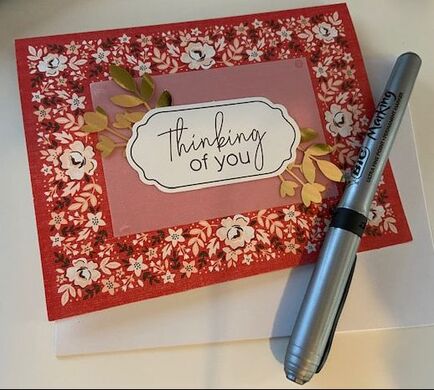 3. Redecorate with only the things you already have. Since you will be stuck in your home for an extended period of time, why not make some small changes to freshen up the space? Switch the pillows on your bed and couch, move your plant to a different shelf, rearrange the pictures on your wall. Little things like that can make you feel like you’ve accomplished something big. 4. Make some cookies. If you don’t like cookies then I really don’t know what to do with you. But most cookie recipes only need flour, sugar, butter, salt and either baking powder or baking soda to work. If you don’t have chocolate chips, throw sprinkles in there. Or make sugar cookies. There are approximately 18765 cookie recipes online so you will be able to find one that fits the ingredients that you have available. Below are some cookies that I made last night which were delicious!
5. Of course, if you are more of a seasoned crafter who has the supplies, this is also the time to do the big projects that you haven’t had time for. Refinish the dresser. Paint the cabinets. Sew new pillowcases for the couch. We have all the time in the world right now, so use it.
6. My final suggestion is not really crafty related, but just something that I have been trying to do with all of my extra time: find a new book, Youtube channel, podcast or blog. Or just revisit one that you really love. I am a Harry Potter girl so yesterday I picked up the third book and just started reading. For me, taking small breaks from staring at my computer screen really helped me get through the day. Find a new blog on a topic that has always interested you or on a topic that you want to improve on. Might I suggest this blog: Managerine Leadership: https://www.managerine.com/#/. My wonderful, talented, badass friend Julia just recently started a blog on female leadership and empowerment and is also offering a subscription box with leadership books and products from women-owned businesses every month. Take this time to invest in yourself and find a new outlet that feeds your passion and gives you a chance to focus on something other than work or the state of the world right now. And finally, given the state of the world right now, I need to take a moment to thank all of the people in my life who don’t have the time to just sit back and relax right now. Thank you to my fiancé who is a police officer and my two cousins who are healthcare workers and to all of the grocery store workers I know who still have to go to work every day so you can get supplies. If you have any essential workers in your life, go thank them, because they need it. Next blog we should be back to regularly scheduled content with, hopefully, an update on how wedding centerpieces are going. Stay safe my friends! - Rebecca
4 Comments
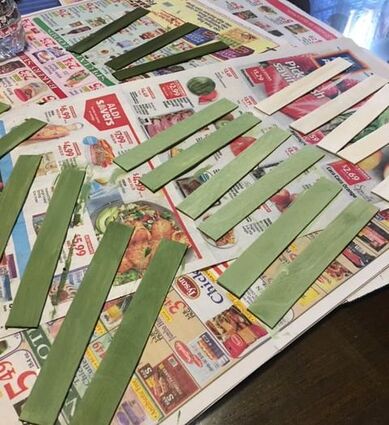
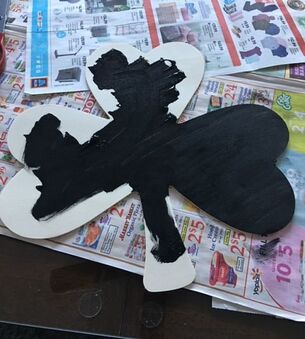
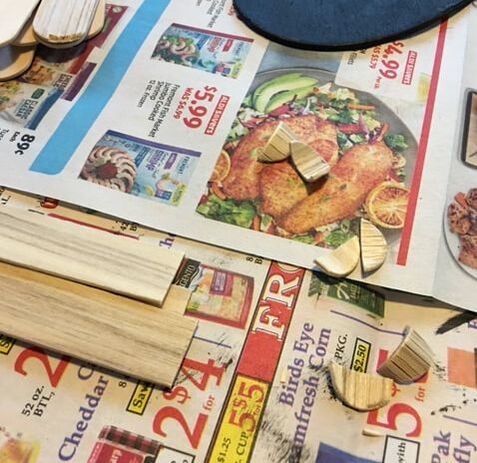
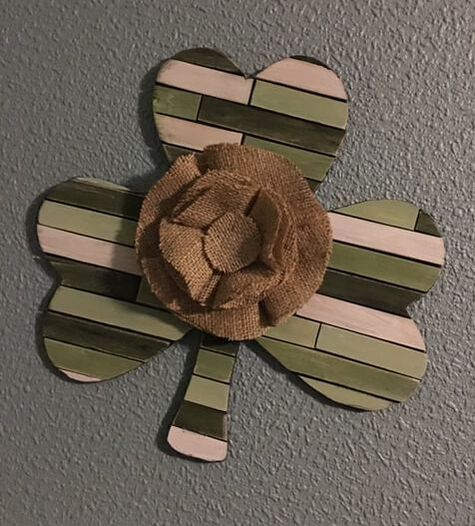
Hello everyone! Just a quick intro from Rebecca before we get into the blog. Typically my mother does a post every other month on the even months, but she swooped in to help out this week as I was away on vacation last week and didn't have the time to prepare anything. She's the best! Now on to the good stuff: Hello! It’s Suzanne, Rebecca’s momma, back today with a quick and easy craft that can be applied to any holiday. We don’t decorate much for St. Patty’s Day here in this French-Canadian household, but I’ve developed a bit of a reputation at work for having something seasonal on my office door, so I thought I’d whip up a quick and easy shiplap shamrock. I’m not really into glittery and shiny décor pieces, so this is going to have a rough and rustic country look. This is also a very forgiving crafting style, so any imperfections just add to the charm of the piece. For this piece, I’m going to use a wooden shamrock shape and craft sticks (from the dollar store). I’ll also need some paint (black, white and olive green) and brushes, a craft knife, scissors, sand paper and some gloves (because I just had my nails done). I’m also going to need a glue gun and some glue sticks. Later, I added some burlap to the mix, to make a quick rosette. 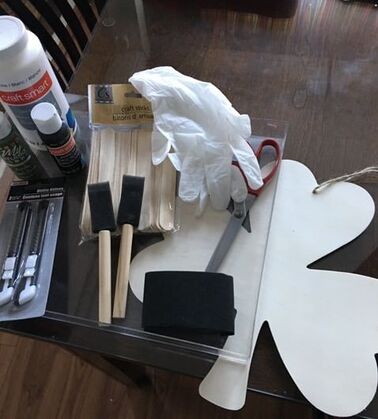 First, I determined that I needed 24 craft sticks to make the shiplap – I did this by laying a bunch of them over the shamrock shape to see how many it would take to cover it. Then, I painted the shamrock black. I knew I was going to leave some slight gaps, so I didn’t want the raw wood to show through. While the shamrock dried, I cut the rounded ends off the 24 craft sticks and I painted 6 each of the craft sticks in shades of white and green. First, I painted the white ones, then added a little green paint to the white to make a sage-y green for 6 more, added a little more green for a darker sage for 6 more, then finally used the same brush I’d used for the black to paint the full strength olive green on 6 more.
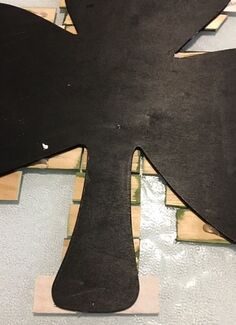
 Once those were dry, I laid the painted craft sticks over the shamrock to create the shiplap. I cut some sticks in half, some off center. I mostly wanted to mix up the colors and make sure the gaps in the rows were not lined up directly over each other. When I had an arrangement that I was pleased with, I started to glue the craft sticks in place. I didn’t measure the little bit of a gap between the ends of each craft stick and between each row – I just eyeballed it and it worked out just fine.
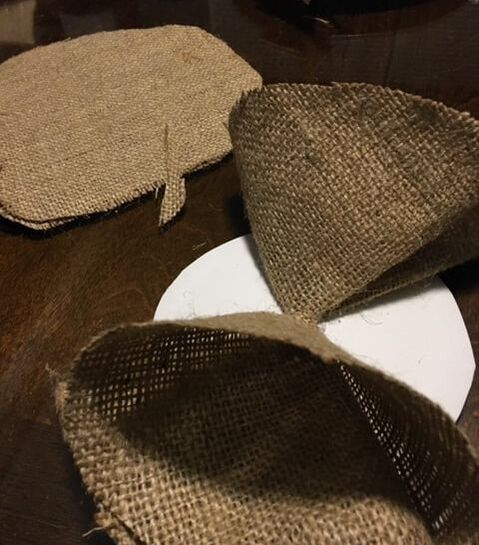
Once the glue was dry, I started to trim the ends of the craft sticks with the knife. The craft sticks from the dollar store are not very thick, so it was pretty easy to follow the outline of the wooden shape and trim away the overlap. Using the sandpaper, I sanded the edges to make them smooth and sanded over the top of the sticks, concentrating on the edges, to distress them a little. Some of the craft sticks did splinter a little, which was OK with the rough look I was going for. I then went back around the edge with the black paint to blend the raw edged of the craft sticks in with the base. I’ll be honest – I wasn’t in love with it at this point, but I continued to sand and smooth here and there, added a little more black paint to the edges, touched up some of the white and got it to a point of grubby chic that satisfied me. 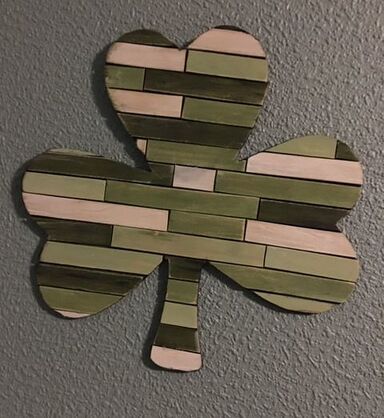 I glued a small piece of jute (this was the original hanger on the wooden shamrock shape) to the back of the base and sandwiched the end under a couple of leftover pieces of craft stick to keep it secure. I wiped the whole thing down with a damp paper towel to remove the dust and it was done, but a little boring. 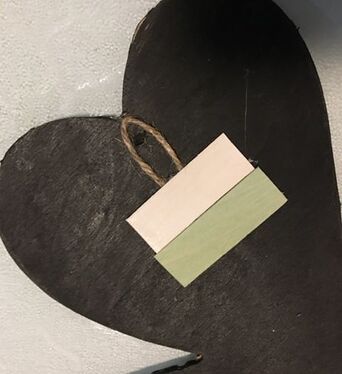 It definitely needed a little something more but I don’t have much in my stash that is St. Patrick’s Day related, so I poked around and found some burlap. Rustic shiplap and burlap seemed to be a good combination, so I decided to make a rosette of sorts for the center of the shamrock. I started by cutting a circle of cardstock just slightly smaller than I wanted the rosette. I then cut four circles of burlap and folded each in quarters, gluing them with the points to the center of the cardstock. I made a second layer with smaller circles and glued those over the spaces made by the original four folded pieces. I fussed and trimmed and pulled stray strings until I got a shape and size I liked. I then cut a small circle for the center, to cover the intersections of the folded bits and glued the completed rosette in the center of the shamrock. That nicely finished it off the shamrock without it being too over the top. Though not intentional, the whole thing hangs a little askew so the shiplap effect is slightly slanted, which I really like.
Cost wise, this was a very economical craft. The shamrock shape cost $1, the bag of 60 craft sticks was also just $1 and I used less than half of them. The rest of what I used are basic craft stash items and able to be used over and over. My suggestions after having completed this would be to keep the shape simple and leave as little overhang as possible when gluing down your craft sticks. The simpler the shape and the less you have overhanging it, the easier it is to trim the craft sticks to shape.
This is a technique that you could use for any holiday. Shades of pink and red would have made a sweet Valentine’s Day heart. Pastels for an Easter egg would be super cute. If you can’t find a wooden base shape to suit your theme, you could even cut one out of poster board. I hope you’ve enjoyed this idea and give it a try! |
AuthorI am a 27-year-old crafter and baker from New Hampshire! Archives
July 2024
Categories |


 RSS Feed
Proudly powered by Weebly