|
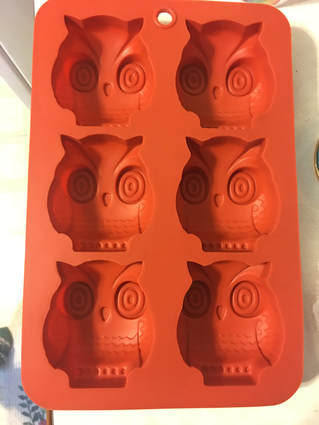
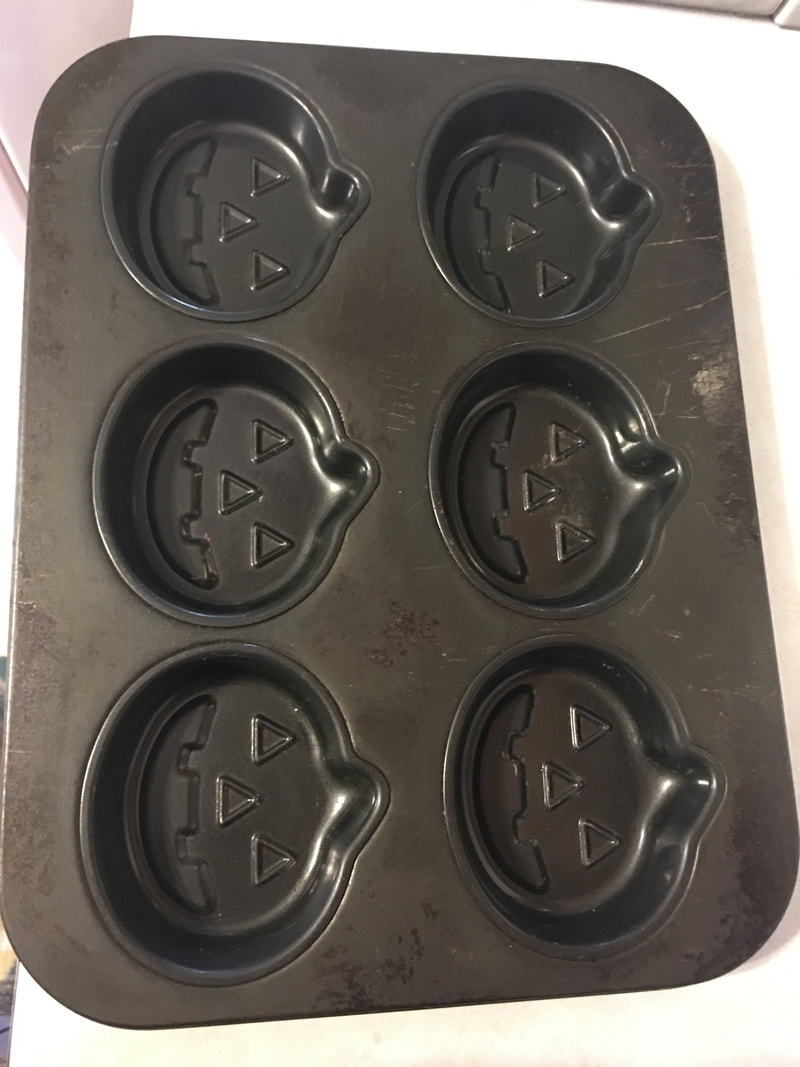
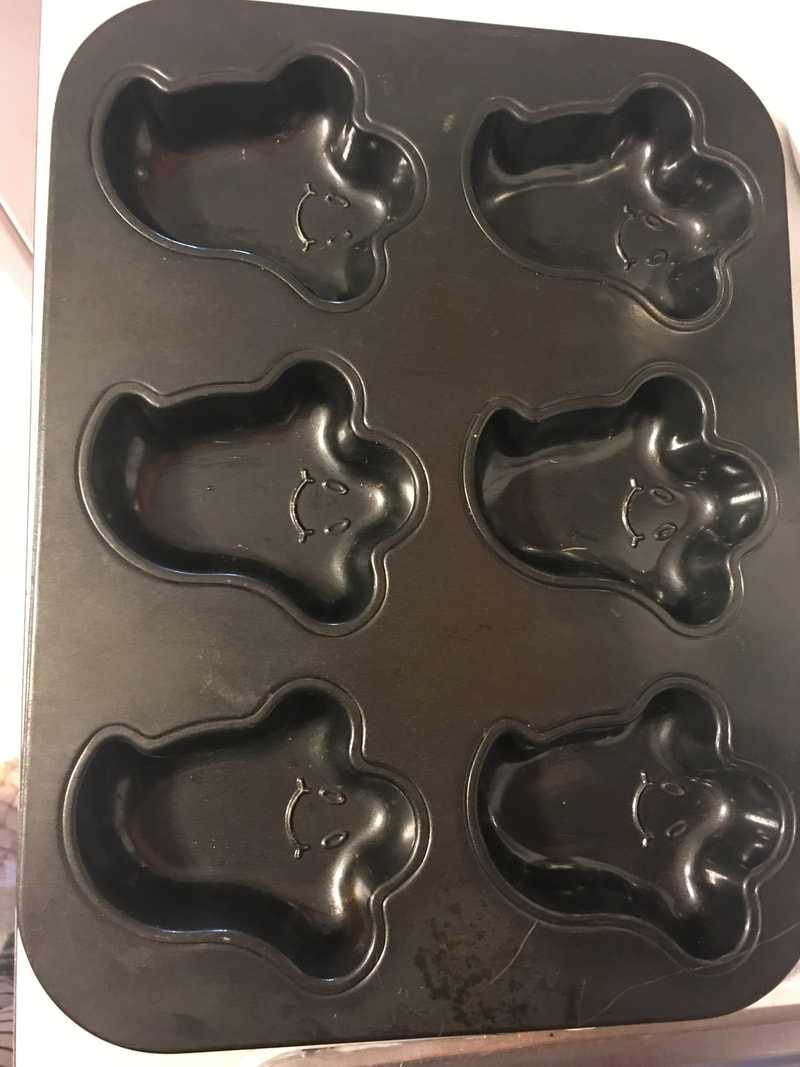
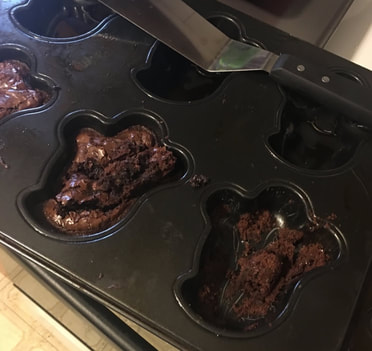
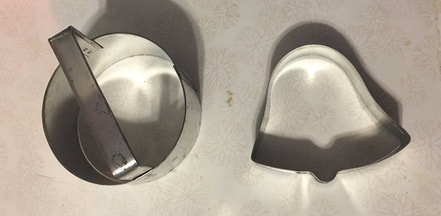
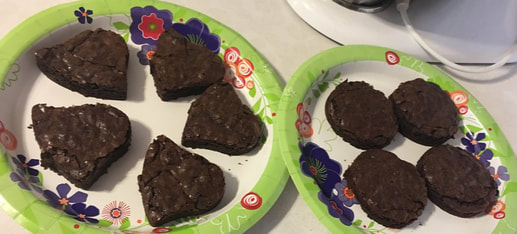
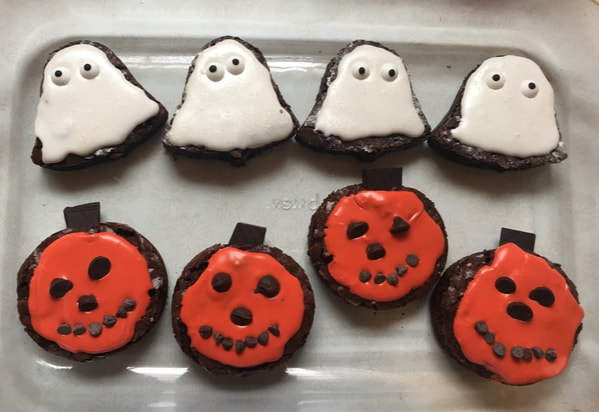
Happy Halloween everyone! I haven't done a baking post in quite a few weeks so I figured it was about time. We are going all out for Halloween this year in my office. We are all dressing up as Rosie the Riveter (I work with all women). We are also having a desk decorating contest and the winner gets an "off the books" PTO day so stakes are high. Every good Halloween party needs some snacks so I figured I would make some spooky treats! I used three different baking pans for these treats: an owl shaped one I got from my mom and ghost and pumpkin shaped ones my boyfriend's mother gave me. I love me some cute shaped baking pans! I know owls maybe aren't "spooky" per say, but I just love them and they remind me of fall so we are going for it. These treats are pretty easy, but may require some supplies you don't just typically have on hand. The supplies you will need are: - Fun baking pans - Baking Spray - Boxed brownie mix (or you can make your own if you want to be that way) - Cookie icing in those little pouches from the grocery store (again you can make your own if you are feeling frisky; I was just being ridiculously lazy and spent like $15 on icing I could have made for free at home) - Luster Dust - Candy eyes (or small M&Ms if you can't get your hands on some candy eyes) - Gel food coloring Simply prepare the brownie mix according to the directions on the box. I always go a little crazy with boxed brownie mixes and typically add vanilla, cinnamon and chocolate chips which is what I did for this, but you can make it easy and just follow the direction exactly if you would like! I have a vegan coworker so I also prepared some vegan brownies. I take NO credit for this recipe as I am not well-versed in the world of vegan cooking. I used a recipe that she recommended to me from a website called Detoxinista so here you go: detoxinista.com/vegan-flourless-black-bean-brownies/. I made a few changes to the recipe as suggested to me by my coworker. After getting the batter all ready I sprayed my pans and poured the batter in. Below are my pans: Hello friends. I hate to interfere with your regularly scheduled programming, but I have to be honest with you. Those brownies DID NOT cook well in those pans so we are going to start the blog post fresh from this point on. I could have just rewritten the part above and pretended like I didn't mess up and everything was glorious, but I am here to show you the honest, messy, mistake-ridden world of crafting and baking so why lie? Anyways, look at what happened to my brownies in those pans even with copious amounts of spray: The edges cooked too quickly and the middle did not cook and the shapes of the pans were not at all conducive to the stickiness of brownies, even when they were well cooked. The brownies and pan basically became one homogeneous material. Soooo I started over! All of the supplies and ingredients I listed above before the debacle are the same except for 2: I exchanged fun baking pans for regular rectangular baking pans and had to break out some cookie cutters as well. You will see why later! So once I had some fresh brownie batter and had successfully made about 100 dirty dishes in the process, I got the batter into the regular baking pans and got them cooking. This worked much better! After they were fully cooked I let the brownies cool completely. I will admit I am notorious for not letting brownies fully cool before I handle them, but given the struggle I was having before I decided to be patient for once. It was hard for me, but I managed it. So once the brownies had completely cooled I pulled out the those cookie cutters I was telling you we would need. Since the whole plan to use fun shaped pans failed miserably, I decided that cookie cutters would be the next best way to get the general shapes I was looking for. I used a circle cutter for a pumpkin and a bell cutter to get the basic shape of a ghost. I gave up on trying to make owl shaped brownies as that was just not gonna work anymore. Sometimes you have to change your plans! Here are the cutters I used: For the vegan brownies, I just cut them into squares as they are very fragile and I didn't want to risk breaking them, but I used these cutters for the regular brownies! I was able to get 5 ghosts and 4 pumpkins out of the 9 by 13 pan I used to cook the brownies in. 8 to bring for work and one to save for the boyfriend! I then used one some of the white cookie icing I had bought to cover the tops of the ghost brownies. When I was done with that I took the white icing and mixed in some yellow and red gel food coloring to create an orange coloring to use on the pumpkin ones. I then sprinkled some luster dust on the ghosts and finished then off with candy eyes. For the pumpkins, I spread on some orange icing, then ended up pulling out some chocolate chips and pieces of a chocolate bar as well to add some face details and a stem. Here they are! I'm happier with the ghost brownies than the pumpkins because for some reason the pumpkins look a little like monkeys to me (especially that last one on the right), but I ended up with something that tasted good and that's what counts. These little brownies are cute overall, but definitely not my favorite baking project I've ever done! This post is proof I'm not a master baker, but I will always keep trying new things and trying to improve upon my skills. Maybe next year I will have a new Halloween treat to try!
- Rebecca
3 Comments
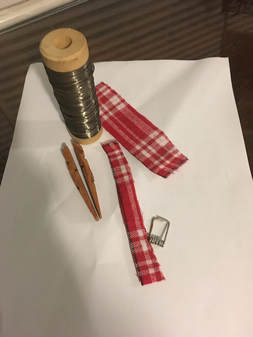
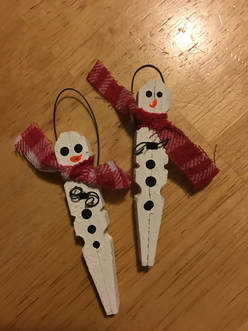
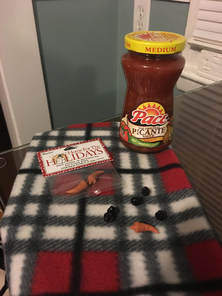
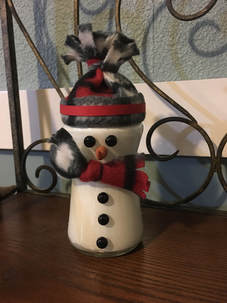
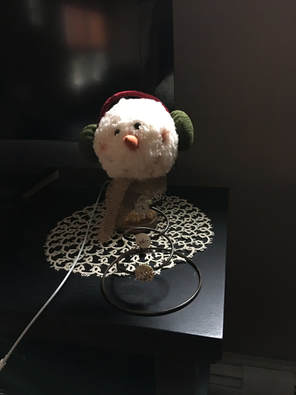
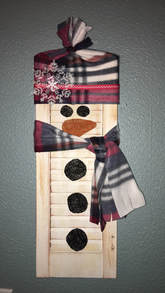
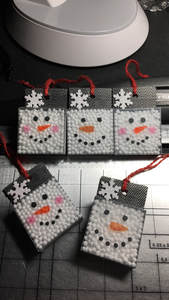
Hello All! This is Suzanne, Rebecca’s Momma, and I am excited to be her guest blogger this week. Rebecca and I have a long-standing joke that I can turn anything into a snowman. Truth be told, I’m not a big fan of real ones, because they involve winter and cold and snow. A cute little crafted snowman, though? I’m all over that. Today, I am going to share two examples of snowmen I have crafted from everyday objects, proving Rebecca’s point that almost anything can be turned into a snowman. First up is this cute Christmas tree ornament. This little guy is made from a spring clothespin. All you have to do is pull the wooden bits free of the inner spring and glue the flat sides together. Give it a quick coat of white paint and a little speckling with brown paint – nothing too neat because we are going for a rustic look here. Next, add his scarf, which is just a torn strip of cotton cloth. There is a natural indentation in the clothespin where you’ll tie the scarf around his “neck”. Then, we need a loop for hanging. This is a length of floral wire that is pushed through the little hole created from the grooves where the spring was seated. Give the ends a twirl on the front to keep them from pulling out of the hole. The strength of the wire against the back of the snowman will serve to keep our little friend upright. Finally, he needs some details. Use the end of a paintbrush dipped in black paint to make dots for the eyes and buttons and a little swipe of orange paint becomes a nose. I like these guys with no mouth – there just really isn’t enough room for mouth dots. Now he’s ready to hang on the tree or tie onto a package. Cost-wise, this is a very economical craft. A pack of 36 spring clothespins is available at any dollar store. Small bottles of acrylic craft paint will last forever making these, because very little paint is needed. The cotton cloth? It’s an old flannel shirt of my husband’s. I laundered it several time to make it nice and soft. I love working with plaid fabric, because I can follow the lines to cut straight. You could literally make hundreds of little scarves from one old shirt. Floral wire is available in small quantities at the dollar store, or use your 40% off coupon at one of the big box craft stores for a larger roll. Next, we have a darling little snowman figurine. This little guy is made from a picante sauce jar. Whenever I see a jar with an indentation, I immediately think it could easily be a snowman. After enjoying the sauce on some nachos, thoroughly clean the jar and remove the label and the “use by” stamp with a bit of Goo-Gone. After it is quite dry, drip some white acrylic craft paint inside and turn and twist the jar until the paint completely covers the inside of the jar. Give it a day to dry and replace the lid on the jar. I like fleece for the hat and scarf for these, since it has a bit more body than cotton fabric. These are made from a fleece scarf from the dollar store. Tie a long strip around the indentation in the jar for the scarf. For the hat, cut a strip a little longer than the circumference of the jar and about 8 inches wide. Use hot glue to turn a small cuff along one edge of the fabric, then glue the strip around the lid, overlapping the ends. Finally, cut a small strip of matching fleece. Tuck a few cotton balls into the hat to give it some height, then gather the loose end and tie it together tightly with the strip. Cut into the top of the remaining loose bit, about every inch. That makes the pompom on the top of the hat. If you wish, add a strip of contrasting ribbon over the cuff and decorate as you wish. His eyes and buttons are made with small shank back black buttons. A shank back button doesn’t have holes in it. Instead, there’s a little loop on the back where you’d sew the button onto the garment. Using pliers, cut the shank off and use a bit of strong glue (E6000 is a favorite) to pop on his eyes and buttons. His nose is a resin carrot, also glued on with strong glue. I would not recommend a hot glue gun for adding these details. Hot glue and glass is not the best combination for long term stability. I’d like to add a word here about shopping sales and keeping your eyes open for deeply discounted or free supplies. The dollar store is an amazing resource for inexpensive supplies. An old cotton flannel shirt is free plaid fabric. The resin carrot used on the jar snowman came in a pack of two, originally priced at $3.99. I got the pack for $0.39, sometime in February when winter items were 90% off. I rarely go to one of the big box craft stores without perusing the clearance rack for things to add to my stash. If you have room to store things and can keep them well organized to be able to find them when they are needed, you can save lots of money by purchasing items after the season, to be used later. Red baker’s twine in a Christmas package will be clearance priced when red baker’s twine in a Valentine package will be full price. Green Christmas ribbon at 90% off? St. Patty’s is coming, just around the corner. Be judicious in your purchases, to guard against becoming a bit of a hoarder. However, once you recognize your crafting style, you can start to build your stash. Finally, here are some photos of other snowmen I have made. The first is an old bed spring, the next one is a shutter and the last one is the box from a roll of washi tape. I’ve had a great time being Rebecca’s guest blogger this week so I’d love to know if you’d like more details on these. Let us know in the comments! - Suzanne
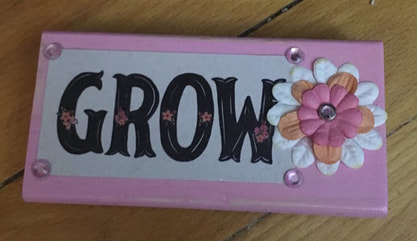
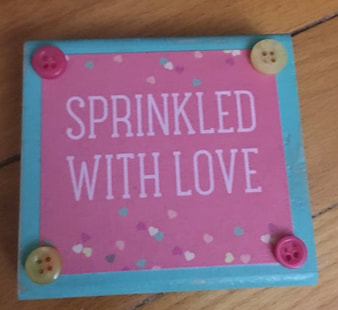
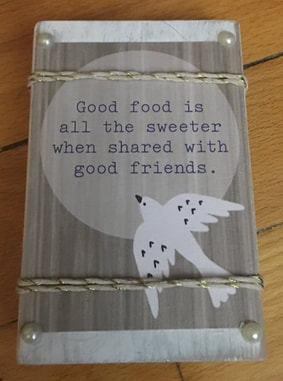
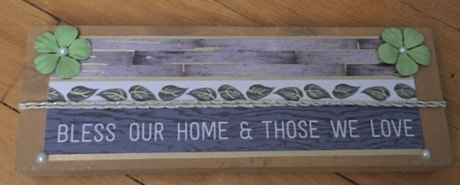
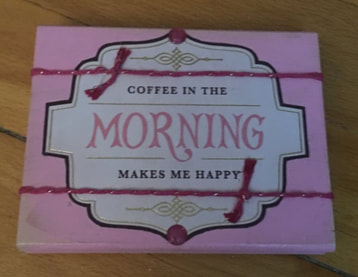
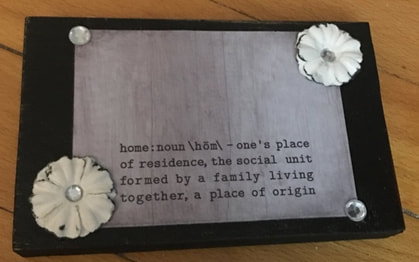
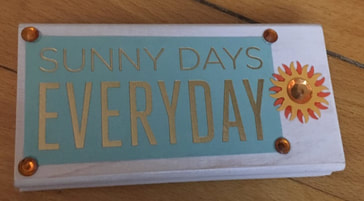
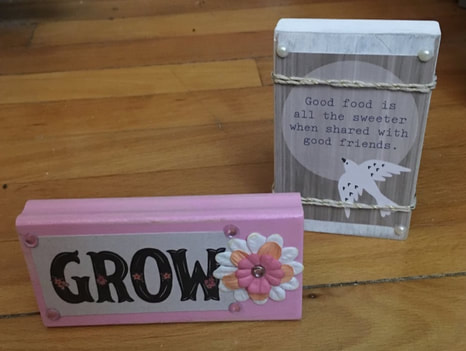
Happy Wednesday! When we last were together I had sanded and painted some wooden blocks. I'm sure it has been eating away at your soul over the past week wondering what I was going to turn those cute little blocks into. Well wait no more! The next steps for these blocks took only a few more supplies: - Mod Podge (this stuff is amazing glue and sealer all in one. I would highly recommend you get some) - MONO Multi Liquid Glue (or any liquid glue that will effectively adhere paper to wood without damaging the paper, but my vote is with MONO. Google it, its good stuff!) - Patterned Paper (preferably with pages that have cute little phrases on them!) - Super Glue - Various decorations (ribbon, buttons, stickers etc.) The first step was going through my patterned paper and finding all of the adorable phrases that would fit on the block sizes that I had. If you don't have paper like this, you could also easily find some phrases online and print them out on cardstock! I cut the paper down and used my MONO glue to adhere it to the wood. Once this dried, I went over the whole front of the block with about 2 coats of Mod Podge to seal everything in. I then added little decorations such as ribbon, sparkles, and buttons where appropriate! And now these old wooden blocks have been turned into cute little signs! Not to toot my own horn but I think they came out great! Here they are! I tried to make the images come up as a slideshow and be more aesthetically pleasing but alas I could not so enjoy this long string of differently sized photos!! I'm not an expert blogger yet so take pity on my lack of skills please... I am so happy with how these came out! My favorite is the "Sunny Days" block! These blocks are about 3/4 inch to 1 1/2 inches thick so they are easily able to stand up on their own like so: I hope the suspense was worth it and you liked this craft! I may even make a few more ;)
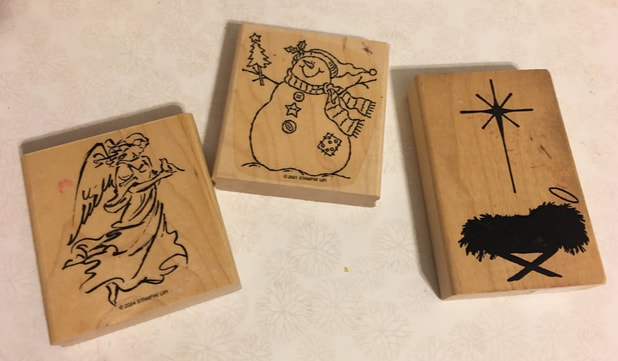
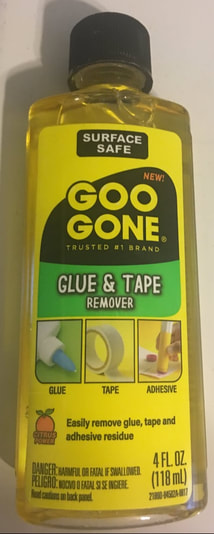
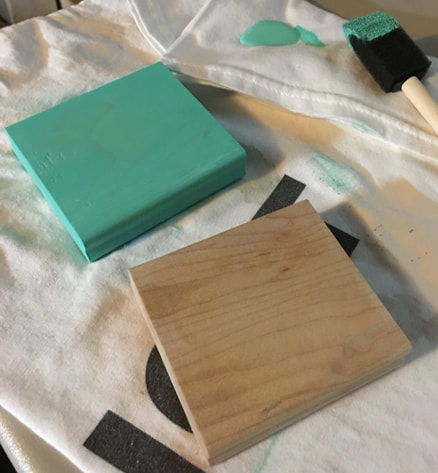
- Rebecca P.S. Next week I have a special surprise! Check back next Wednesday! Why hello! Today's blog will be part 1 of 2 with the second part coming out next Wednesday. I have started a project with some wooden blocks and will be continuing to work on it throughout the week/weekend so next week you will be able to see the finished project! So to start this project I grabbed some old wooden blocks that used to have rubber stamps on the back. My mom was going to throw them away, but luckily she held onto them! As you can see, these blocks used to hold Christmas rubber stamps, but my mom has since started using acrylic blocks for her stamps and no longer needed the wooden ones. The black image is simply a sticker so I peeled it off carefully. There was some residual adhesive still left on each side on the block so I pulled out a magical potion that I knew could save the day: Goo Gone (not a sponsor of course). If you've never heard of or used Goo Gone, its this weird, oily stuff that somehow manages to get residual glue, tape and stickers off of whatever you'd like. Here's my trusty bottle. See! It's fun stuff! So I poured a generous amount of Goo Gone on the blocks, let it sit for a few minutes and then scrubbed at the adhesive with a sponge and warm soupy water. With a little elbow grease the glue was gone! I then let the blocks dry overnight. The next night I sanded them with fine grit sandpaper to smooth them down and then painted them. Just your basic acrylic craft paint will do! The blue block below has about 2 coats of paint. You could still slightly see the wood grain through the paint, but I like that look. If you want heavier, more even coverage, go for 3 coats and let the blocks dry completely between coats. I was painting on one of my boyfriend's shirts that had been ruined by coffee because why not right? Okay thats all you are going to get this week! What am I going to turn these painted blocks into? Check back next week to see the finished product!
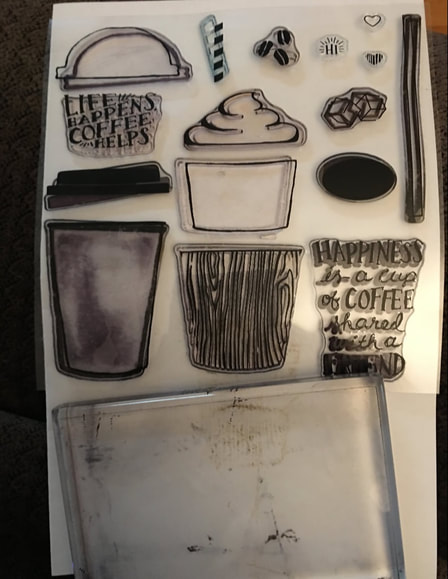
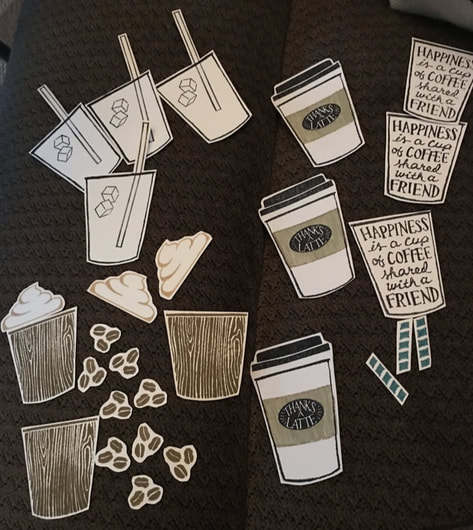
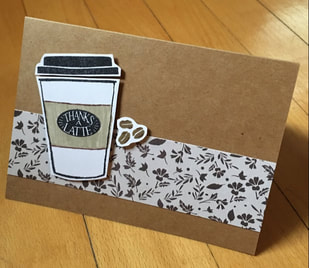
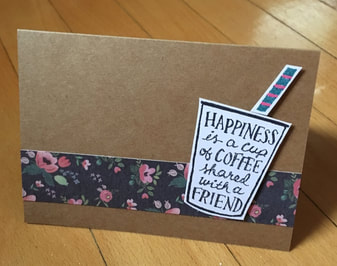
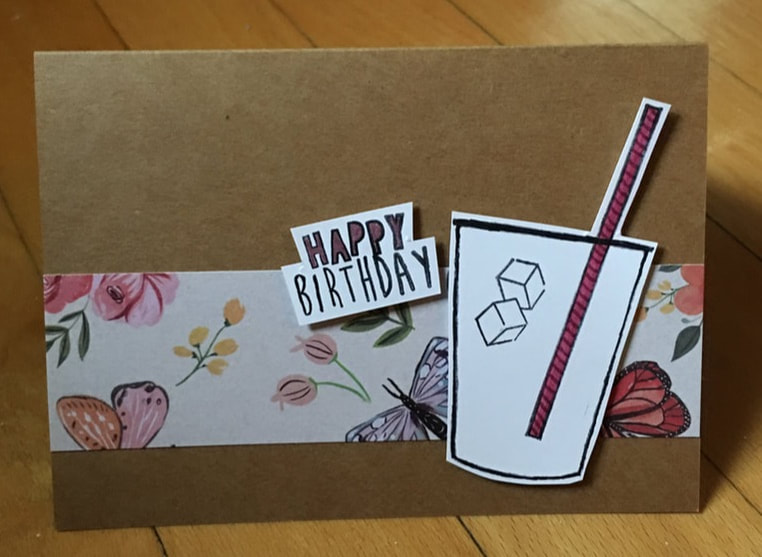
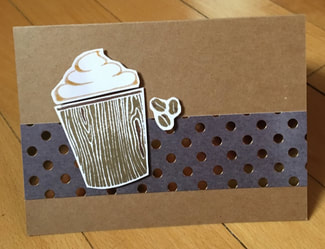
- Rebecca I love coffee. SO very much. I used to hate it and think it tasted like burned plastic, but then one day the coffee gods smiled down upon me and made me realize that it is a precious gift that we humans are not worthy of. I know there must be a few of you out there that don't like coffee (my mother for example), but I think that most of us are passionately on the side of coffee. Anyway, all of that was an unnecessarily long transition into the topic of coffee-themed cards! My mother and I will be going to a few craft fairs in November so I am working on some small projects. I happen to love projects that take an extremely long time and I have to keep working on over a series of weeks OR projects that are quick and painless and take me less than 3 hours. There's no in between with me. These adorable, quick coffee cards are definitely the latter type of project. Here's what I used to make these cards: - Double sided adhesive ( I have craft adhesive but you could easily use double sided tape) - Sharp scissors - Foam adhesive blocks (These are thin strips of white foam with adhesive on either side; they are used to stick something on your card slightly above the surface of the card to give it dimension) - Precut and folded card bases and envelopes - Black, brown, blue and tan ink pads (I use Stampin' Up! pads, but any brand could work) - Markers - Sparkly gel pens - 12 by 12 pad of coordinating patterned paper (All of the patterned paper used on these cards comes from the same pad which I think was bought at Michael's) - Happy Birthday stamp (I pulled this out of another stamp set I had and used it because I just wanted a few of the cards to be for birthdays; any Happy Birthday stamp will do) - Clear acrylic block (Pictured below; this is used for mounting stamps on) - Coffee stamp set (Pictured below; I think my mother purchased this on wish.com, but any stamp set similar to this would be just fine) If you have never seen or used stamps like this before, do not worry! They are so easy to use. The stamps are made to stick onto the acrylic block and are repositionable and reusable. The blocks are clear which help you position your stamp before you press it down. Here are all of my coffee pieces once I stamped them and cut them out. I ended up also stamping and cutting out a few Happy Birthdays from a different stamp set but that is not necessary if you don't need some birthday cards! After stamping and cutting a made a few accents with gel pens and markers to give some extra color and sparkle. Putting these cards together once all the pieces had been cut out took about an hour. The whole process of stamping, cutting, and glueing these cards together took around 2 hours overall. A nice quick project! I made these while watching Harry Potter and also doing schoolwork so they really were very easy! I picked some patterned papers from my pad and cut out a strip for each card, glued the paper strip on, then attached the coffee and word pieces with foam adhesive blocks. And that is all! So easy! I made 3 of each of the types shown below. Aren't they cute? I know! Quick and easy can be cute!
- Rebecca |
AuthorI am a 27-year-old crafter and baker from New Hampshire! Archives
July 2024
Categories |
 RSS Feed