|
Hi people! Since a few weeks ago I talked about some of the crafting projects I have scattered throughout my house, I thought that today it would be fun to share some of the crafting (and baking) projects that are just not for me! I am open to all baking and crafting and love seeing what others have done, but these few things just involve a certain sense of patience or attention to detail that I simply don't have!
Crafting: 1. Jewelry Making: My aunt (shoutout to Aunt Monsie) makes gorgeous jewelry and I have some jewelry pieces that I absolutely love that have been handmade, but I just can't seem to bring myself to love making it myself. I used to have some beads and wire and tried my hand at a few necklaces and bracelets but it never caught on. I also go through weird summer camp phases where I enjoy making friendship bracelets, but that usually dies down after about a week or two and the string goes back in my drawer for another 3 years. 2. Knitting/Quilt-Making: Absolutely not. I have another aunt (shoutout to Auntie Dottie) who makes gorgeous quilts and she painstakingly picks out different fabrics and uses different kinds of stitches to attach the pieces together and the finished products are always beautiful, but I would lose my mind trying to do that. The only quilt I've ever made was for my mom when I was like 7 and it was HORRIBLE. My Memere knits and crochets and she tried to teach me once when I was younger and it did not go all that well. I think I ended up with a piece about 2 inches square. Maybe when I get older I will get on the knitting train, but not now! The only sewing I will do is patching a hole in a shirt and the tiny little intricate stitching involved in making Christmas stockings. I'm not sure why I have the patience for tiny stitching and not for bigger projects. I can't explain it. Baking: 1. Homemade Pie Crust: As I mentioned in my pie post last week, making pie dough from scratch seems like WAYYY more work than necessary and I usually just don't do it. I'm sure one day I will try it again when I'm feeling particularly extra, but not today!! 2. Cheesecake: Never. No. Nope. I have never and (I can say with 98% certainty) will never make a traditional cheesecake from scratch. Just no. Nope. I don't own a spring-form pan which is a pretty crucial implement when baking cheesecake (I would really love one, but not for traditional cheesecake-making thats for sure). I am a big fan of no bake cheesecake. Or cheesecake from the grocery store. Or when people at a restaurant make it for me. Those are yum. And don't involve baking and cooling and cracking and all the things that terrify me about cheesecake. I know this was little more of a low-key blog today, but I have several really exciting, labor-intensive craft projects in the works so I can't wait to share those with you over the next few weeks. Some cool stuff is coming your way. Here's a little hint for next week: unicorns!!!! - Rebecca
1 Comment
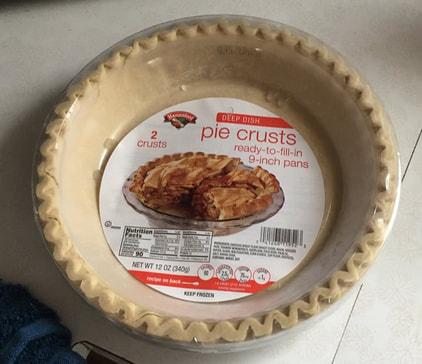
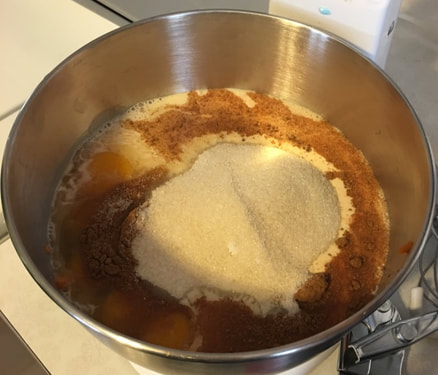
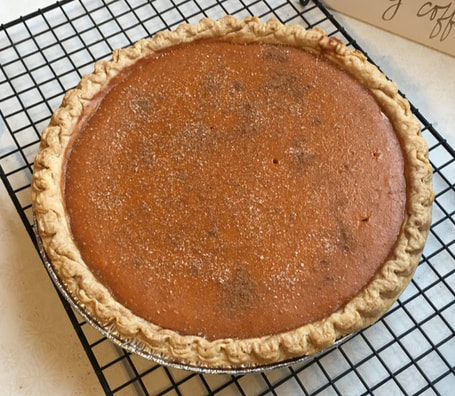
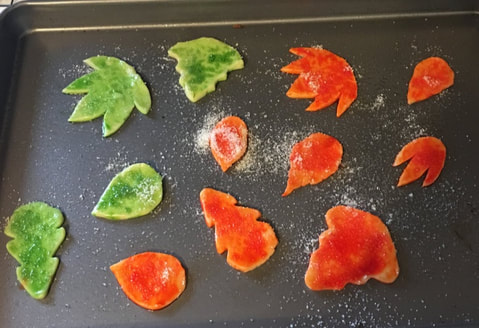
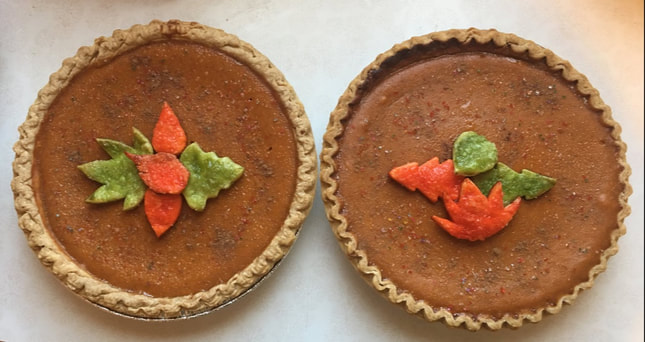
Happy (almost) Thanksgiving everyone! My boyfriend and I will be celebrating 2 thanksgivings this year; one with our parents on Thursday and one with my Memere, parents, aunt and cousin on Friday. I was put in charge of pumpkin pies (my favorite Thanksgiving dessert of ALL TIME) so I decided to go for a semi-homemade recipe with a decorative twist. The filling of this pie is homemade, but all pie crust used was store-bought. I made pie crust once about 2 1/2 years ago when I had just started dating my boyfriend and was desperately trying to impress his parents with a completely from scratch strawberry-rhubarb pie complete with a woven pie crust design on the top. Never again. They love me and are stuck with me now so frozen grocery store pie crust it is!!!! Here is what you will need (below is what is needed for one pie, but I made 2 so I doubled the ingredients): For pie: - Frozen 9 inch deep dish pie crust - Refrigerated pie crust that can be unrolled - 1 can (15 oz) pure pumpkin or pumpkin puree - 1 can (12 oz) evaporated milk - 3/4 cup of white sugar, plus a few pinches - 2 tsp pumpkin pie spice, plus one pinch (this contains cinnamon, ginger, nutmeg and allspice) - Pinch of salt - 2 eggs For decoration: - Eggs - Water - Red, yellow and green food coloring (I used gel food coloring) - Cool whip or whipped cream for serving This is a fairly basic pumpkin filling recipe so nothing too crazy here. Some recipes also ask for sweetened condensed milk and then omit the extra sugar so if you would prefer that go ahead and google a recipe using those ingredients! I came to my recipe by combining and altering a few different pumpkin pie recipes I found on allrecipes.com. Before you start mixing your ingredients together, take your pie crusts out of the freezer so that they have a few minutes to thaw. Any basic store-brand pie crust will do. I used Hannaford brand because I have about 3 Hannafords within 25 minutes of me and its my preferred store. Go ahead and mix all of your ingredients together in a large bowl, except for the pinches of sugar and pumpkin pie spice. I used a stand mixer simply because I was mixing the ingredients for 2 pies together and didn't think I had a bowl that would fit everything. I didn't beat together my eggs before adding them to the rest of the mixture because the mixer is strong enough to do that easily, but if you are just using a bowl and a whisk I would recommend beating them up a bit first so you don't have big chunks of yolk floating around your pie filling. Also one my pies were already cooked I realized that I forgot to add the pinch of salt to my recipe SOOO hopefully that isn't extremely crucial. We shall see! Although I was making 2 pies, I did cook them separately as it usually doesn't work great to cook multiple things in the oven at the same time. It usually ends up taking much longer and the cooking is sometimes uneven because the two things could potentially be blocking the heat from reaching each other. Put the pie (frozen pie crusts should already come in a metal pie plate so you shouldn't need a pie plate) on a cookie sheet for some stability and put it in the oven for about 20 minutes at 425 degrees (Fahrenheit). After that, turn the heat down to 325 (also Fahrenheit) and leave the pie in the oven for an additional 40-ish minutes. When you get to about 35 at 325 minutes start checking the pie to see how it looks. If a toothpick near the center of the pie comes out clean you are good to go. Here is what a fully cooked pie looks like: Right when the pie comes out of the oven, sprinkle on a tiny bit of sugar and pumpkin pie spice as well just to give the top of the pie a little extra something. As my pies were cooling I moved on to the fun part: the decoration. I learned on the Food Network (which is basically the only channel I watch other than HGTV) that if you mix some food coloring into an egg wash you can stain pie crust or dough a certain color. I though I would give it a try on some store-bought roll-out dough. I wanted to cut out some leaves and dye them red and green to lay on the top of the pie. I didn't have a leaf cookie cutter so I just used a Christmas tree cookie cutter and free-handed some leaves as well which I think turned out pretty well! I then made a few different egg washes and, using gel food coloring, dyed them red-orange and green. An egg wash is simply a beaten egg, a few drops of water and, in this case, a few drops of food coloring as well. I brushed the egg wash over the leaves with a paint brush that is only used for food. I then sprinkled some sugar on the pieces as well and put them in a 350 degree (still Fahrenheit) oven for about 10 minutes. After the pies and crust leaves had cooled a little, I arranged some leaves on each pie and then sprinkled some colored sugar on the pies as well because I tend to overdo things. Here they are! I like how the leaves look a little better on the left pie, but am really proud with how they both came out! Hopefully when we taste them the lack of salt won't be an issue ;) I will be serving them with cool whip and whipped cream tomorrow and Friday. Have a wonderful Thanksgiving and, if you don't celebrate, have a great weekend and make pumpkin pie anyway!
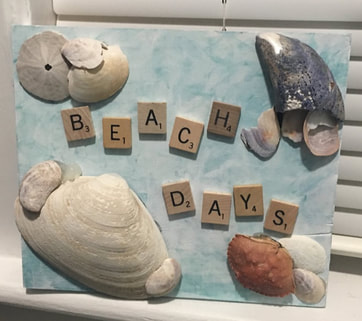
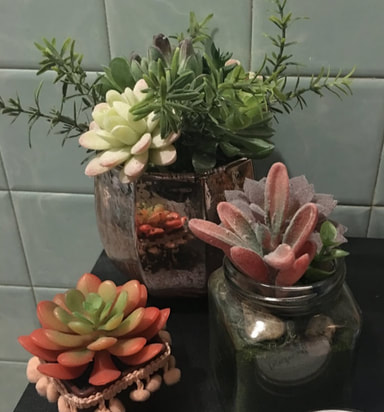
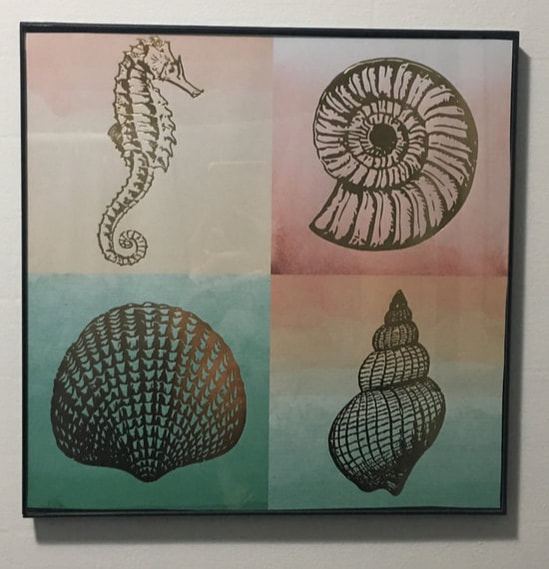
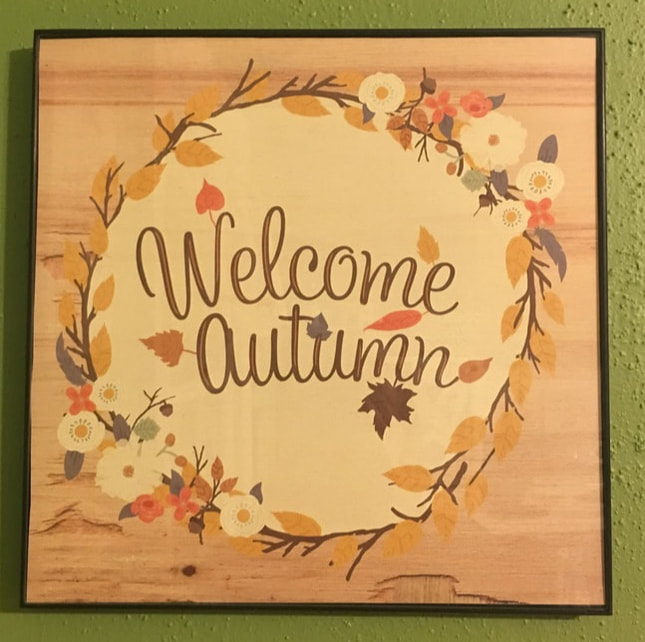
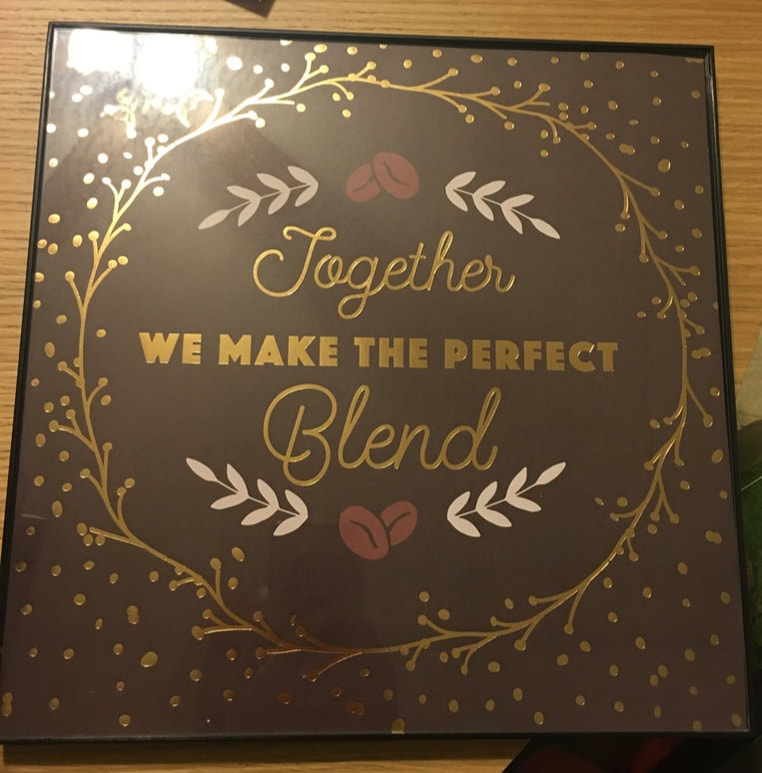
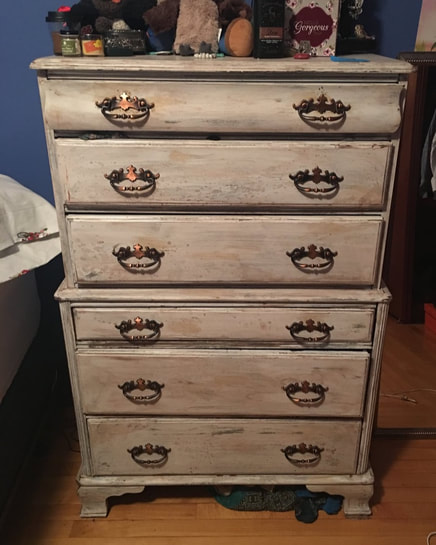
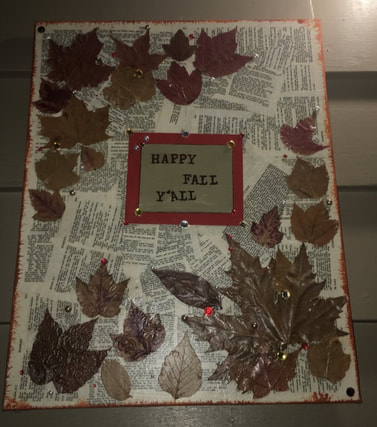
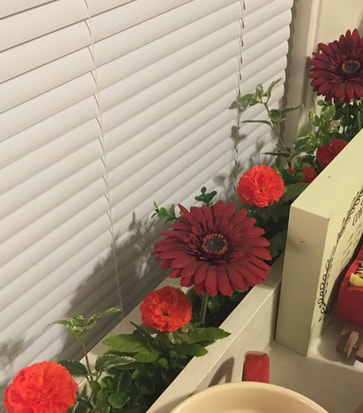
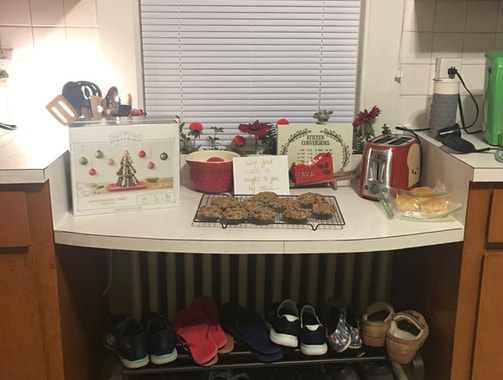
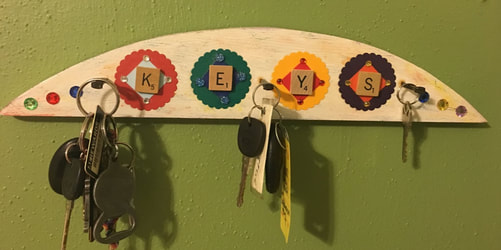
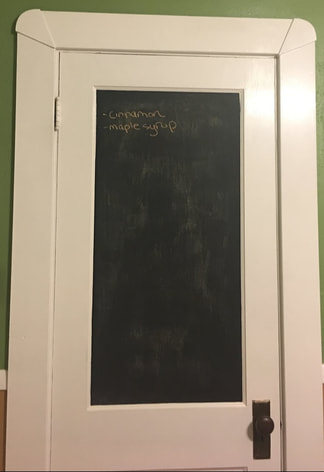
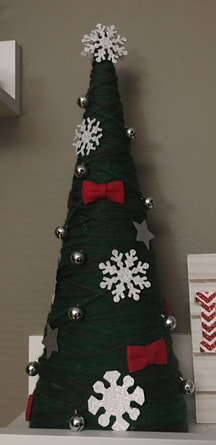
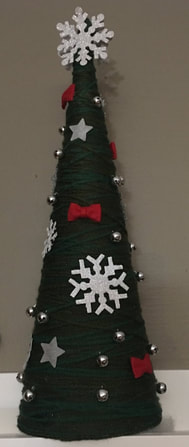
- Rebecca Hello! So I partied hard with my mother in Vegas this past weekend and haven't had oodles of time for crafting or baking. Therefore, I thought it would be a good week to show some of the crafts I have made over the years that I currently have in my house to give you all a little more insight into my style of crafts. First off, we have a "Beach Days" sign in the bathroom: This sign was fairly simple, just a square piece of wood, some paint, shells I had collected, scrabble tiles and high strength glue. Looks great in our beachy bathroom! I have collected so many shells over the course of my life so I am happy to put some to good use on a craft. I could genuinely re-shell a whole beach with my stash. No joke. Also in the bathroom are a few succulents I made: The larger succulent was bought for me from Francesca's, a small boutique-ish store that we have in the northeast (not sure if they are a regional or national chain), but the two small ones I made to match. I made these at separate times, but the supplies were basically the same for each: a jar or plastic container, hot glue, small rocks, greenery, plastic succulents and, for the smallest one, some cute pink ribbon! Next, we have some of the easiest crafts known to man: These are just pretty sheets of 12 by 12 paper that I put into simple black frames. Most large paper pads have a few pages with full-sized patterns or sayings like this. I just picked some of my favorites and framed them. How much easier could you get? The coffee and autumn pages go in the kitchen and then seashells are in the bathroom. Now for an older project that I still very much love. My dresser! This dresser was bought probably five or six-ish years ago at an antique/vintage little shop and it was originally a darker shade of grey (you can still see the grey coming through in some spots). I then painted the whole dresser with cream-colored paint, not worrying about perfectly even coverage. I sanded away on the edges of the drawers and the base, revealing some of the grey. I then used various shades of brown to antique the dresser even further, painting on streaks, splattering the paint across the drawers and letting it drip down the dresser at some points. I loved the hardware that was on the dresser, but several of the holes in the drawers had been made so big that the screws would no longer hold, so a few of those drawer pulls have been glued on the front to stay put! Now we have a fall craft that's one of my boyfriend's favorites. This fall sign is up on our porch and although it was a bit time-consuming, its still pretty cute! I took a large canvas and covered it with old book pages, using Mod Podge under and over the paper to stick it down. I had some falls leaves that I had previously pressed and used the same method with the Mod Podge to stick them on, once the paper layer had dried. I added some jewel and pearl accents and my "Happy Fall Y'all" phrase to the middle and once again slathered on some Mod Podge. The copious layers of sealer is what makes this craft take a decent amount of time, but every layer is important if you want everything to stay sealed in! This next craft I must admit I'm pretty proud of ... A cute little flower bed in front of the kitchen window! The kitchen in our apartment used to be a bedroom because the house was originally a single family with all of the bedrooms on the second floor. Then the second floor was turned into a separate apartment so one of the bedrooms had to be turned into a kitchen. Anyways, this means that there is a weird section of our kitchen counter that is lower that the rest, which is probably where the original vanity in the bedroom was. See what I mean? Spot my attempt at making healthy breakfast cookies cooling on the wire rack. Behind this little vanity section is couple inches wide rectangular space. I honestly have no idea what purpose this ever had, but since we are in the kitchen and it was in front of the window, I figured it would be cute to turn it into a little flower box that would never die. For this I used some styrofoam that I cut to the right size and painted green. I stuck this down into the window box and then pushed in some fake flowers and greenery that I had bought at Hobby Lobby. Voila! Next up is a key holder for right beside the door. This little wooden sign with nails already attached came from (I think) my mom's extensive stash of random things yearning to be turned into crafts. I painted it white and streaked on some other paint colors. I cut out circles and squares of colored cardstock, attached them with some glue, added some jewels because sparkles are life and then attached some scrabble letters! Now for a chalkboard cabinet door, again in the kitchen! This was an easy and extremely functional project. I took the door to our coat closet in the kitchen and used black chalkboard paint on the top, inner section. I just followed the rules on the paint can (you have to follow special steps before you can write on it) and now we have a excellent place to keep our weekly grocery list! Yes, the things on our list right now are cinnamon and maple syrup. Don't judge. Finally, since it's basically Christmas and the boyfriend and I have already decorated, here are some little Christmas trees I made! These pictures don't show this very well, but the tree on the right is taller and bigger than the one on the left. Big surprise, but these Christmas tree forms, which are made of cardboard, came from my mother's crafty stash. She has all the things. I then went on to wrap them with green yarn which literally took a million years and was painstaking, but it was worth it right? I added some bells, bows and sparkly snowflakes to finish them off!
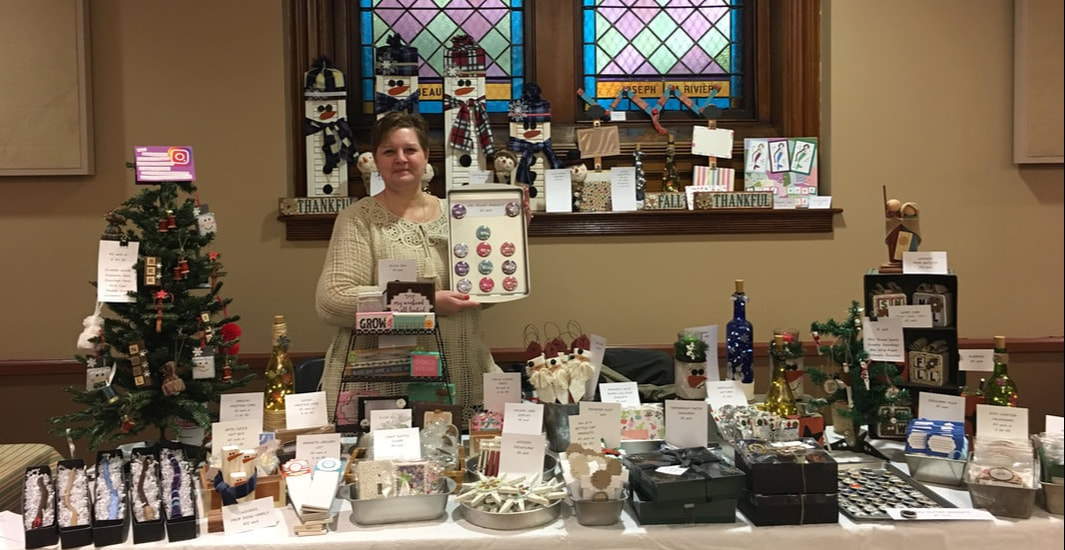
I am so happy to share with you all some of the crafts I have made over the past few years to give you a little more insight into what I love to do. I gave a brief description of each craft, but if you are interested in learning more about any of these, please leave a comment and I will be happy to share more details. I may not know exactly where each supply came from, but I will give you any information that I can. Have a lovely evening crafty ladies and gents! - Rebecca Hello crafty ladies and gents! November is here so it is officially craft fair season. My mother and I are being a part of 2 fairs this month: one already took place last weekend and the other is in a week and a half. So I figured it would be a good time to share some of my craft fair knowledge! I want to preface this by saying that I live in New Hampshire (in the US of A) so perhaps my information is only limited to the northeast. I'm not sure if craft fairs are as big of a thing on the West coast, but here in NH you can find at least two or three per weekend from the beginning of November to the middle of December. Here are 10 things that I think everyone should know about the world of craft fairs: 1. Chances are high that it will be in a church basement or tied to some kind of charitable organization. Typically craft fairs are fundraisers to raise money for a church or charity and are held in a function hall owned or rented by the church/charity. 2. You will have to pay for your spot. This is tied to the point above; since most craft fairs are fundraisers, most will also require a fee for you to be a part of the fair. Since you are able to keep the money from the actual sale of your crafts, the organizers can make money from this fee which is typically $50 or less. You may also be required to give up one of your crafts for free so that it can be put into a raffle to raise additional money. Any fees/gifts you have to give aren't typically a problem; if the craft fair is run well and advertised adequately you should be able to make that money back! 3. You may need to be required to submit some description/photo evidence of your style of crafting before you are officially "accepted." The organizers of the craft fair probably do not want multiple tables with the same exact type of crafts or vendor products (most craft fairs also accept vendors such as Mary Kay. Tupperware, etc). Therefore, they may tell you that you cannot participate if people with a product similar to you have already been accepted. 4. Don't underprice your products. You should set your prices to cover the cost of the item and the time you spent making it and also keep in mind that you want to make some additional money on the items. You don't have to go crazy, but don't price your items extremely low just in hopes that they will sell. A reasonable price shows that you are proud of what you've made and think your crafts have value. 5. People may try to haggle with you like they are at a market in the 1800s. Not all haggling is bad and you may be more willing to knock down the prices especially at the end of the day, but don't be too willing to take dollars off. This ties in with Number 4. You set your prices as they are for a reason and should try to stand firm! 6. You need to come prepared. Bring change, tissue paper, gift bags, snacks, table clothes etc. These things will most likely not be provided for you so you will have to to bring it yourself. Change is an especially important one because people will come up to your table and buy $3 worth of stuff and hand you a $20. Just saying. Gift bags are also a great thing to have; it makes you look a little more professional to be able to wrap people's purchases up in a nice gift bag. And I mean actual, cute gift bags, not just used plastic grocery bags. There's a difference people. 7. If you are more than just a hobby crafter and are trying to build some kind of following, maybe go online and spend $10 and get some business cards made with any social media you would like to promote. 8. Maybe investigate the fancy little credit card swipey things for your phone? My mom and I have actually never felt the need to have these and have only ever accepted cash at craft fairs, but people have been asking more and more if we accept cards. It might be worth it to look into depending on your demographic and if you think you could make more money if you accept cards. Keep in mind that I think apps like that do take a small percentage of your profits so it's important to really do your research and see if its worth it for you. 9. Variety is key. It looks nice to have a somewhat cohesive style to all of your crafts, but I think that having different crafts is important as well. I have been to many craft fairs and seen tables where people just sell wreaths or just sell bags and they haven't made been able to sell that many items. I understand that you may have a craft that is your trademark, but maybe try branching out as well so that even if people don't like all of your products, there may be something on your table that catches their eye. 10. A craft fair is a full-day commitment so be ready to give over a whole Saturday or Sunday to it. Even though the actual fair may run from only 9-2 or 10-3 or whatever time it may be, you still have to lug all your stuff in to your car, get there a few hours early to set up, stay a little bit later to clean up, lug your stuff back from your car into your house and the you are just tired from all the standing and interacting with other human specimens. They are more work than they seem, but, if you put in the appropriate amount of effort to do a good job, can really be a great way to make some money and get your craftiness out there! Here is a picture of my crafty momma at the fair we were at this past weekend behind our masterpiece of a table: We will also be at a craft fair at Sacred Heart Church in Manchester, NH on Saturday, November 17th from 9 am to 3 pm so feel free to stop by and check out our crafts!
- Rebecca |
AuthorI am a 27-year-old crafter and baker from New Hampshire! Archives
July 2024
Categories |
 RSS Feed