|
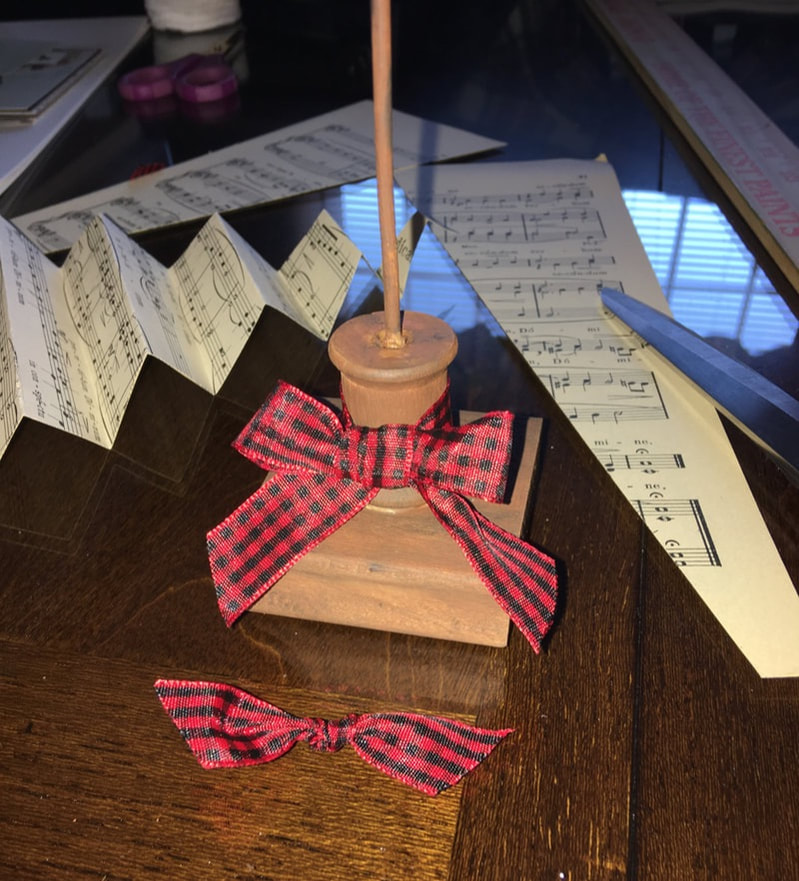
Hello friends! It’s guest blogger time again on the PPP. It’s me, Suzanne (Rebecca’s mom), and today I am going to show you how to make a couple of sweet little trees with some different materials – vintage sheet music and ribbon. Depending on the paper, ribbon and embellishments used, these trees would be suitable for a holiday decoration any time of the year. First, we have to prepare bases for our trees so they can stand proud and tall. I’m going to repurpose wooden blocks from rubber stamps. [Slight aside with additional craft information - In an effort to save space in my craft room, I have been removing rubber stamps from their wooden blocks. The stamps can them be temporarily mounted on reusable acrylic blocks and stored in acetate envelopes more compactly than when permanently mounted on the wooden blocks. I hate to throw away a potential craft supply, so I have a basket of these blocks waiting to be repurposed. A little Goo-Gone or acetone nail polish remove cleans up the adhesive residue and makes them ready for paint.] For the base of the tree to be made with paper, I glued an old thread spool to a block and added a thin kebab skewer in the hole of the spool. 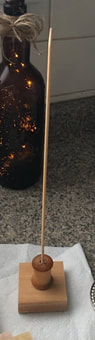 For the base of the ribbon tree, I glued two blocks atop one another (I have a number of these in the works, as I am making these for sale at an upcoming craft fair). Once the glue was dry, I gave both types of bases a coat of slightly watered down brown acrylic paint. I let that set a couple of minutes then wiped the paint down. I then gave them some dimension by dry brushing on a little black paint and going over that with a little more brown until I was satisfied with the depth of color.
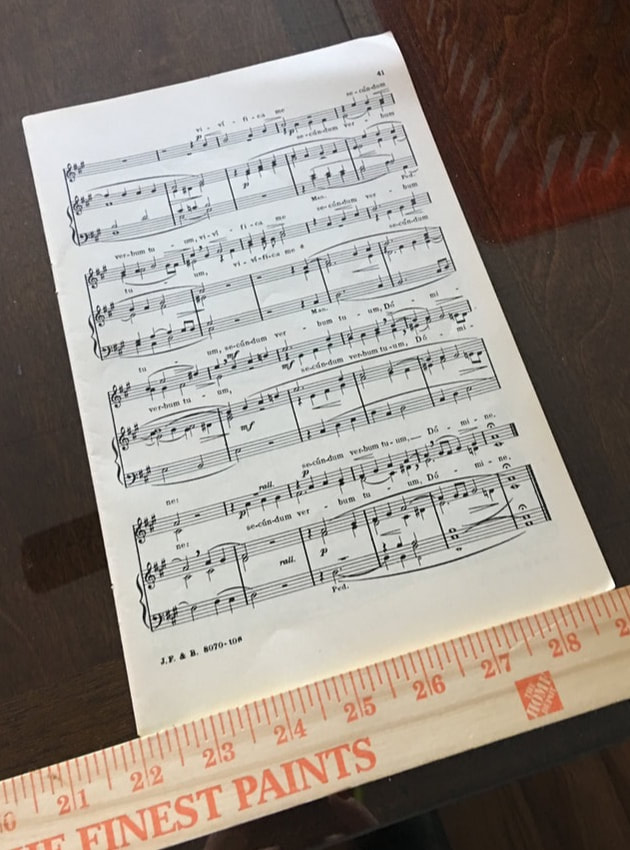
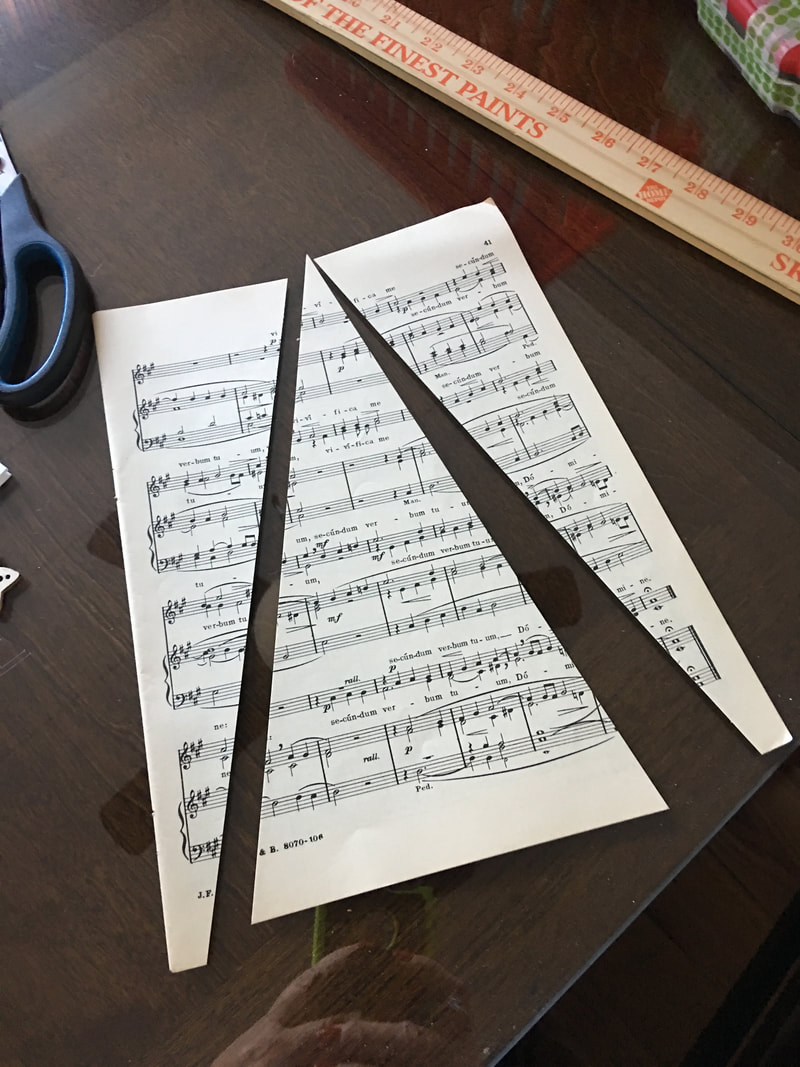
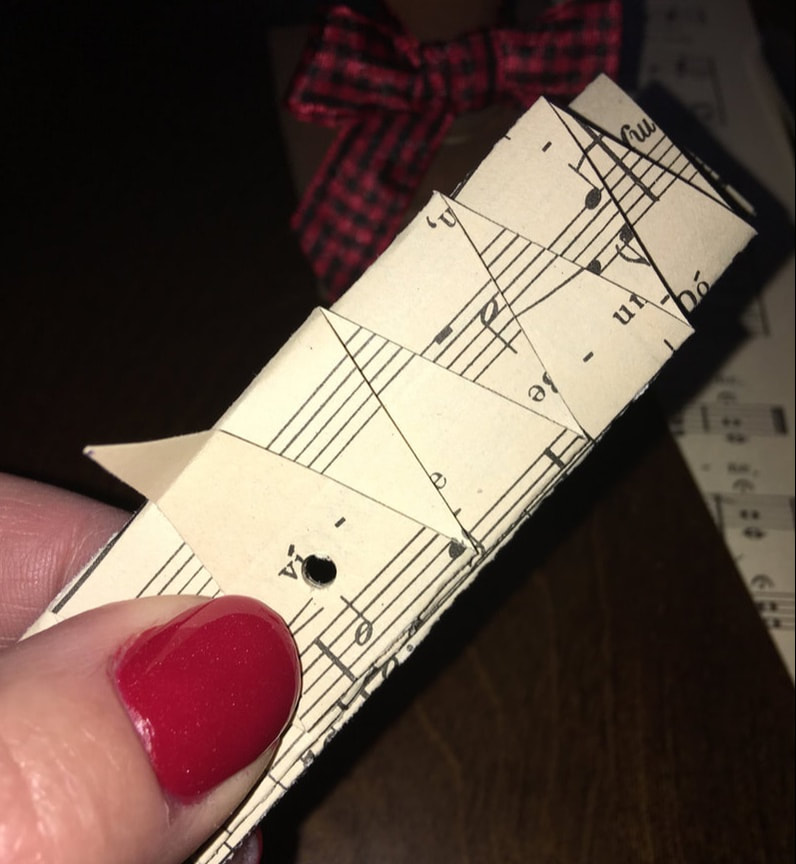
Time now to work on the body of the sheet music tree. I removed the staples from the center of a vintage book and glued in half a full two page spread, to give the paper a bit more body. I marked the center of the top of the sheet and marked three inches to the left and right of the center of the bottom of the sheet (to make the bottom six inches wide) and cut the triangular shape. My sheet is eleven inches tall.
I then gently scored the width of the triangle every inch and gently folded the paper accordion style. These two steps, when using vintage paper, need to be done carefully, because it’s easy to break the paper. If you make these trees with new scrapbook paper (another cute option), the paper will be less fragile. 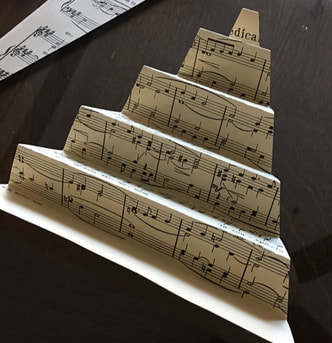 I prepped the base with a little ribbon bow around the spool and made a small ribbon knot that will be used later at the top of the tree. I then punched a hole in the center of the accordion folded paper triangle and fed the skewer through that hole.
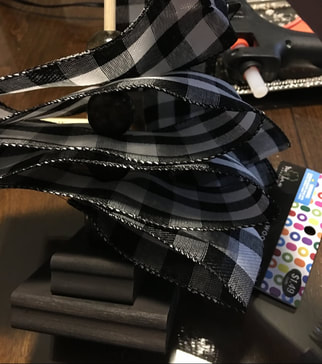
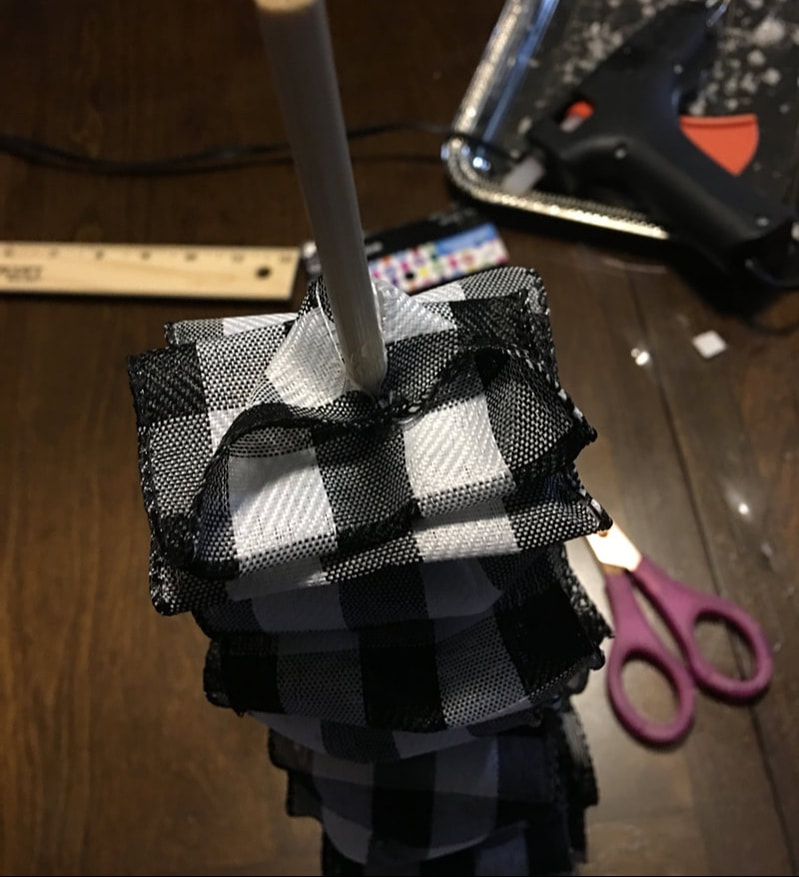
Working carefully again, I spread the folds of the paper out evenly along the length of the wooden skewer and glued the top tip to the skewer, making sure I was lined up with the flat side of the base and the bow I’d tied around the spool. I made sure that the bottom and top of the paper triangle were to the front of the tree. 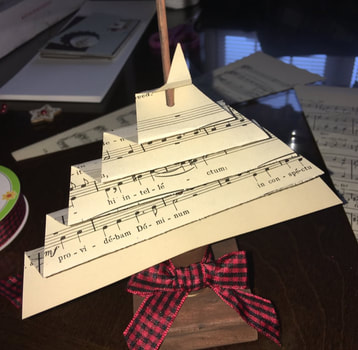 I decided to top the tree with a small wooden star, so I held that in place and trimmed the end of the skewer off just below where the star would end. I glued the star in place and added the ribbon knot just below it. Embellishment options are many. I liked the simplicity of these, so I added just a few red pearls up the center, on the “trunk” of the tree. Buttons, sequins or pompoms would also be good options, depending on the type of paper used for the body of the tree. 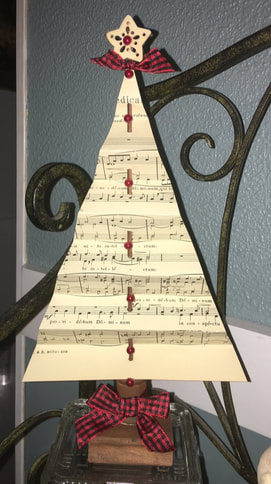 For the ribbon tree, I drilled a small hole in the base, about a ½ inch deep, to insert some glue and a thin dowel. I wasn’t worried about doing this before painting because with these trees, the “trunk” will be fully covered by both the ribbon and some beads. To start, I threaded a long bead onto the dowel and added some glue in the hole to hold it in place. 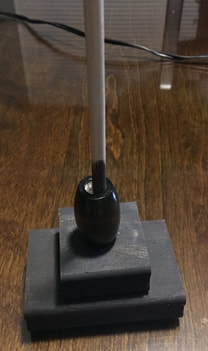 I put the base aside for a moment and worked on the body of this tree. Starting with a measurement of approximately 7 inches, I folded the wire edged ribbon back and forth on itself, drawing it in a little more with each layer of folding, until the top layer of ribbon was approximately 1 inch wide. There is no exact measurement to the length of ribbon needed – it will depend on how much each layer is shortened as it is folded.  When I got to the 1 inch mark, I cut the stack of ribbon free from the spool. Then, with a pair of pointy scissors, I poked the middle of the stack of ribbon and twisted the scissors to make a hole to accommodate the dowel. 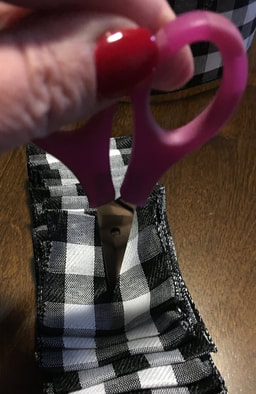 It was time now to add the ribbon to the dowel, separating each layer with a wooden bead or two (depending on the size of the bead) to give the tree its height. I added a touch of hot glue to the start of the ribbon at the bottom (to keep it from flopping down) and made a little triangle fold at the top (to neaten up that end). I also added a touch of glue under the bead at each level to keep the bead in place and the tree solid.
The last bead at the top of the tree holds the last bit in place. To finish this little guy off, I “fluffed” each layer of the tree to be sure it wasn’t folded flat onto itself. I then added a sprig of greenery with some red beads and pine cones to the base and an iridescent snowflake with a red jewel in the center as a tree topper. In the last photo, you can see a fall version of the ribbon tree with a pumpkin embellishment on the bottom and a burlap bow as a tree topper. I think the ruffle and pattern of the ribbon is enough for the body of the tree, but you can add buttons, sequins or pompoms to these as well. 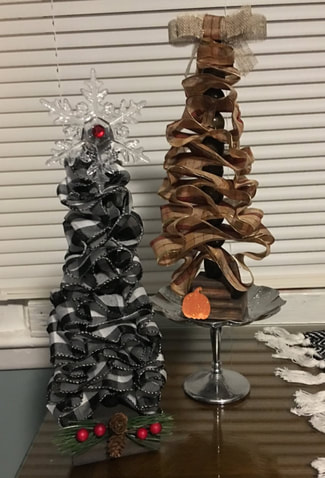 Happy Crafting!
2 Comments
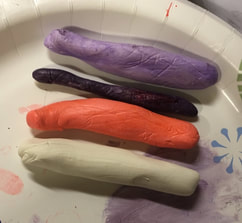
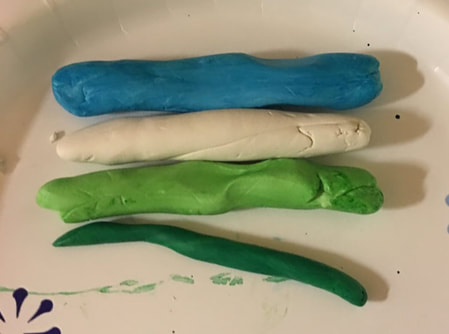
Hello friends!! I’m back at it again with a fun craft, some homemade coasters. I saw this idea on one of those Five Minute Craft-type videos that pop up on everyone’s Facebook feed and decided to try this on my own with a few adjustments. I started with some oven bake clay in white. 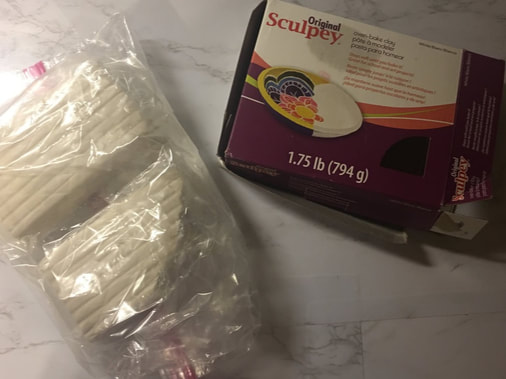 The coasters from the video I saw were marbled with different colors and I only have white oven-bake clay so I thought I would try my hand at dyeing the clay myself. I have quite a few of these Stampin’ Up re-inkers which are bottles of highly pigmented dye that you are supposed to use when your stamp pads are drying up which I thought would work well enough for dyeing the clay. 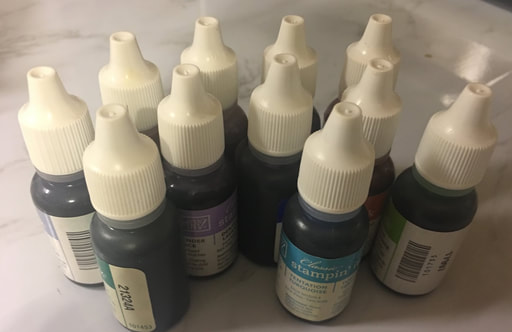 I put on some latex gloves and then got to work on dyeing. I had made a test run of this coaster idea earlier and had not put on gloves and dyed my hands magenta for a few days so I would highly recommend springing for some gloves. I took a small amount of clay and squirted a few drops of dye onto it and then just worked the dye throughout the clay with my fingers until the color was fully incorporated. I dyed some clay blues and greens for one set of coasters and then purples and pinks for another set. I rolled the colored clay into logs and then lined up a few colors with a log of plain white clay as well.
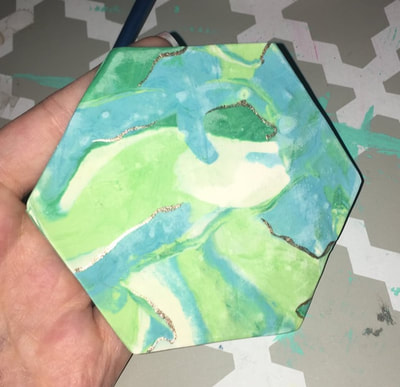
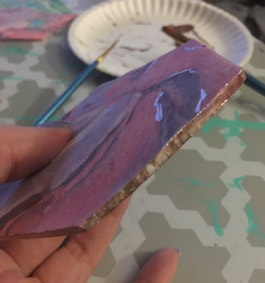
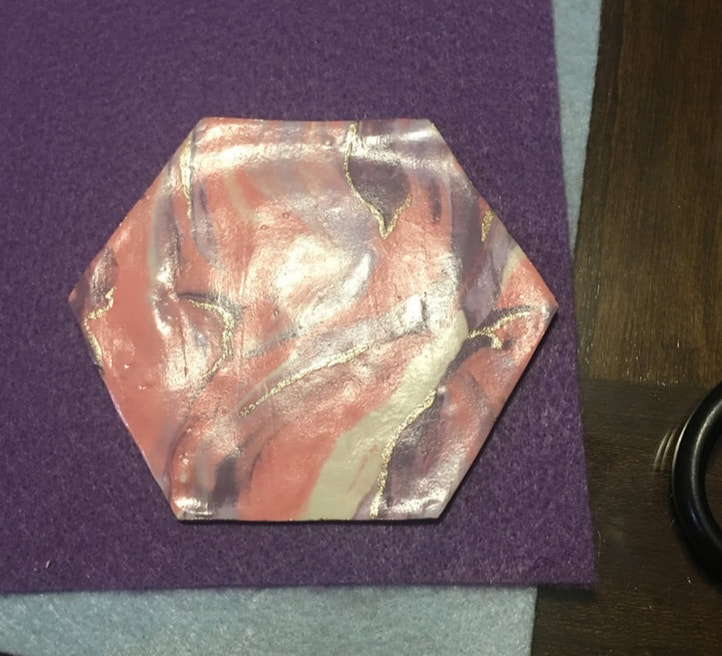
To get the marbled look, I started twisting and folding the different colors of clay together until they were intertwined, but the colors had not yet started to bleed into one another. 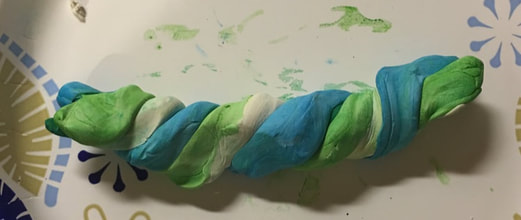 Then I put the clay between two sheets of parchment paper and rolled in out using a rolling pin. Once I had it rolled out thin enough (about ¼ inch), I used a paper template of a hexagon that I had printed out to cut out the coaster shapes. My hexagon was about 4 inches wide and tall, but you could make your coaster smaller or bigger if you wanted to. 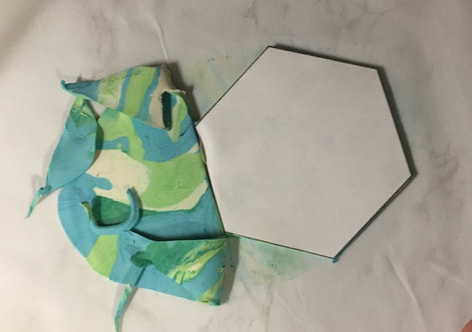 I was able to make 2 blue/green coasters and 2 pink/purple coaters and then use the scraps to make a fifth multicolored one. I cooked the clay according to the direction and then let it cool for a few hours so it could harden completely. Once the coasters were hardened, I used some fine sandpaper to sand away any rough edges on the sides or top of the coaster. Once I was done sanding, I went in with a thin paintbrush and some gold nail polish to create some gold accents in the marbled design of the coasters. I also painted the edges of the coasters with the gold nail polish as well just using the nail polish brush in the bottle.
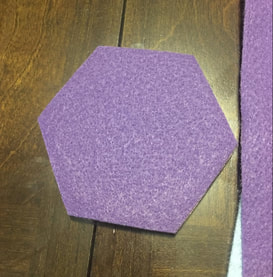
Once the gold nail polish was dry, I went over the top of the coasters with two coats of my favorite clear varnish to seal them and give them some nice shine. Here's a fun picture to show how shiny they are! 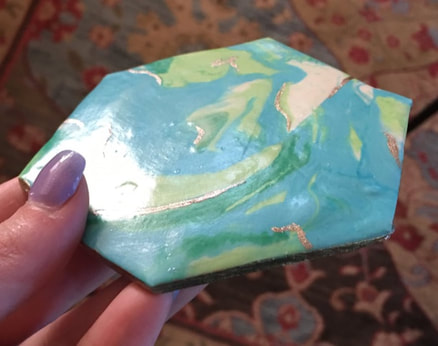 Once the varnish was dry, I got the glue gun heated up and glued the back of the coasters to some felt in a coordinating color and cut the felt away around the edges to give the coasters a nice soft base.
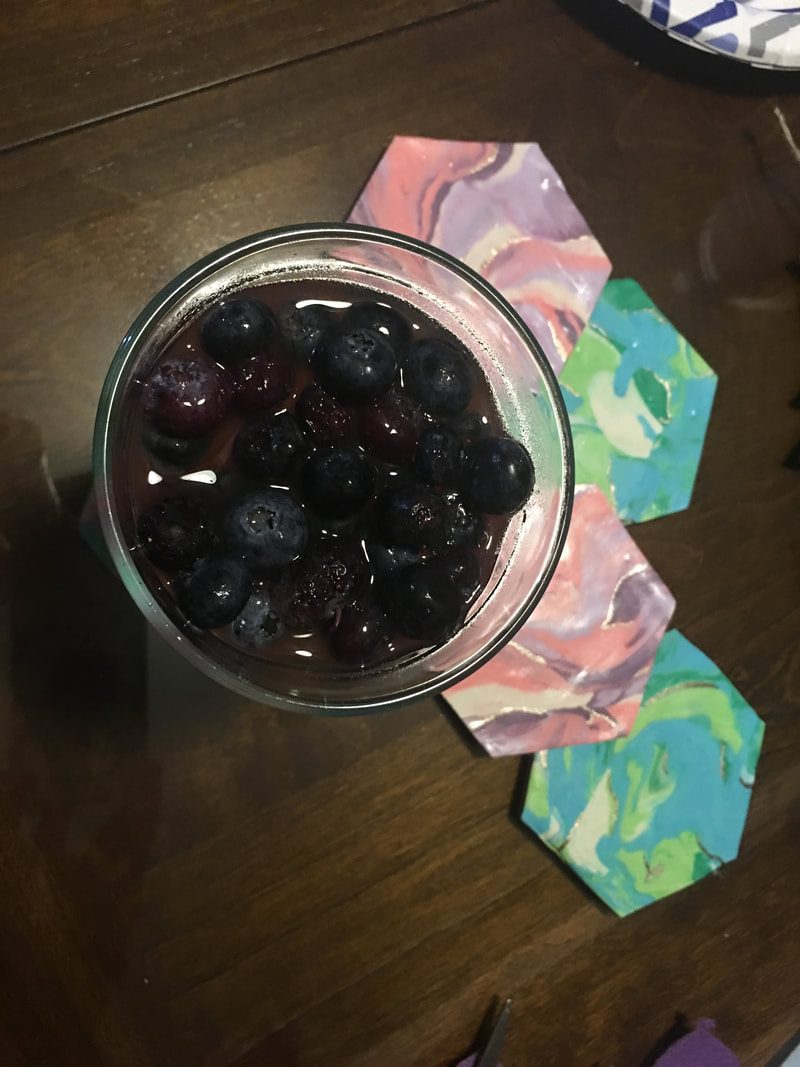
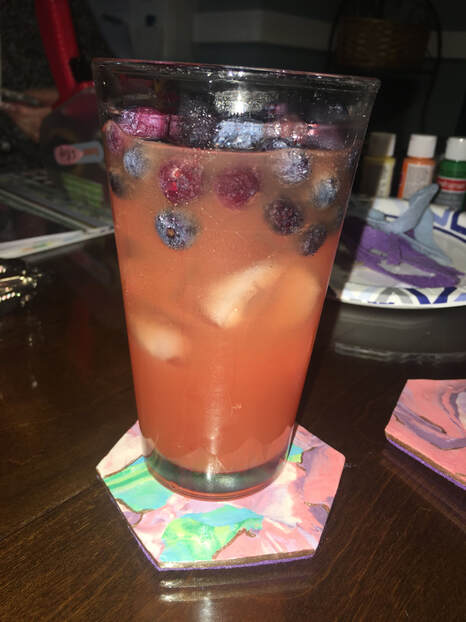
And here are the coasters are all done and in action! They were holding my delicious alcoholic beverage for the evening.
I really love how these came out, but don't think they are viable to make for craft fairs because of the work it took to just get 5 coasters. I may keep these for myself or give them as a gift.
Let me know what you guys think in the comments below! - Rebecca |
AuthorI am a 27-year-old crafter and baker from New Hampshire! Archives
July 2024
Categories |
 RSS Feed
Proudly powered by Weebly