|
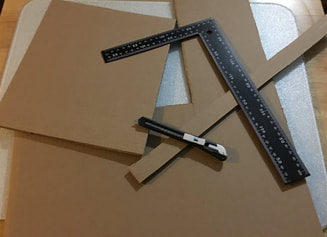
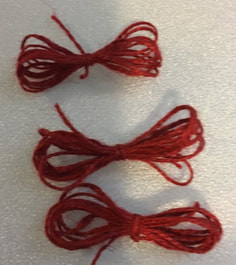
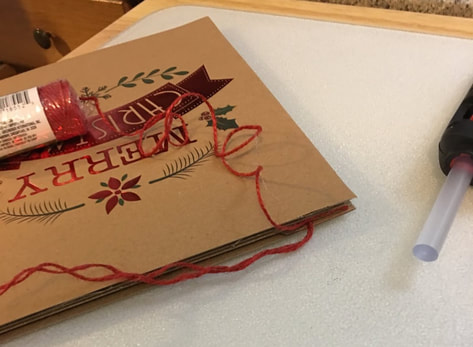
Hello friends – this is Suzanne, Rebecca’s momma. I’m happy to be back on the blog this week with a guest post. Today’s craft is a quick and easy one, perfect for some last minute Christmas decorating or even a sweet little homemade gift. Depending on what you have in your craft stash, this project could cost you as little as $1. There are some really adorable gift boxes in stock this holiday season at one of my favorite places, the Dollar Tree. When I saw this set with the “Merry Christmas” message on it, I thought it would make a great little décor piece. My plan is to use the image as the centerpiece of a hanging sign for my back door. As I was thinking about what to do, I pulled some other items out to have on hand –
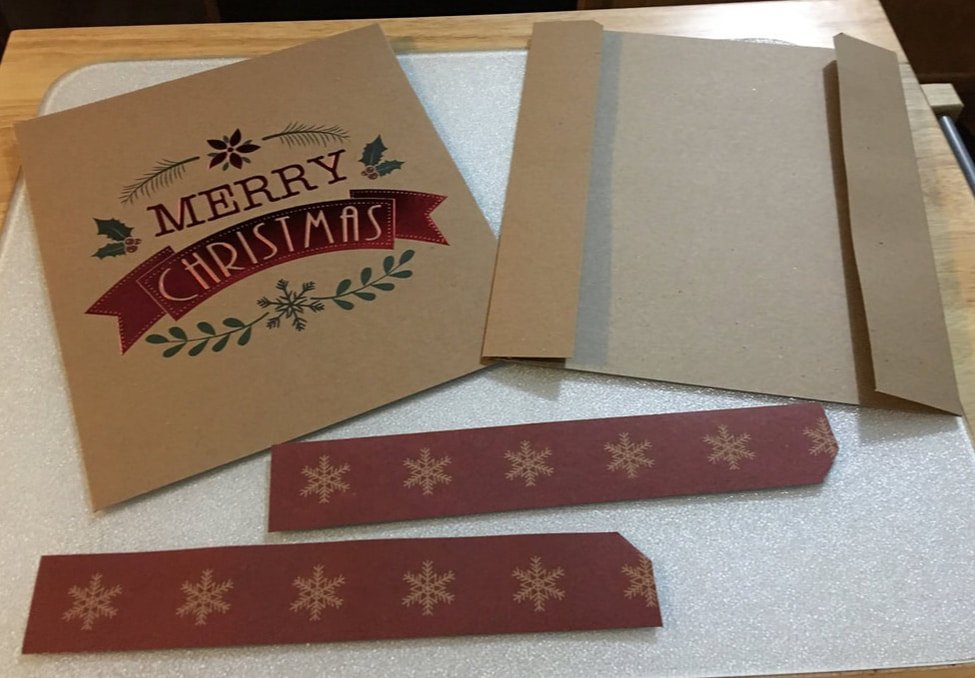
I started with the top half of the box, the one with the image on it. Using a guillotine cutter, I trimmed the box to center the image on it. I eyeballed it, but you can certainly measure and mark the box before cutting. If you don’t have a guillotine cutter or other cutter of some sort, scissors will get the job done. I then trimmed off the sides of the box because they had a delightful snowflake print on them. Finally, I trimmed the bottom half of the box to match the size of the top half. In retrospect, I should have opened up the sides of the top half of the box and trimmed those off first. I would then have had a bit more of the stripe of snowflakes to use on other projects, since it is so cute. Perhaps next time! Next, I cut a rectangle of corrugated cardboard (Amazon boxes, anyone?) that was just slightly smaller than the trimmed box. I will also need a thin piece of corrugated cardboard just slightly smaller than the snowflake strips. Let me take a moment to commend this metal angle ruler and box cutters from the Dollar Tree. The quality of both is excellent and I highly recommend them as very useful additions to your craft room. Now for the super simple assembly –
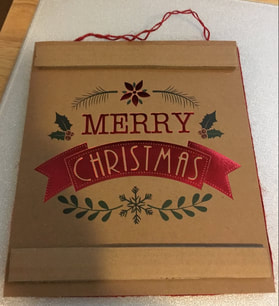
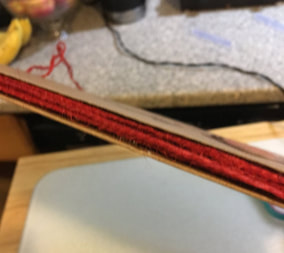
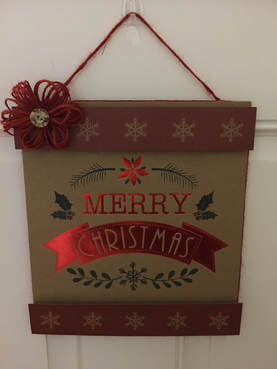
You could call this done at this point, hang it on your door and go on with your life. It’s cute, but I wanted to add a little more detail. To hide the raw edges of the cardboard, I wrapped a few rounds of the same red jute I used for the hanger into the groove created by the cardboard piece being slightly smaller than the two sides. A tiny drop of glue to start and to end holds everything in place. A word of caution – be sure that the two gift box pieces are adhered right to the edge of the cardboard piece or the jute will work itself between the gift box and the cardboard piece. Then I glued the narrow strip of the cardboard to the top and bottom of the sign, slightly in from the edge, and added the snowflake strip over that. The additional layer of cardboard gives nice dimension to the piece. I had initially thought to add a bow of some sort to the hanger, but none of the ribbons I’d pulled out was giving me the look I was going for. With the image and the snowflake strips, everything seemed a little too busy so I decided to go with the same red jute and make a little rosette. Wrap the jute around something – a box, a piece of cardboard, your hand – 6 to 8 times and tie in the center with another small piece of jute. Do this three times, then glue them together at the center, offset from each other. If you think of a clock face, lay one bundle at 12 and 6, lay the second one at 2 and 8 and the last one at 4 and 10. Add a button to the center to finish it off. I added the rosette to the top of the piece and it was done! I hung it on the back door, ready to greet guests to our home. Obviously, this is not a piece to hang where it will be exposed to the weather, but behind a storm door or on a porch or inside the house, it’s a super cute sign. Since the boxes come two to a package, you could actually get two signs out of one package. What a deal!
I wish each of you a very Merry Christmas and a crafty new year! See you soon. - Suzanne
0 Comments
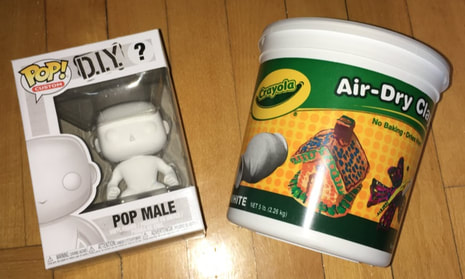
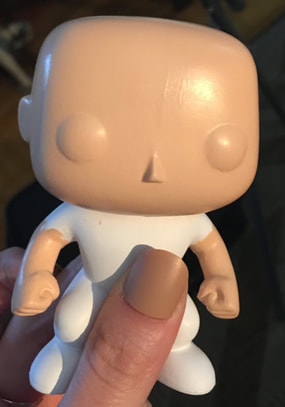
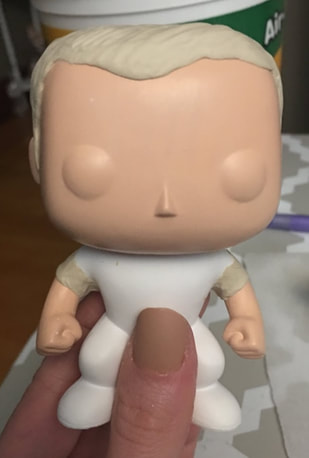
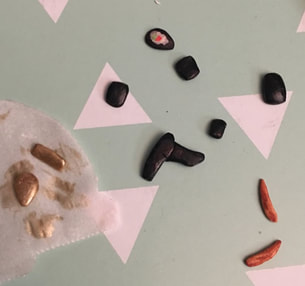
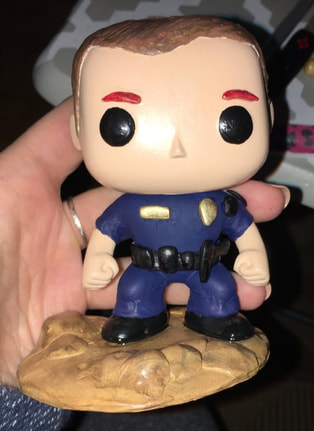
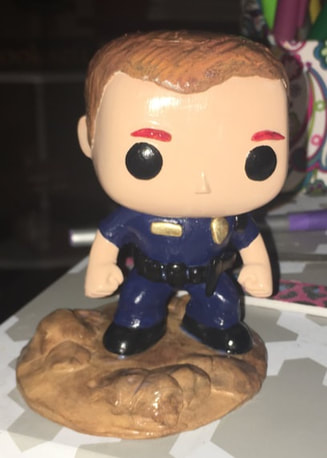
Hello crafty friends! This week's craft was a real labor of love. My boyfriend and I both love Funko Pop Vinyls (which are little action figure-type things made of all different tv and movie characters) and I thought it would be a great idea to get one that looked like him for Christmas. He is a police officer so I wanted to get one that looked like him in his uniform! First, I was going to get one made for him on Etsy because several shops do custom work like this, but the cheapest one I could find was for $85 and I'm stubborn so I decided I could do it myself for cheaper and it would also be extra special because I made it. I was a little scared because this is a kind of craft that is out of my normal area, but I gave it a go! First off I needed to buy some air dry clay and a blank Funko Pop. You can buy both a blank male and female figure on Amazon for less than $10 so that was easy! The first step was just washing off the Funko Pop with some soap and water and drying it off. We want to get him nice and clean before we give him a makeover! The next step was painting the skin that would be visible on the figure; I just bought an acrylic paint at the craft store that I thought matched my boyfriend's skin tone because I thought that would be easier and more effective than trying to mix together a color. After this it was time for the hair. I used the air dry clay for this, laying on different sections and shaping and texturing them until I got the look that I wanted. I also added some clay to give the appearance of pants bunching around boots and the arms of a short-sleeve short. I just wanted to give the little guy some more dimension! The picture below shows the sleeves and the hair! I let the clay dry overnight before I moved on to the next steps. I also made some smaller pieces that I wanted to attach to the figure later and let those dry as well. I made some eyebrows, badges, patches, a gun and other objects to put on the figure's belt. I used orange, black, silver, green, red and gold acrylic paints for these. Here is what they looked like painted and dried! So once the clay dried I was going to get started on more painting, but noticed that some cracks had appeared in the hair. I panicked for a moment, but no worries! I went over the cracks with some Superglue to fill them in and seal everything, let that dry, and then could get to painting! I painted the hair a brownish color and then added some highlights with red and orange since my boyfriend is a ginger! I painted the clothes blue to match the color of his uniform and painted the eyes and boots black. After that dried I added another piece of air dry clay around the figure's middle to make a belt. Police officer's wear a belt that holds their gun, handcuffs, etc. so I wanted to make the little figure as realistic as possible! Once that dried I painted it black. I also used oven bake clay to make a little stand for the figure to keep it more stable and painted that different shades of brown. Then it was time for assembly! I used some of my favorite substance ever, Superglue, to attach all the small pieces to the guy and used some stronger Gorilla glue to attach him to his stand. After some final paint touches, I put on a few coats of varnish and he was done. The varnish just gave him a little bit of shine! I was worried that this was going to be a project that was too hard for me, but I am so proud of this little guy! This was technically a Christmas present for the boyfriend but I already gave it to him because I couldn't wait! He loved it! Leave a note in the comments if you've ever tried a complicated craft project and totally nailed it :)
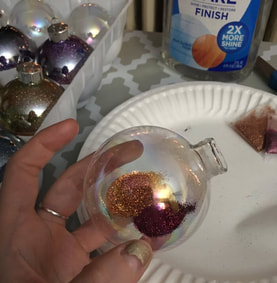
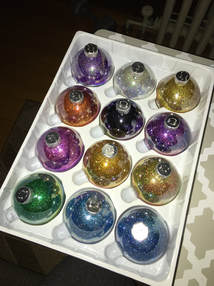
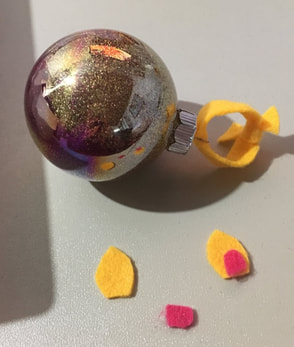
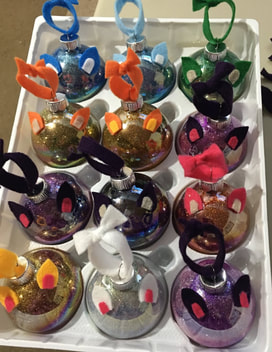
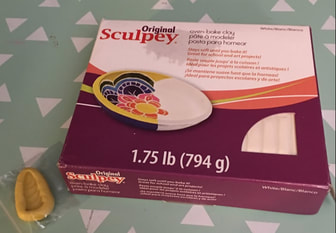
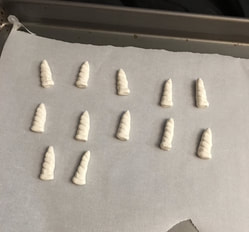
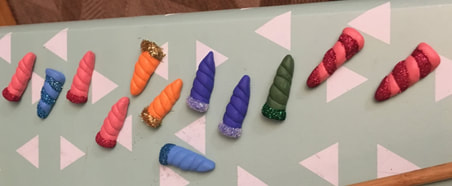
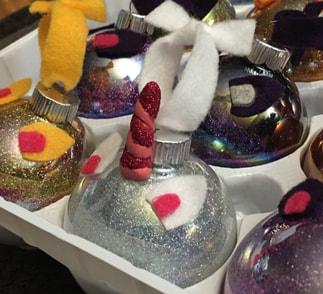
- Rebecca Hello people! So last week was a busy week for me which is why there was just a quick little blog post, but today we are back in action with a really cute project that was a lot of work! So sit back, relax and enjoy the many steps of this super punny craft: unicornaments! I had in my crafty stash some clear glass ornaments and decided it was time to do something with them. The first step to these ornaments was some glitter and floor polish. Yes. you heard me right. Floor polish. I learned this trick from my mother! Take off the metal attachment that holds the hanger to the ornament, pour a small amount of floor polish into the ornament and swish it around until all of the inside is covered with a thin layer. Then siphon in some glitter and twist the ornament around until glitter is caught in all of the polish. Tap out to extra glitter, replace the top of the ornament and let it dry! Below are all 12; I decided that unicorns could be whatever they wanted to be and went for all different colors. The next step for these ornaments are the hangers and the little unicorn ears. I went with felt for both of these; I cut out felt strips to string and tie through the metal loop at the top of the ornaments and then cut the ears for each unicorn out of the same felt to match. I then cut out some smaller pieces of contrasting felt to work as the "inner ear." I attached the 2 felt pieces together with hot glue and then stuck the whole ear piece to the glass ornament with some high strength gel Gorilla Glue. I think superglue would have also worked, but it has such a small window before it dries and I wanted to have a few minutes to be able to move and reposition the ears before they were stuck on for good. Once the ears were all set, the next step was where things got a little more complicated: the unicorn horns! I was originally going to buy the little horns already made on Etsy, but all the ones I could find were about 2 inches long and I needed something smaller given the size of the ornaments themselves. So I ended up buying a small unicorn horn mold off of Etsy as well as some oven-bake Polymer clay to make the horns out of. If you want the mold I used you can use the link below to check it out on Etsy. I was so cheap and great quality! https://www.etsy.com/listing/577840971/unicorn-horn-silicone-mold-4-fondant?ga_search_query=unicorn&ref=shop_items_search_3 I think technically the mold was meant for Polymer clay to be baked in, but I am impatient and didn't want to wait for each horn to cook and cool before I moved on to the next one. So I just used the mold to shape each horn and baked them on a piece of parchment paper on a baking tray according to the directions for the clay. After the horns cooled, I painted them a wide array of colors using some basic acrylic craft paint. After several coats of acryclic paint were dry, it was time for more of my favorite substance: GLITTER! Using a small a paintbrush, I painted some paper glue onto specific spots on the horns and sprinkled glitter over them quickly so that the glitter would only stick to the glued spots. Like so: So I haven't fully finished glueing all the adorable little horns on the ornaments yet, but did try out one to see what it would look like! This process took a combination of 2 types of glue: superglue and more of the gel Gorilla glue. I put a sizable dot of Gorilla glue on the ornament because it will dry clear and very strong, but then also squeezed a tiny bit of superglue to keep the horn from sliding off the surface of the ornament before the slow-drying Gorilla glue took hold. Here is one all completed! I think as I continue to finish the rest of these ornaments off, I may go crazy and add a little more glitter to the base of the horn where it connects to the glass. What do you guys think? Leave a comment letting me know if you think these unicorns need a little more or if they are finished once I attach the horn! Overall these were quite a bit of work, but are coming together so well. Who doesn't love unicorns right? Here's a little hint for next week's blog: a craft made specifically for my boyfriend!
- Rebecca |
AuthorI am a 27-year-old crafter and baker from New Hampshire! Archives
July 2024
Categories |
 RSS Feed