|
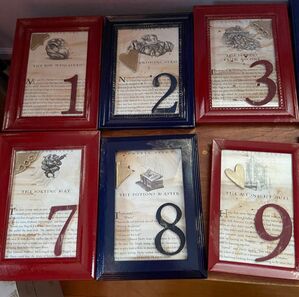
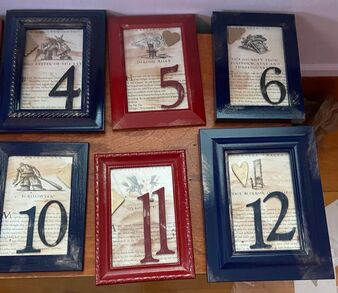
Hello everyone! I am finally back with some wedding centerpiece content! I ended my last post on the centerpieces with some frames that need more painting and some pages and numbers that needed to be added to the frames. We finally started getting some spring weather so I was able to give all of the frames another two coats of paint to make sure they were fully covered. Once they were dry, I took some gold paint and dry brushed it onto the frames lightly so that some of the designs and patterns on the frames would be highlighted. 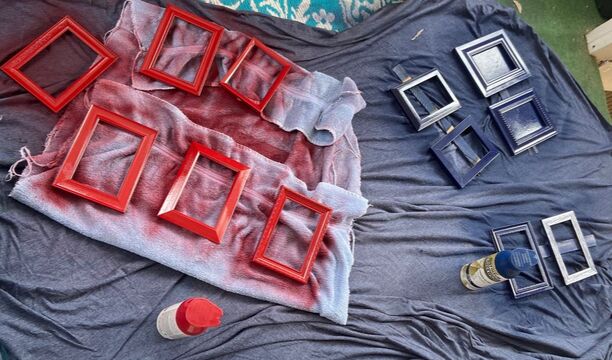 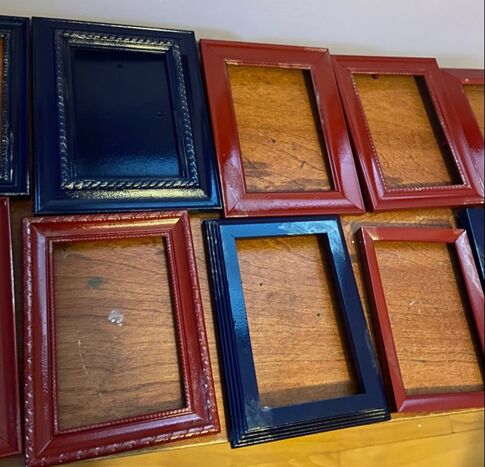 Then, I went ahead and added the pages in, making sure that the colors alternated. So table number one was in a red frame, two was in a blue frame, three was a red frame and so on. If you are doing a craft similar to this, I would highly recommend somehow keeping track of which piece of glass goes with which frame. Although these frames were all the same size, the pieces of glass are all a bit different so it was super fun to painstakingly try each piece of glass in each frame until I got the right ones. Once the pages were in the frames, I then hot glued the numbers and additional gold accent pieces to the front of the glass itself to provide some fun dimension to the frame. I am SO proud of these and love how they are a fun Harry Potter touch to the wedding without being in your face.
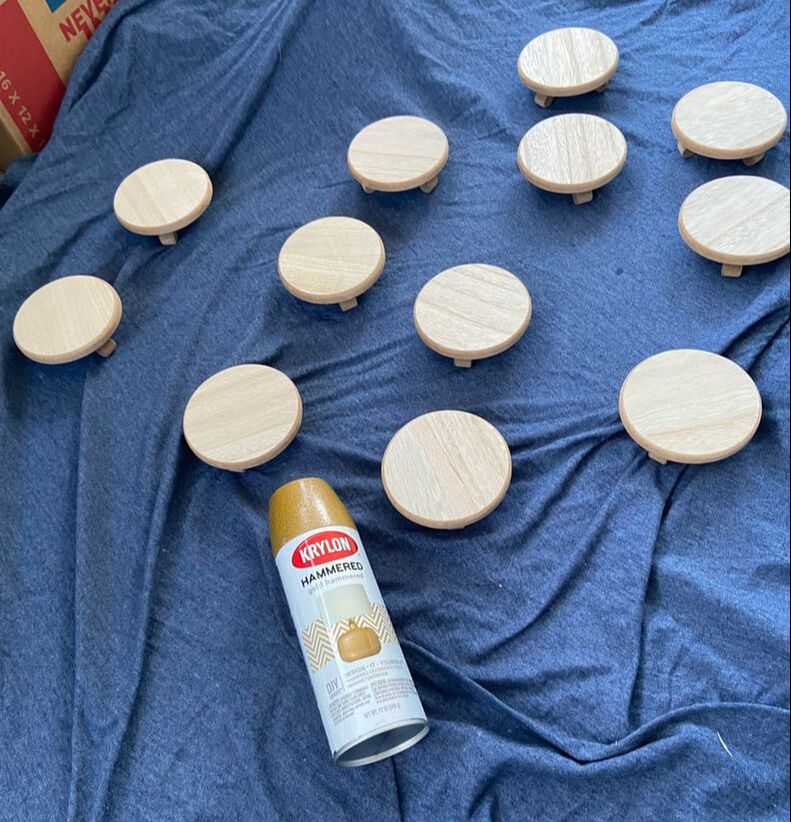
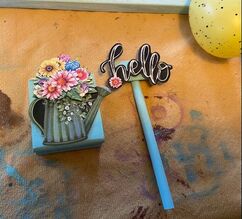
I also made a similar frame to go on Sean and I’s sweetheart table; we are just going to have a table for the two of us rather than a big, long head table so I wanted a sign that was similar in style to the table numbers. Since the table numbers featured some Harry Potter pages, I felt that it would be fun to have a nod to Star Wars in our own table sign as Sean is a big Star Wars fan. Over our years together he has been slowly converting me into a Star Wars fan while I have been doing the same to him with Harry Potter. For this sign, I just used an 8 ½ by 11 frame I happened to have and painted the frame, as well as some little decorations, gold.  I printed out a paper with some iconic Star Wars love quotes to put into the frame and aged it a bit with some brown paint as I had with the other pages. Finally, I painted a wooden R and S with some burgundy and navy blue and we were ready to assemble. This frame has a similar feel to the table number, but on a larger scale. 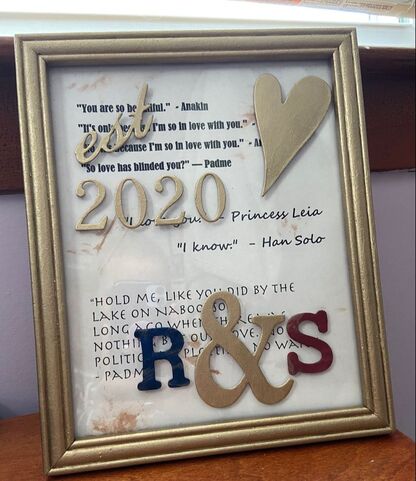 Finally, I have also been working on painting some small little risers that will be part of the overall centerpiece. I got these little wooden stands, which I believe are supposed to be individual cupcake stands, in the dollar section at Target and I just felt like they would be a nice touch if a vase or candle needed to be elevated slightly in the final centerpiece. I went ahead and spray painted them gold. Once they had dried, I felt that the spray paint was a bit too much of a yellow-ish gold as opposed to the champagne gold that I had been using to paint other things so I went ahead and sponged on a bit of the champagne gold paint onto the stands to mute them a bit. And here they are!
These centerpieces are really coming together! Let me know what you think in the comments below!
- Rebecca
3 Comments
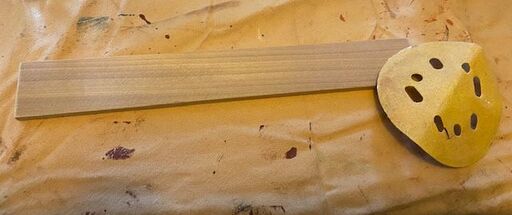
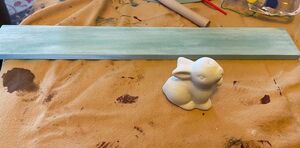
Hello friends! This week we are here with a quick Easter craft. I have made progress on the wedding centerpieces and was planning on sharing that with you guys this week, but my mother and I made an Easter craft recently and it seemed like it would be better to share that before Easter came and went! This blog will not be so much of tutorial as people are not likely to have the same things in their crafty stash, but this will hopefully show you how easy it is to whip up something for spring. This type of craft can be customized to be more Easter-focused or more generally springy if you are not an Easter celebrator. Here is what my mother gathered up from her stash for us to use:  We have some pieces of wood, little ceramic bunnies, plastic eggs and carrots from the Dollar Tree, some paint, hot glue and stickers. We also went back into the stash to augment with some faux grass, stickers and other wood bits. I started off by sanding my wood and then painting it a whitewashed light blue. I also painted my little bunny a warm white rather than the greyish white that the ceramic originally was.
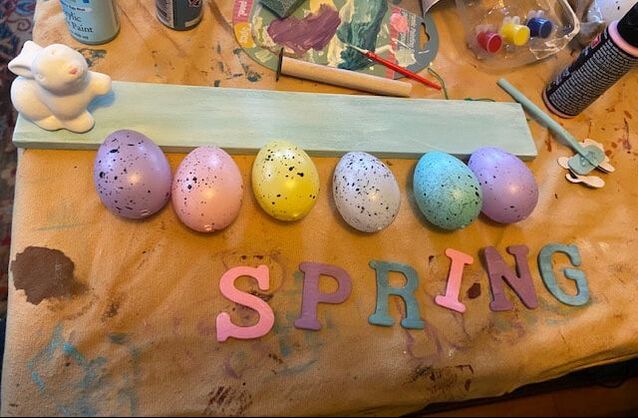
I decided that I wanted my sign to be for spring in general as I don't have much spring decor at the moment. I used some wooden letters that I painted pastel colors, as well as some spring stickers that I propped up on wooden pieces. I also painted my bunny's nose pink because he needed a cute nose!
I hot glued the painted letters to the eggs and then glued the eggs standing straight up on the wood. I then hot glued the little bunny and additional wood/sticker pieces to either end. Then for a finishing touch I hot glued some faux grass around the bottom to cover up any other glue globs. My mother went a different route and used rub on letters on her eggs and gave her wood and bunnies a brown wash for a more country feel. And here they are! I love how my mother and I used fairly similar supplies and came out with two different decor pieces. Mine is the SPRING sign and hers is the HAPPY EASTER sign. Go raid your stash and see what you can make for spring! - Rebecca 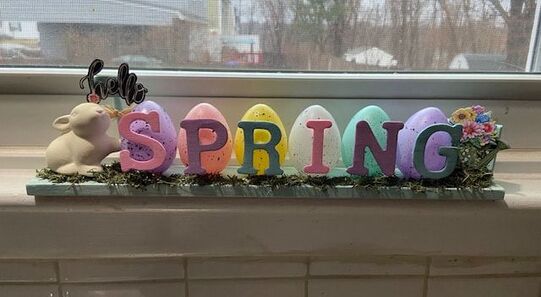 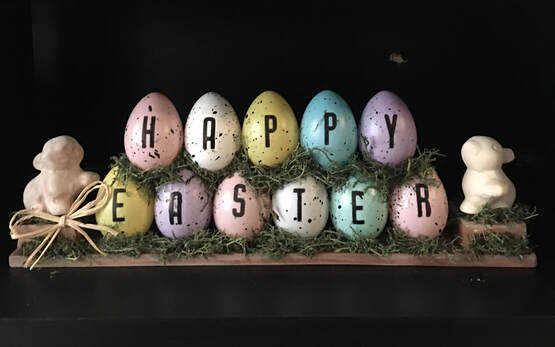 |
AuthorI am a 27-year-old crafter and baker from New Hampshire! Archives
July 2024
Categories |
 RSS Feed
Proudly powered by Weebly