|
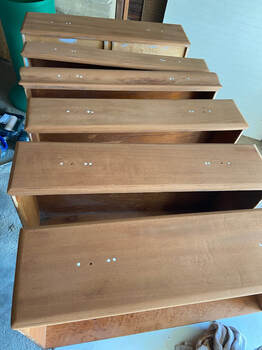
Hello everyone! How are you today? You might be over there thinking, Rebecca didnt you redo your dresser like a year ago? If so, yes. You are correct. As you may recall, I redid my dresser last year and switched it from an antique style to a fun and colorful dresser with mismatched knobs. I really do like how the dresser turned out with its colorful drawers and knobs, but friends I must admit that once I put it back in my bedroom I did not like it in the space. The dresser was fun and quirky and would have looked great in my craft room, but once back in the bedroom it looked very childish. But alas, I lived with it for a year. As you might have seen in my last post about acrylic pour painting, my fiance, Sean, and I are redoing our bedroom completely and I figured this was the perfect excuse to redo this dresser yet again. This time I decided on painting the dresser brown to somewhat match Sean's dresser and keeping the mismatched knob look, but with a more grown-up and cohesive feel. First step was sanding down all of the drawers. Last time I redid the dresser, I just hand sanded them lightly before repainting. This time, I wanted to sand the drawers down completely and get them down to the wood. There were about three layers of paint on the drawers so it took a while to sand them down, but my mother and I tackled the project and got them all sanded over the course of two Saturdays. 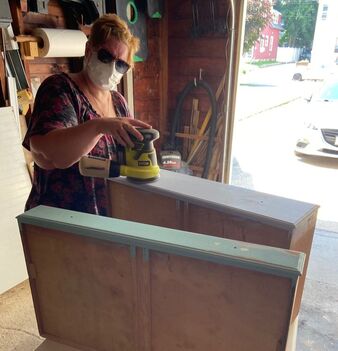 The drawers each had a decorative beveled edges so while sanding down the front we also sanded down these bevels to give the drawers a cleaner, more modern look. As I mentioned above, I wanted to keep the mismatched knob look, but did buy a pack of 6 gold dresser knobs on Amazon so that there was some consistency across the dresser. I also used some of the knobs I already had which fit the vibe I was going for.  Once the drawers were sanded with both coarse and a fine grit sandpaper, it was time to paint. I was originally going to buy some semi-glass brown paint, but then my mother and I found a random can of brown paint from 2014 in the basement that still looked fine so I went with that! In the photo, the painted drawers look almost grey, but in person the color is a cool-toned brown.
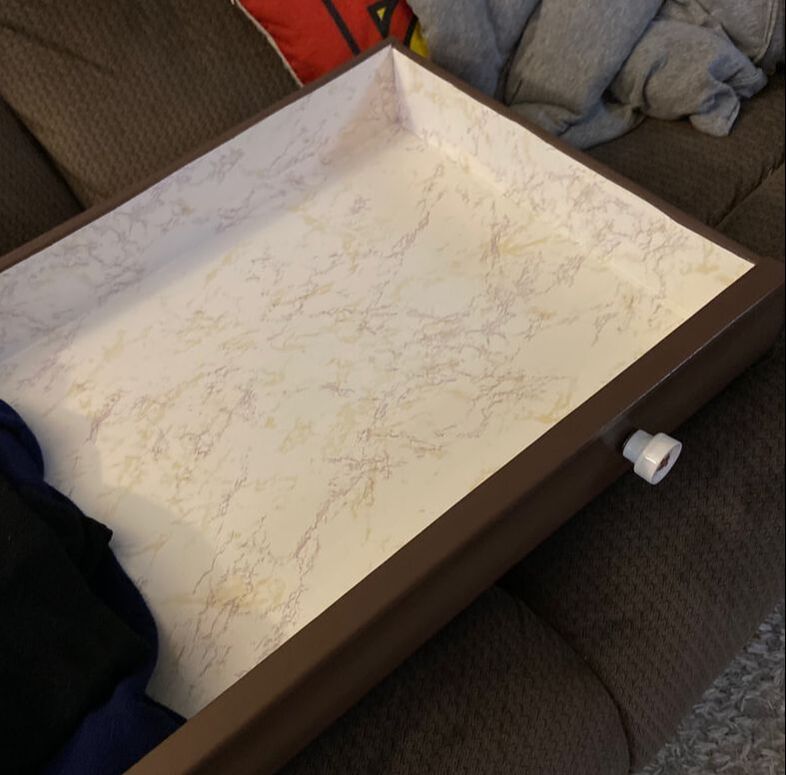
Since I did not end up getting a gloss paint, I bought some water-based polyurethane to seal the drawers. Last time I redid my dresser, I used non-glossy paint which I did not seal and it has been a nightmare to clean. I would highly recommend either using a gloss paint or sealing your paint on a piece of furniture that will be used often. The polyurethane also helped to make the brown look a bit warmer and less grey which I liked. 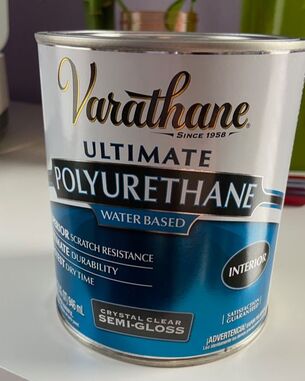 After the drawers were dry, It was time to line the insides and add the knobs back on. I did some complicated math (well, complicated for me) to find out how many square feet of adhesive shelf liner I would need to ensure I bought enough. Friends, I would like to tell you that it was easy to do the shelf liner. That would be a lie, though. I found it very complicated to cut the right sized pieces and get everything lined up and this ended up taking me a few hours. But when it was done, I added the knobs back on and we were done! For now.
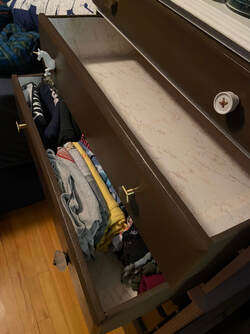
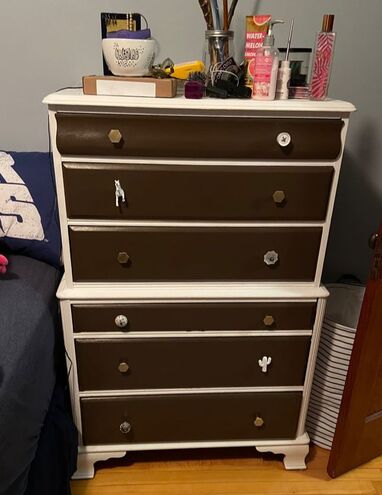 I was pretty convinced that I was going to paint the base of the dresser brown as well, but after my fiance mentioned about 5 times that he thought it looked nice with a white base, I decided to consider it and ended up deciding that I like it too! I will be sanding down and repainting/polyurethaning the base as I did it poorly before, but it will look fairly similar to the picture you see above when done, so it probably will not warrant a second blog about it!
This dresser redo and the acrylic pour paintings from my last blog are part of a larger bedroom redo, so next blog will likely be a little summary of everything that we did for the makeover. What do you guys think of this dresser redo? Let me know in the comments below! - Rebecca
2 Comments
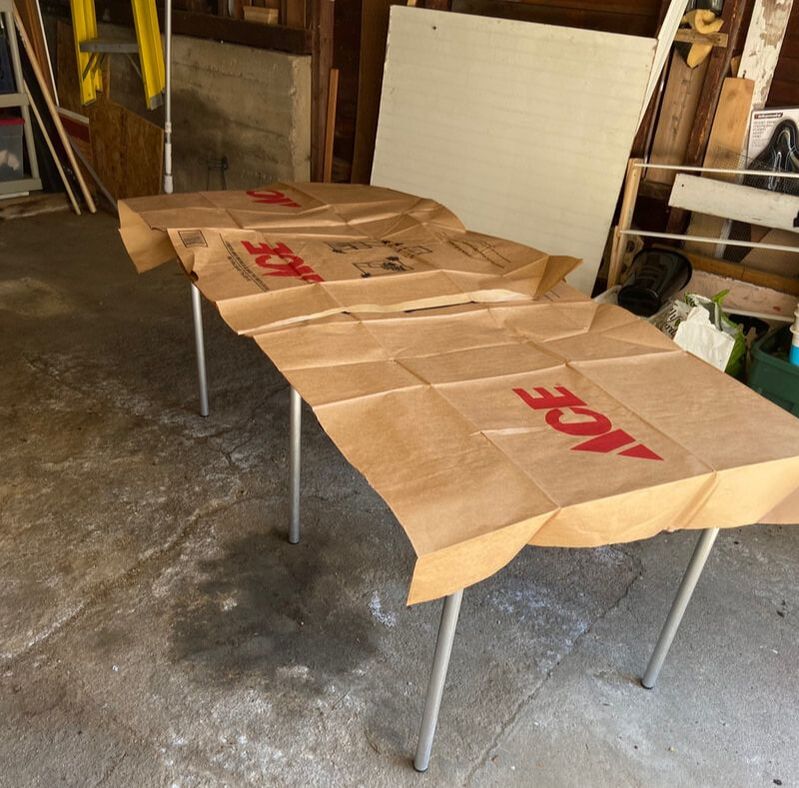
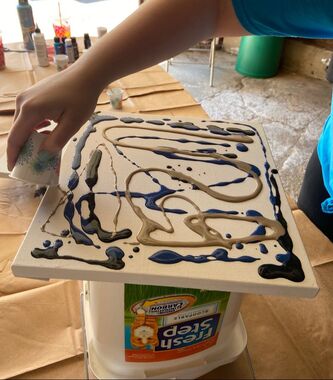
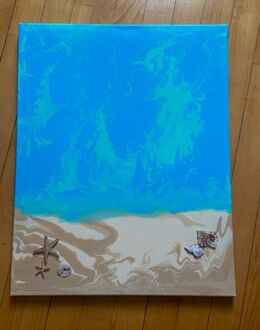
Hello everyone! I hope that you are doing well. Today, I want to share a craft that I am SO excited about: acrylic pour painting. If you have never heard of this type of painting before, it involves thinning out acrylic paint and pouring it over a canvas to get a very abstract pattern that looks a bit like marble. I did much internet researching before attempting this craft, but was still pretty worried that it was all going to go poorly. To start off, for this craft you need a canvas (or two), some gesso, some paint thinner stuff (more on that later), and acrylic paint or color. I also added a clear coat of acrylic spray sealer on my projects once they were done, but that is optional. I would highly recommend doing this craft outside. I am the queen of doing messy things inside, but even had to admit that this craft was not suitable for the indoors. I used two 12 by 12 canvases for this craft and covered them both with 2 coats of clear gesso. According to the internet, this helps the paint to stick better as it is pouring so I did what I was told. Once the gesso on my canvases had dried, I set up my outdoor acrylic pour station, with the help of my mother.
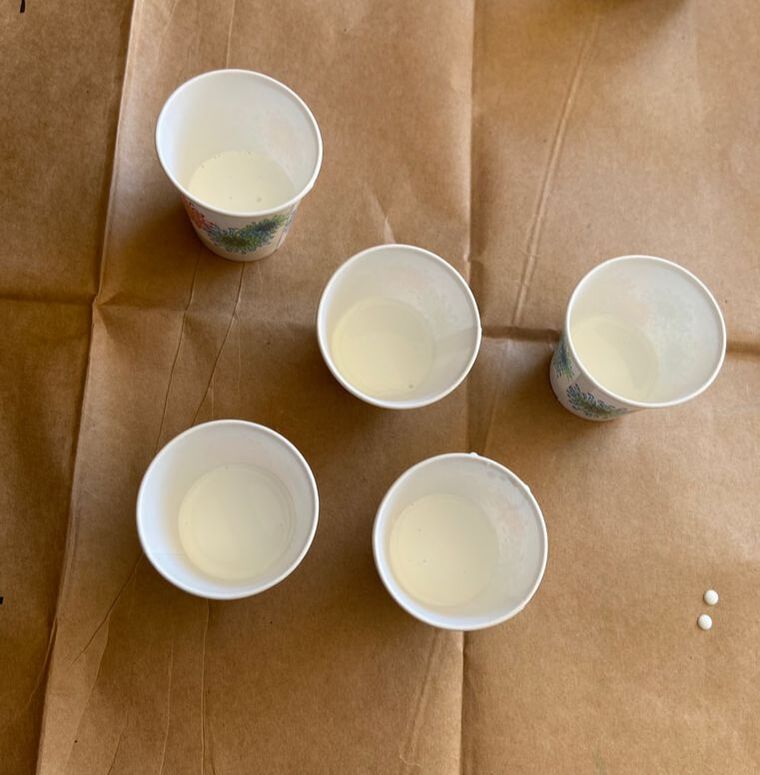
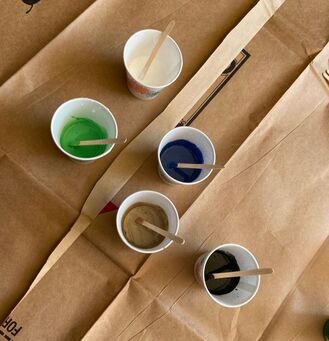
I would also recommend laying the canvases on something so that they are lifted off the work surface. This allows the paint to drip off the side and not stick your painting to the table! When it got to the paint mixing step, I must admit that I went a bit Rebecca and did not measure anything. I did, however, listen to the internet and buy "Golden GAC 800 low crazing extender for pouring acrylic colors" which was very highly recommended by many. This is the paint thinner I was talking about above. You mix it with your acrylic paint or pigment and it allows it to spread and pour more smoothly. I used basic acrylic paint that you buy in little bottles at the craft store, but you could also use acrylic pigment or color, which I assume would be stronger and therefore you would need less of if. I filled little cups with a good pour of "low crazing extender" and then added in a good squirt of each of my paints and mixed each together.
Once my paints were ready, I poured the paint onto the canvas as evenly as possible. I mixed only enough paint for one canvas as it seemed easier to do one at a time.
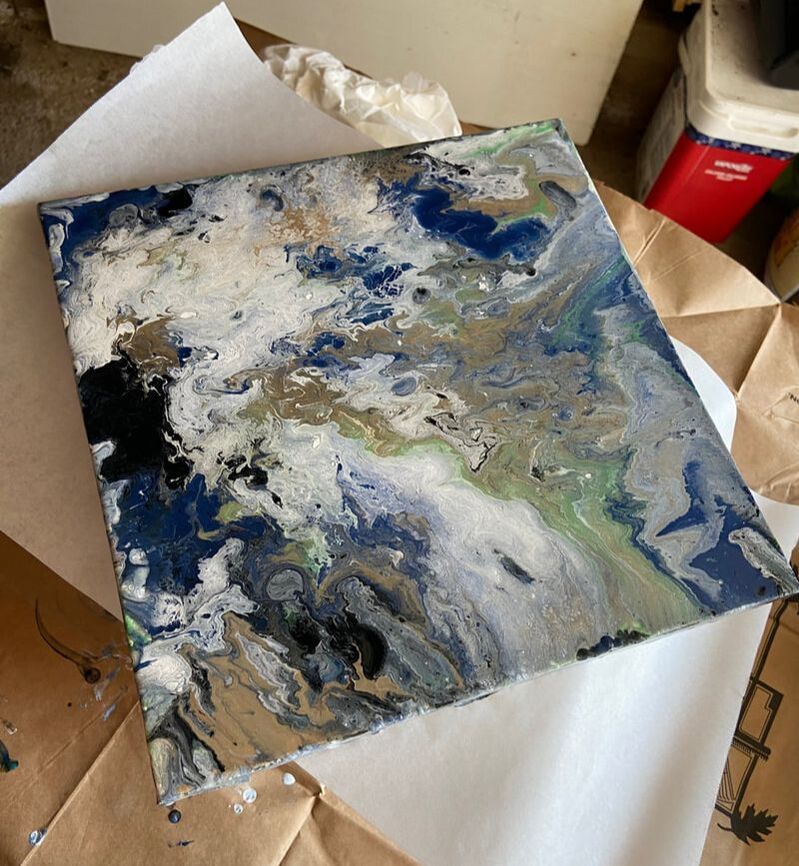
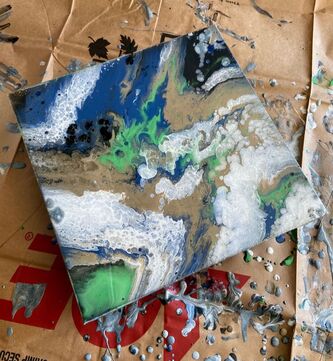
Once the paint had all been drizzled over the canvas, it was time for the fun paint. Time to lift the canvas up and let the paint blend and pour! I would recommend wearing gloves for this. I did not and there was much paint on my hands. 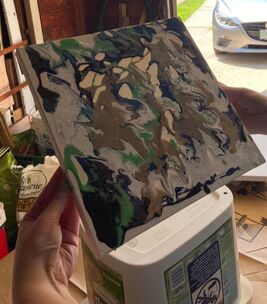 For this part of the process, it is really up to your discretion. You can move the paint around as much or as little as you want to get your desired look. I would just recommend making sure you have enough paint so that it can drip over the edges of the canvas fully as I think that looks more finished. I had a harder time making the edges look clean on my first try and made sure to mix up a bit more paint for my second canvas. Here they both are!
The painting on the left was my first attempt and on the right is my second attempt. On the second, I definitely had more paint to work with so the colors were able to flow a bit freer and not get quite as muddled as on the first painting. Honestly, I am really happy with both though! I let them each dry for about 24 hours and then covered with a few coats of acrylic sealer. I made these paintings specifically for a makeover that my fiance and I are doing for our bedroom (more blogs to come about that). Here is the gallery wall I have in mind, including the acrylic pour painting and a few other pieces. 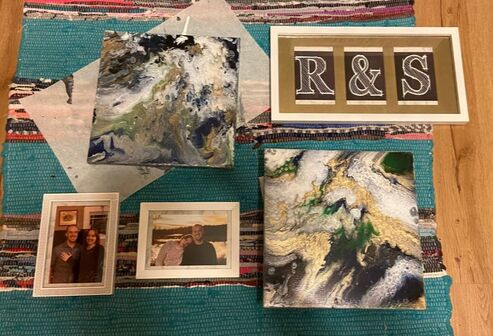 Let me know what you guys think about this painting technique in the comments below. Would you ever give it a try?
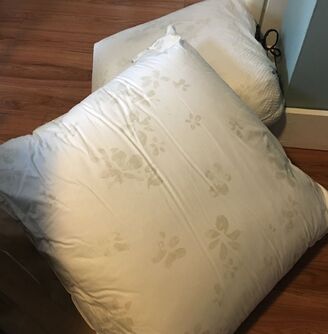
- Rebecca Hello Friends – It’s Suzanne, Rebecca’s Momma, guest blogging this week. Today, we are going to talk about a little sewing project I recently completed for a friend who asked me to make her some pillow covers. I am not a seamstress by any stretch of the imagination, but I have a sewing machine, know how to thread it and can sew straight lines. I also think I can figure out how to do anything, so I said I’d give it a go. My friend provided the pillow forms (26 inches square) and the end of a bolt of fabric with which she’d already had a bench covered. She wanted the pillows to match.
There were a couple of things I knew going in to this project. First, I wanted the covers to be removable for cleaning and, second, I did not want to have to learn how to put in a zipper. I thought about how pillow shams for beds often have a crossover opening in the back, so that’s what I decided to do. This is a very straightforward way of making a very simple cover and is adaptable to any size pillow. I’ll describe my process and you can easily replace my measurements with your own for the size pillow you have. I’d venture to say that you could even use a glue gun with glue sticks suitable for fabric (there is such a thing – I just googled it!) rather than sewing. First, figure out the size of your pillow. As I mentioned, mine are 26 inches square. Check the depth of your pillow as well. If it is very plump, you’ll need to figure the thickness of it into your measurements as well. For the width of your fabric, you will need a piece the width of the pillow, plus about one inch for every two to three inches of the thickness of the pillow, plus an additional inch for the seam allowance. For me, this was 28 inches. The length of the fabric will need to be 2.5 times the length of your pillow. For me, this was 65 inches. Then, turn a small hem along one of the short ends of your piece of fabric. This will end up being the upper side on the crossover opening.  Next, fold your fabric with the good side in, roughly in half, but with the two short ends overlapping each other. The hem you just sewed should be under the end with the unsewn sort end, so that it ends up on top when you turn your cover right side out. You are trying to make the long length of the fabric the size of your pillow. In my case, I have square pillows so I folded my sandwich of fabric diagonally to make sure I had a square. 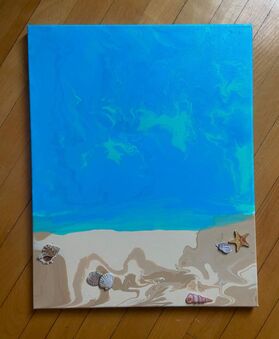 Next, pin the open edges so they don’t shift and sew straight from one end to the other. Remember, you’ve added an inch for the seam allowance, so try to stay about ½ inch in from the edge of the fabric. Sew the other open side straight from one end to the other. Now you can turn the cover right side out through the opening left by the two short ends overlapping each other. Use a chopstick or an unsharpened pencil to push the corners out square. Stuff that pillow form in through the overlapping opening and you are done. Easy peasy, lemon squeezy!
Sewing does not need to be intimidating. Most household items, like these pillow covers or curtains, can be made with just a few short, straight seams. I hope you give it a try. 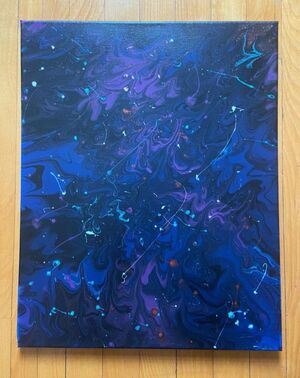 What sewing projects have you attempted? Let me know in the comments below!
- Suzanne |
AuthorI am a 27-year-old crafter and baker from New Hampshire! Archives
July 2024
Categories |

 RSS Feed
Proudly powered by Weebly