|
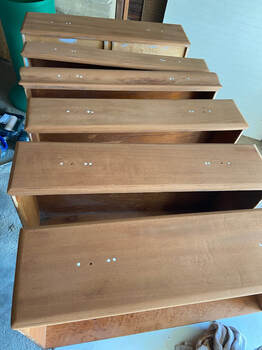
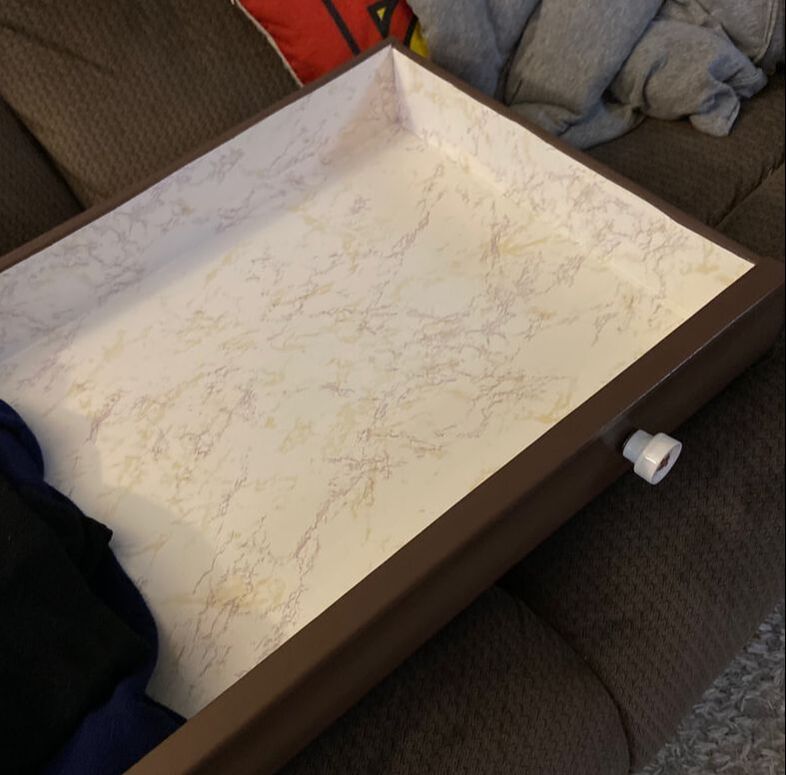
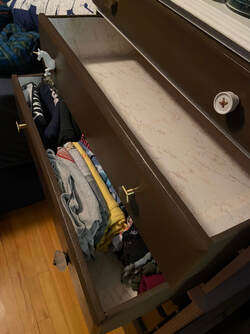
Hello everyone! How are you today? You might be over there thinking, Rebecca didnt you redo your dresser like a year ago? If so, yes. You are correct. As you may recall, I redid my dresser last year and switched it from an antique style to a fun and colorful dresser with mismatched knobs. I really do like how the dresser turned out with its colorful drawers and knobs, but friends I must admit that once I put it back in my bedroom I did not like it in the space. The dresser was fun and quirky and would have looked great in my craft room, but once back in the bedroom it looked very childish. But alas, I lived with it for a year. As you might have seen in my last post about acrylic pour painting, my fiance, Sean, and I are redoing our bedroom completely and I figured this was the perfect excuse to redo this dresser yet again. This time I decided on painting the dresser brown to somewhat match Sean's dresser and keeping the mismatched knob look, but with a more grown-up and cohesive feel. First step was sanding down all of the drawers. Last time I redid the dresser, I just hand sanded them lightly before repainting. This time, I wanted to sand the drawers down completely and get them down to the wood. There were about three layers of paint on the drawers so it took a while to sand them down, but my mother and I tackled the project and got them all sanded over the course of two Saturdays. 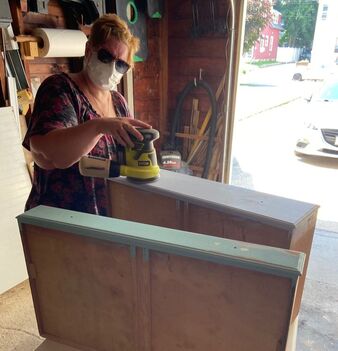 The drawers each had a decorative beveled edges so while sanding down the front we also sanded down these bevels to give the drawers a cleaner, more modern look. As I mentioned above, I wanted to keep the mismatched knob look, but did buy a pack of 6 gold dresser knobs on Amazon so that there was some consistency across the dresser. I also used some of the knobs I already had which fit the vibe I was going for.  Once the drawers were sanded with both coarse and a fine grit sandpaper, it was time to paint. I was originally going to buy some semi-glass brown paint, but then my mother and I found a random can of brown paint from 2014 in the basement that still looked fine so I went with that! In the photo, the painted drawers look almost grey, but in person the color is a cool-toned brown.
Since I did not end up getting a gloss paint, I bought some water-based polyurethane to seal the drawers. Last time I redid my dresser, I used non-glossy paint which I did not seal and it has been a nightmare to clean. I would highly recommend either using a gloss paint or sealing your paint on a piece of furniture that will be used often. The polyurethane also helped to make the brown look a bit warmer and less grey which I liked. 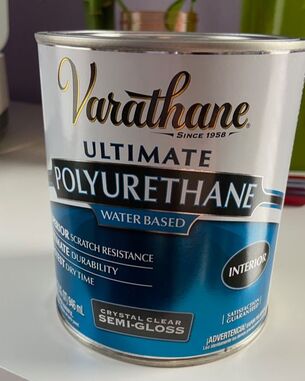 After the drawers were dry, It was time to line the insides and add the knobs back on. I did some complicated math (well, complicated for me) to find out how many square feet of adhesive shelf liner I would need to ensure I bought enough. Friends, I would like to tell you that it was easy to do the shelf liner. That would be a lie, though. I found it very complicated to cut the right sized pieces and get everything lined up and this ended up taking me a few hours. But when it was done, I added the knobs back on and we were done! For now.
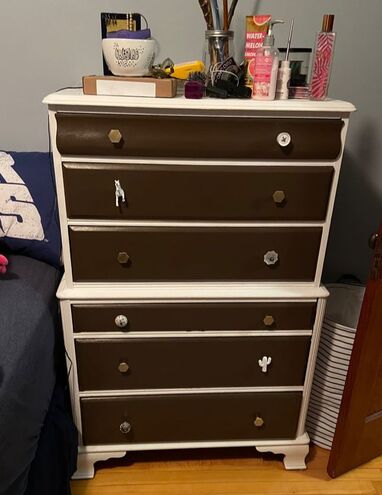 I was pretty convinced that I was going to paint the base of the dresser brown as well, but after my fiance mentioned about 5 times that he thought it looked nice with a white base, I decided to consider it and ended up deciding that I like it too! I will be sanding down and repainting/polyurethaning the base as I did it poorly before, but it will look fairly similar to the picture you see above when done, so it probably will not warrant a second blog about it!
This dresser redo and the acrylic pour paintings from my last blog are part of a larger bedroom redo, so next blog will likely be a little summary of everything that we did for the makeover. What do you guys think of this dresser redo? Let me know in the comments below! - Rebecca
2 Comments
Amanda
7/29/2020 10:13:03 pm
Looks great!! You and your mum are creative! Love you two so much!!
Debbie R.
7/30/2020 05:57:29 am
Great job girls! Leave a Reply. |
AuthorI am a 27-year-old crafter and baker from New Hampshire! Archives
July 2024
Categories |

 RSS Feed
Proudly powered by Weebly