|
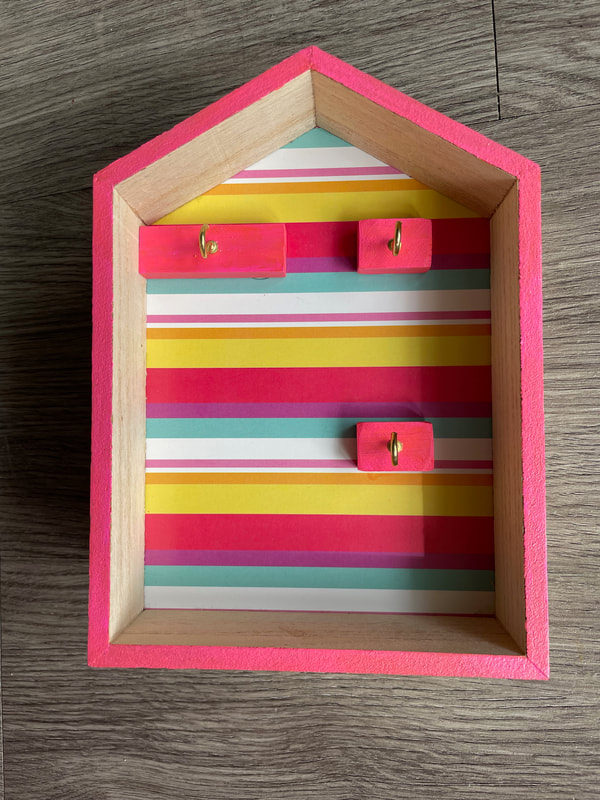
Hello friends! So I would love to be able to tell you that I got all the perpetual calendars completed, but alas that is not the case. The little trunks are still in progress but whenever those are completed and up on the Etsy shop I will let you guys know! So for today, I wanted to show some more in depth photos of the house calendars with some additional information on how I made them. For a refresher on the first steps to this project, you can check out part 1 here: perpetual-calendars-part-1.html So here is calendar one:
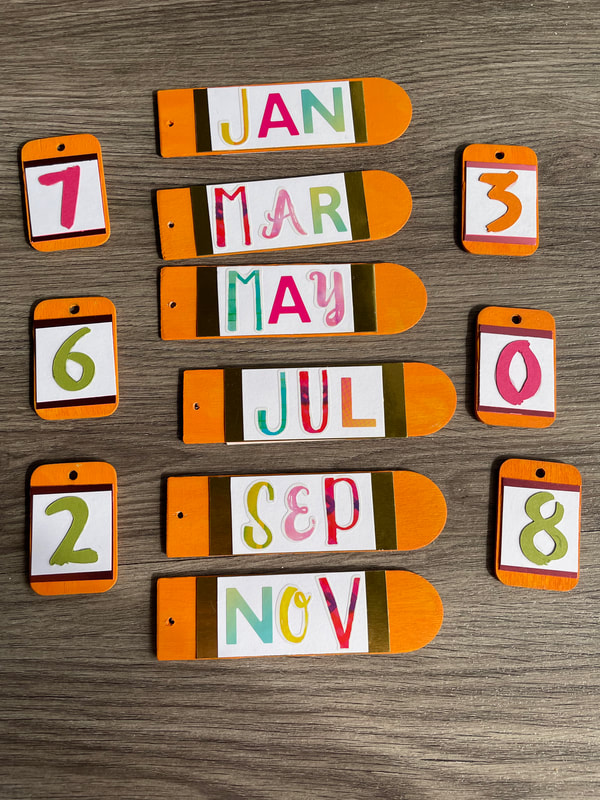
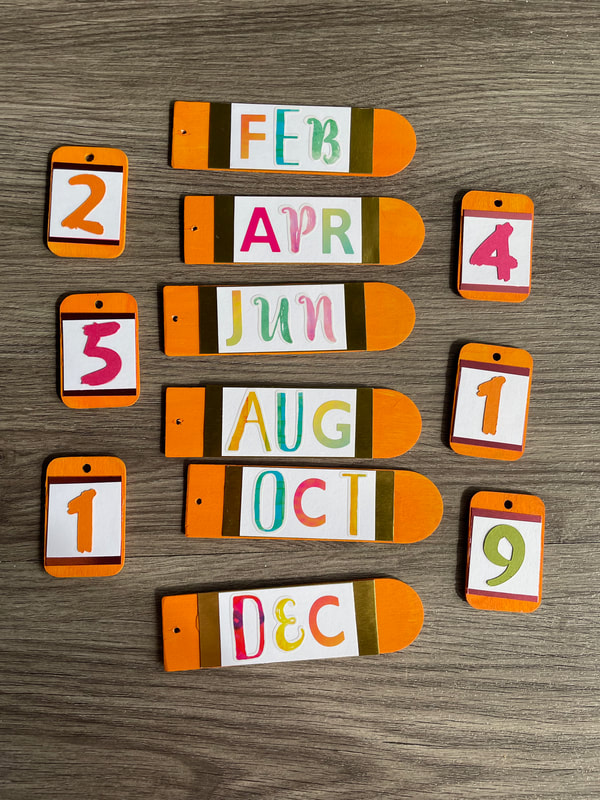
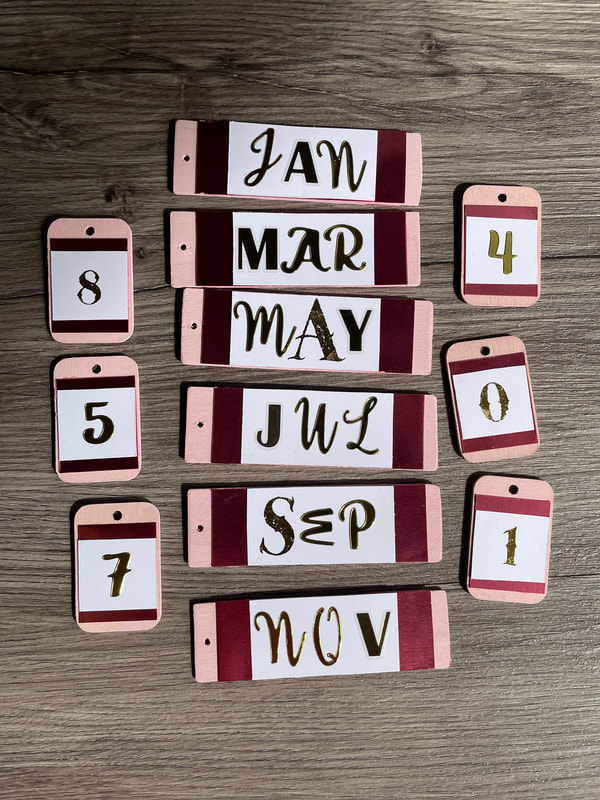
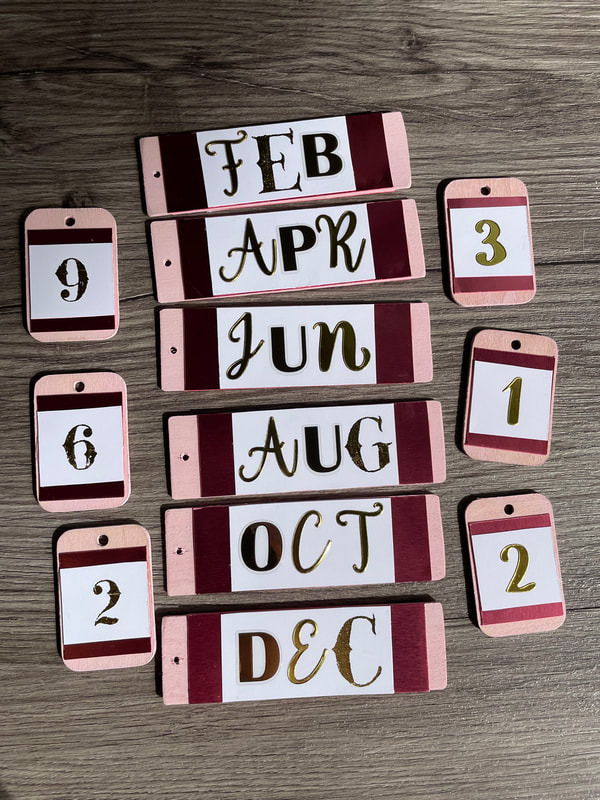
The striped background was already part of the house shadow box, so I went ahead and painted the edges of the house and the wooden blocks for the cup hooks a matching pink. I also attached a sawtooth hanger to the back. For the tags, I painted them a matching orange color. The months tags have a gold shiny paper as a layer, while the day tags have a pink shiny paper. I then used colorful stickers for the month tags, and cut out paper numbers for the day tags out of matching paper using my Cricut. They are all reversible so here are both sides:
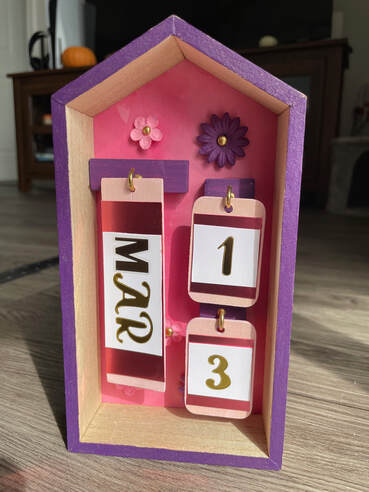
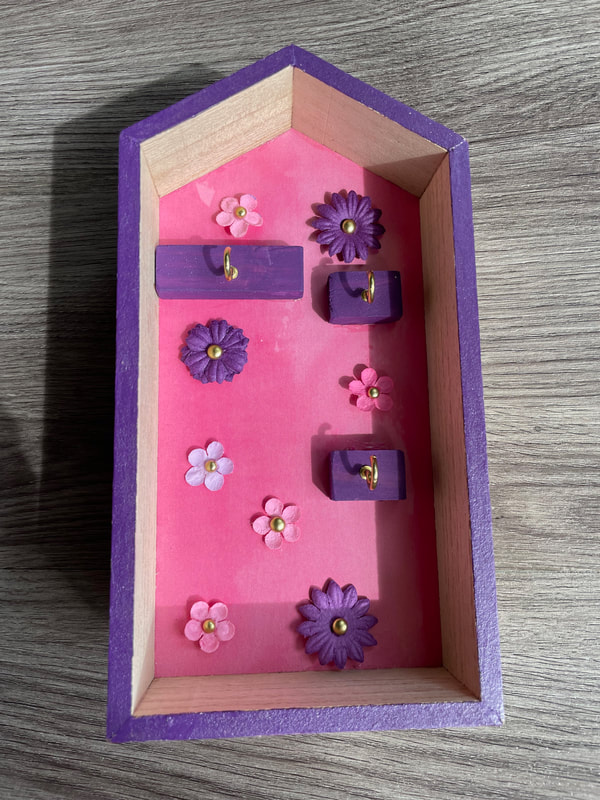
And here it is in action! It can either be hung on the wall with the hanger or stand up on its own on a table/desk. 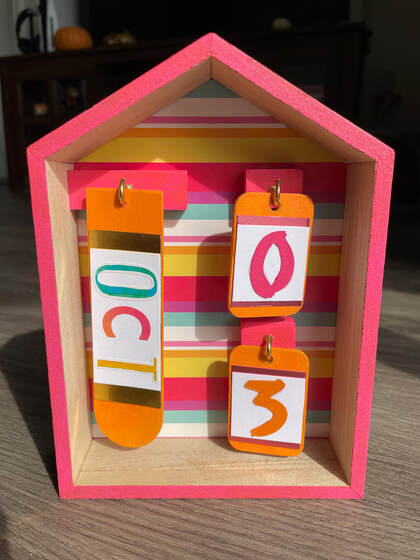 Calendar two! Same idea, the pink paper was already there so I painted the edges and blocks purple while also adding some flowers inside and a sawtooth hanger to the back.
For these tags, I painted them a pale pink and used shiny pink paper as a layer, then finished with gold stickers/rub-ons for the months and days. I love how the gold looks on the tags!
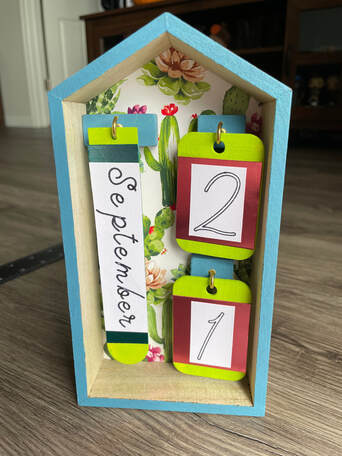
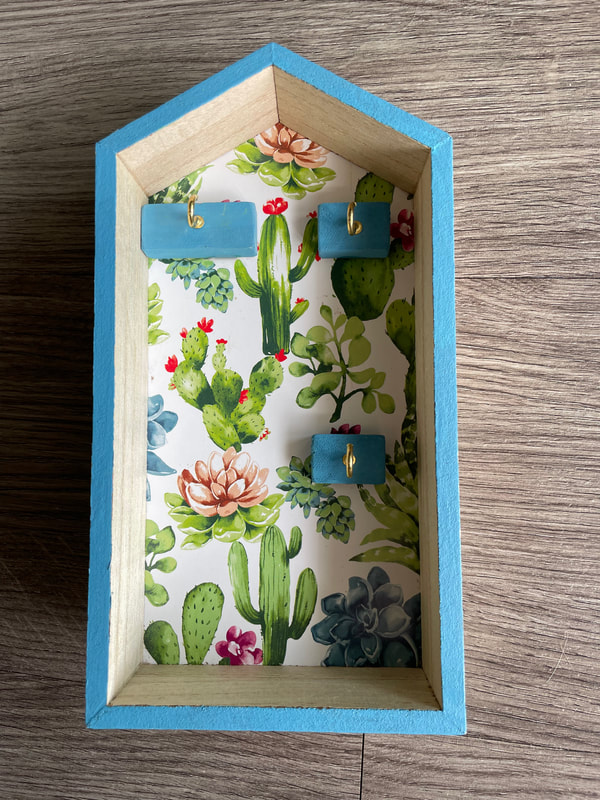
 Number three! I loved the succulent/cactus paper this box already came with so I painted the edges and blocks a fun dusty blue to match and added the hanger to the back.
For these tags, I painted them a bright green, used shiny blue paper on the months, shiny pink paper on the days and then finished them with words/numbers that I drew out using my Cricut.
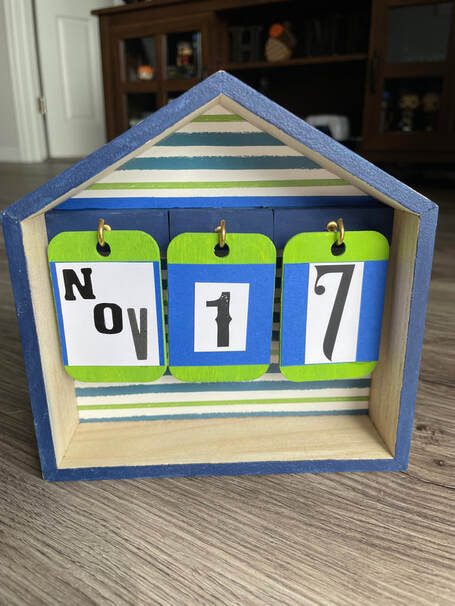
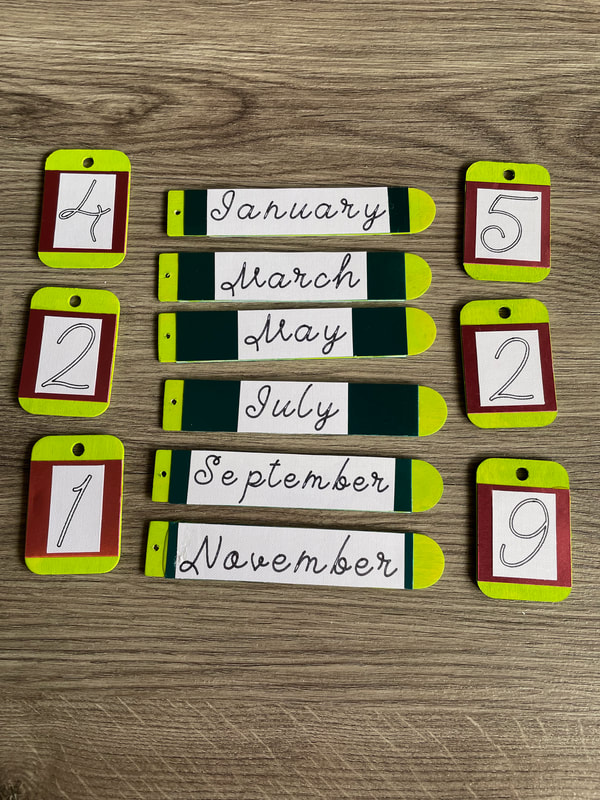
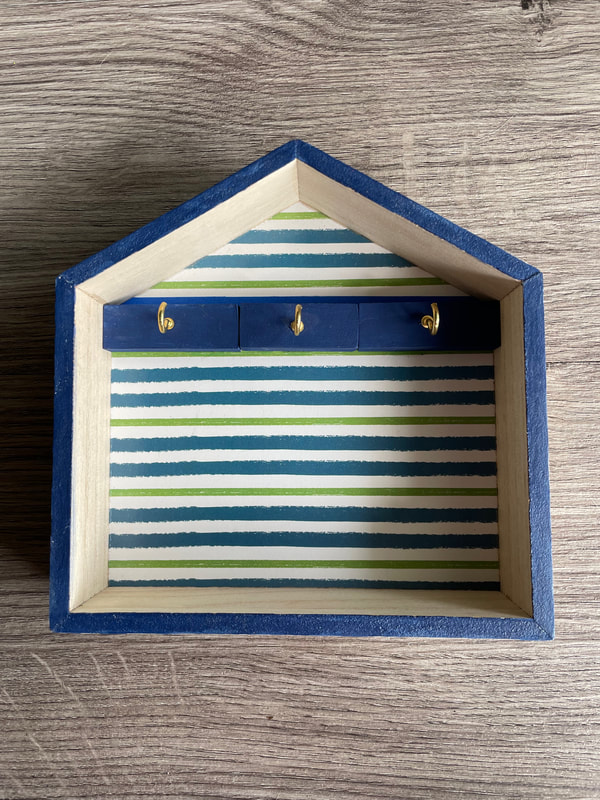
 And here's the final one! I did the edges and blocks blue to match the striped background and added the hanger on the back.
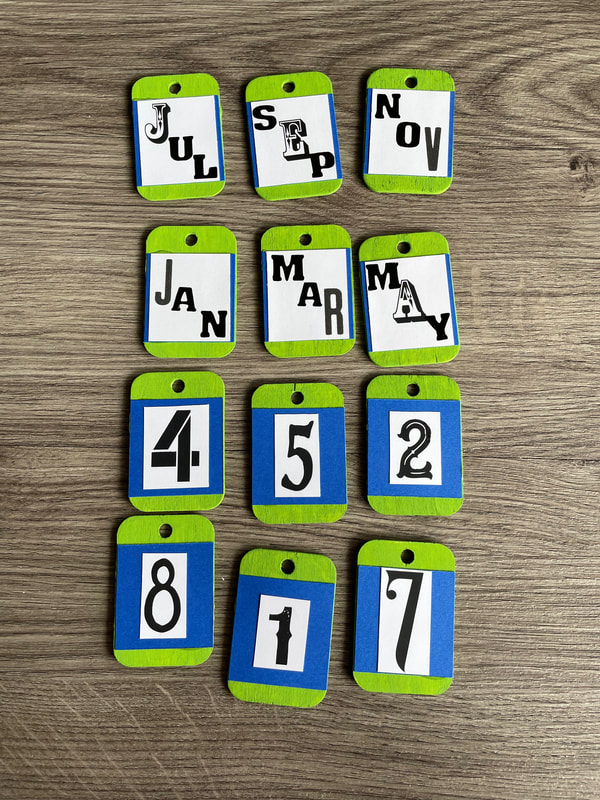
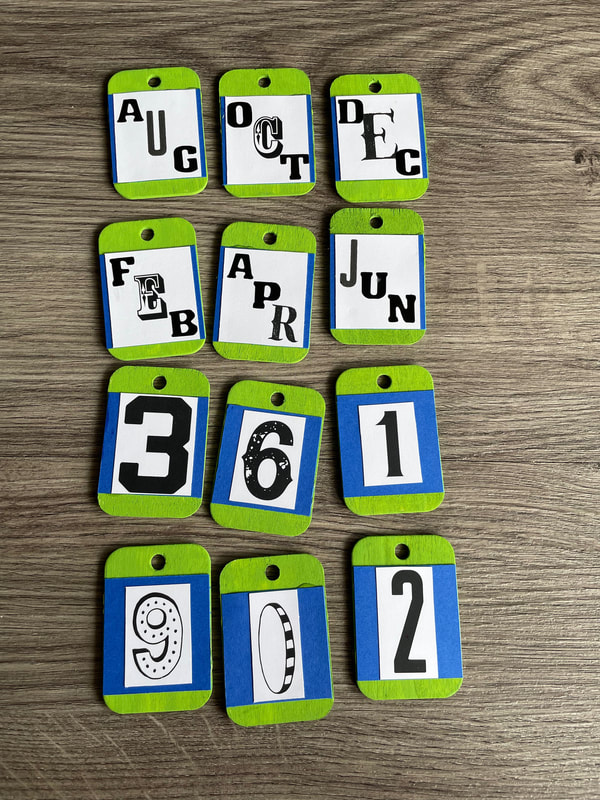
For the tags, I painted them lime green with blue paper as a layer and then black sticker/rub-ons for the months and days.
 And there they are! These calendars are an idea I've had in my head for a while and I'm so happy to see them finished. If they weren't making sense to you before, I hope they are now! Just as an FYI, they are over on the Etsy shop for sale if you are at all interested. You can check it out over on my shop tab. Happy Monday everyone!
- Rebecca Today's photo on the home page is from pixels user Pixabay: www.pexels.com/photo/calendar-conceptual-data-date-272976/
0 Comments
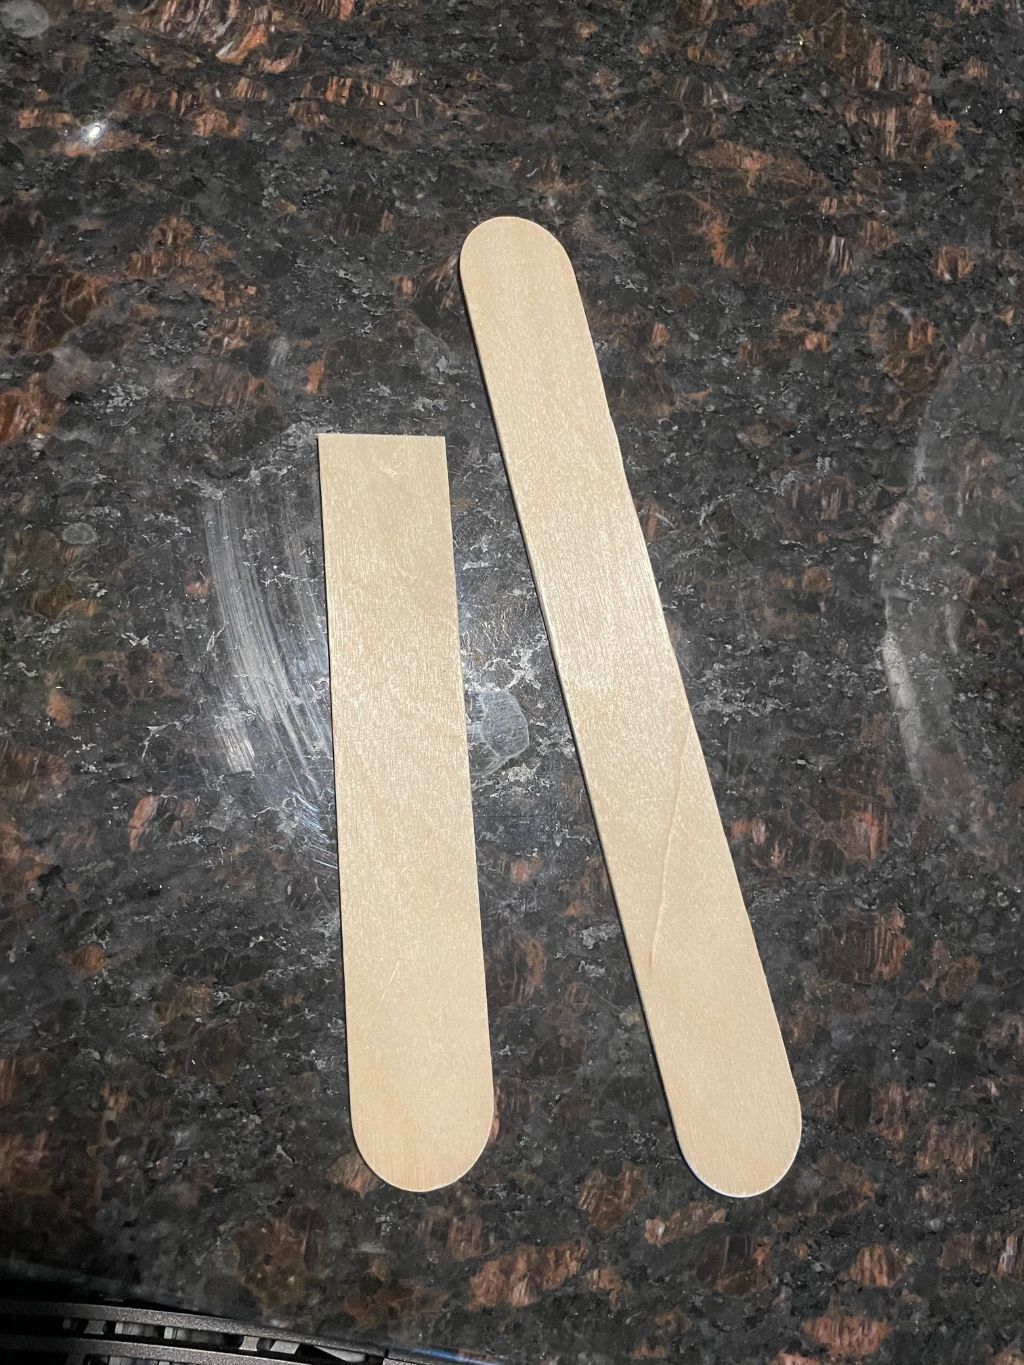
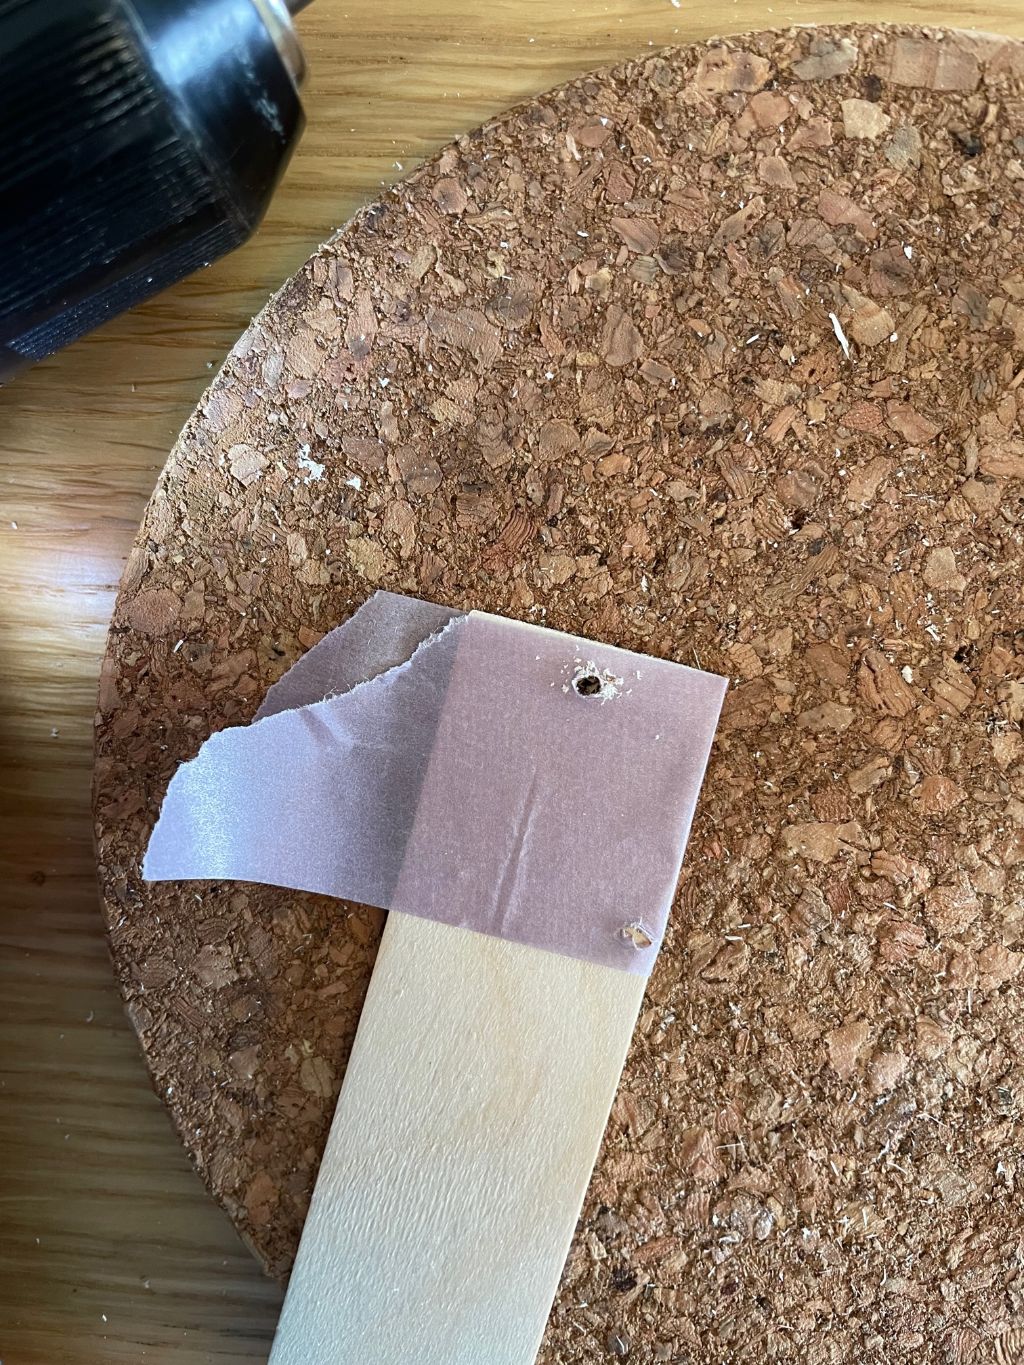
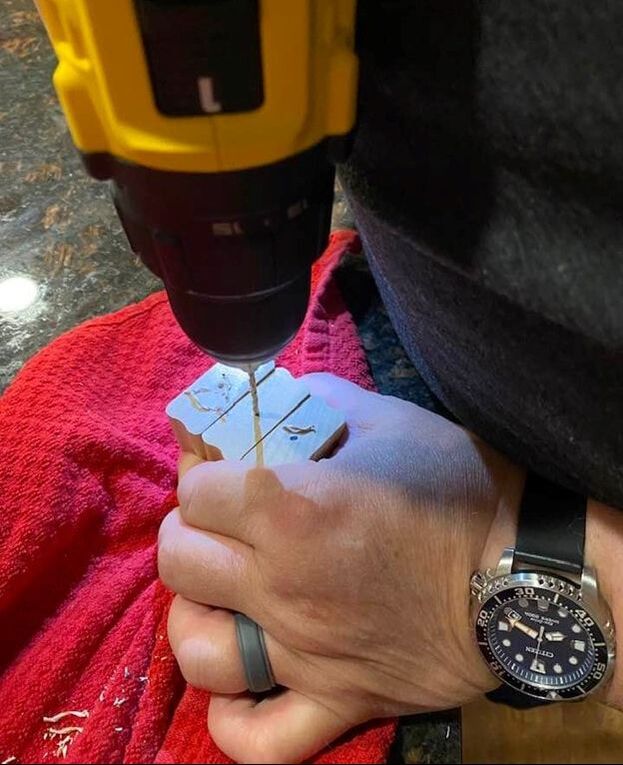
Happy Sunday everyone! Today will be part 1 of a larger project I've been working on, some perpetual calendars! For those who don't know, perpetual calendars are calendars that can be continuously used year to year as you can change the month and day as needed. I originally got the idea to make these as I had some wooden gift tags that seemed like they would be good to hang on little hooks. I had given these tags to my mother as she thought she might use them for a craft, but she ended up not needing them. I removed the jump rings from the wooden tags so that I could use the small hole in the wood to hang them. 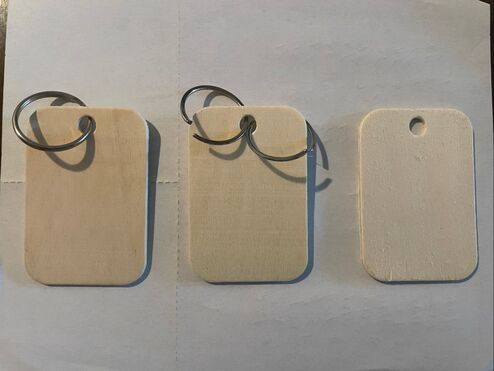 With these tags as a starting point, I then went shopping in my mother's wood storage to see what else I could find to make these work. In the end we were able to find the supplies to make 6 different calendars. 4 of them will be generally like this - wooden house with wooden blocks to screw cup hooks into and wooden tabs to hang off of those hooks for the interchangeable months and days. 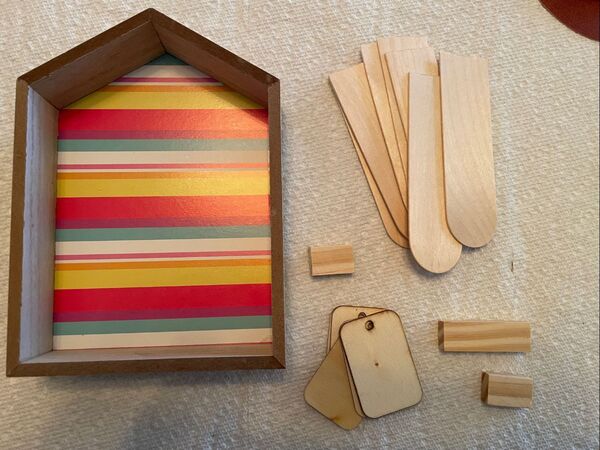 The other 2 will be like this - wooden chests with blocks for the days, wooden tabs for the months to sit in the top of the chest when it is open and a wooden block to keep the chest open. 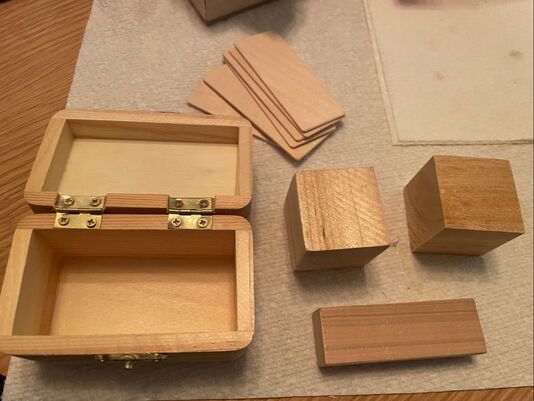 My mother had some other wooden tags that I could use for this project as well, but for the longer pieces we cut down some large popsicle sticks to size and then I drilled a hole in the top. I covered the area that I was going to drill into with painters tape as it helps the wood not splinter or break.
The wooden houses already had a paper background which was great, so I then went ahead and painted the front-facing edge of the houses in a matching color. I left the sides of the house as plain wood veneer. 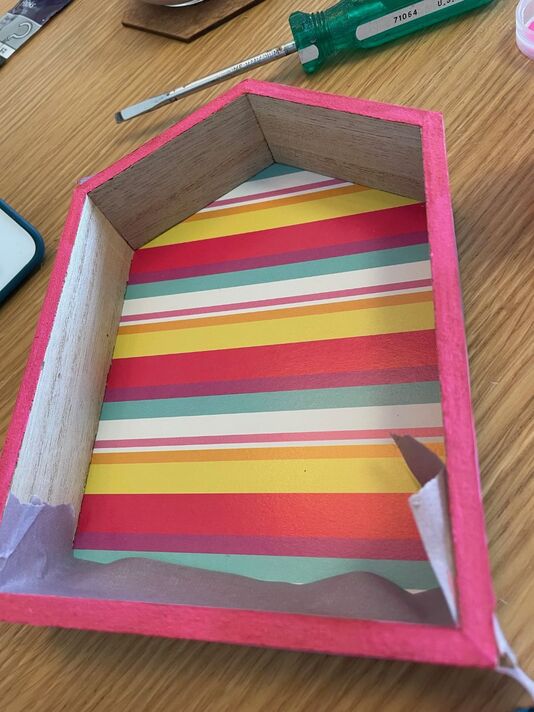 I also painted the wooden blocks for the cup hooks the same color as the edges of the house. Here is an example of the wooden blocks with cup hooks in place. I just drilled a small pilot hole into the wood block and then screwed the cup hook in. I then used a combination of Gorilla Glue and hot glue to attach the wood blocks to the back of the house. If you are looking for something to adhere really well, I would highly recommend using a combination of fast and slow drying adhesive. In this case, the hot glue dried quickly to keep the wood block in place while the much stronger Gorilla Glue dried. 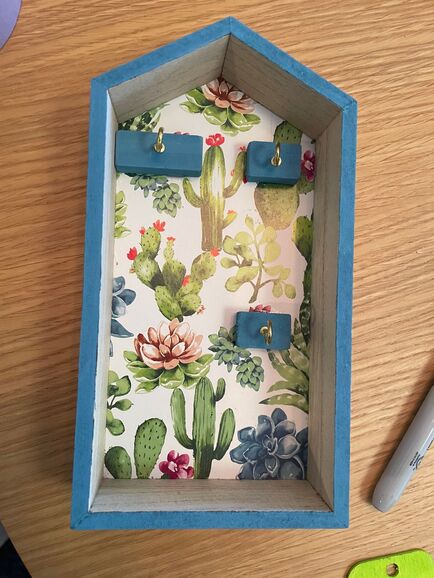 I then painted the wooden tags or tabs for the months and days in another complementary color. For example, the blue cactus/succulent house above got some green tags. Originally I thought I would like to try and freehand the writing on them, but once I had tried it I didn't like how sloppy it looked. So I instead brought out the Cricut and drew things out in a pretty font which I liked much better. For other calendars, I used some letter stickers or rub-ons as opposed to the Cricut. I also made these tags double-sided so they you could flip them over for a different month/day. 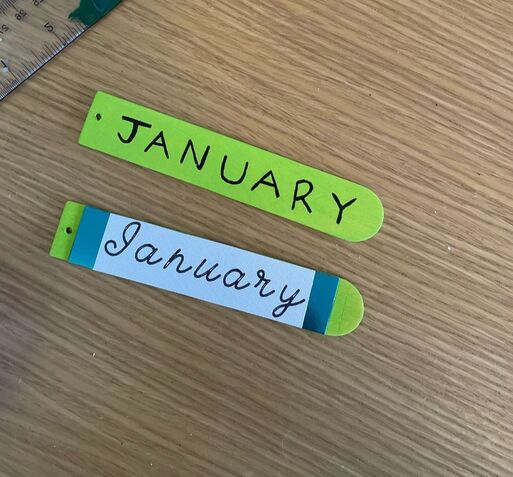 Finally, I screwed in some sawtooth hangers on the backs of the houses so that they could be hung on the wall. 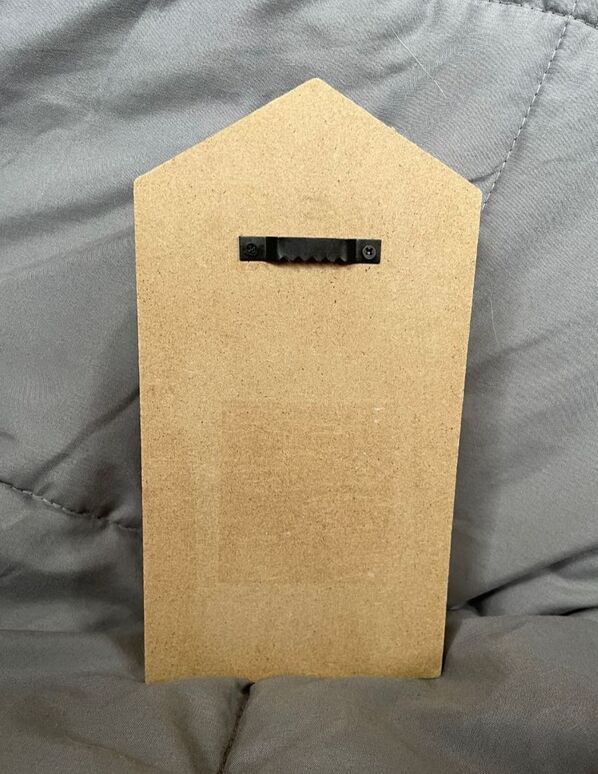 And that's where I am going to leave you for this part 1! If you are not seeing the vision at the moment, that is okay. I promise it will all come together when I show you the completed house calendars and how the chest calendars all turned out. I will also work on getting some better photos so you can really understand how the calendars should be used. What do you guys think of this project so far? Let me know in the comments below!
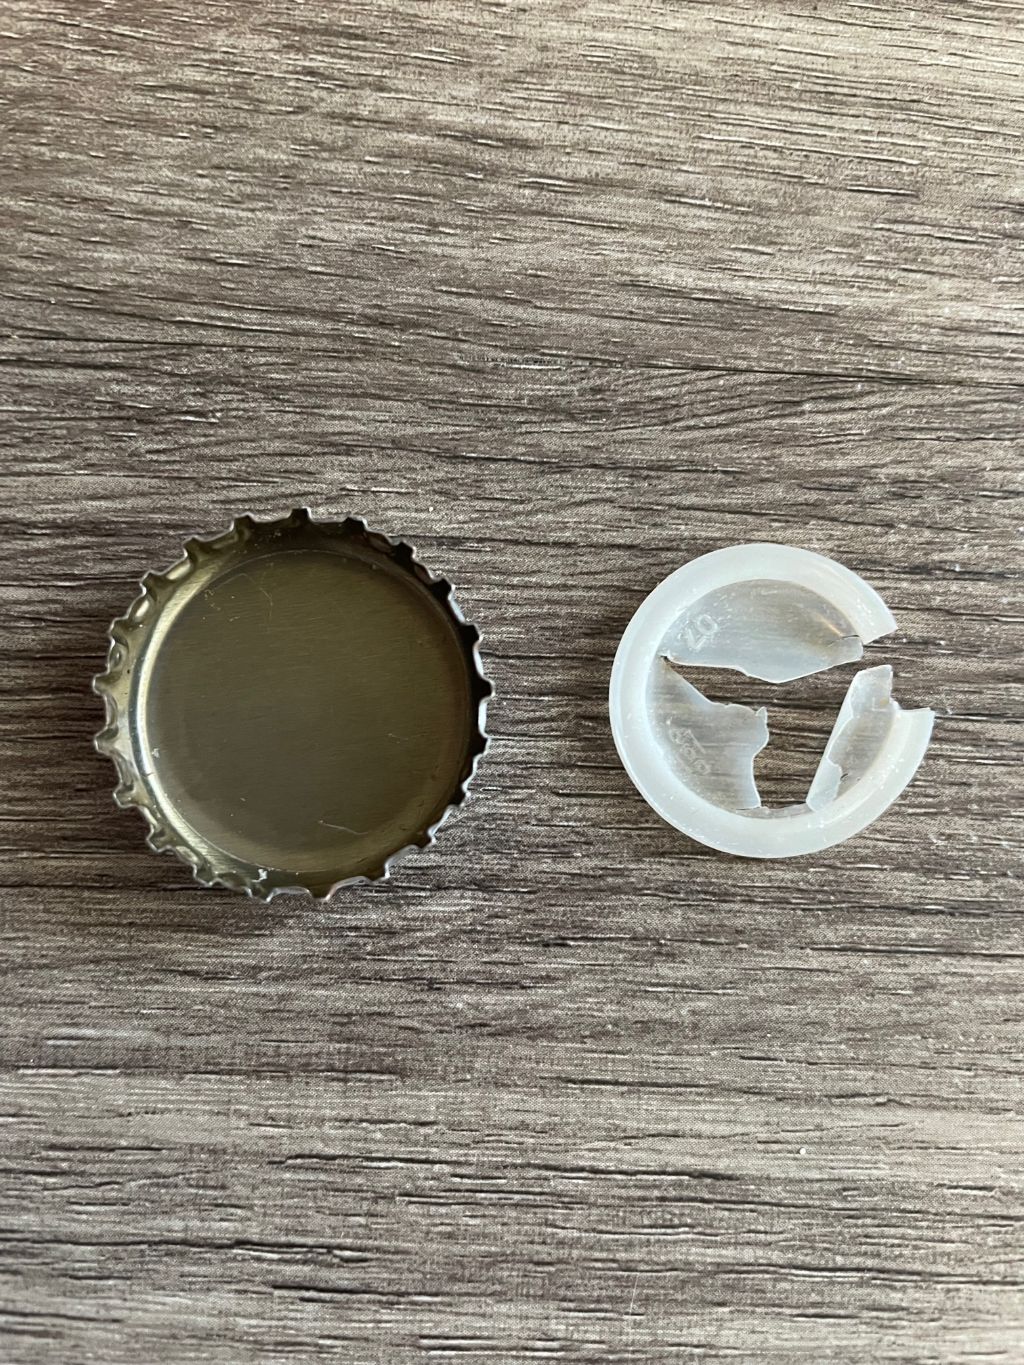
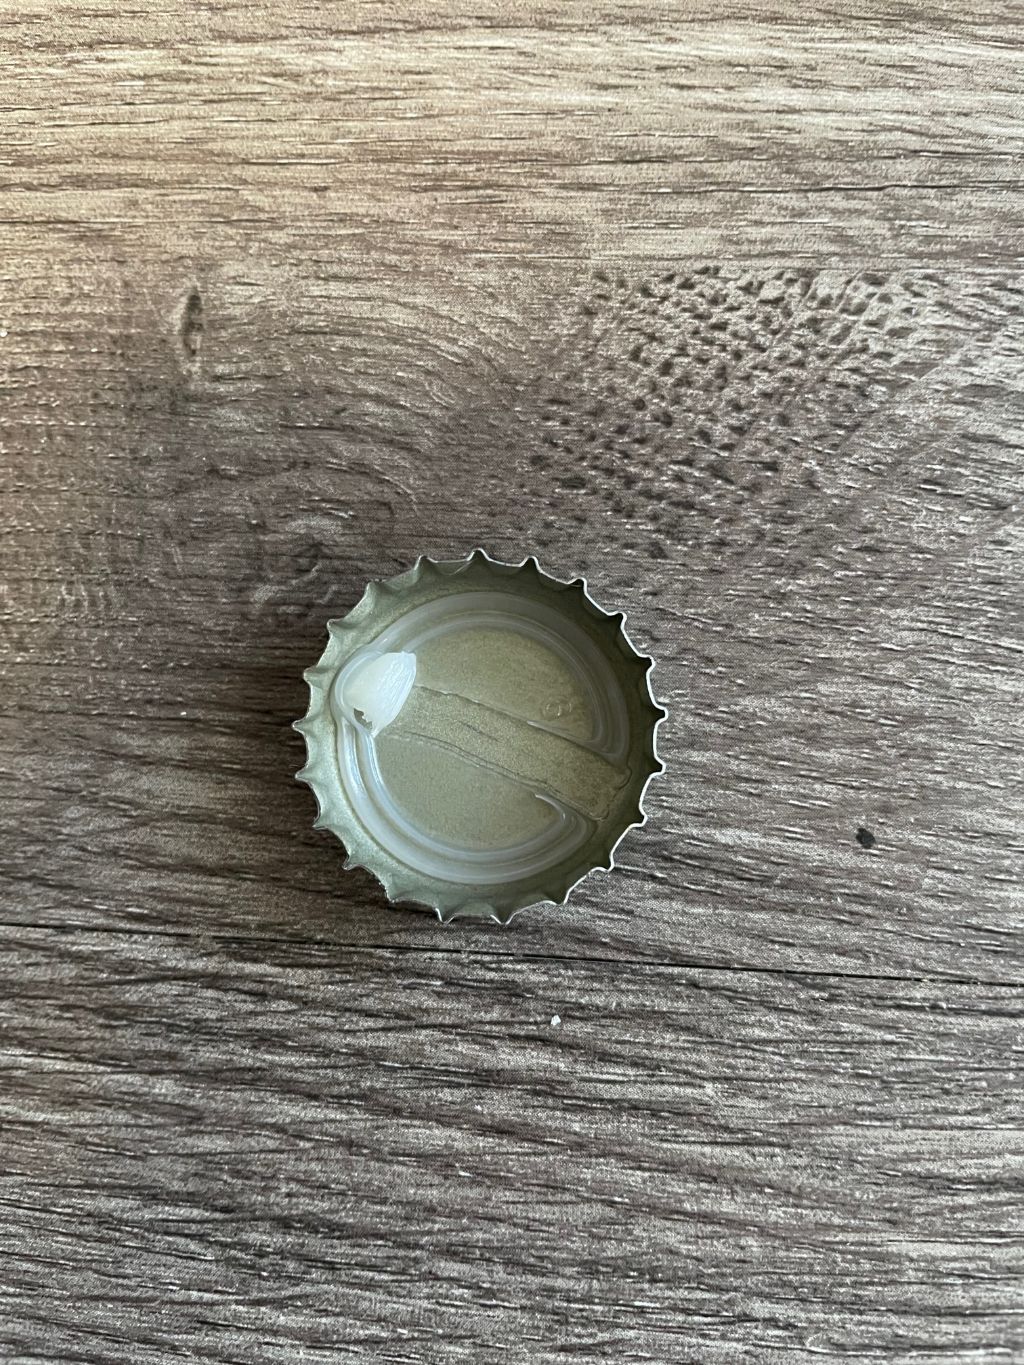
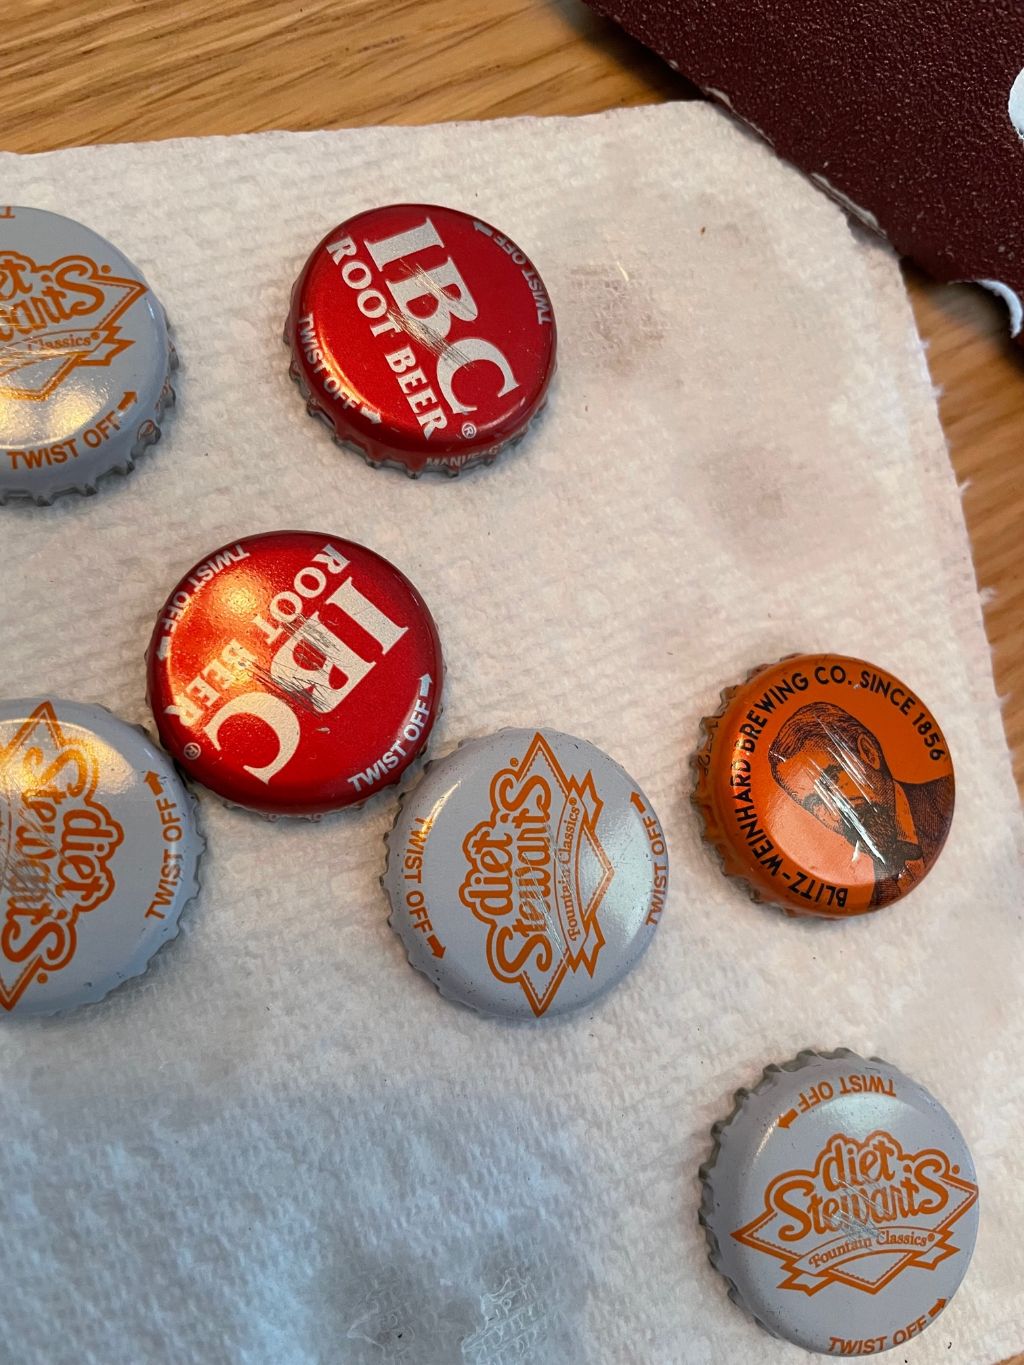
- Rebecca P.S. Today's photo on the homepage is from Pexels user Bich Tran: www.pexels.com/photo/photo-of-planner-and-writing-materials-760710/ Hello friends! We are back at it this Sunday with some crafty content. Today I will be showing you how I made some bottlecap magnets filled with resin. I like to keep metal bottlecaps and finally found a good use for them! The first steps was to remove the rubber/wax gasket inside of the top of the bottle cap. I wanted a flat surface inside the bottlecap so I used a heat gun to soften up the rubber/wax. In some bottlecap brands, it peeled out easily, while in others I had to use a small screwdriver to scrape it out.
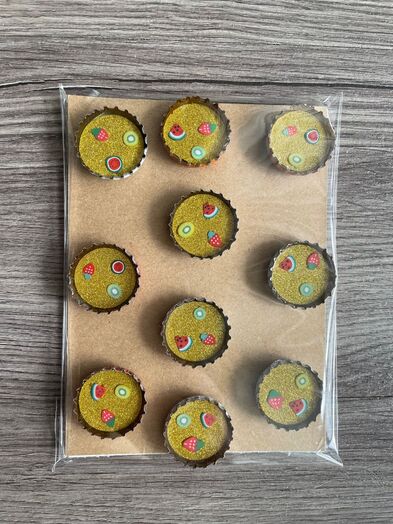
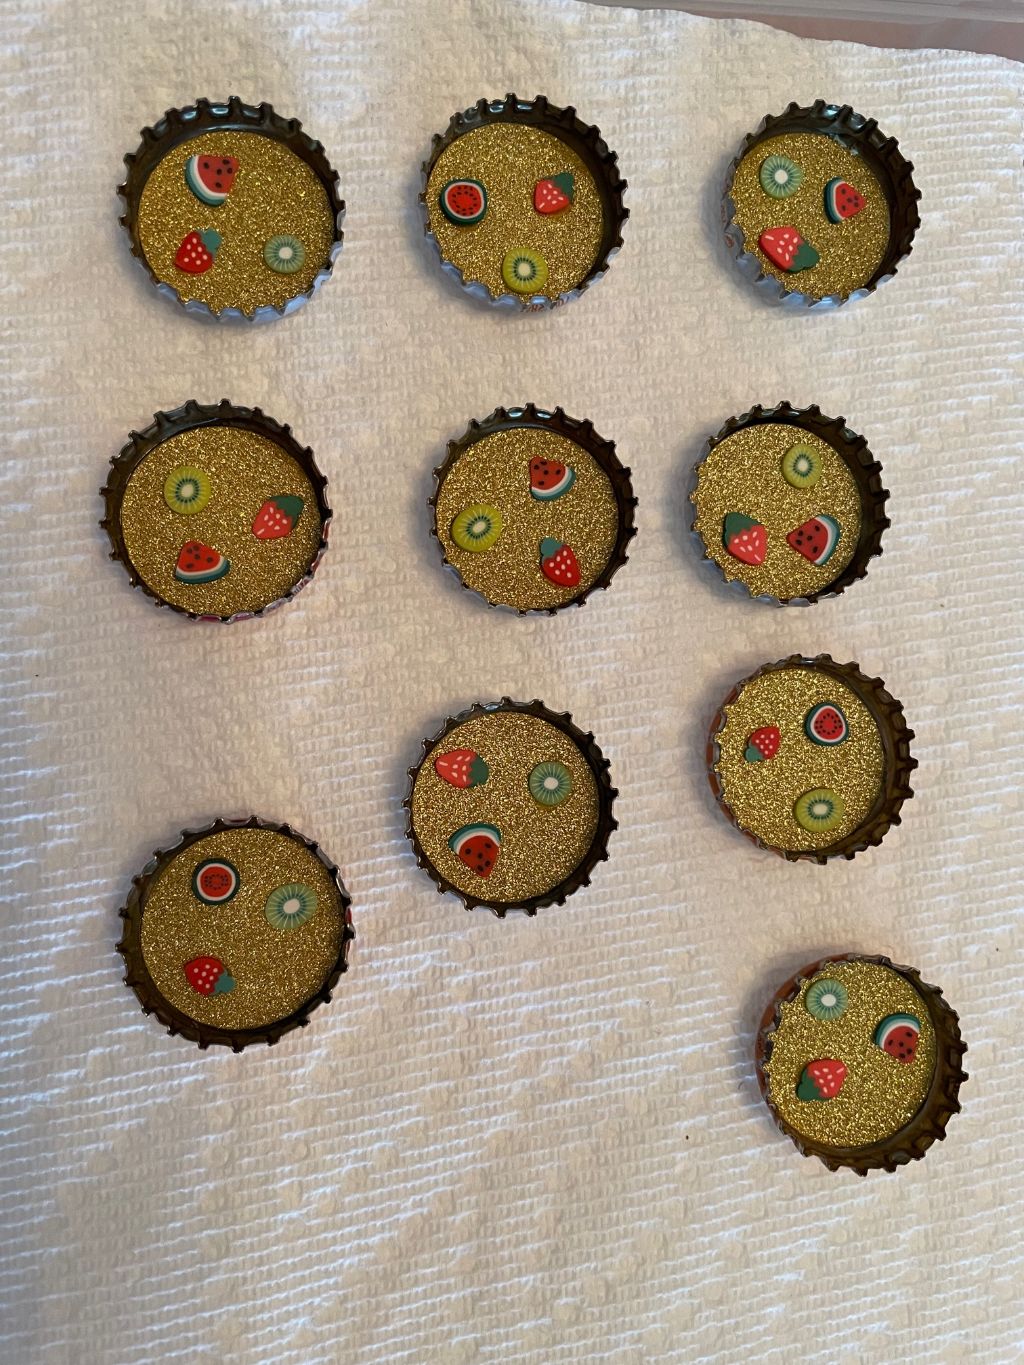
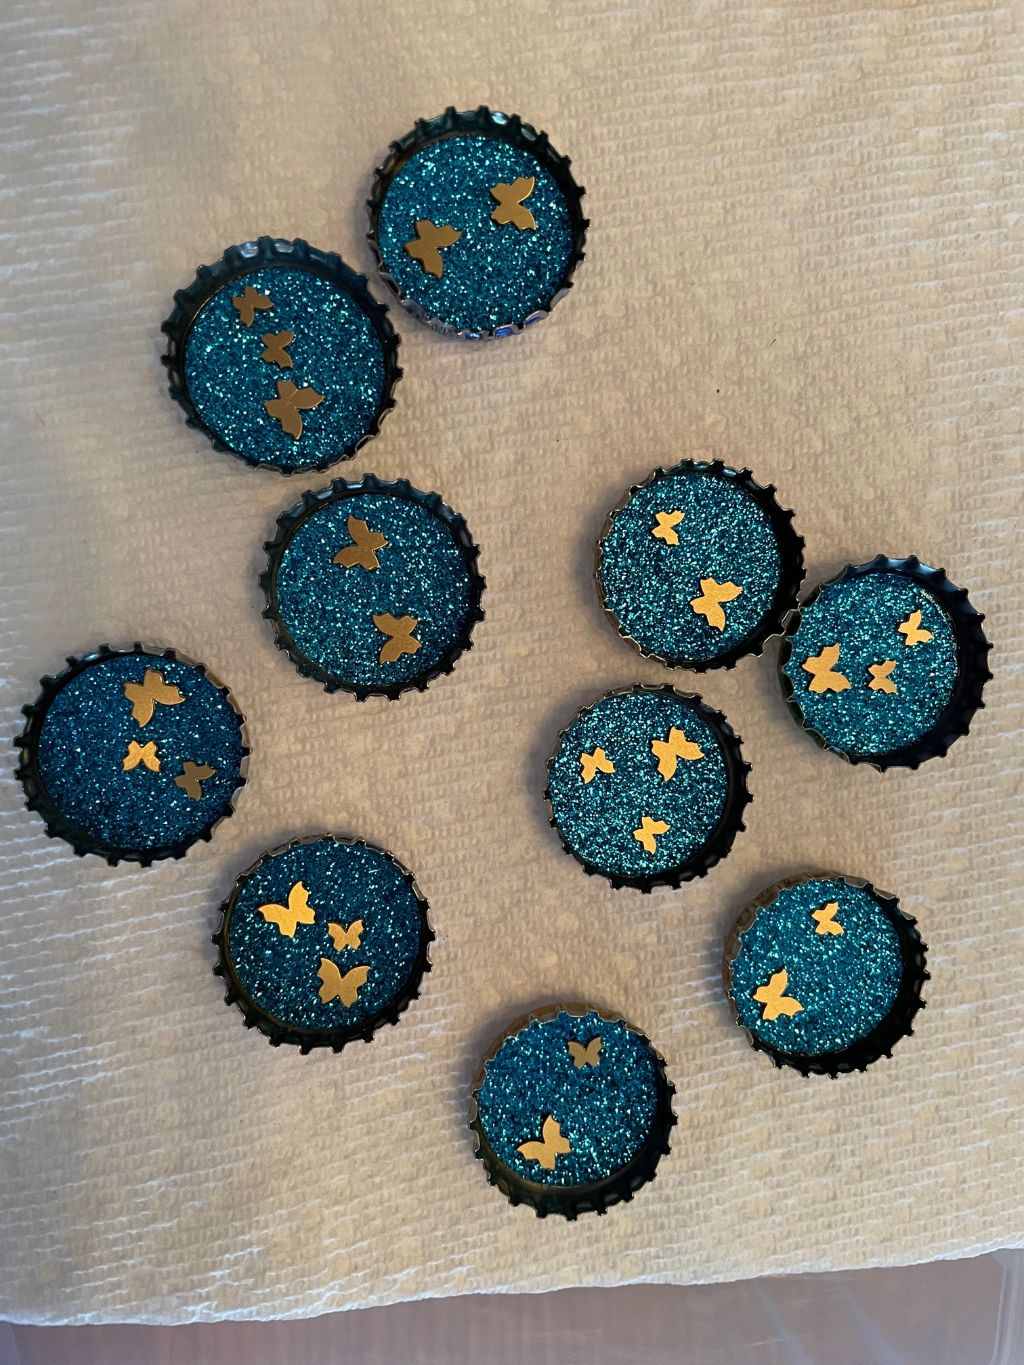
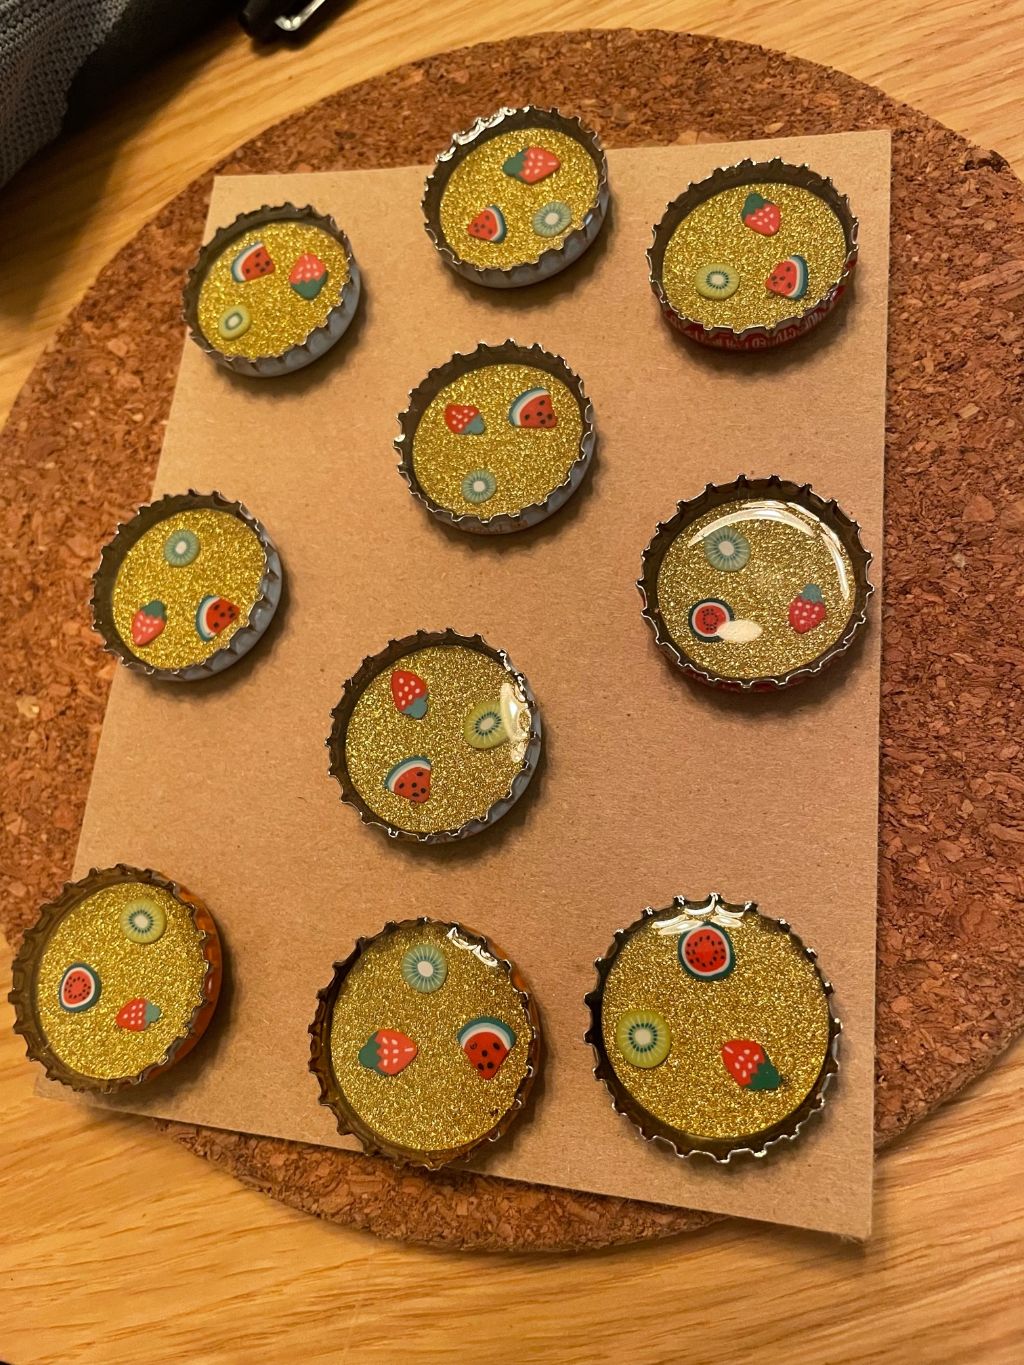
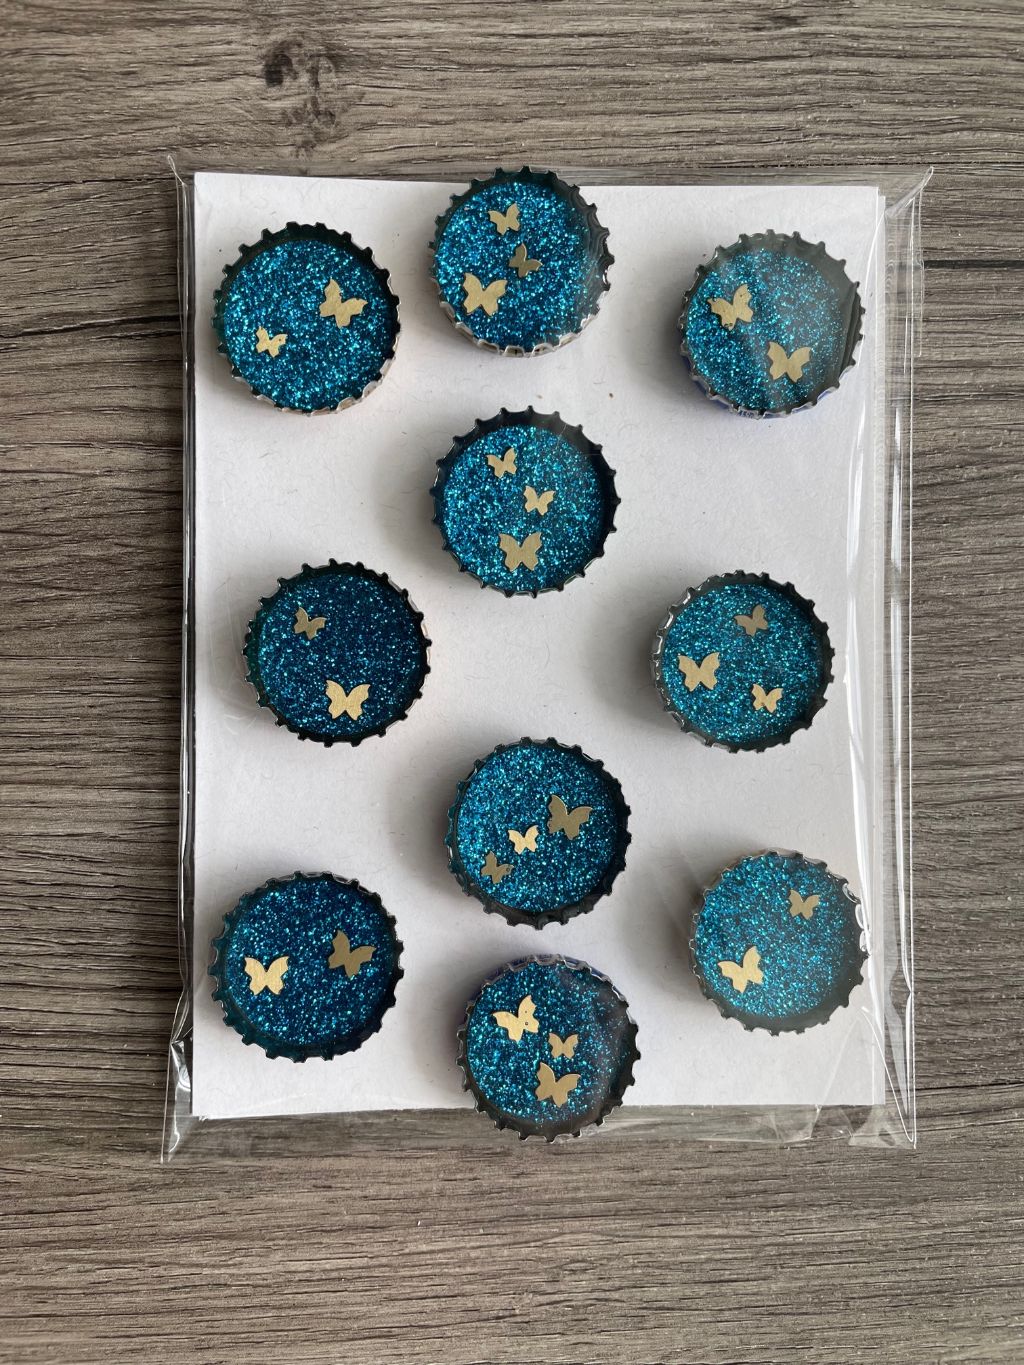
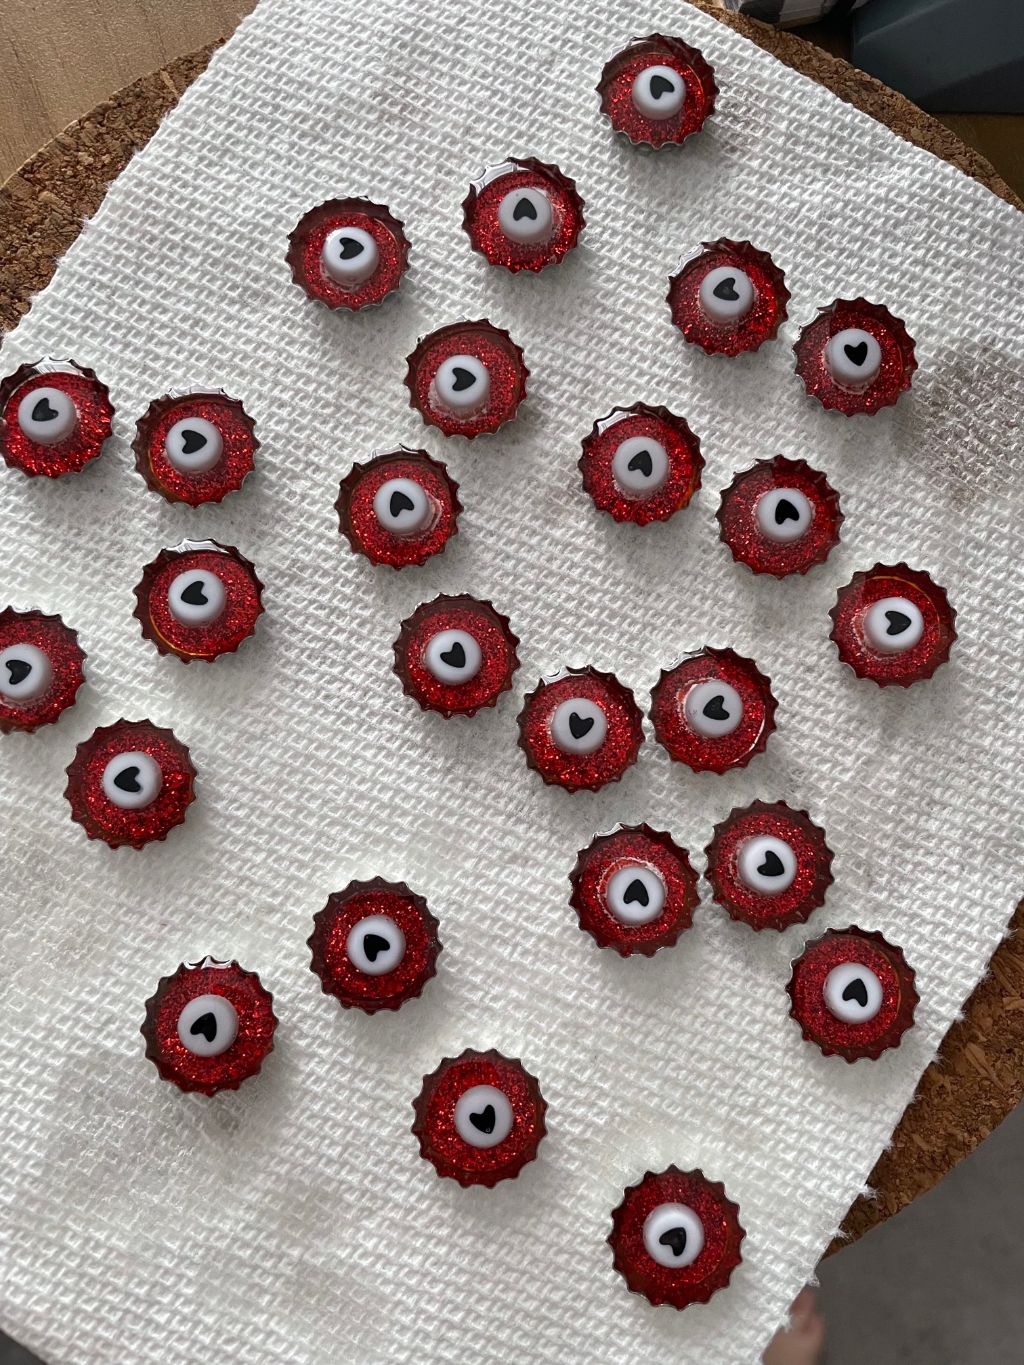
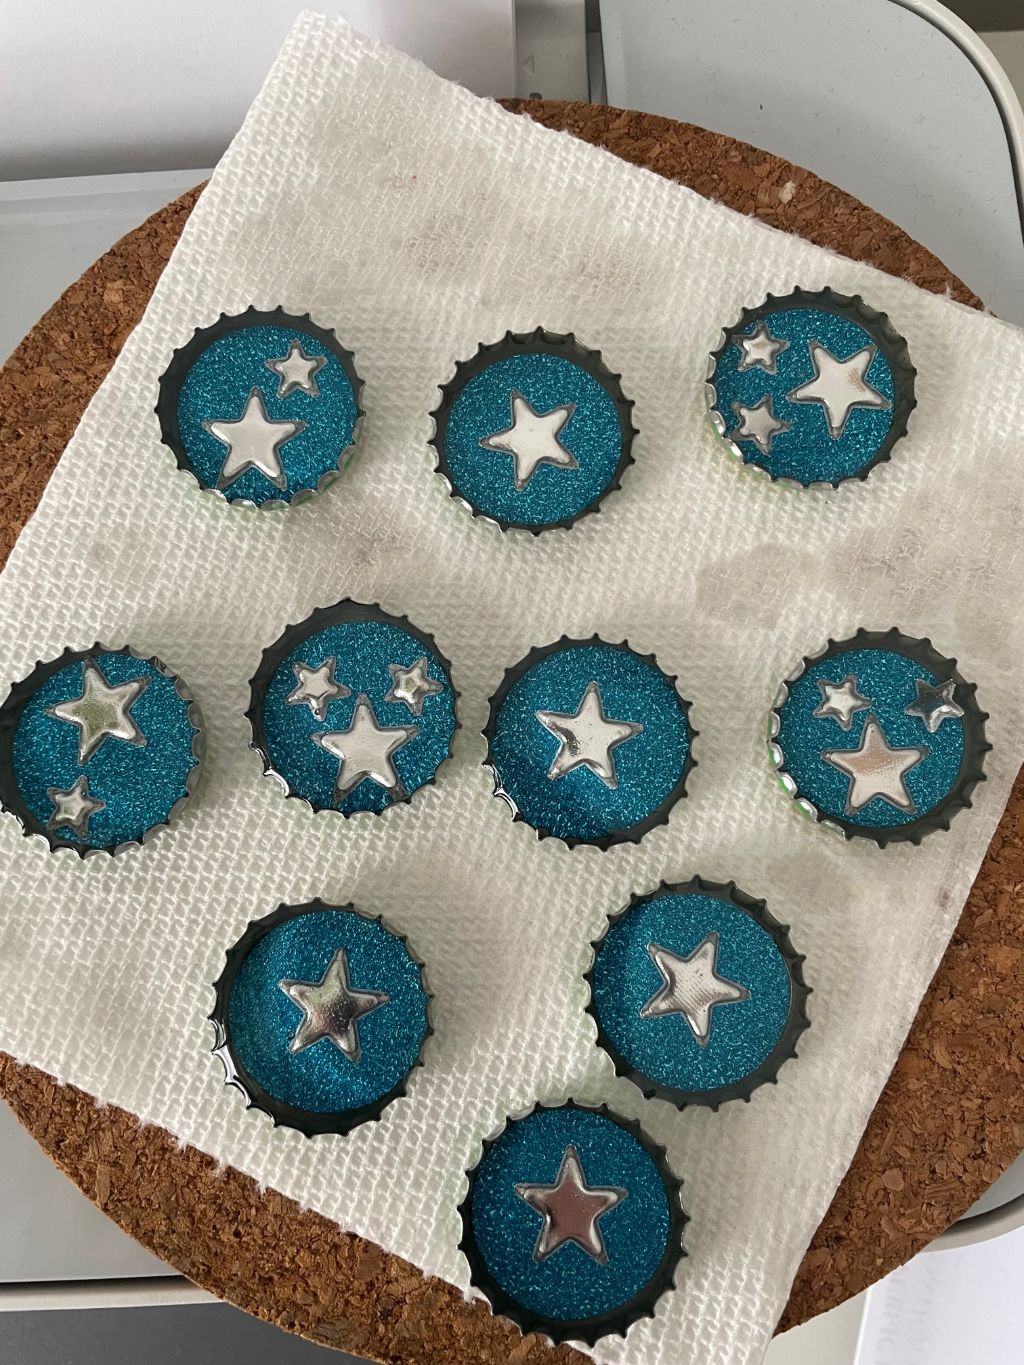
In addition to the regular-sized bottle caps, I also had some mini caps that my mother had given me that I decided to make mini magnets out of. Here's a mini cap beside a normal bottlecap for scale.  Once I cleaned out the caps, I used my Cricut to cut some circles out of fun sparkly paper to fit inside the caps. The larger caps needed a 1 inch circle, while the mini ones needed a 1/2 inch circle. I glued the paper down with a bit of Gorilla Glue but was not too worried about it being stuck down perfectly as the resin would also weigh the paper down. 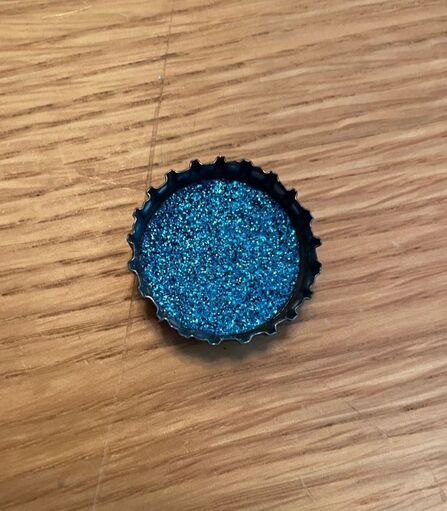 I then used a variety of stickers and resin embellishments to decorate the inside of the caps. I used some SuperGlue to help keep the decorations in place.
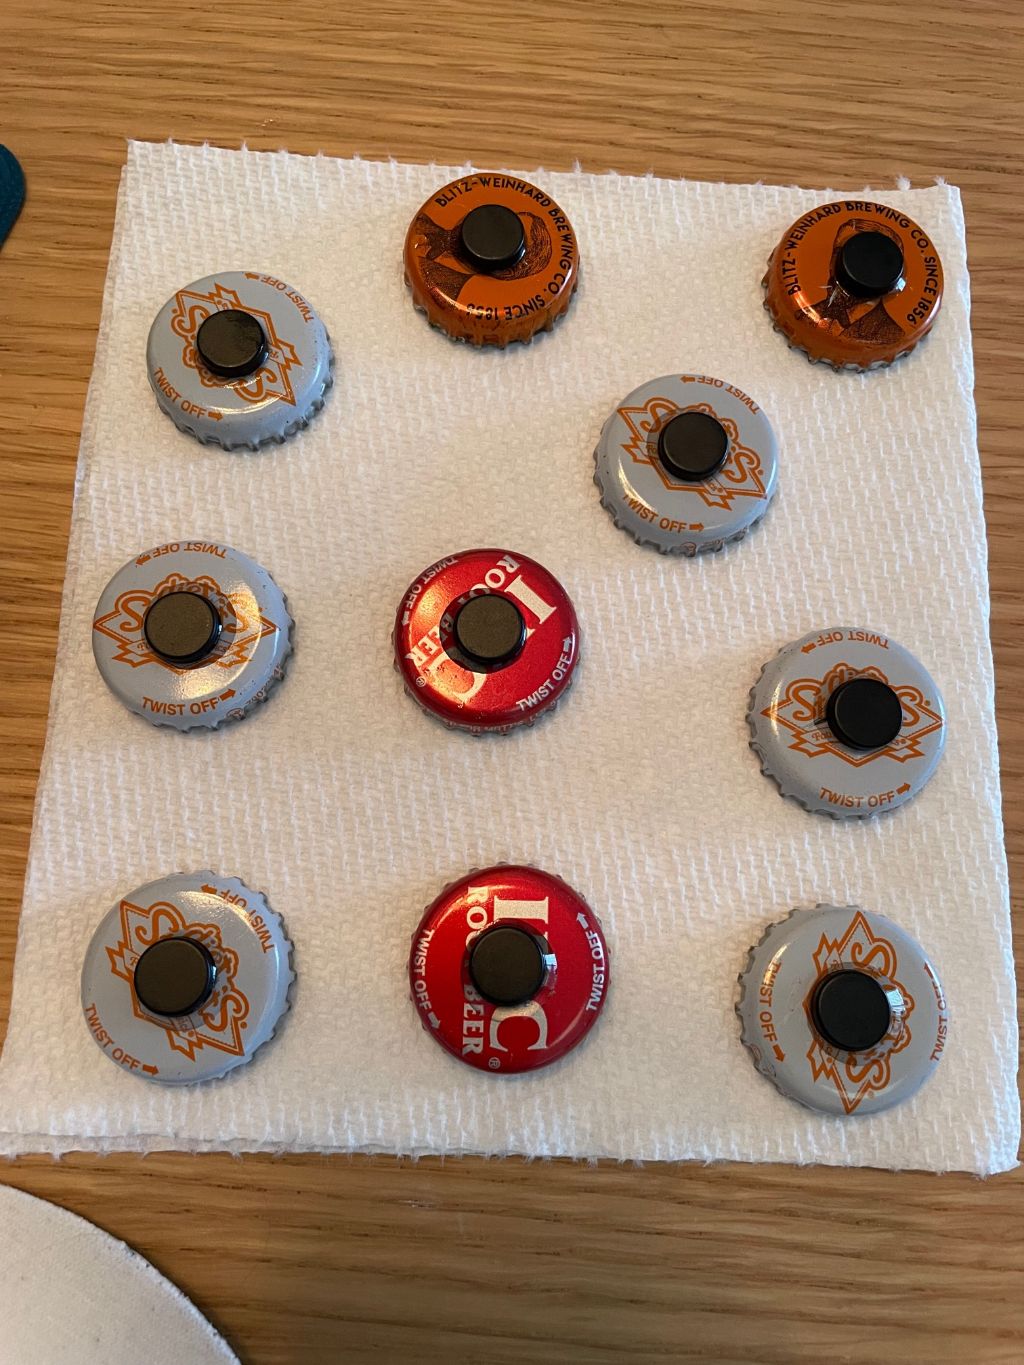
 I then filled the caps with resin. I have talked about resin a lot before so I won't go into details here. I used the same type of resin I always do, a 2-part epoxy resin where you mix equals parts hardener and resin by volume. From this point on, all pictures you see of these magnets will have them full of resin. As its clear, its a bit hard to tell on camera, but I promise its there! After the resin dried, I needed to attach the magnets to the back. I bought some small, super strong magnets on Amazon. Before gluing them down, I used some sandpaper to scrape the metal of the bottlecaps a bit to help with the glue's adhesion. I then used some Gorilla Glue to attach the magnets, letting them dry overnight.
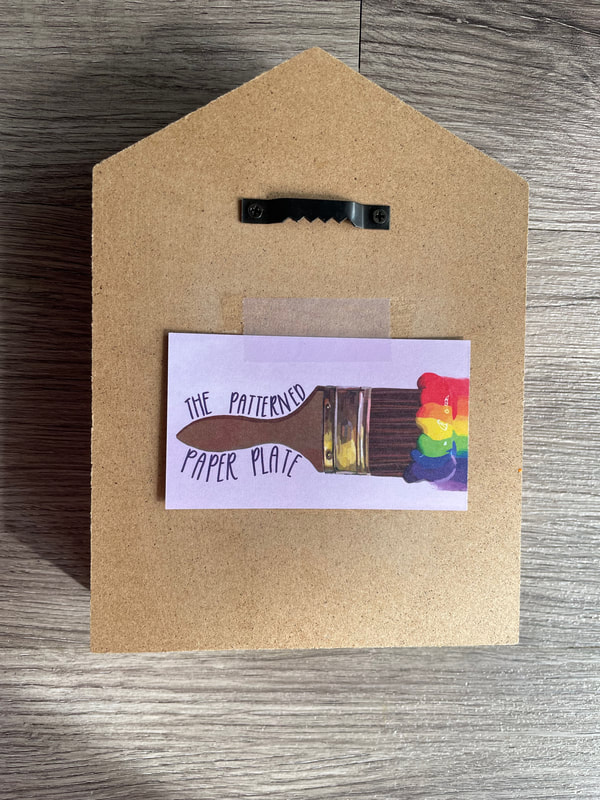
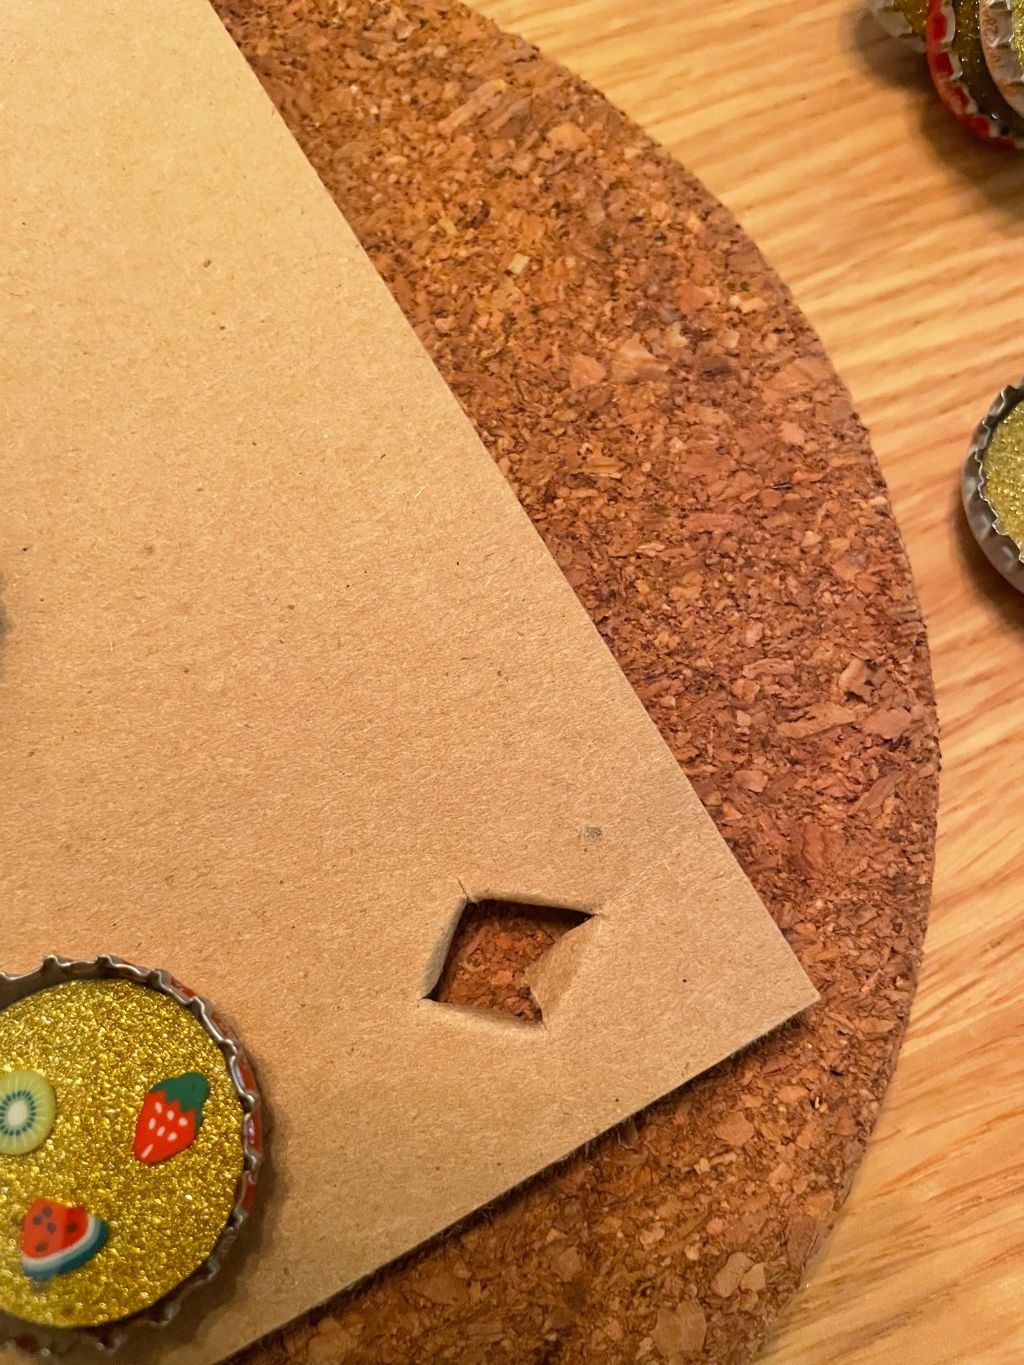
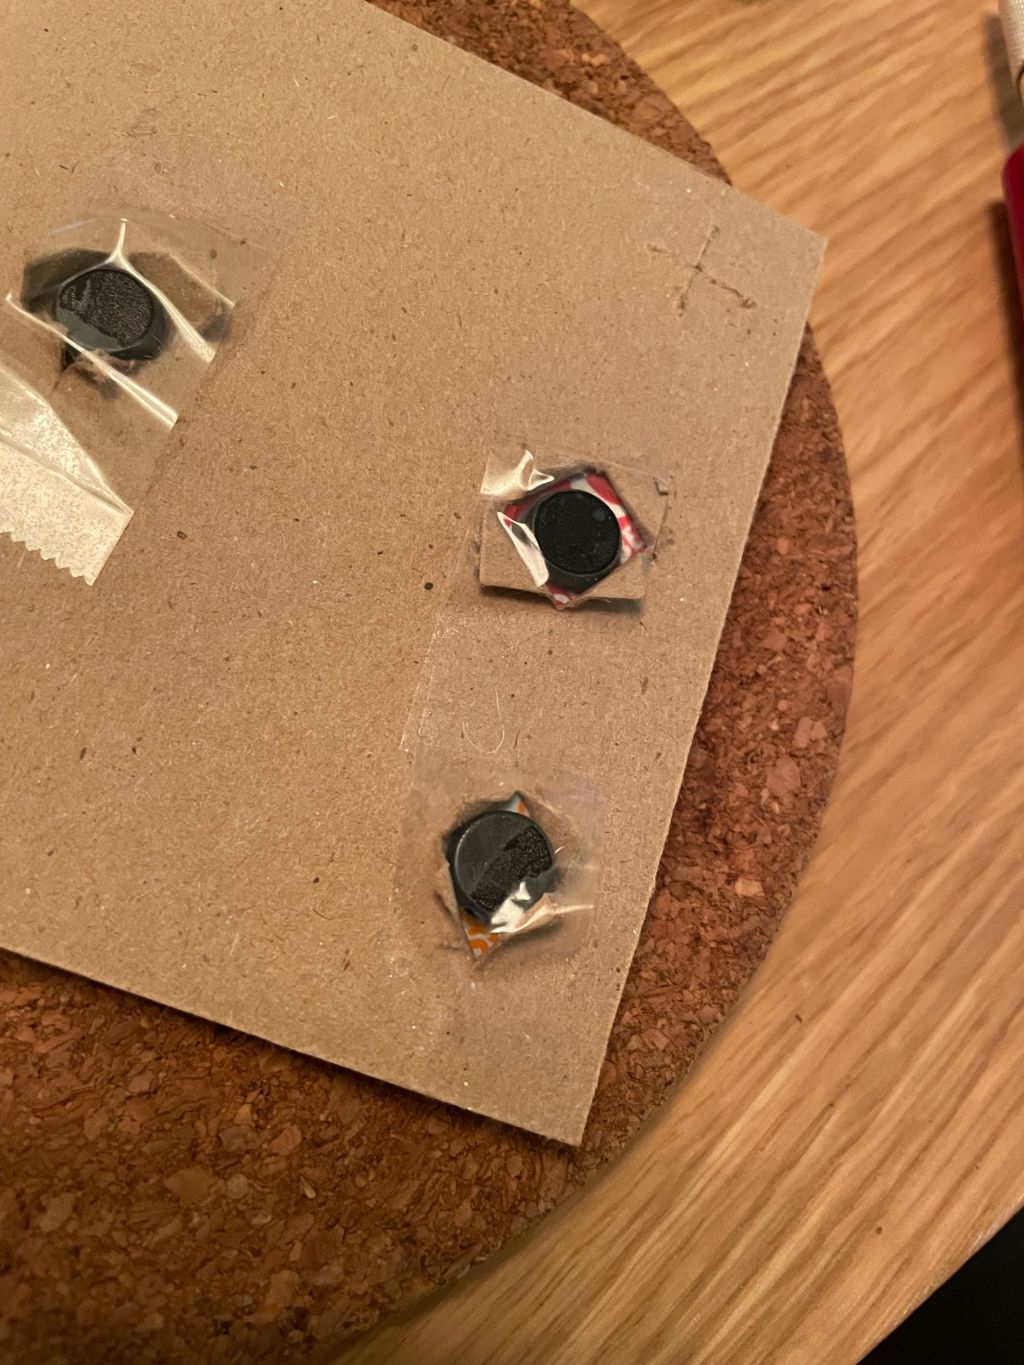
Once everything was dry, I decided to package up the magnets so that they were ready for selling. I have some clear plastic envelopes that are made for a standard-sized card, but I decided that these would be a good option to package up the magnets as well. I cut a piece of paper the correct size to fit inside the sleeves to attach the magnets to. 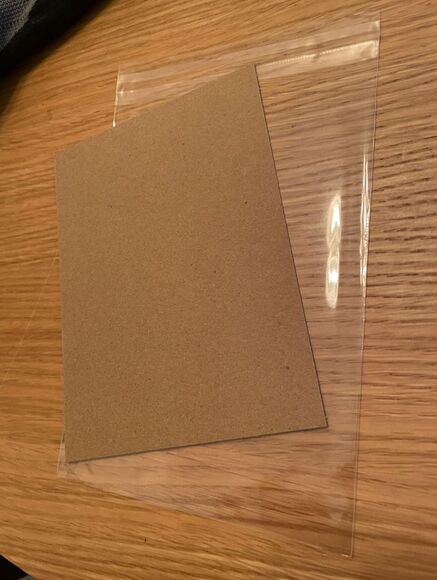 I then made some cross cuts into the paper using an X-Acto Knife so that I was able to push the magnet through the cut. I used some tape to keep the magnets in place from the back.
I then cut another piece of paper to slide behind the magnets to cover up the messy tape and holes. 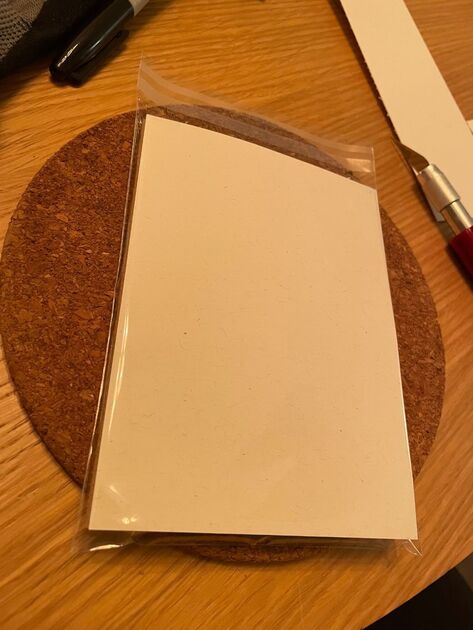 And here they are all packaged!
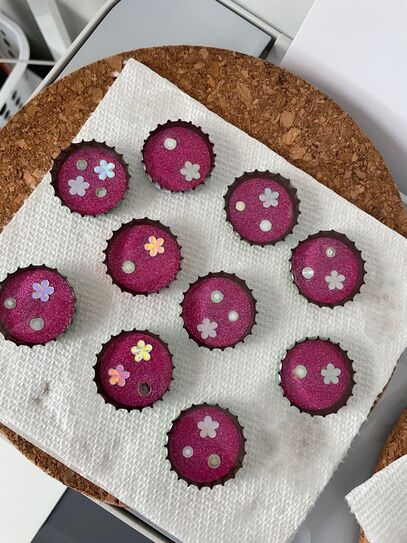
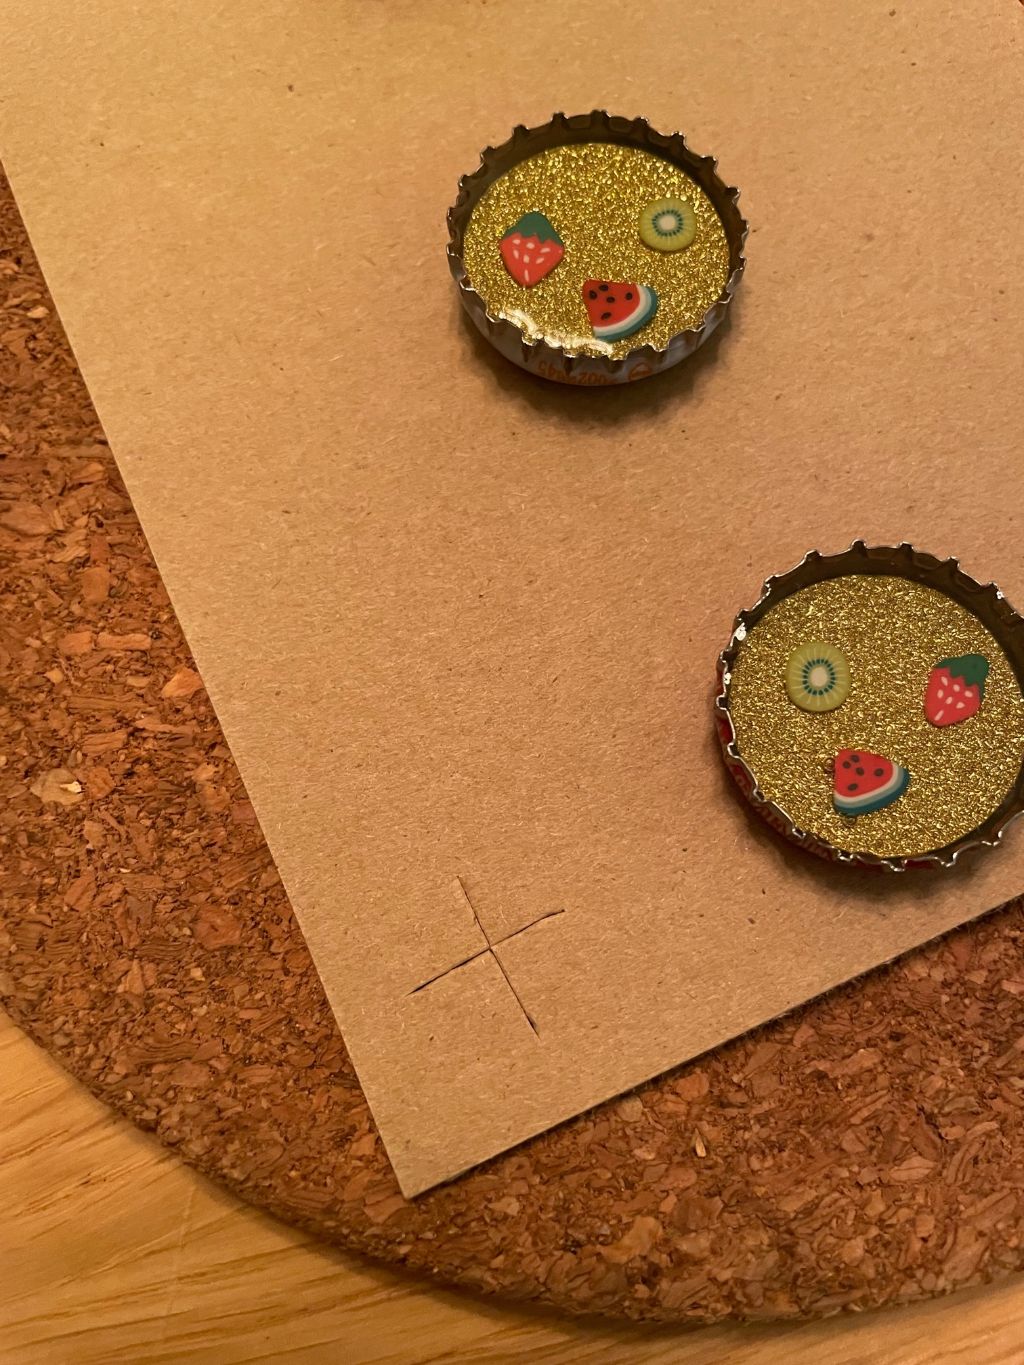
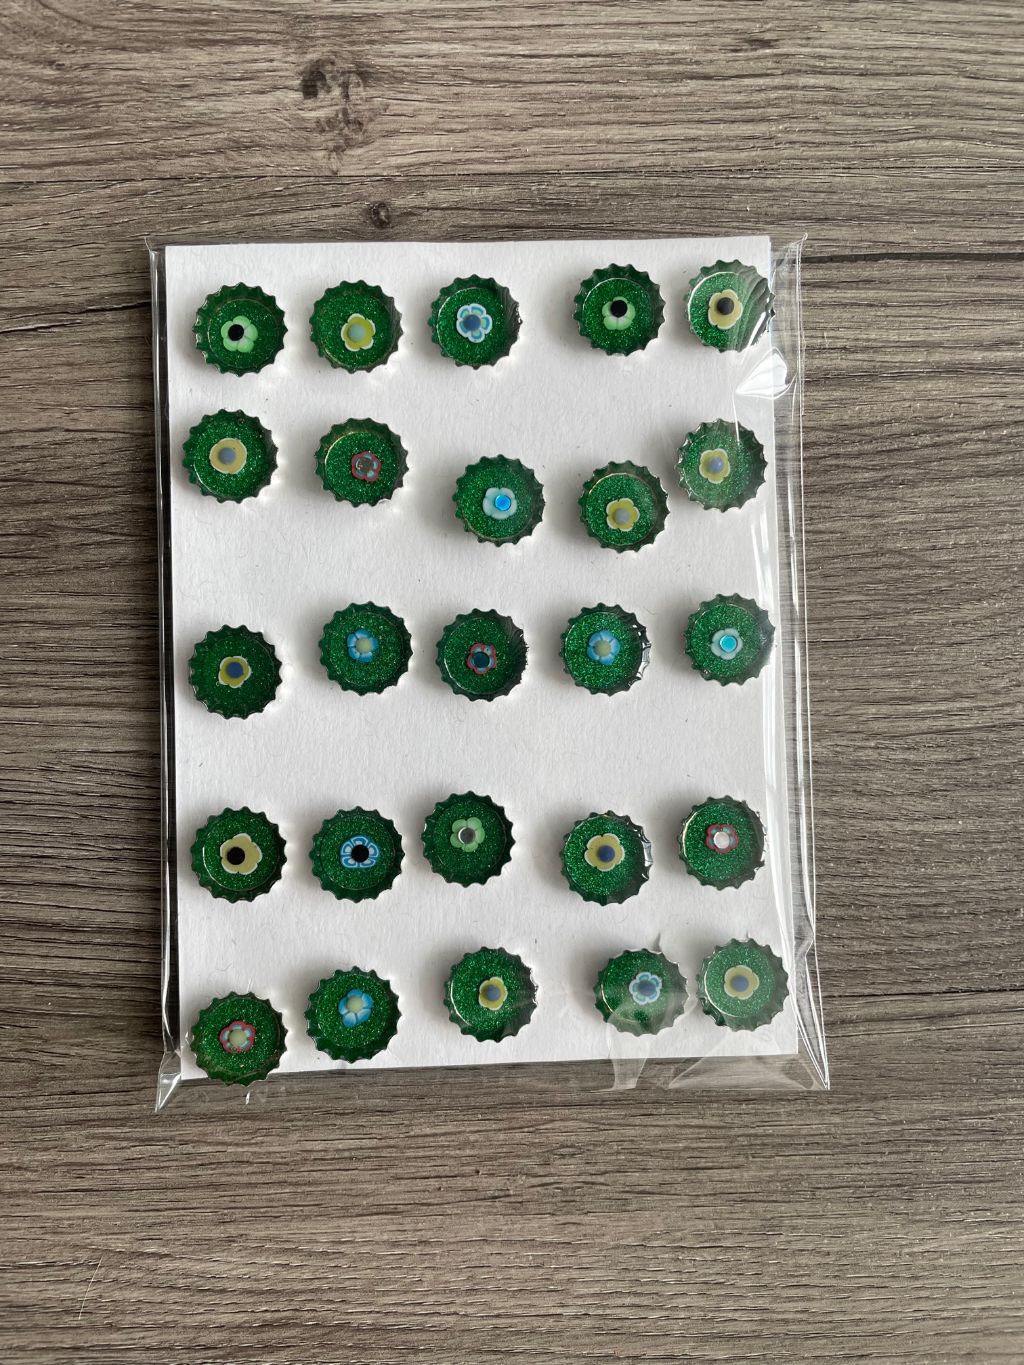
 I was so happy with how these came out that I decided to make a few more! These have been filled with resin but have not had the magnets attached yet.
 I think these are very cute and I love how they look all packaged up! Let me know what you guys think in the comments below! Also, if you are interested, please keep an eye out as these should be popping up on the Etsy shop sometime this week ......
- Rebecca P.S. Today's photo on the homepage is from Pexels user Miguel Á. Padriñán: www.pexels.com/photo/light-art-alcohol-texture-3752036/ Happy Sunday everyone!
The day has finally come ..... the Etsy shop is live! You can check it here: www.etsy.com/shop/patternedpaperplate?ref=shop_sugg Thank you all for your patience as I got this up and running. I am pretty nervous, but also very excited to start this new chapter of the Patterned Paper Plate! Even if you are not interested in buying anything (which is totally fine!) please take a second to go check out the shop and leave any suggestions in the comments below here about what you think would make it a better shopping experience. The shop is a bit sparse at the moments besides the listings, but I will be working to add more detail to it in the coming weeks. If you ever need to find the link to the shop again, you can click on my "Shop" tab at the top of the website. Thanks again to everyone who supported me!! - Rebecca P.S. Today's photo on the homepage is by Pexels user Kevin Bidwell: www.pexels.com/photo/blue-and-white-come-in-we-re-open-signboard-1376412/ Hello friends! So last week I mentioned on social media that I was working on something exciting and now I am ready to officially share it: I am opening an Etsy shop!
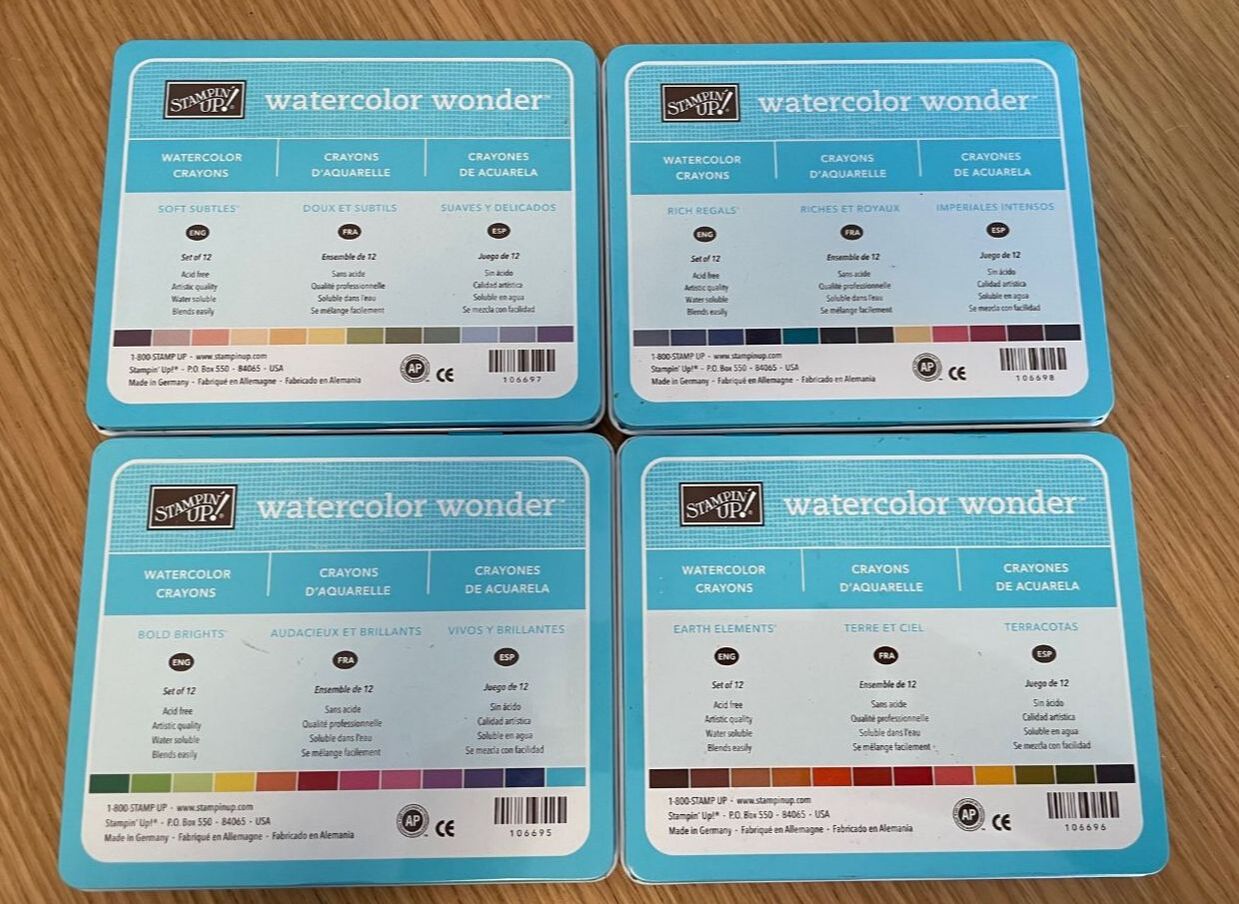
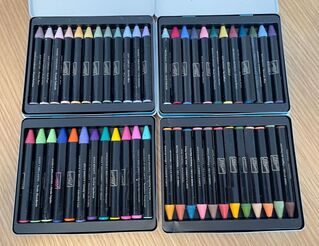
At the moment I would say that I am about 75% ready to open up the shop, but am just finishing up some final things and making sure I am all ready with shipping, packaging, etc. I would love to be able to tell you that I will be 100% ready for next Sunday, but I don't want to overpromise. So I will say that I HOPE to be ready by next Sunday, but don't be surprised if it's actually 2 more weeks :) I am going to be starting out easy with some things that are light and relatively easy to ship: canvases, yarn hangings and canvas bags/pouches. I do have some larger/heavier things that I would love to add in the future, but I am still trying to figure out the best ways to ship things and not have it be cost prohibitive. I've decided that I want to offer free shipping on my Etsy shop so I have been figuring out how to price things to cover the cost of shipping and find shipping options that are reasonable. Thank you to Cara from SeptemberSunStudio for giving me many "Etsy for Dummies" lessons! So that's the exciting announcement! This is something I have been working on for a few weeks and is why I haven't had much crafty content to post for a while. I will be back in action soon and will hopefully have an update next week or the week after letting you guys know that the shop is live. Thank you all for your patience! - Rebecca P.S. Today's photo on the homepage is from Pexels user Markus Winkler: www.pexels.com/photo/typewriter-with-paper-5227049/ Happy Sunday everyone! So before we get started on the crafty content today I just wanted to share a fun update in case you had not seen it on Instagram or Facebook. We have a new logo! I am so in love with this logo and it was made by the lovely Cara over at September Sun Studio: www.etsy.com/shop/SeptemberSunStudio. Go check her out for all your custom art, adorable sticker and pretty yarn weaving needs. Now on to the craftiness! So a few blogs ago I shared some watercolor rain paintings that I made. I was still on a watercolor kick and my mother was getting rid of some old Stampin' Up! watercolor crayons which I happily snagged.
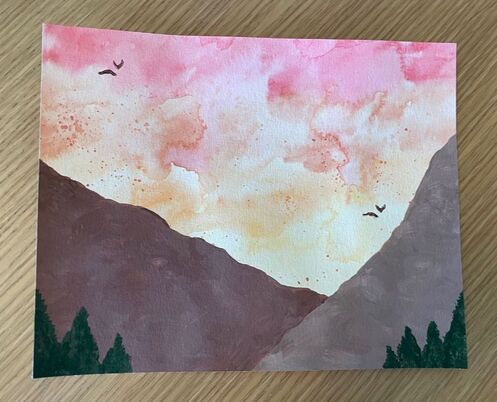
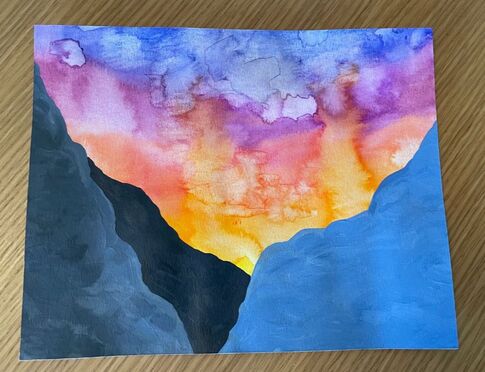
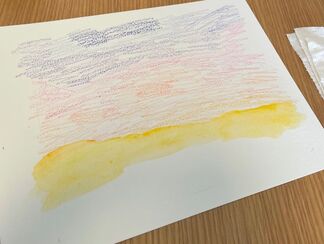
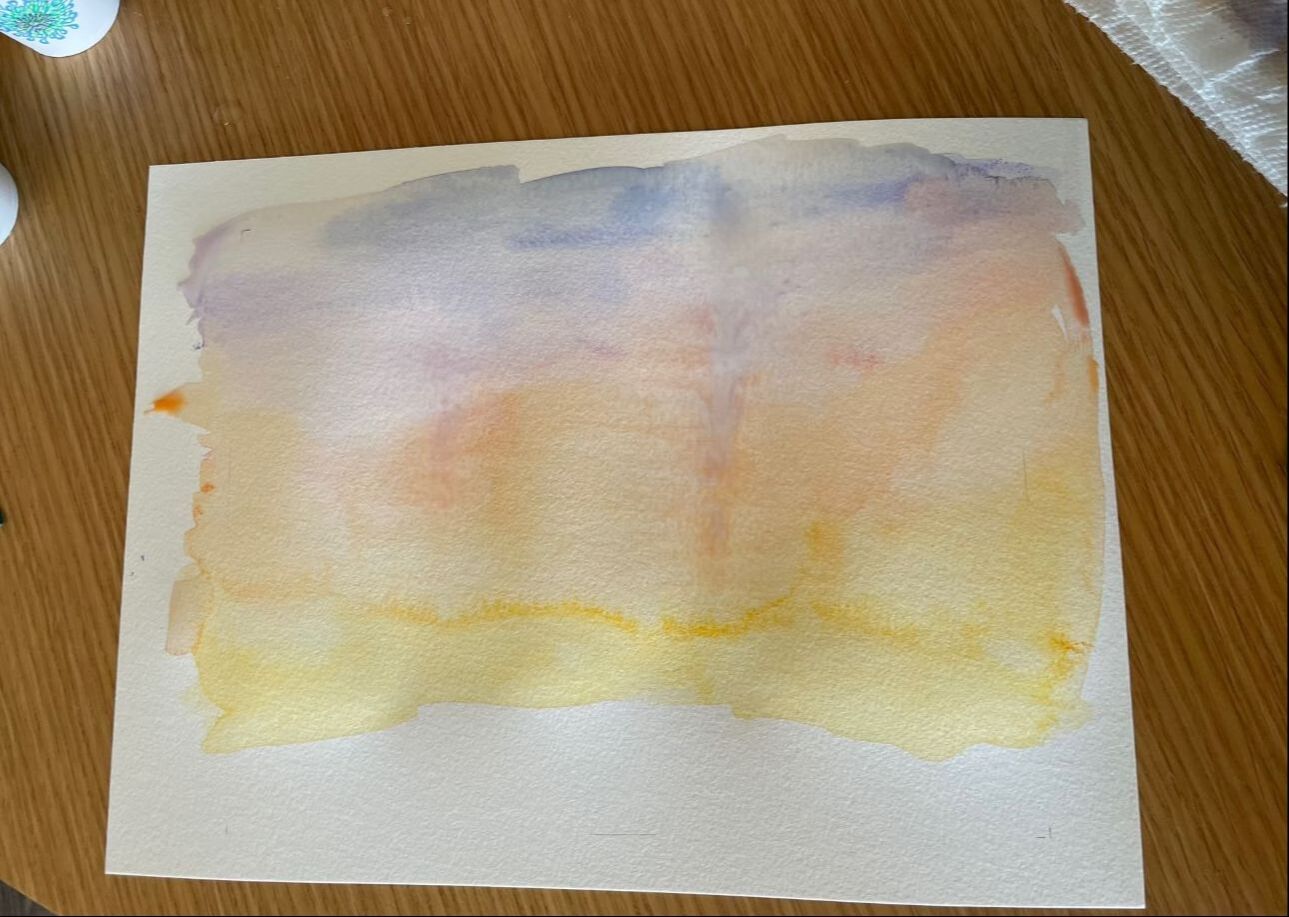
Although my other watercolors work well enough, I was very excited about these crayons as it is much easier to control how much you use and how dark or light you want the colors to be. I wanted to do a sunset painting just for myself so I started by coloring some of the pastel colors onto watercolor paper. You can then apply water directly to the paper and blend the colors together.
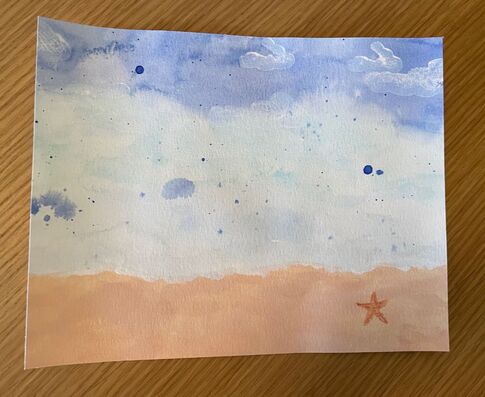
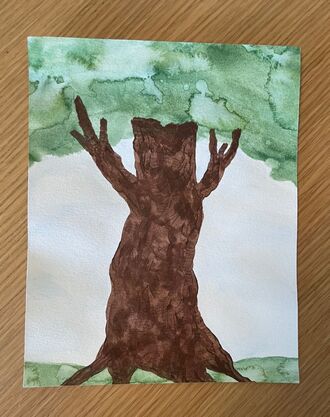
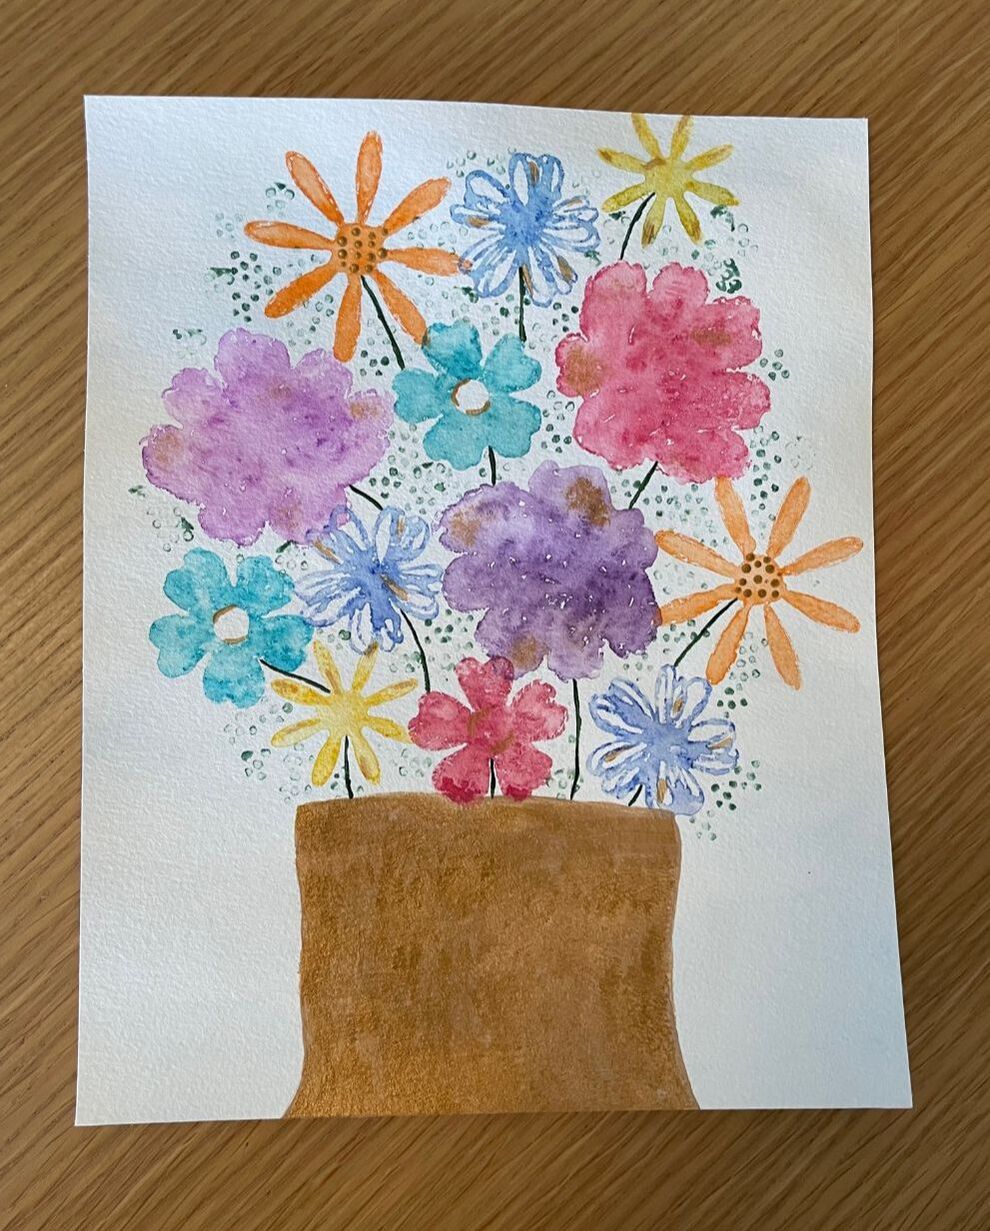
I wanted some real contrast between the watercolor and the other details in the art, so I used acrylic paint overtop of the watercolor. I sketched out and painted some mountains and the setting sun in the valley of the mountains. 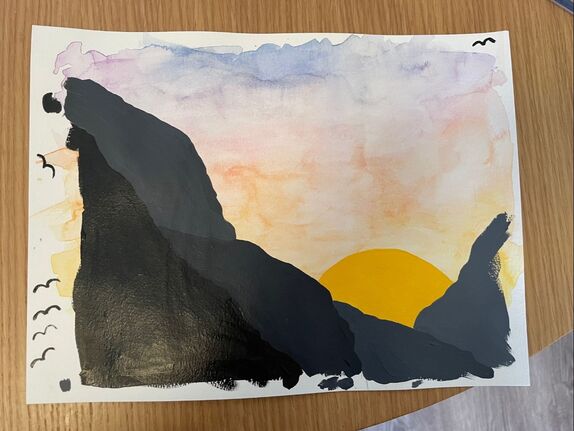 I then cut the paper down and put the art in a wooden frame I had painted black. What an easy art piece! 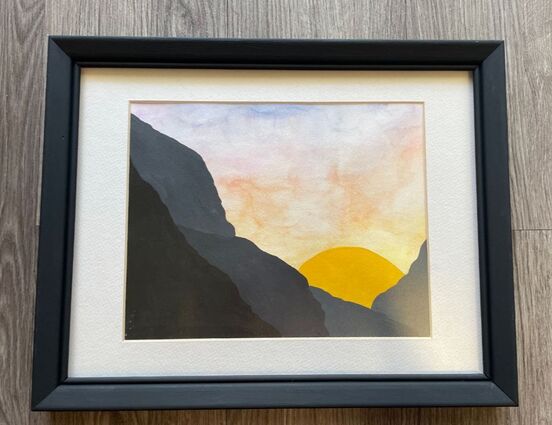 I really liked how this came out and wanted to make some more paintings that used both watercolor and acrylic paint. As of right now I have 5 additional paintings made and have cut each down to 8 by 10 inches. I figured they could be sold at a craft fair as art prints that people could frame on their own. For 4 of these, I used the same basic technique of doing watercolor first and then adding detail with acrylic paint, but for the flower bouquet painting I did something a little different. My mother had the smart idea of drawing directly on a rubber stamp with the watercolor crayon and then spraying water on it. This allowed me to get the basic shapes of each flower using a rubber stamp instead of having to freehand them. 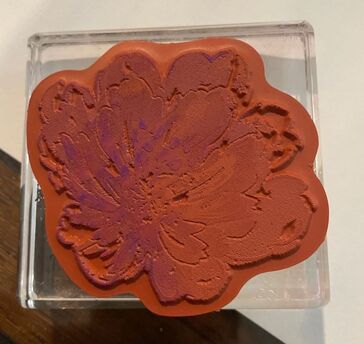 And here are the 5 paintings I have at the moment! They are very simple and pretty quick to make so I'm sure I'll be doing more of them when I want a small project.
   What do you guys think of these paintings? Let me know in the comments below!
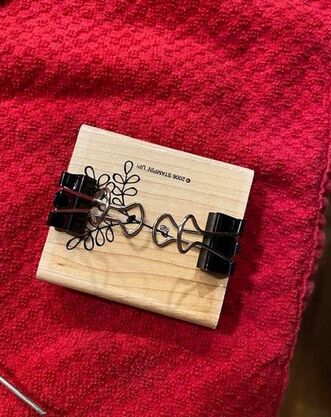
- Rebecca Today's photo on the homepage is from Pexels user Jadson Thomas: www.pexels.com/photo/pain-brushes-inside-clear-plastic-cups-542556/ Hello again! It’s Suzanne back on the blog with a special guest this week – my sweet hubby and Rebecca’s dad Paul. He’s going to be putting together part one and helping on part two of this week’s two-part block party. A while ago, to save storage space, I removed most of my rubber stamps from their wooden blocks. I kept a few of the blocks to use in future craft projects and today, I’ve got two quick and easy projects that can easily be duplicated with any small block of wood you might have available. First up is Paul’s idea. We are going to make a small sanding block that is the perfect size for the small sheets of sandpaper that are sold at the dollar store. This quick project takes one block, two small binder clips, two washers, and two screws. 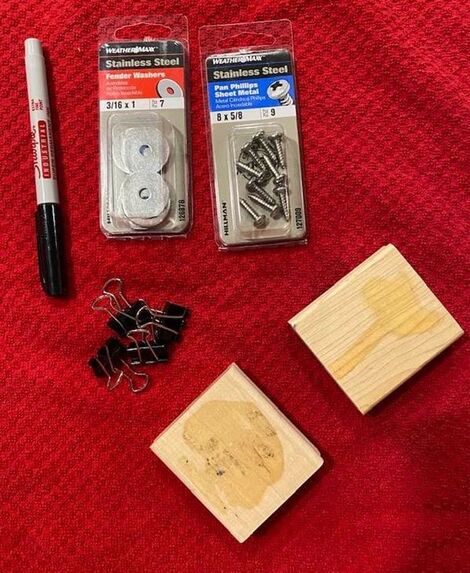 First, position your binder clips at each side of the block with the openings facing out. Mark where the handle of the binder clip lands so you know where to drill a pilot hole for your screw.
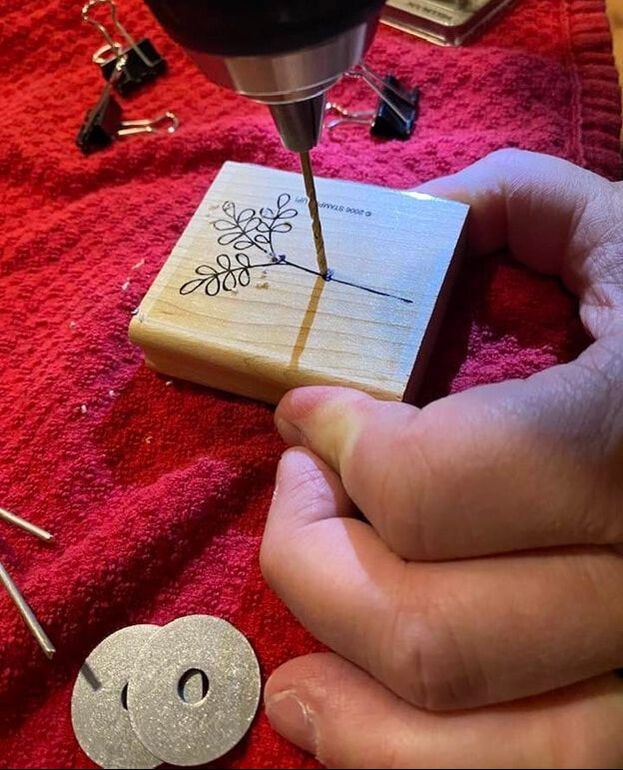
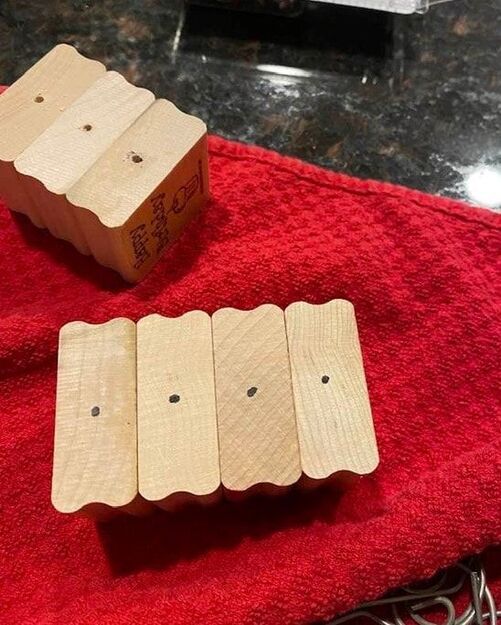
Once the pilot hole is drilled, screw a washer over the handle of the binder clip to hold it in place. 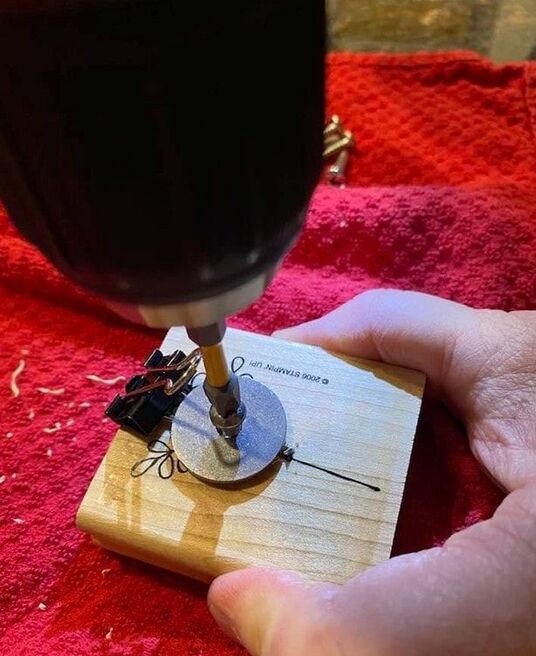 Repeat on the other side and clip your sandpaper in place. 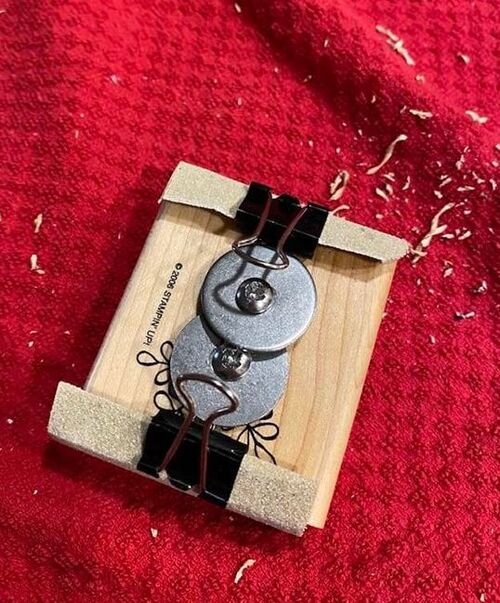 You now have a perfect little sanding block for small craft projects. 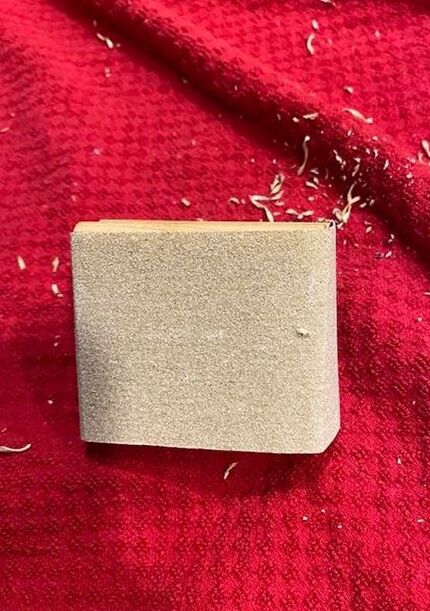 The second quick project today is going to make use of more blocks and these picture holders that I’ve had in my stash for so long that I can’t remember where I got them. 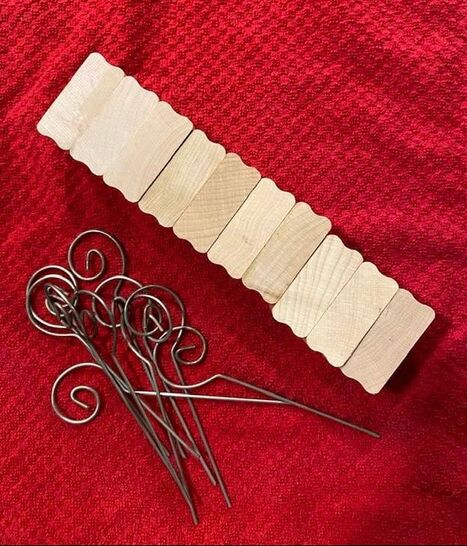 I started by marking a spot on each for Paul to drill a small hole in each of the blocks.
After peeling off the label and giving the block a quick sanding with my new sanding block, I gave it a coat of faux stain with a furniture repair marker. These markers are a quick and easy way to mimic the look of stain on a small project without having to pull out a can of stain. 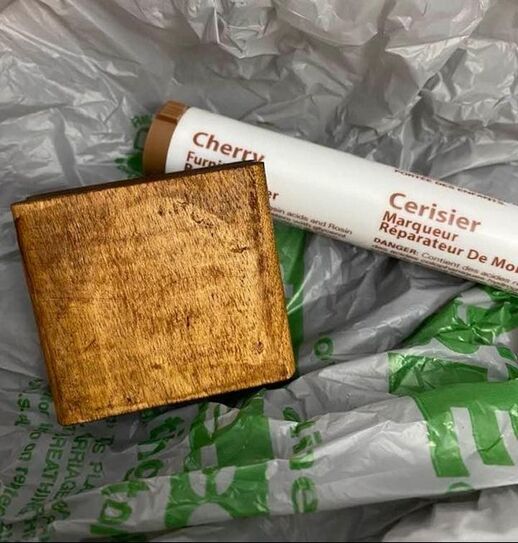 While the block was drying (which takes only minutes), I cut some squares of cute and colorful paper and layered them together. I picked papers that matched some adorable cutouts I picked up recently.  Using hot glue, I added the paper squares to the front and back of the block and wrapped some baker’s twine around the block. I added one of the cutouts and then secured the picture holder in the pre-drilled hold with gel super glue. As a final touch, I added a knot of the same baker’s twine around the base of the picture holder. In honor of Paul’s contribution to this week’s projects, my first finished product features Slowhand himself, Eric Clapton. I have nine more blocks ready to go to make more. 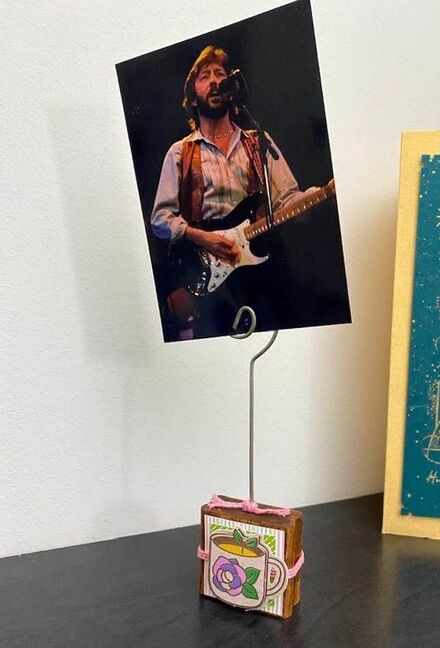 Thanks for stopping by!
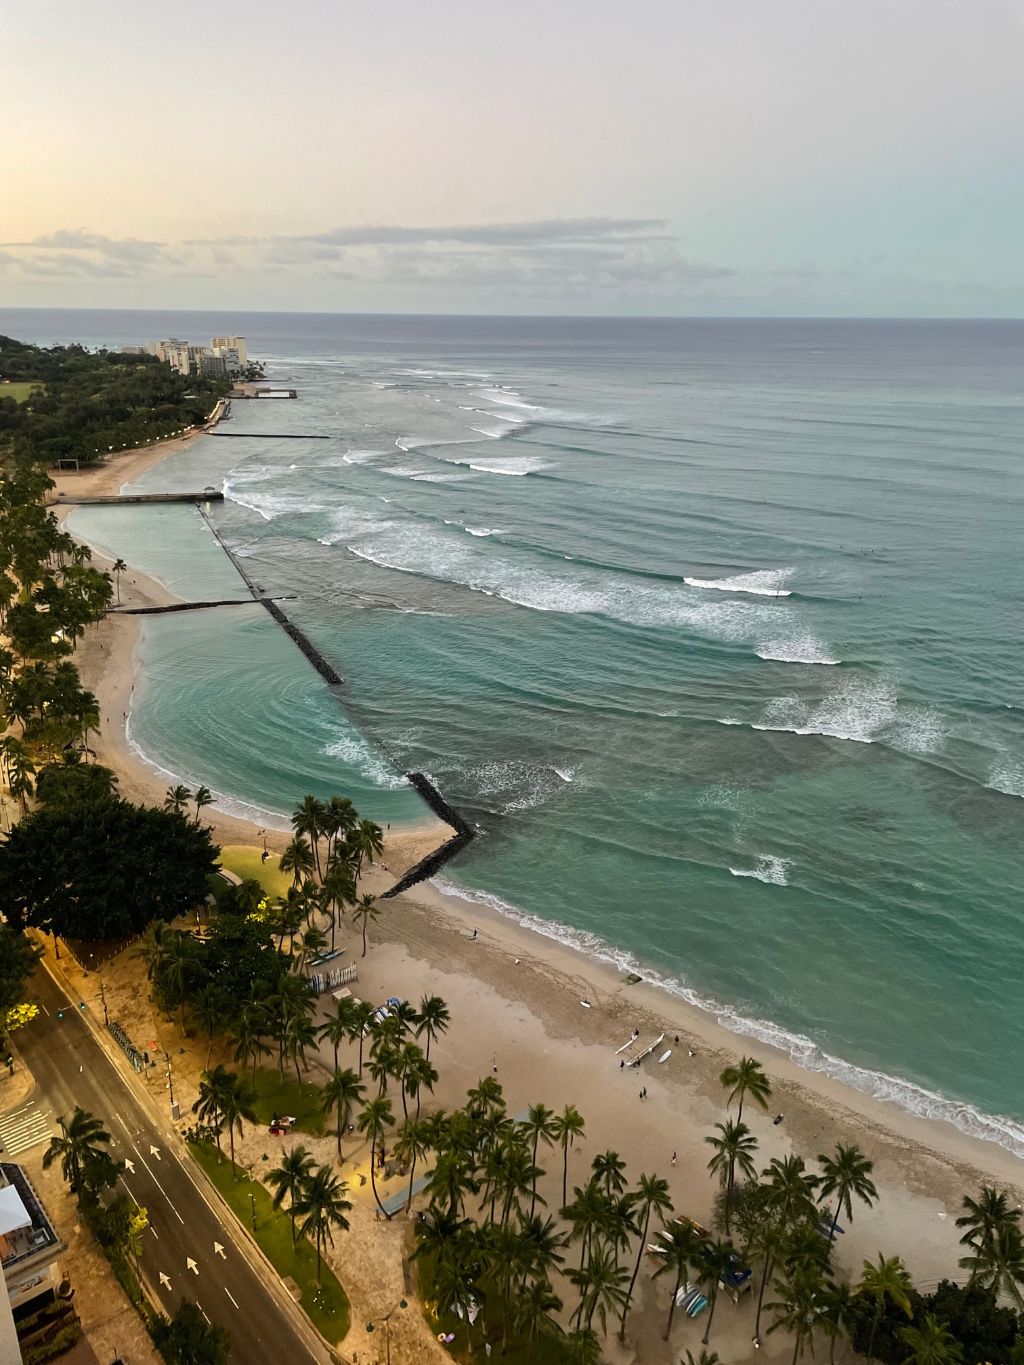
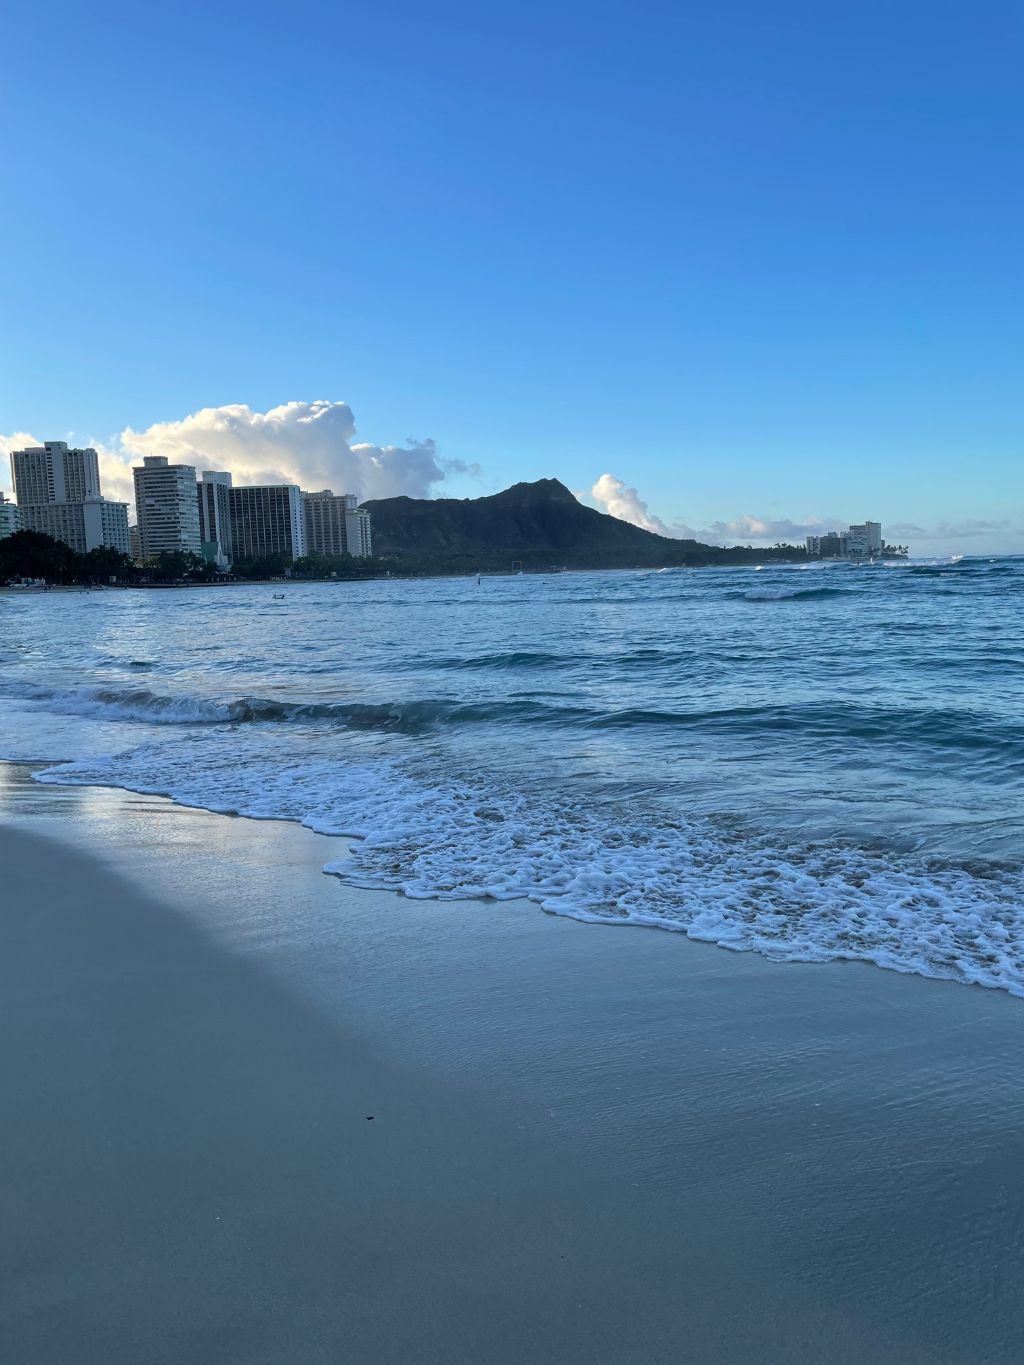
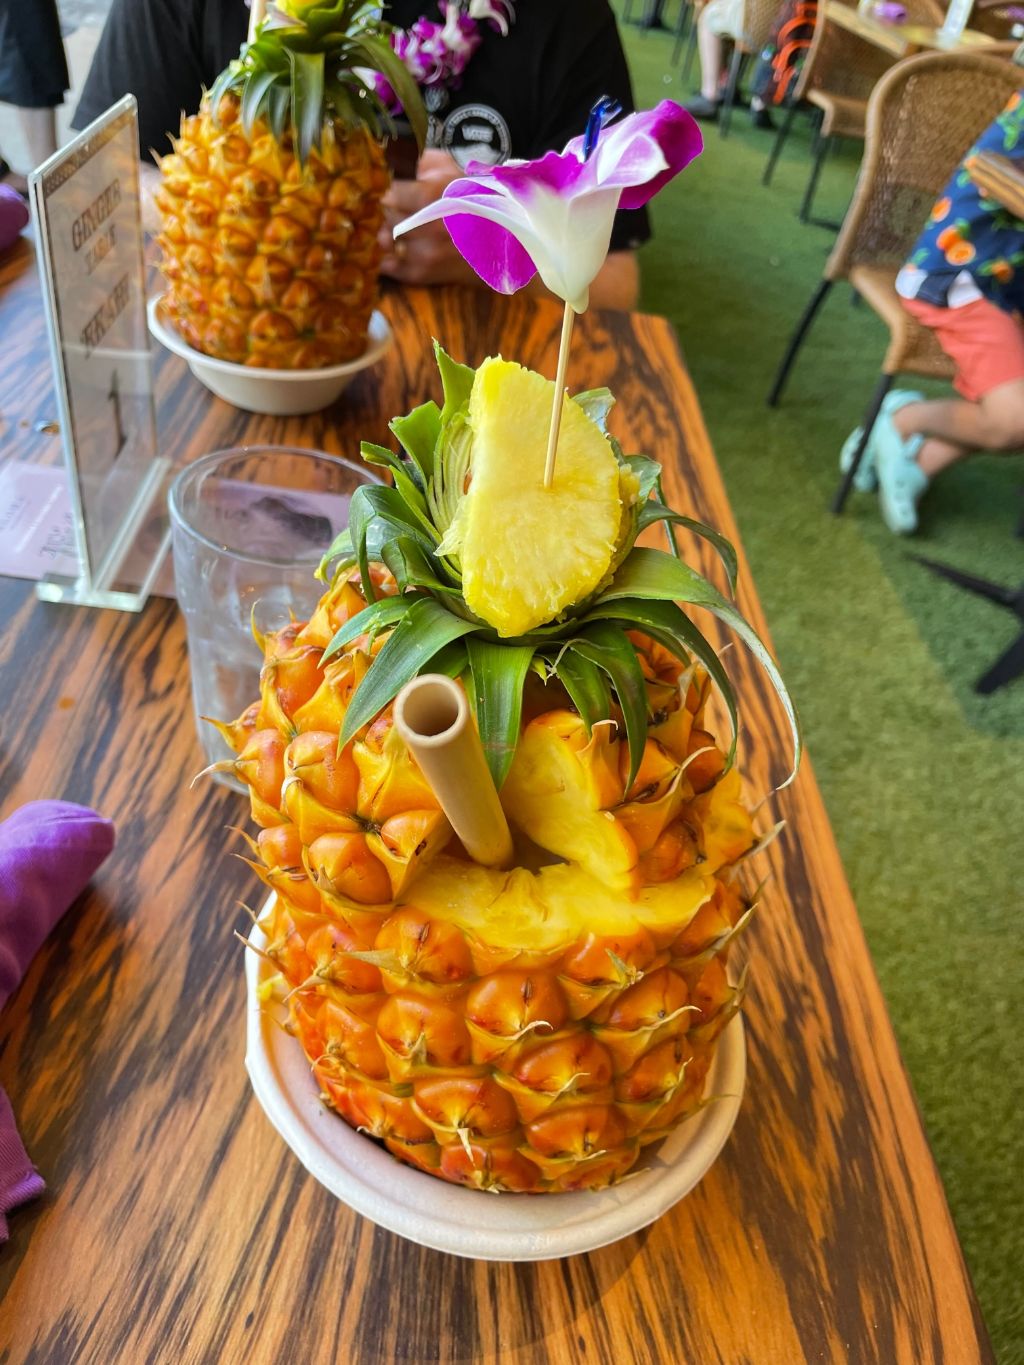
Rebecca here! A big thank you to my parents for the great ideas today! Today's photo on the homepage is from Pexels user FWStudio: www.pexels.com/photo/brown-wooden-panel-172277/ Hello everyone! I don't have anything crafty to share today as I've been on vacation! My husband and I were finally able to go on a honeymoon after getting married in 2020. We went to Hawaii, specifically Oahu, and I thought it would be fun to share some of the photos from that trip in a little mini blog. If you guys enjoy this more lifestyle-oriented blog, let me know! So let's start off with some lovely pictures of the ocean. My husband and I were staying at a hotel right across the street from Waikiki beach which was beautiful!
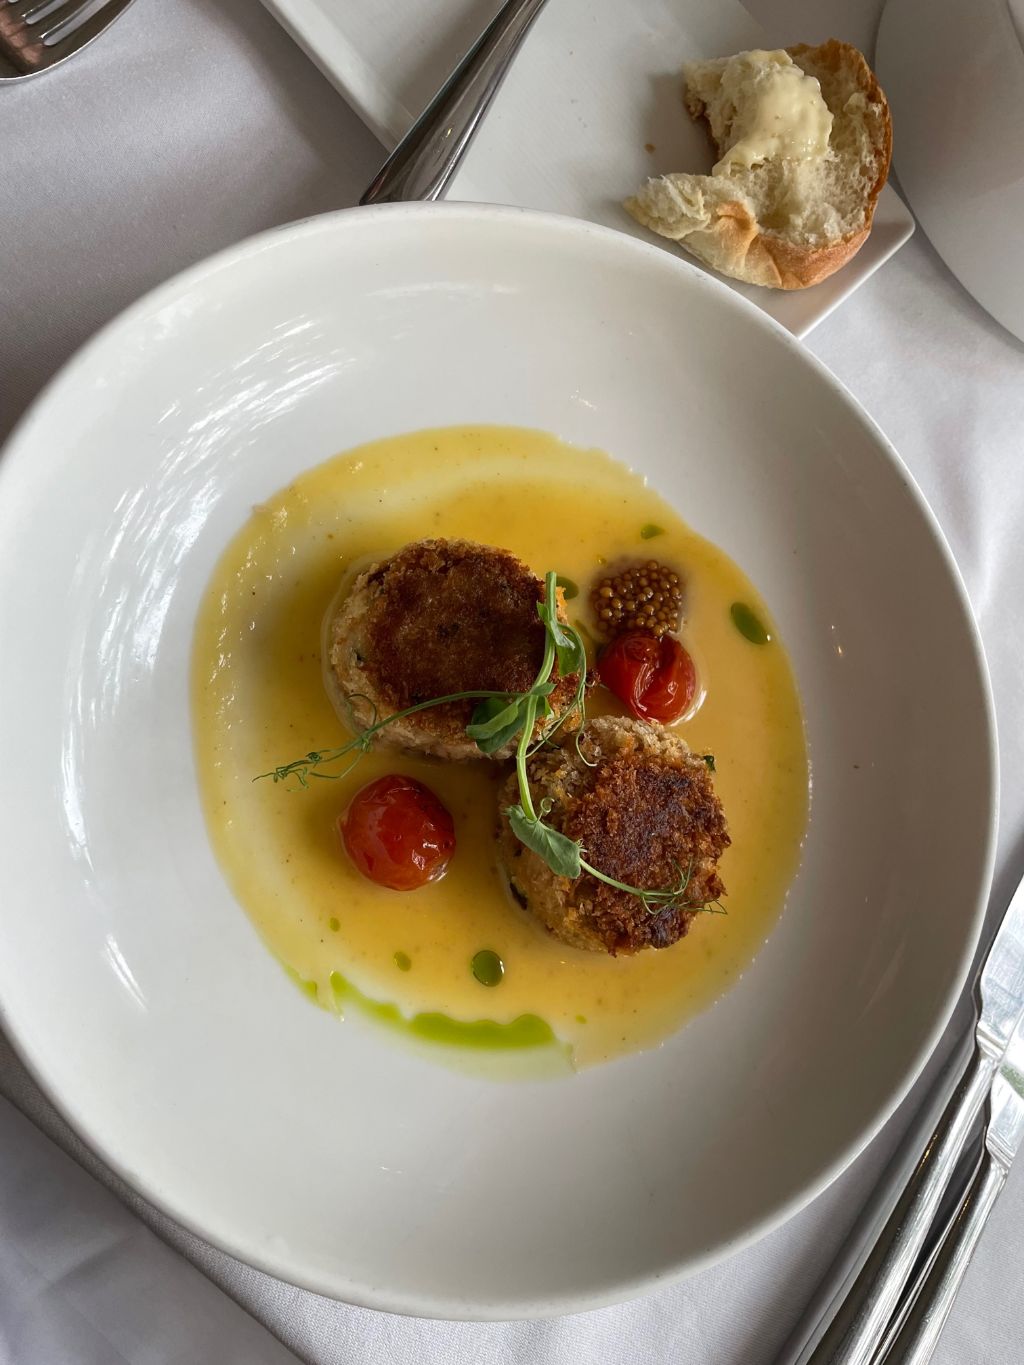
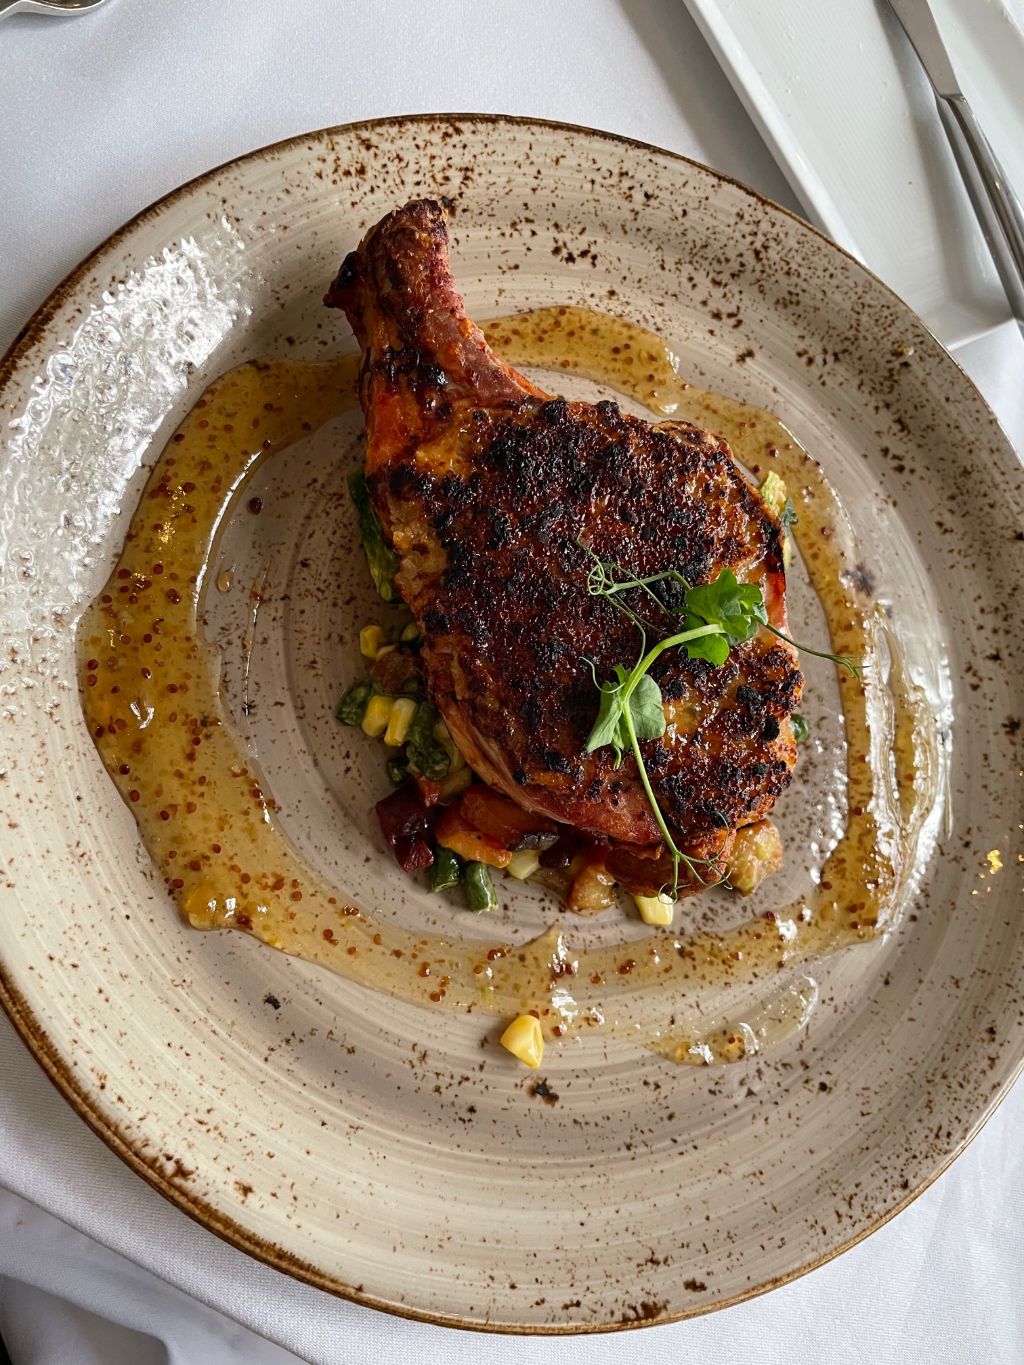
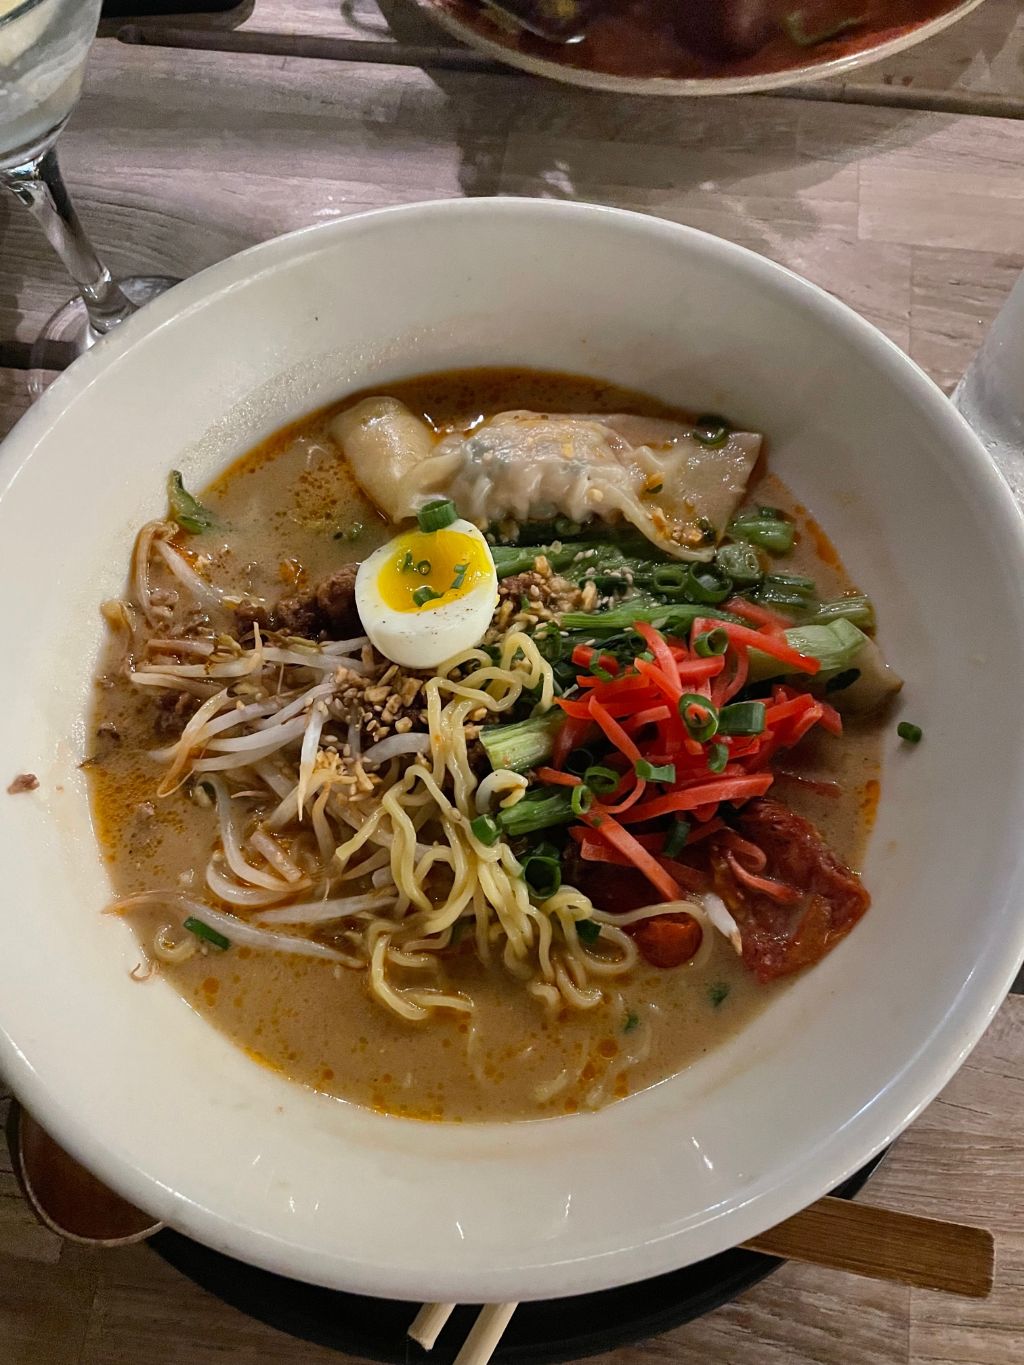
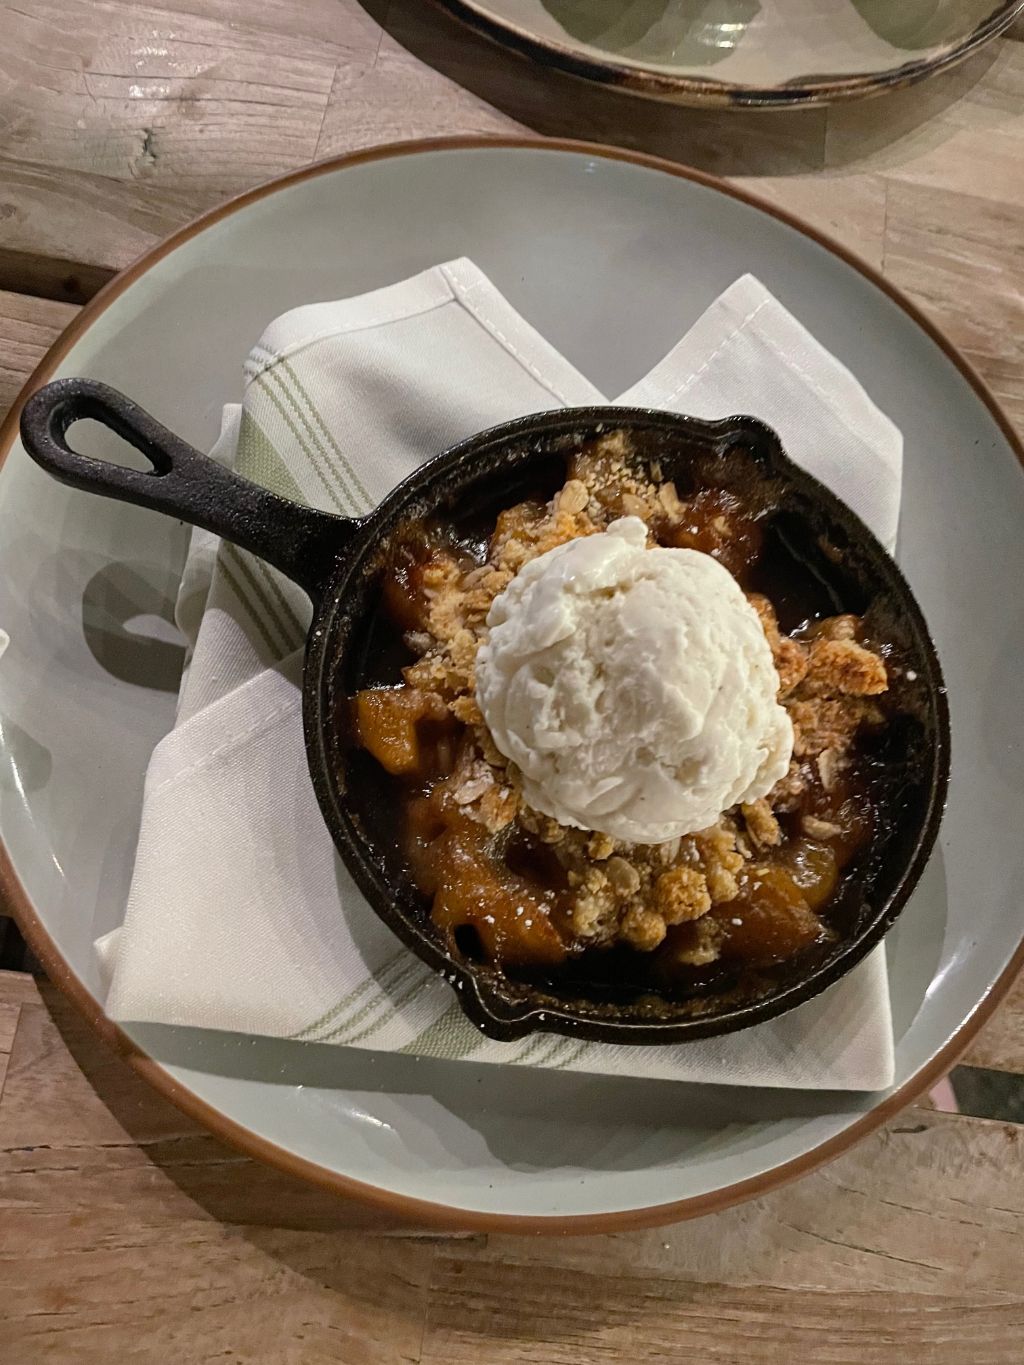
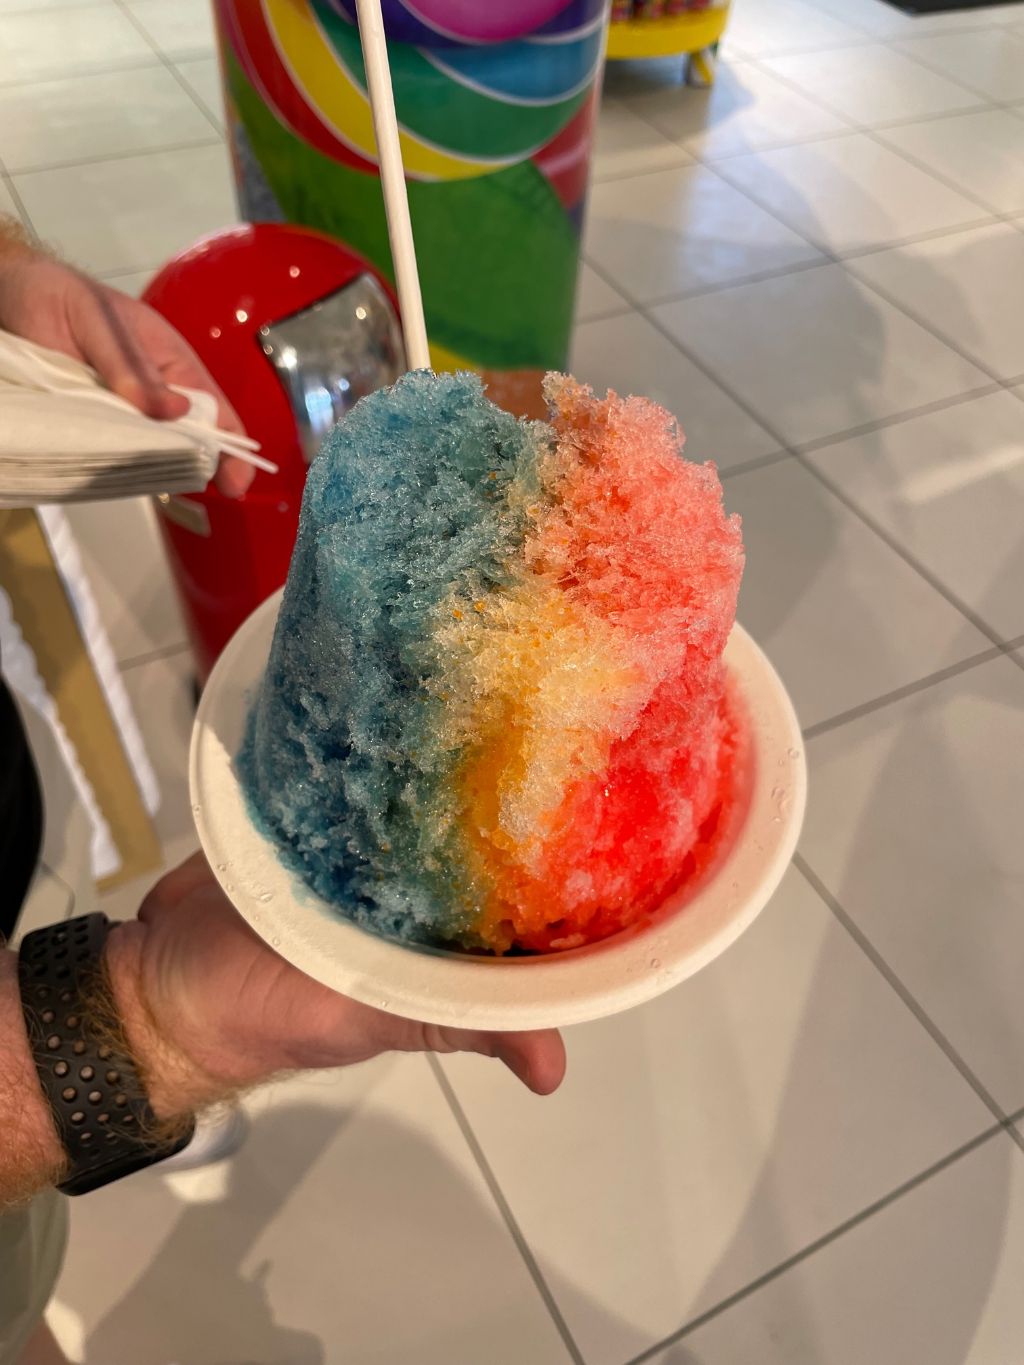
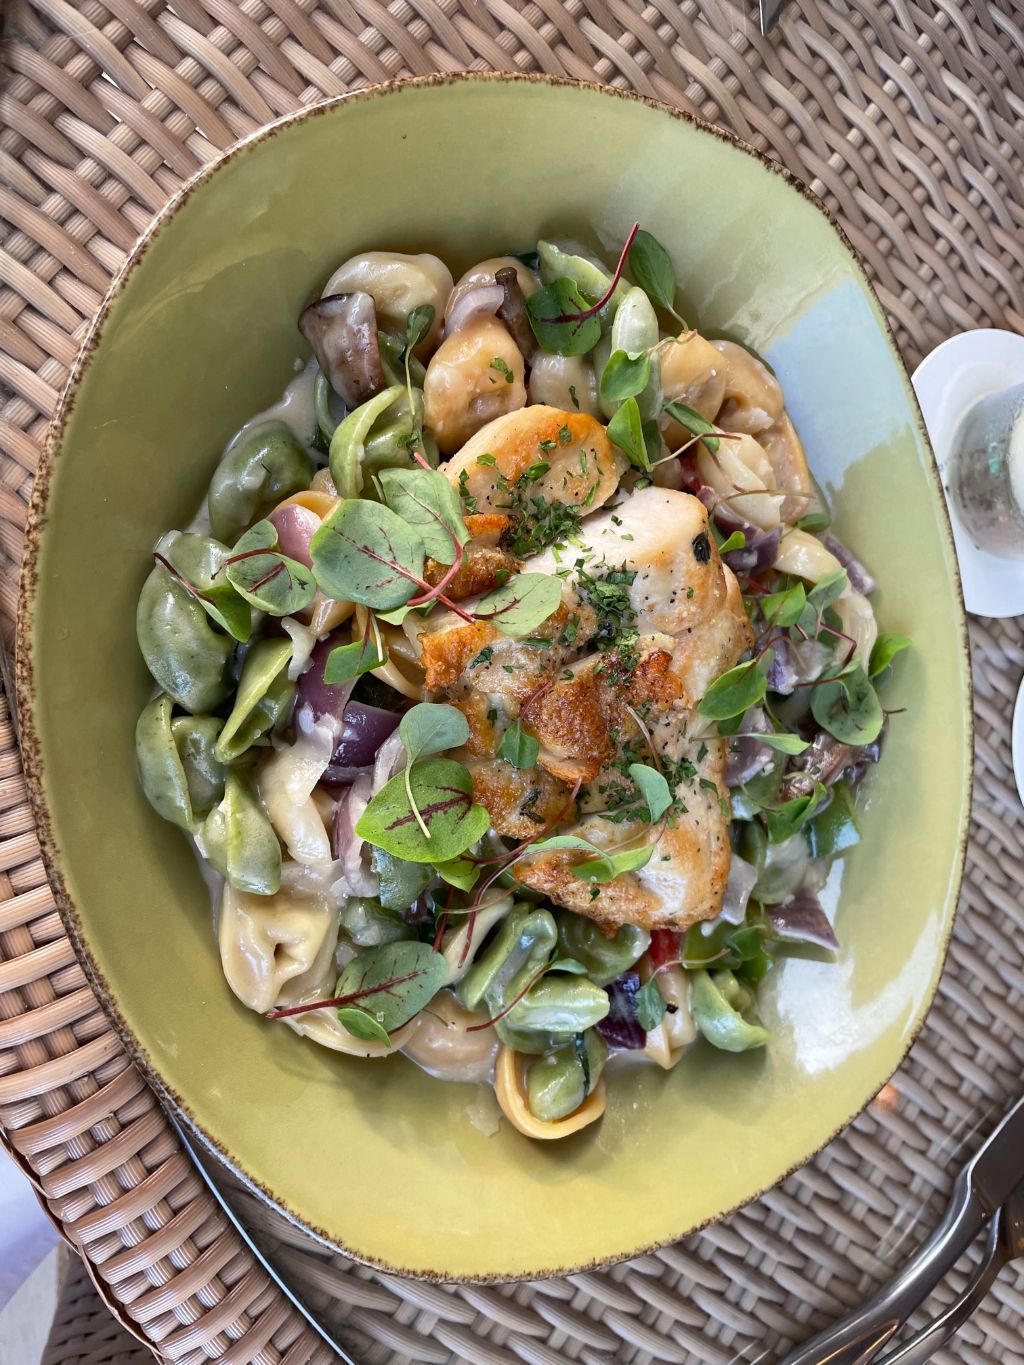
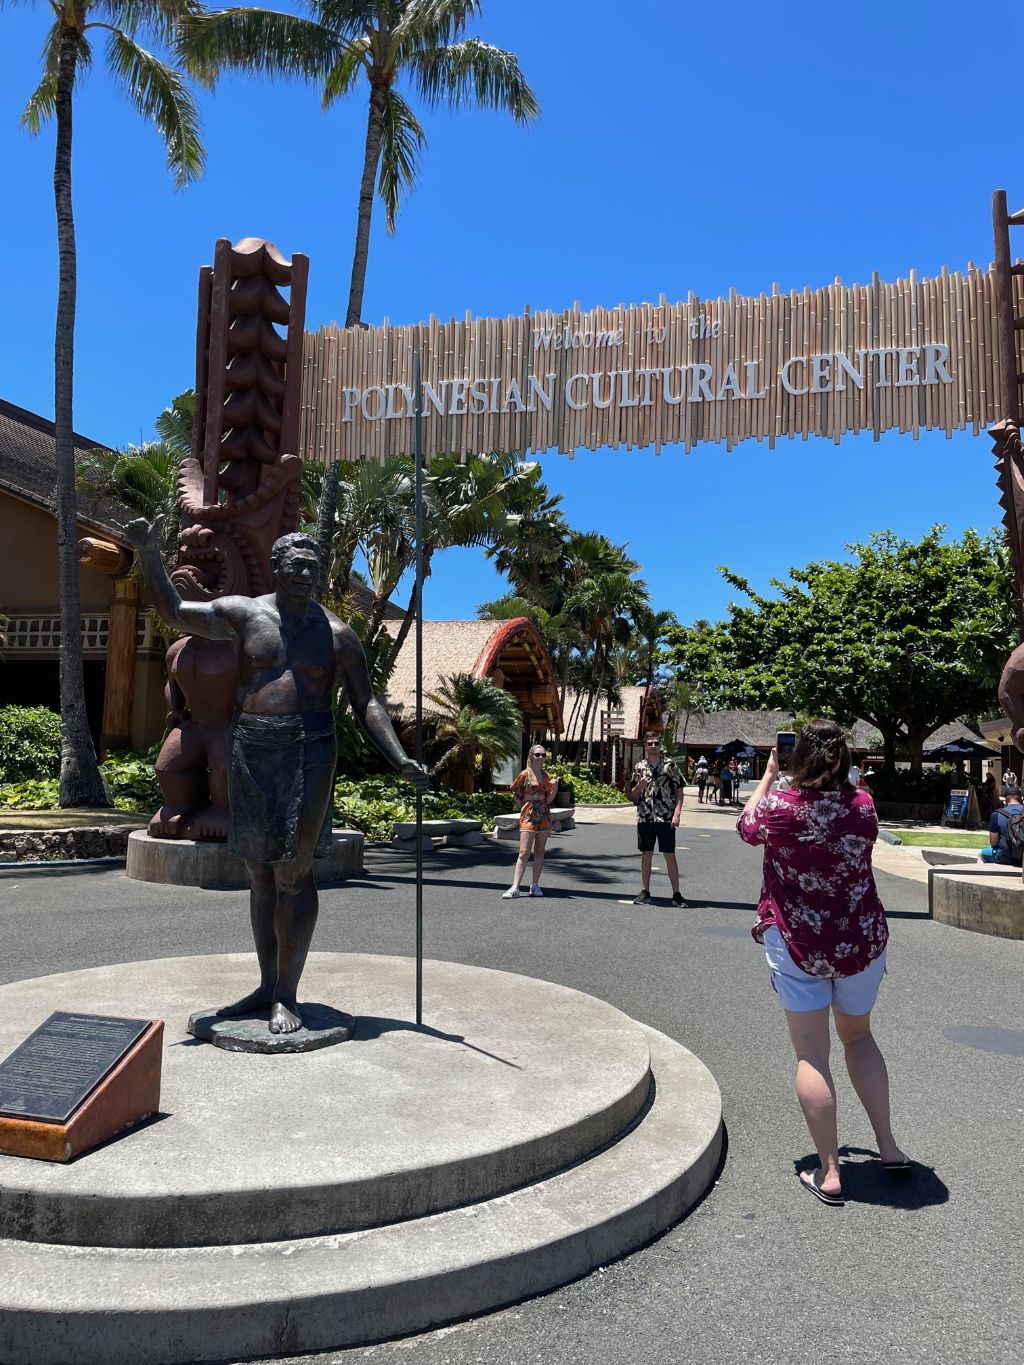
 Now for some food we got at various places across the island. The pig you see was for a luau we were a part of at the Polynesian Cultural Center (I would highly recommend a day here if you ever go to Oahu). PCC shares so much wonderful information about the history and culture of Hawaii, Samoa, Tahiti, Fiji, Tonga, and Aotearoa (New Zealand).
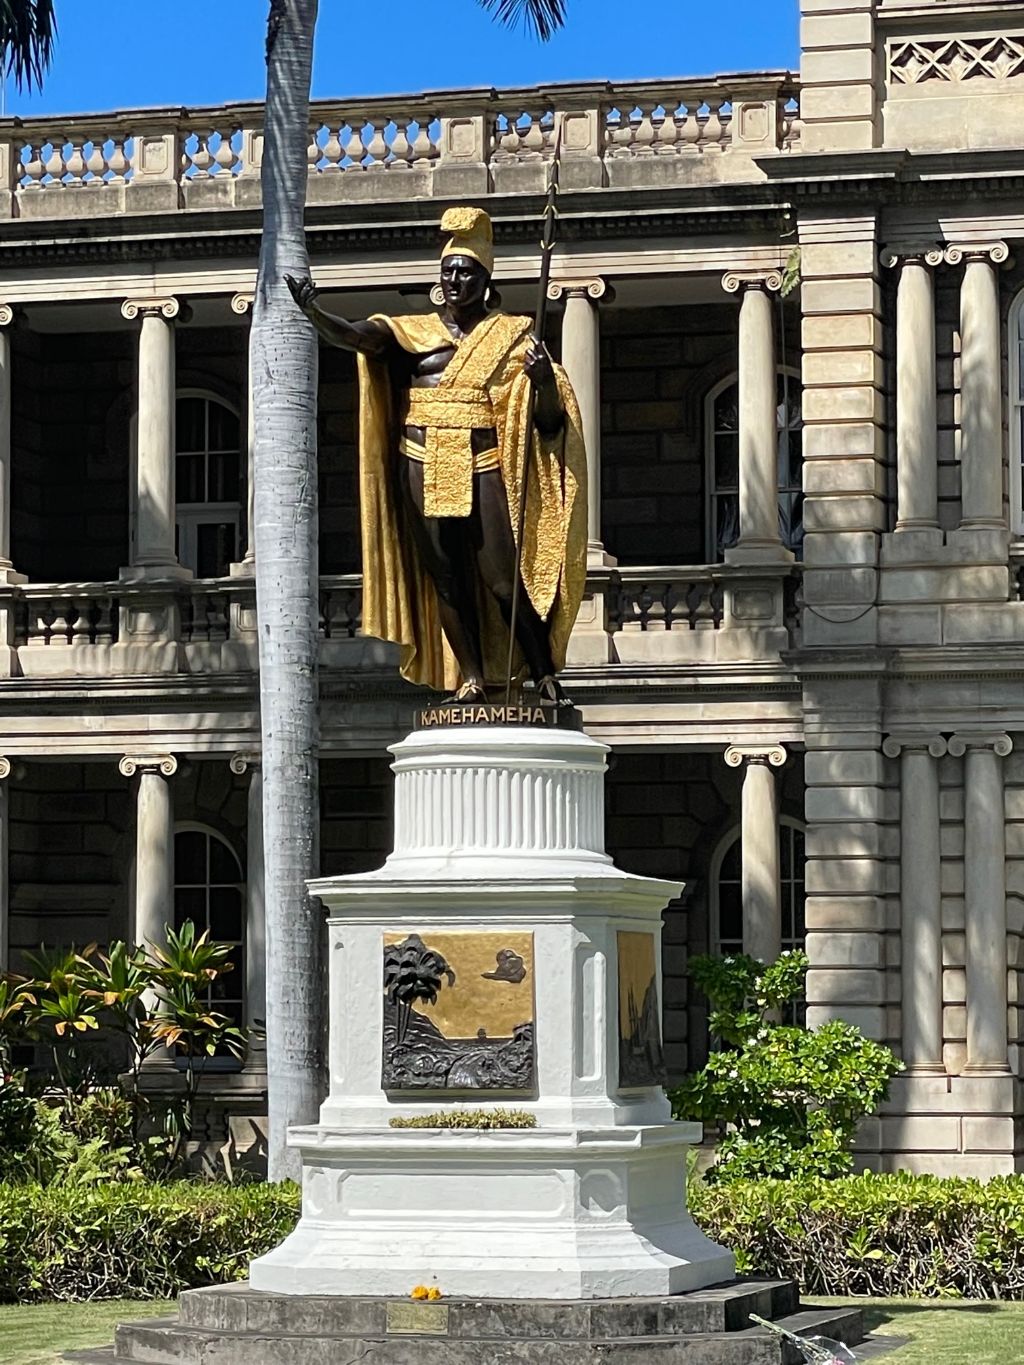
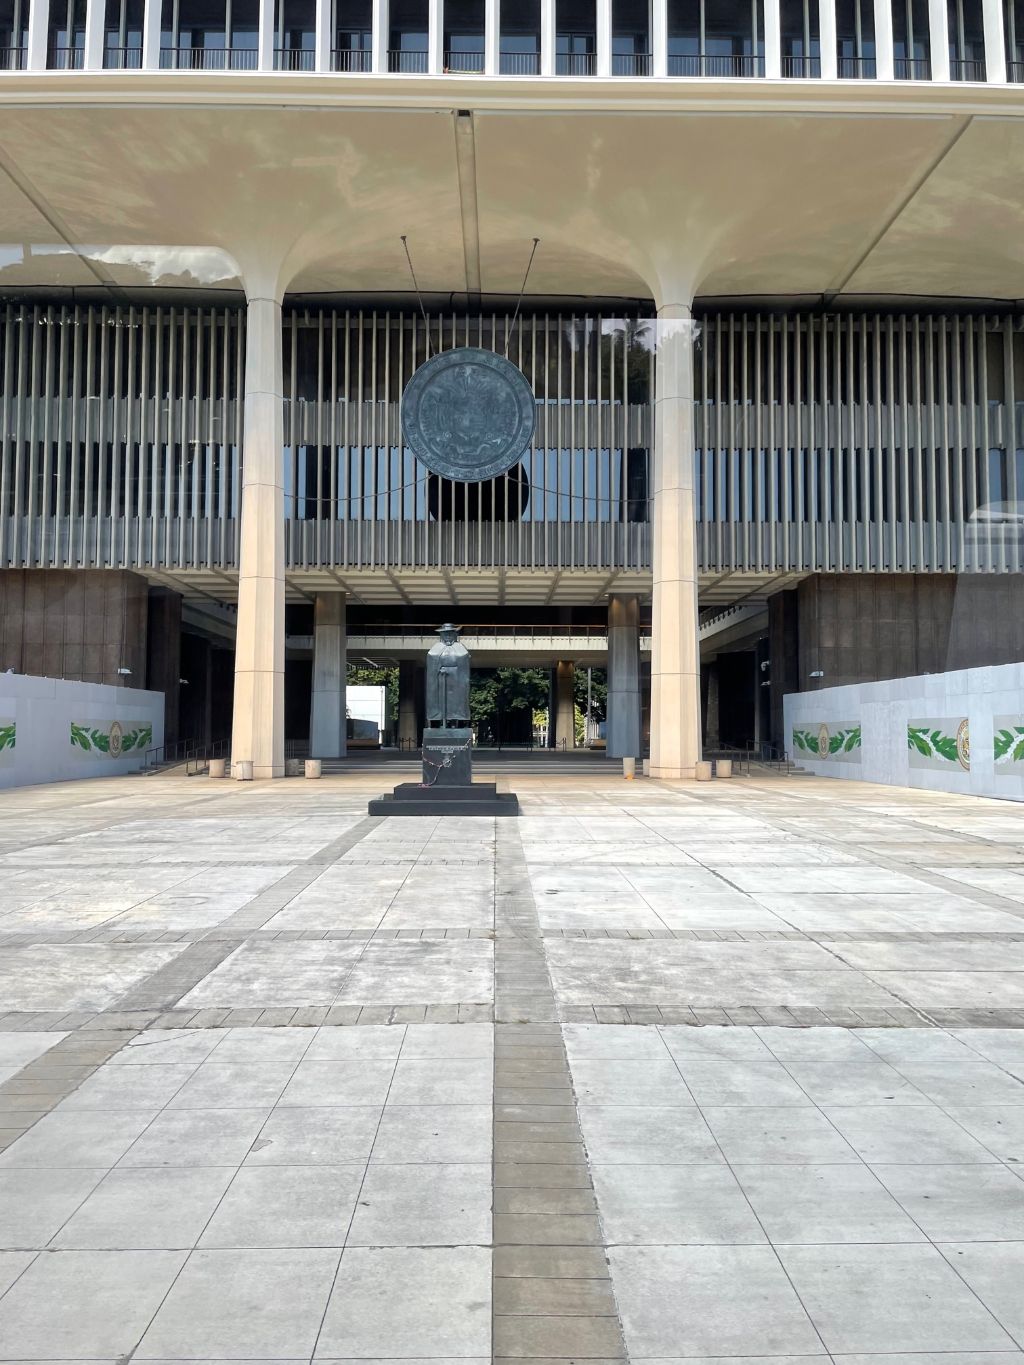
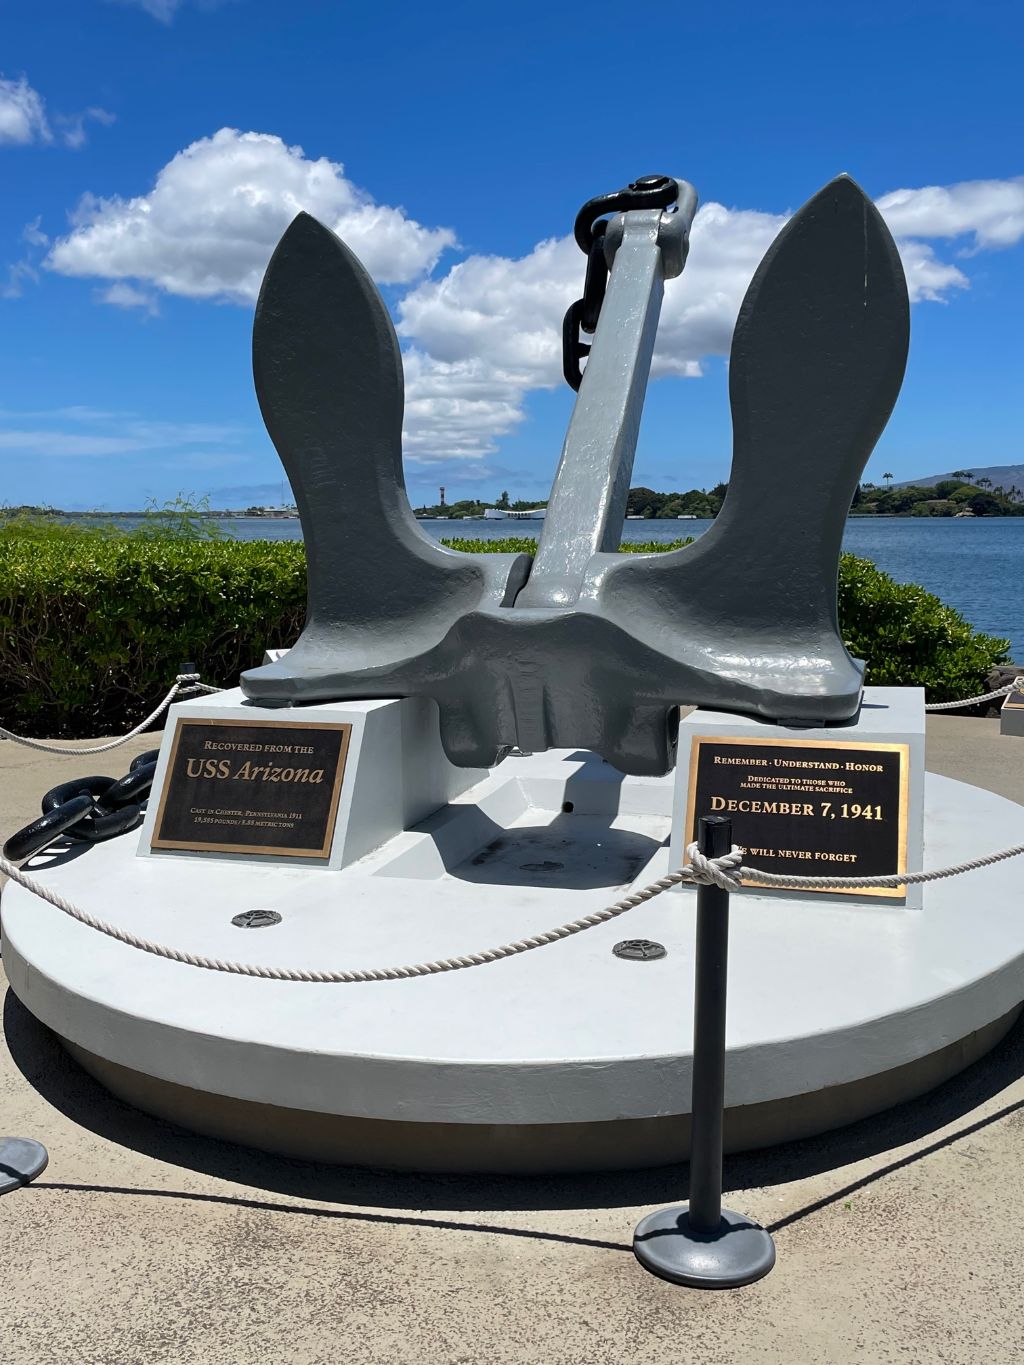
And here are a few bits and bobs including some wonderful dancers from the Polynesian Cultural Center, the Hawaii state capitol building, a statue of King Kamehameha who was the original ruler of the Kingdom of Hawaii, and an anchor from the Pearl Harbor memorial site.
 Those are a few of my favorite memories! Clearly I am just a tourist who spent one week on one specific island of Hawaii so I am by no means an authority on anything at all, but I can say it was a wonderful time. It was fun to experience both the "touristy" side of the island, but I also loved seeing the more rural side; it was very clear how important it was for people living on that side of the island that it remain undeveloped. It's easy to just think of Hawaii as a tropical paradise totally untouched by any of the issues of the mainland US such as high housing prices, homelessness and economic distress still going on due to the pandemic, but these issues are still present even there. If you ever go I hope you have a lovely time and just remember to be respectful of the people and natural environment that you have been welcomed into. I'd love to hear about some of your vacation experiences in the comments below!
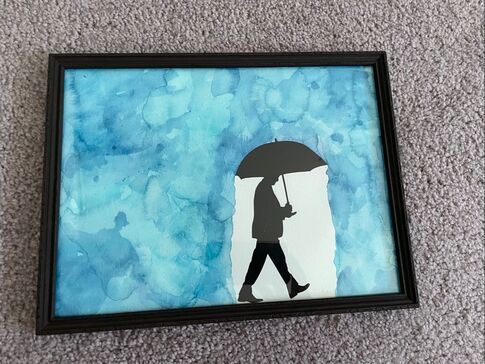
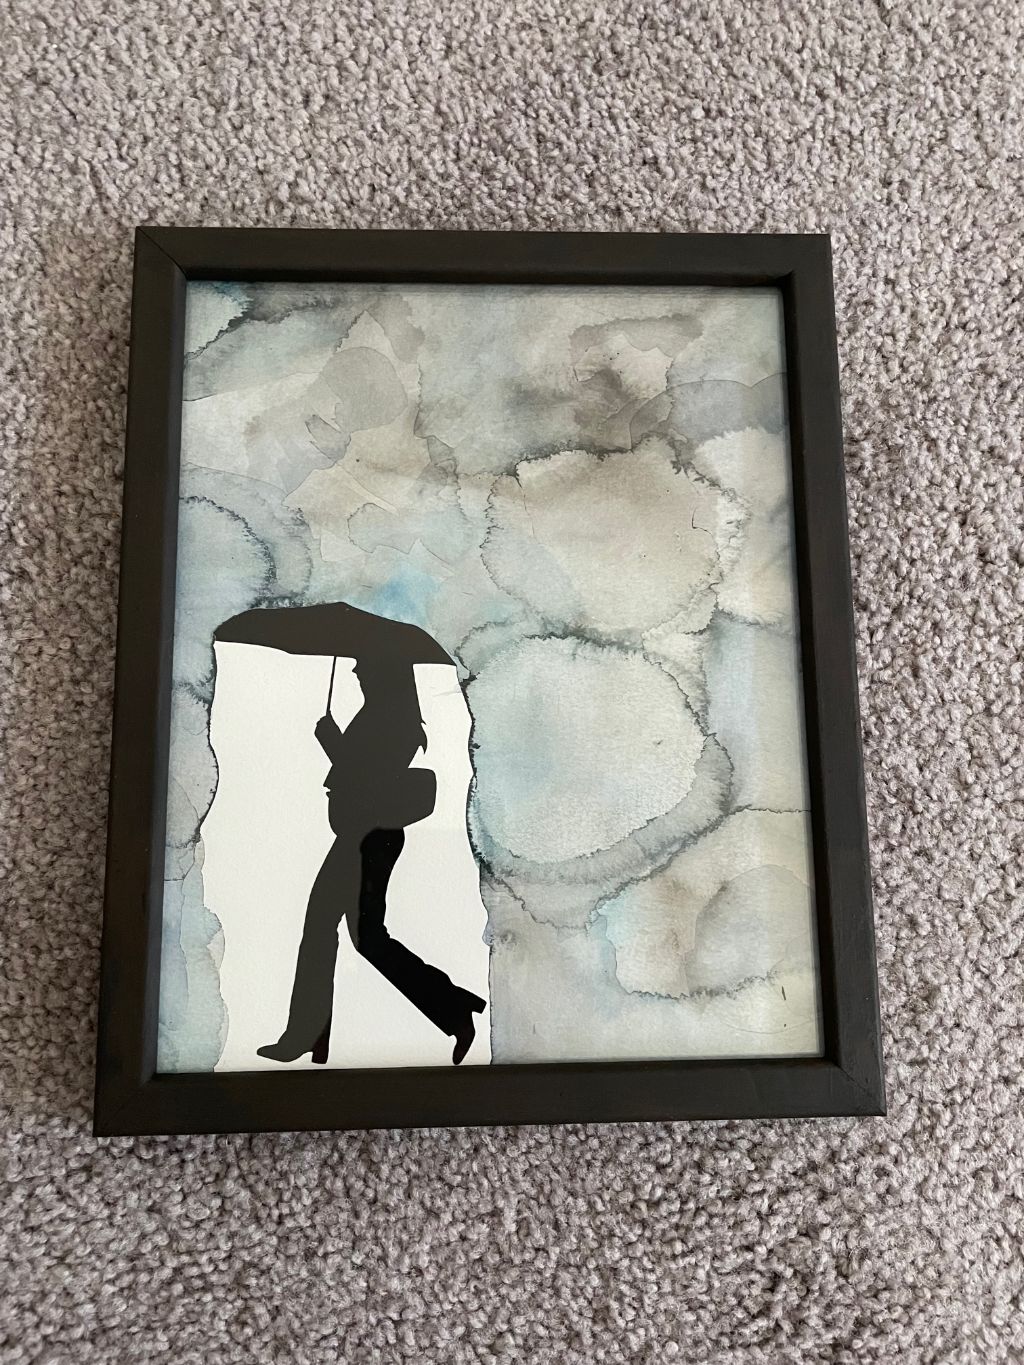
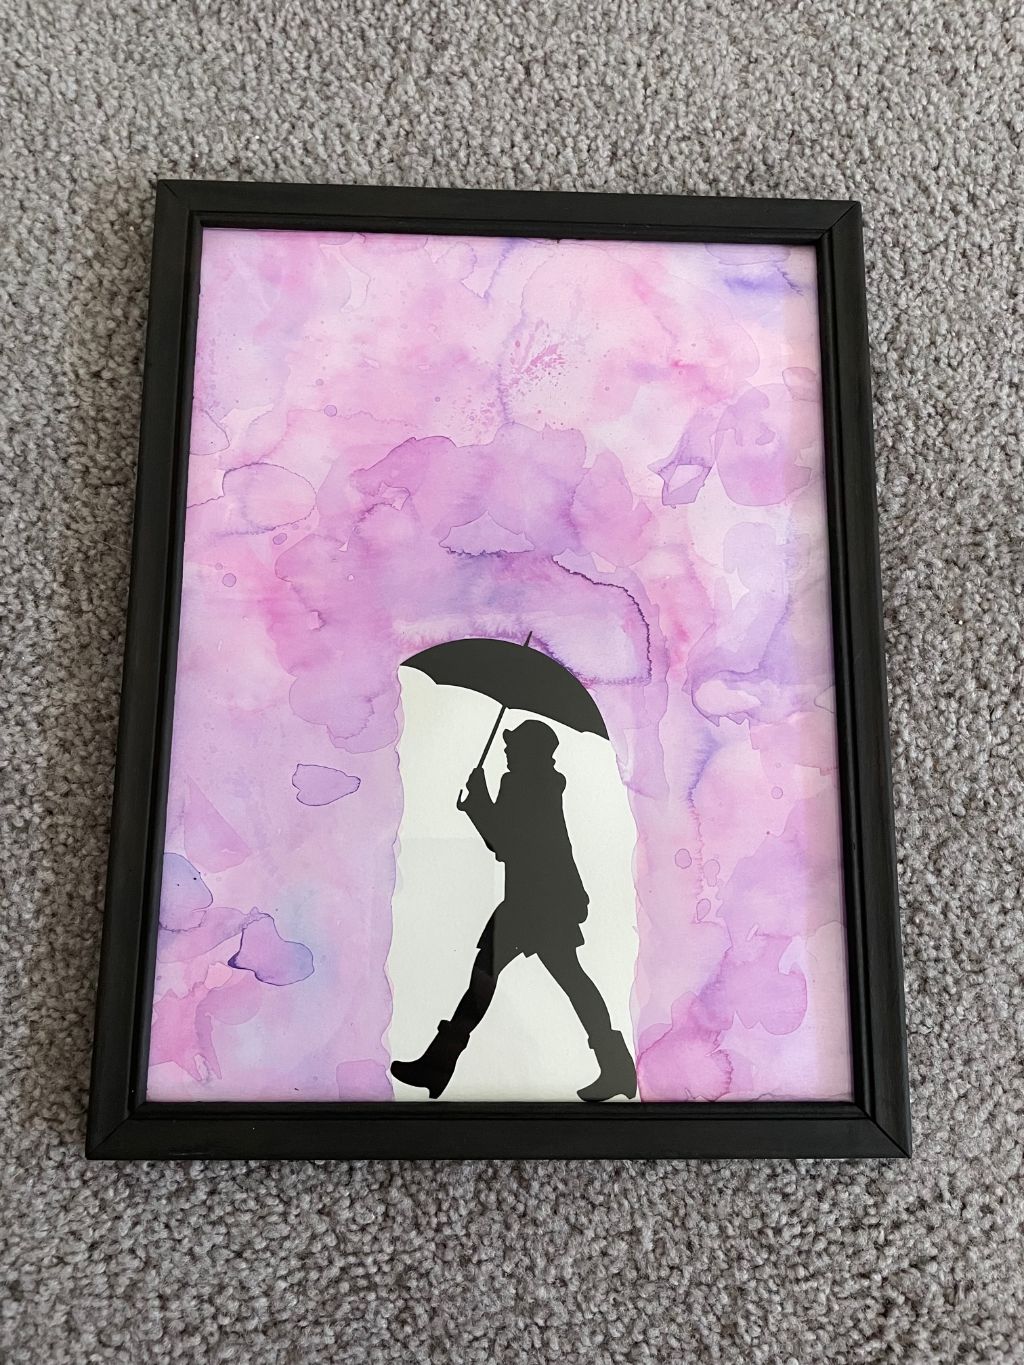
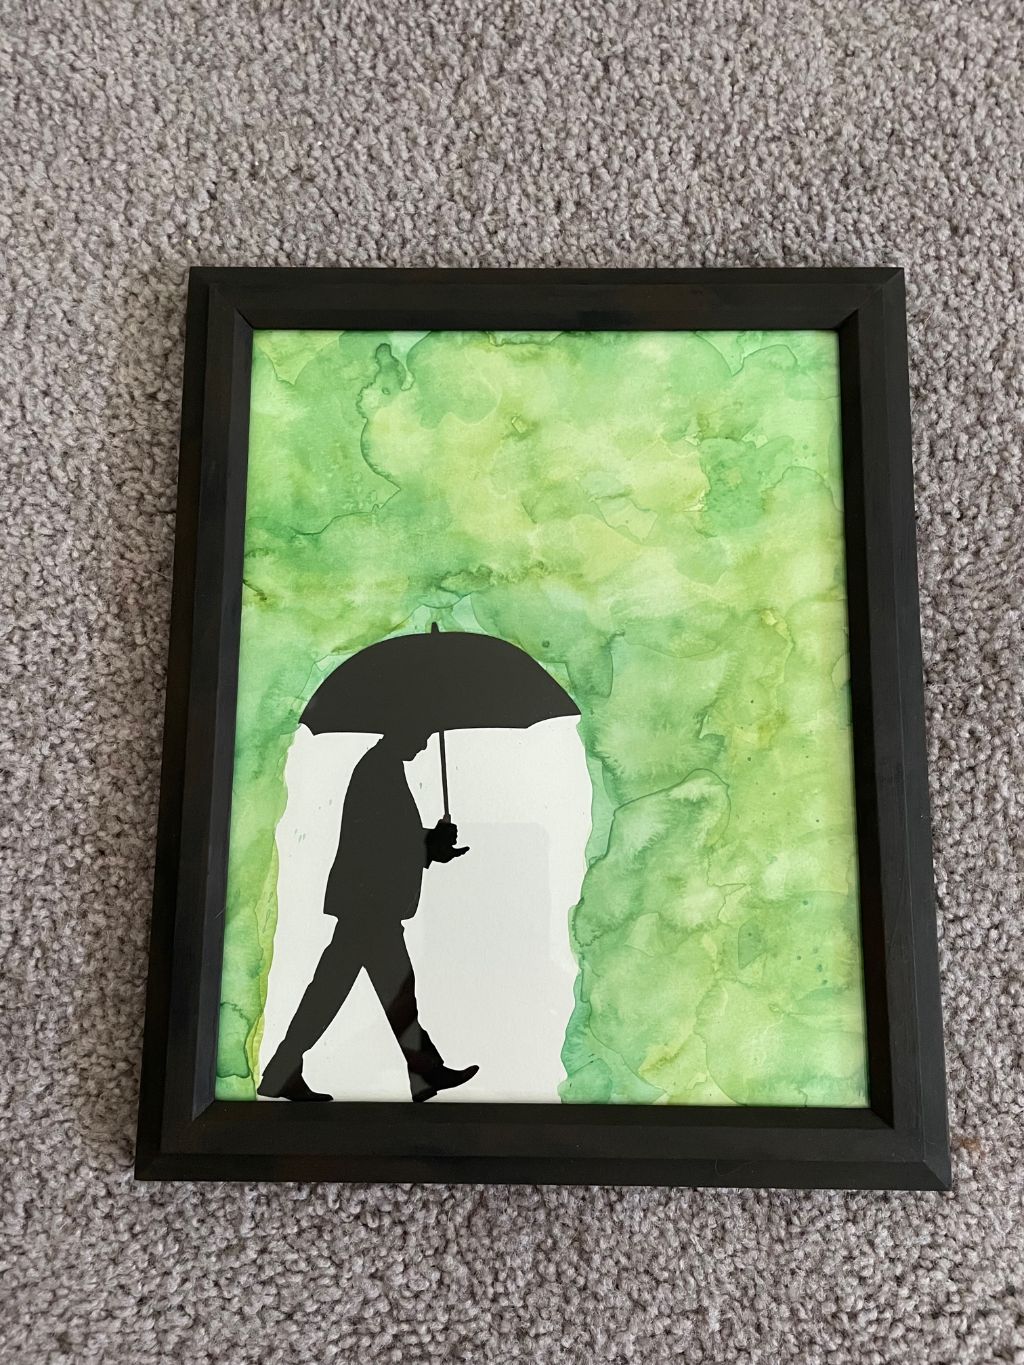
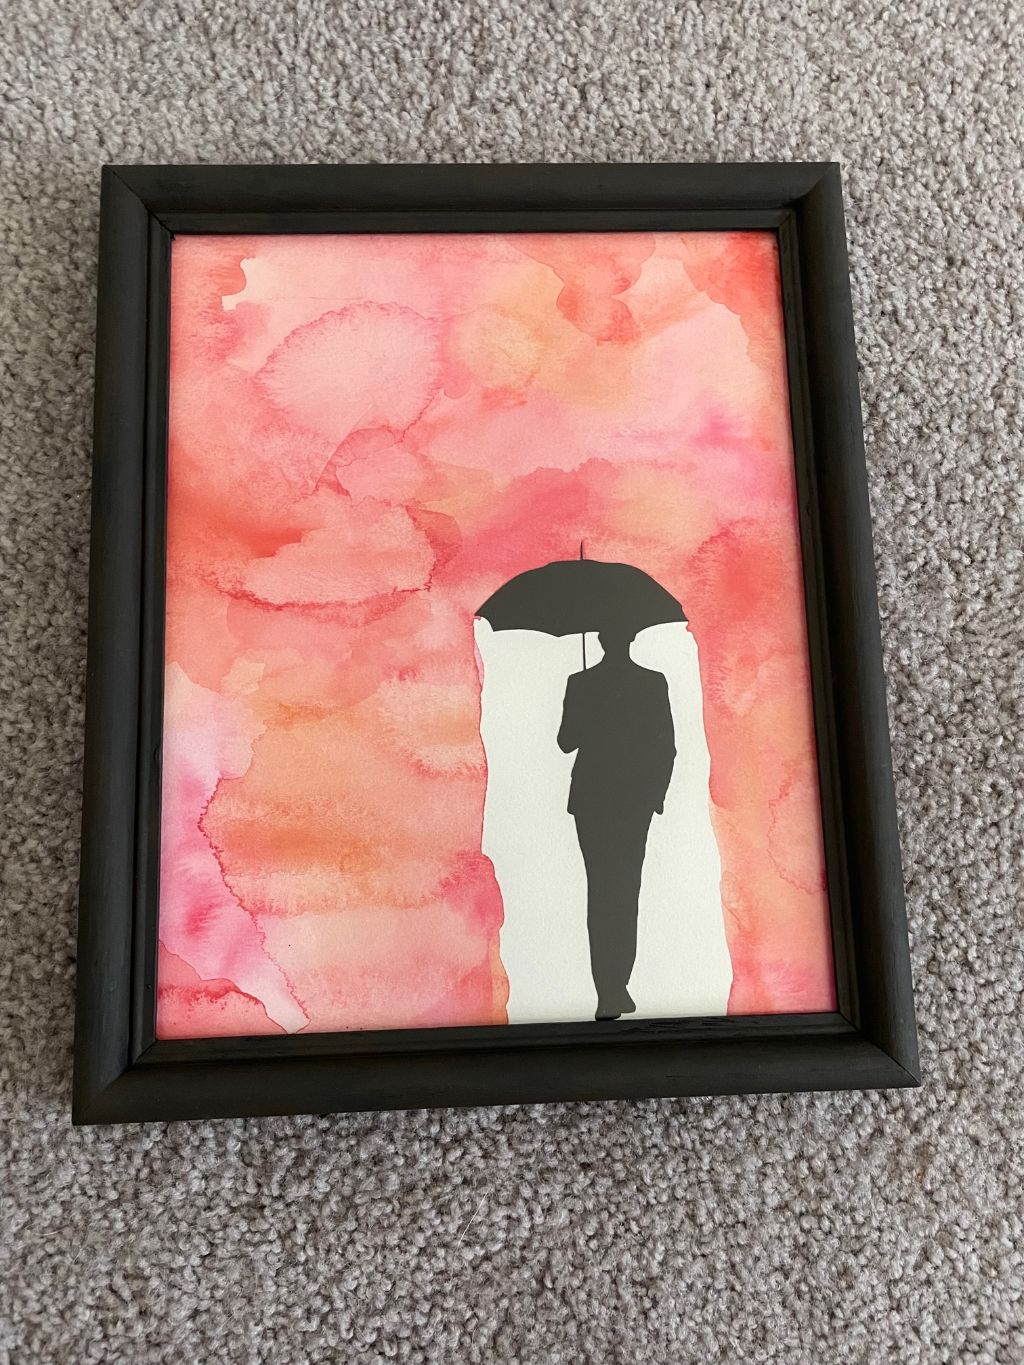
- Rebecca P.S. The blog homepage photo today is from my camera roll! No stock photos needed today :) Hi everyone! So today we are back with a fun painting craft but using something that I don’t believe has been on the blog before: watercolors. I typically FaceTime my best friend every Sunday and she has a really cool painting in her bedroom featuring a silhouette of a woman holding an umbrella and then acrylic pour paint all around to look like a rainstorm. I always think it is so cool and have wanted to try and do something similar, but I can also acknowledge that you may be a bit pour paint-ed out over here. So I was trying to think of something else that I could do to get a similar effect and thought of watercolors. I have had these watercolors for a while, but don’t often get to use them. Instead of being a powder that you mix with water, these are very concentrated thick liquid pigments that you can mix with water to achieve your desired level of color. 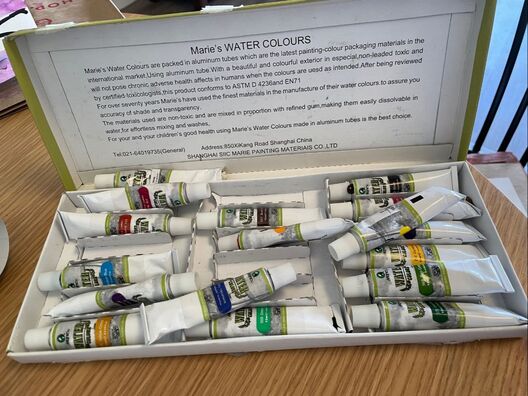 To start off, I went to a thrift store to get myself some frames or cheap pieces of art to refurbish. 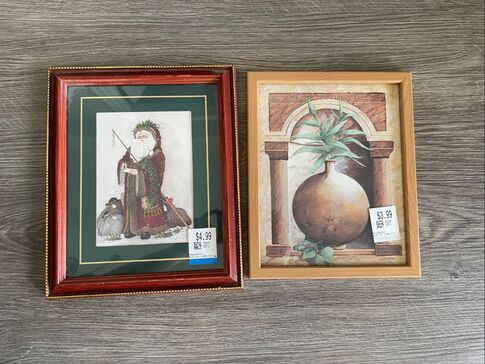 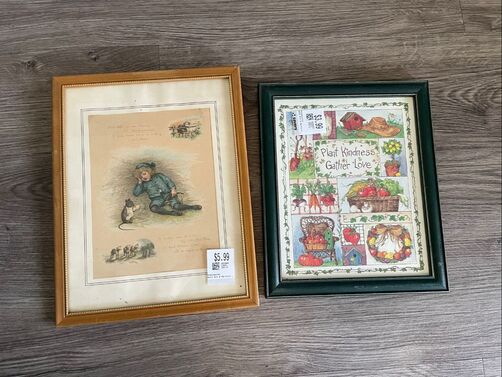 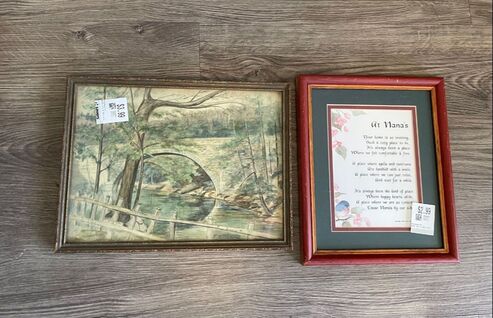 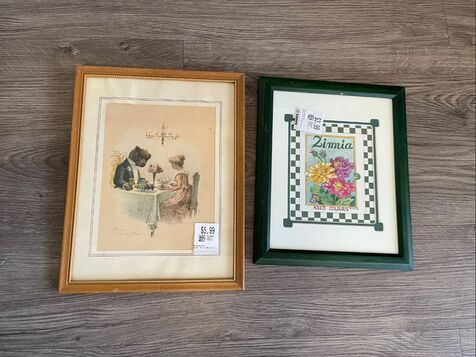 I also bought myself some watercolor paper at Michaels. Watercolor paper is extremely thick and able to withstand being saturated with water and paint without starting to disintegrate. 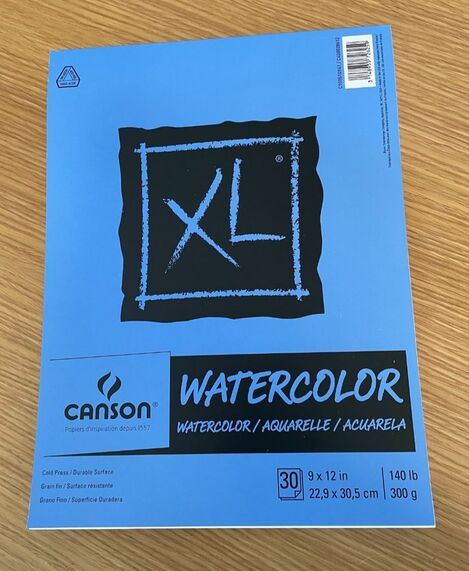 Some of the frames I bought were a bit old and looked like they had been professionally finished at one point so they had some paper on the back. For those, I was easily able to peel back that paper to reveal the prongs holding the art in place. 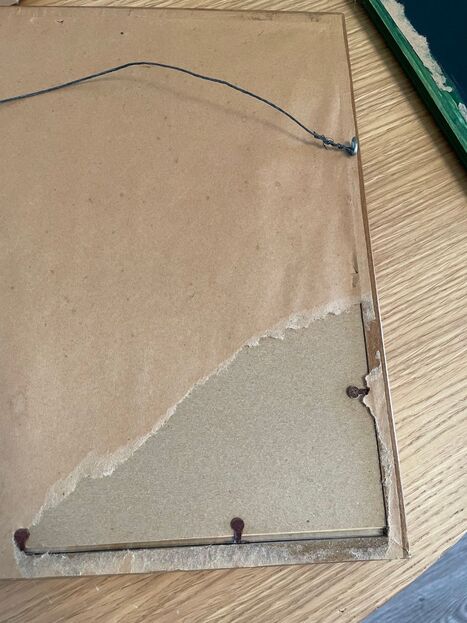 I then sanded down the frames if they needed it and used some black chalk paint on them. I know I've talked about chalk paint before, but its great to use when you don't feel like doing a ton of prep before painting as the gritty texture of the paint makes it adhere well to a lot of surfaces. The only frame that I had to sand very heavily before using the paint was one that I had thought was wood but was actually plastic that looked like wood. For that one, I scuffed the plastic up a lot to ensure the paint would stick. After giving the frames several coats of paint and letting it dry, I also went over with a thin coat of finishing wax. This helps to seal in the paint and give the frame a bit more shine as chalk paint is very matte. The only wax I had was a dark brown, but I actually loved how it highlighted some of the texture on the frames and gave them some dimension against the black paint. I'm not sure how well it comes across in the photo but the frame on the left just has the chalk paint while the frame on the right has the brown finishing wax as well. 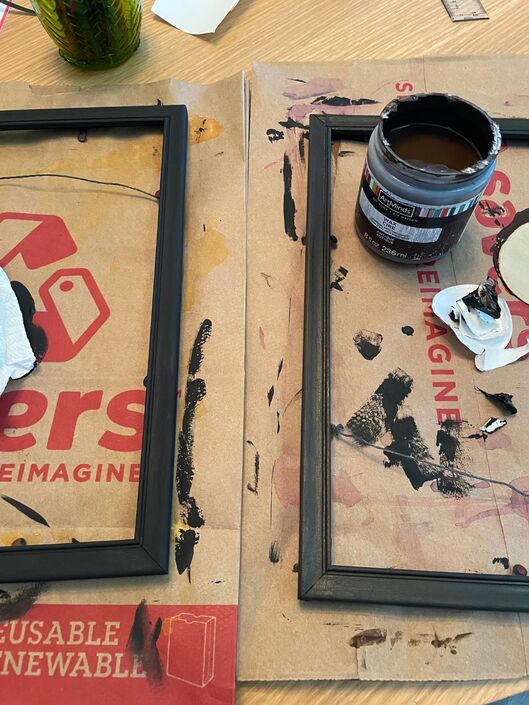 Now for the actual paintings! I started by tracing the art size for each frame onto a piece of watercolor paper so I knew the exact size I was working with. 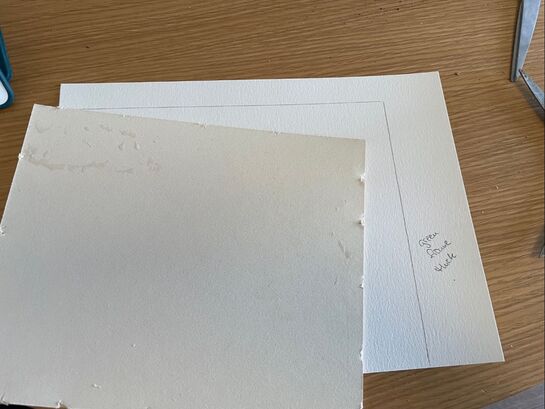 I then used my Cricut to cut out some different black silhouettes of people holding umbrellas from adhesive vinyl. 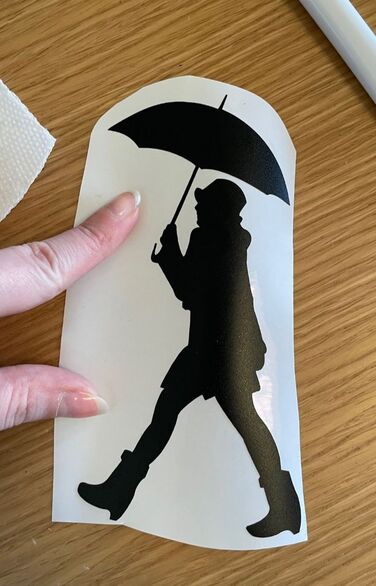 I then sketched out an area where I knew the sticker would go so that I could leave it blank when I painted. I then just went crazy with the watercolors, using about 3 colors per painting. Once I was almost done I added the sticker and then finished up the watercolor so that it looked like it was rain coming down around the person. Below is an example of a painting before I did that final step of finishing up the watercolor. 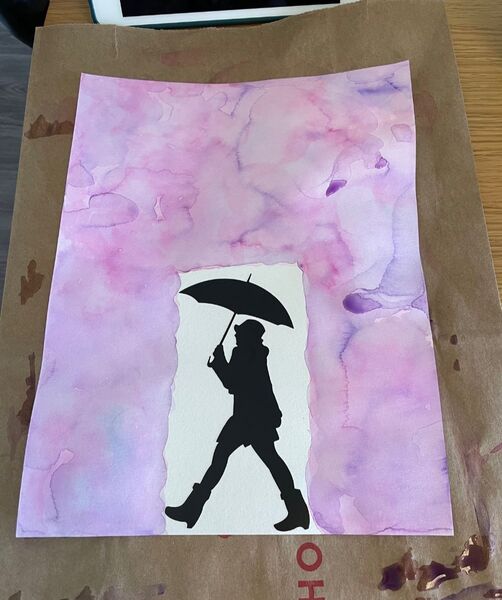 Once I was finished with the paintings and they were dry, I ended up putting them between some of my husband's high school yearbooks as the paper was a little wrinkly. This helped to flatten the paper back out. 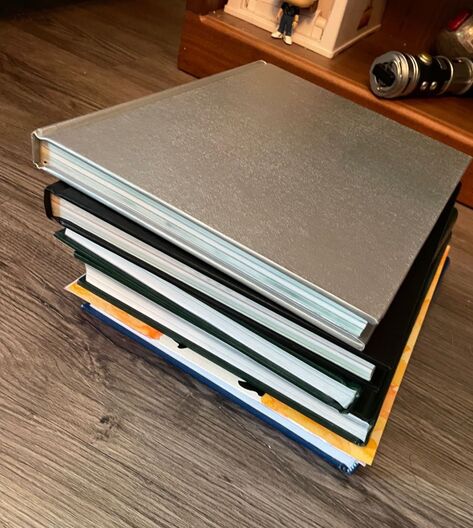 At this point I have made 6 paintings and added them back to their frames. I have 2 frames left which I did not get to yet, but I plan on finishing them up soon! Here are the 6 that have been completed so far; 1 is horizontal and the other 5 are vertical. 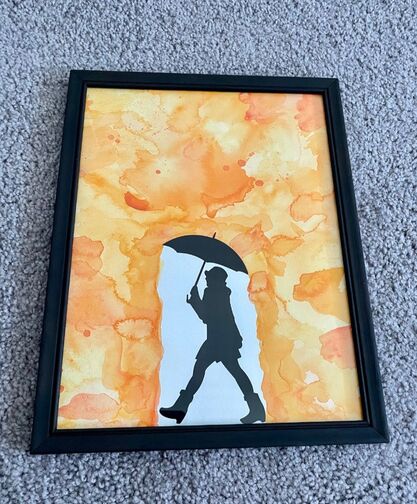
 I am so happy with these and they were honestly pretty easy to make! What do you guys think? Let me know in the comments below!
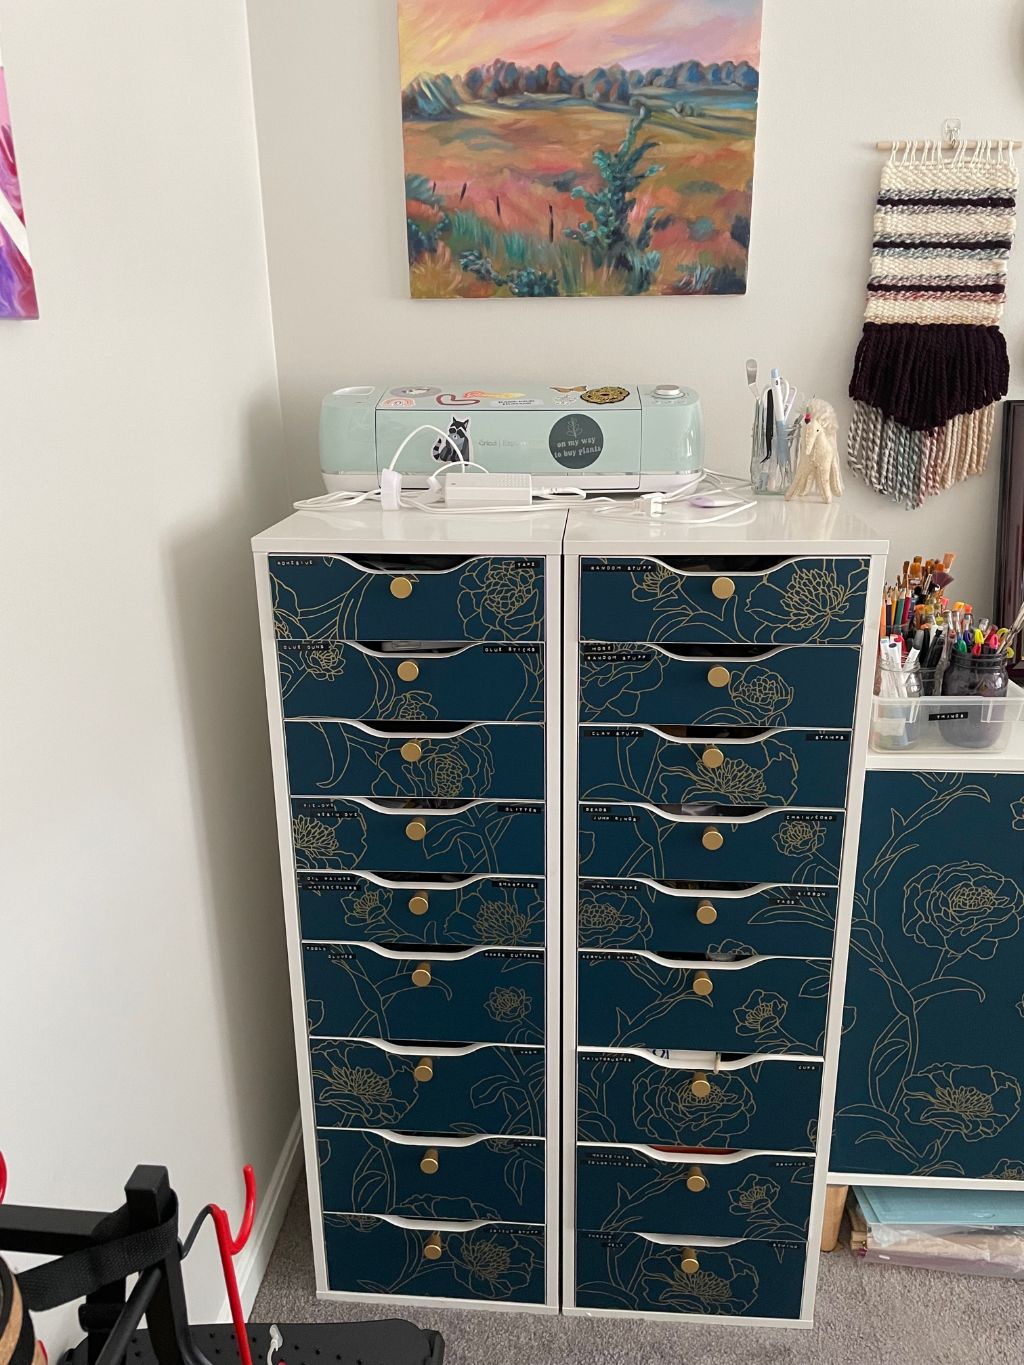
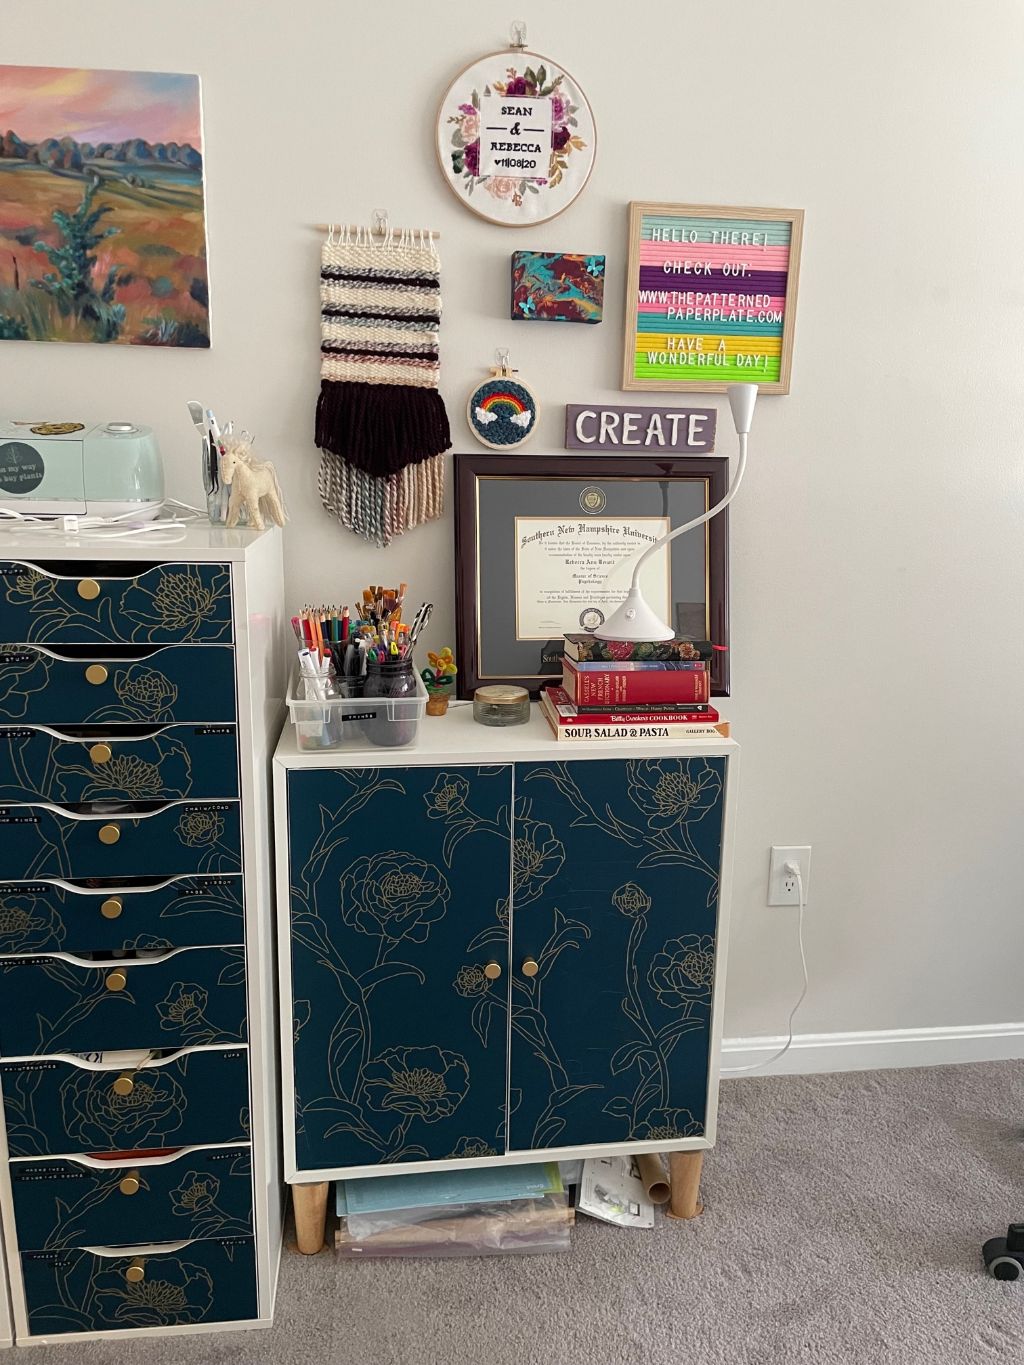
- Rebecca Today's picture on the homepage is from Pexels user Nick Collins: www.pexels.com/photo/selective-focus-photography-of-paint-brush-on-paint-palette-1213431/ Hi everyone! So I realized I have not given a tour of the craft room/office since it was last redone so we’re going to do that today! Here is the blog showing what the craft room looked like right after we moved into our apartment last July: www.thepatternedpaperplate.com/blog/weve-moved We’ve made some changes since then and I’m here to walk you through them! I’m always trying to make this room more efficient, so it gets changed up pretty often. I’m really happy with it as it is right now! So when you first walk in and look to the right, we have my husband’s desk. This has not moved, but some décor and shelves were added to the wall to make it look less empty. The fronts of the drawers and doors were also covered in peel-and-stick wallpaper and have had knobs attached to match the other white furniture in the room. His desk is usually where we keep papers before they need to be shredded so it gets a bit messy at times! (I covered up any personal info just in case.) To the left of his desk is another small piece of IKEA furniture that has our printer on top of it. 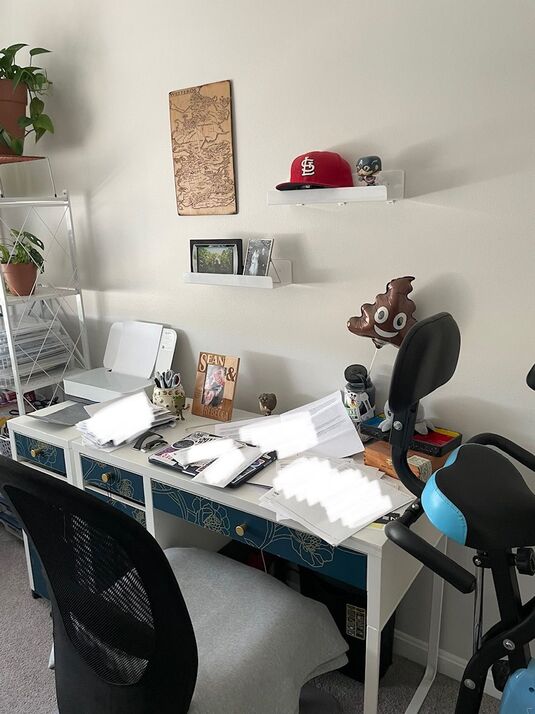 If you are looking straight in from the door we have my IKEA drawer units that I have had for a long time as well as a new piece that I got from my parents. That piece has also been covered in wallpaper and knobs have been added. This is where the bulk of my craft supplies are kept and it has been working well for me!
I also took the time to label each drawer so that I could remember what was in each one. 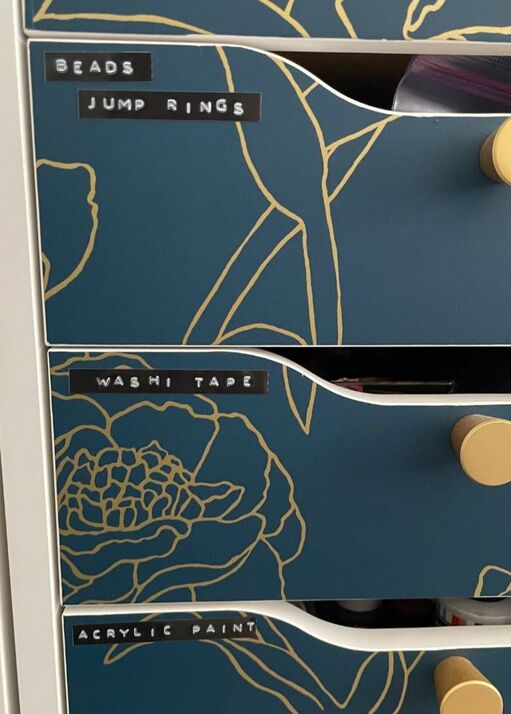 To the left when you walk in is a weight rack that we bought for all of our workout equipment. We used to just have all of our weights on the floor, but this looks much nicer and gives everything a place to be. 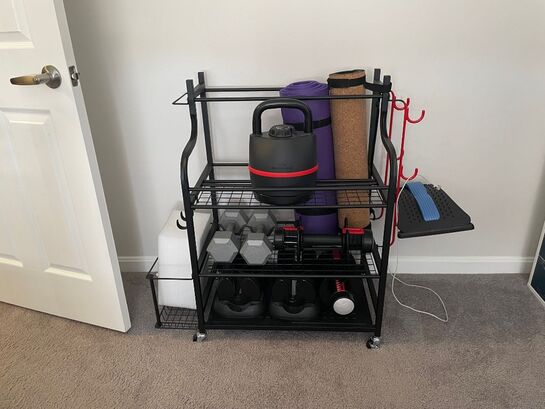 I also added some sheer curtains to the window. It really made a difference to the room and looks cozier now. 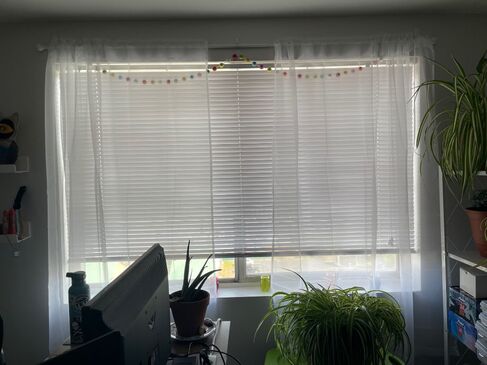 In the far corner near the window we have this white metal bookcase we got from Home Depot. It works great as a place to hold all of our plants as well as some additional craft supplies that don’t fit in the other units such as paper, sanders, big bottles of paint and sealer etc. I also have tubs full of completed crafts over here ready to go for any future craft fairs. 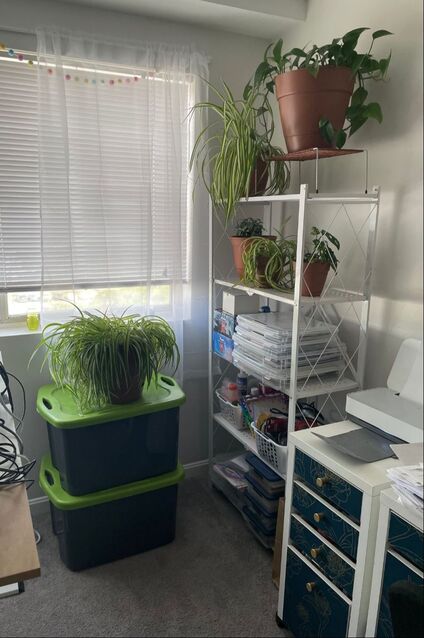 And finally, we have my work desk. This used to be on the other side of the room, but I moved it closer to the window and I love being able to see outside during the day. It is a motorized sit/stand desk and I am really happy with it! 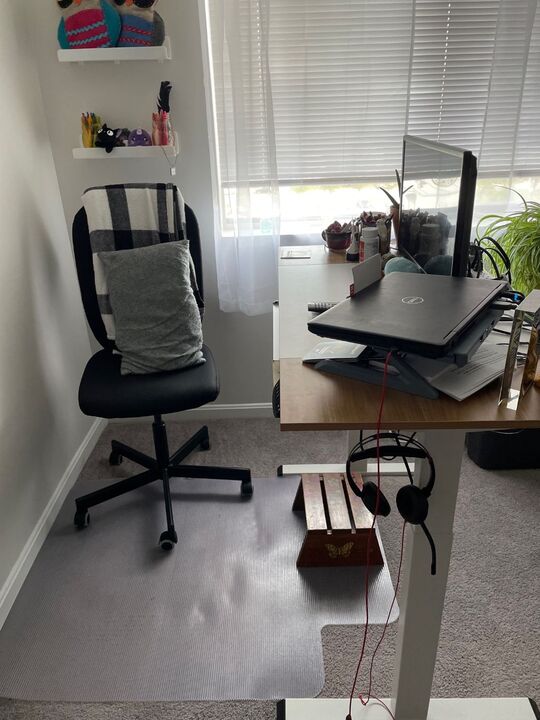 This room serves many purposes, but it is more organized now than it has ever been and I'm really happy with it. What are some tips and tricks you all use in your own crafty spaces? Let me know in the comments below!
- Rebecca P.S. Today's picture on the homepage is from Pexels user Anete Lusina: www.pexels.com/photo/art-supplies-on-shelves-in-studio-7256933/ |
AuthorI am a 27-year-old crafter and baker from New Hampshire! Archives
April 2024
Categories |


 RSS Feed
Proudly powered by Weebly