|
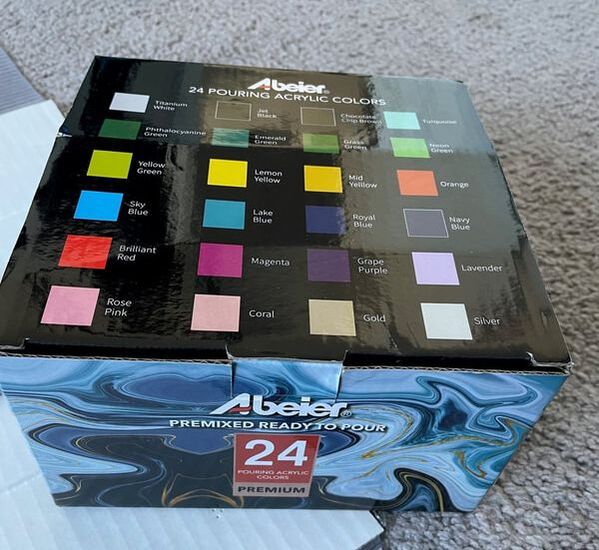
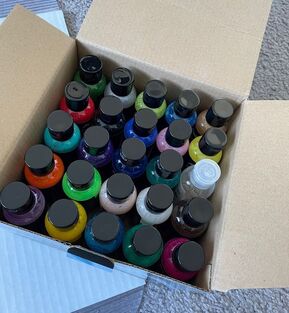
Hello crafty friends! Happy Sunday. So …. Have you seen me make coasters before? Yup. Have you seen me do acrylic pour painting before? Countless times. Buuuuuuut, I LOVE how this product turned out and am so excited to show you. If you are sick of pour painting, this might not be your blog! And that is okay. However, I will say that this blog gives some new tips and tricks about pour painting, so, in my humble opinion, it’s worth a read. This project is being split into 2 parts. This blog will cover the making of the coasters and the next blog will cover the packaging and tag-making. So my mother gave me some coasters in a crafty purge and I will admit that I took them begrudgingly, but I’m so glad that I did take them. Most of the coasters were about 4 to 4 ½ inches square. I decided that I was going to make some sets of acrylic pour coasters, but was somewhat worried about how the paint would adhere to the tiles as most of them had a glossy, textured finish. 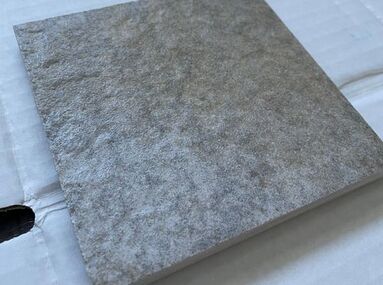 I thought about using some sort of adhesion medium like gesso to ensure that the paint would stick, but then I found this very helpful Youtube video where this woman tried pour painting on tiles using gesso, another adhesion medium and then on bare tiles. The video is very short, so I’d recommend giving it a watch, but the main takeaway is that the bare tiles worked best. Because the tiles are non-porous and anything painted on just sits on top, the gesso and adhesion medium bubbled and cracked under the paint, where the paint dried perfectly on the bare tile. Therefore, I listened to the nice YouTube lady and poured directly on the tiles. I also used some pre-mixed acrylic pour paints that I had bought a while ago, I believe at Michaels.
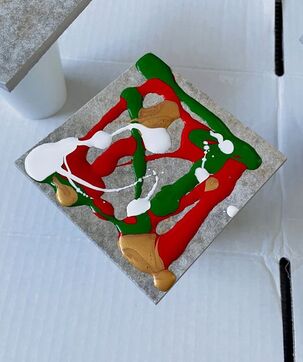
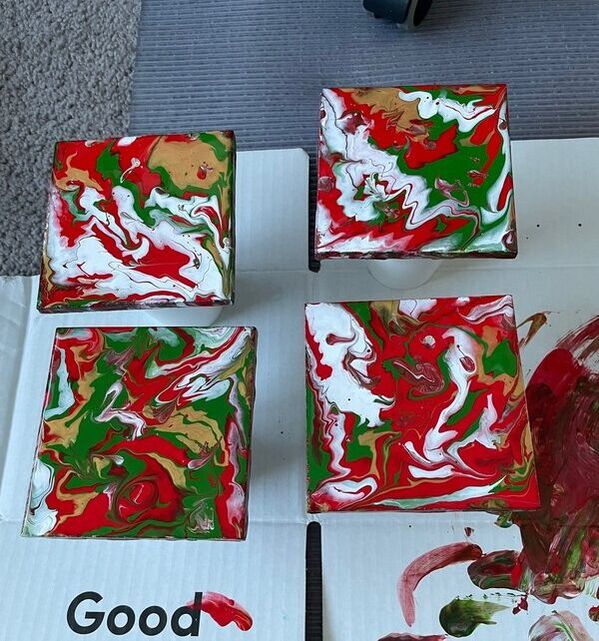
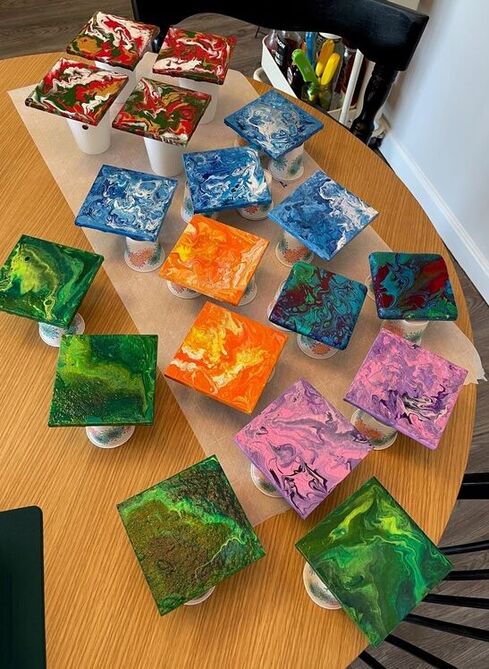
These paints are already mixed with the pouring medium instead of you having to mix the two together yourself. I would highly recommend as they are the perfect pouring consistency and very easy to use. Although the bottles are small, I have found that the paint goes a long way and I have not yet run out of any color, even having used this on other projects previously. I decided to make three sets of 4 coasters and three sets of 2 coasters. I did have two additional tiles that could have been another set of 2 but those were a fail and ended up a delightful shade of brown. They did not make the final cut! For the first set of four, I went for Christmas colors and used my normal technique which is to pour paint directly on the coaster and then move it around from there. This technique has always worked well for me and is good for ensuring that colors don't bleed together too much, especially when you’re using very different colors.
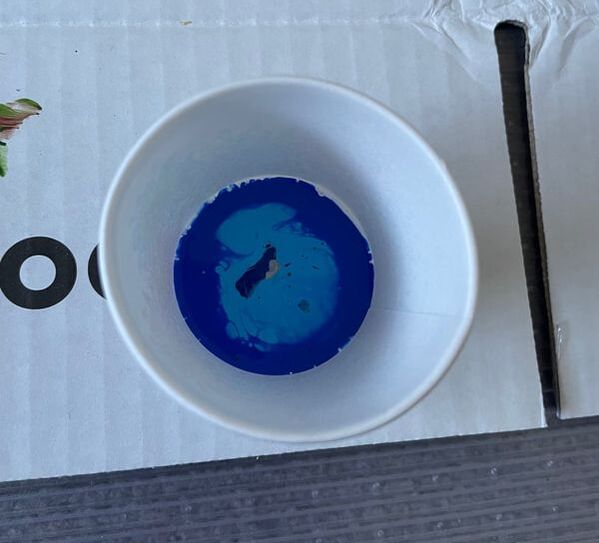
I then wanted to try out a popular pour painting technique which is to add the paint all together in a cup and then flip the cup over onto the tile. Or rather, place the tile on the cup and then flip the whole thing over. I felt like this technique would be great when using more similar colors that you wanted to blend and mix together a bit more. To do this I simply squirted some paint into a bathroom cup and then continued to squirt all the colors I wanted on top of one another. I then gave the cup a little shake and did the coaster flippy situation.
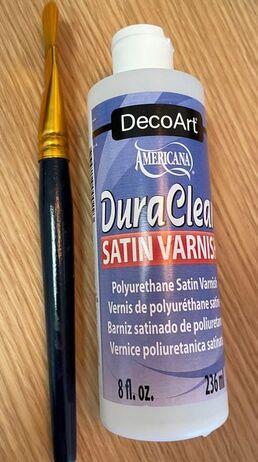
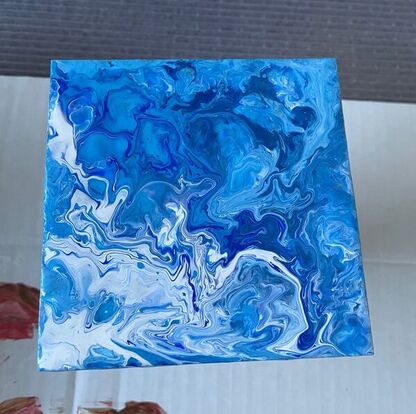 I loved how this looked and used this method for the rest of the coasters. I also had one set of two coasters which did not have a glossy sheen and instead were a matte, raw stone type of finish. I wanted to see if these responded to the paint in the same way. 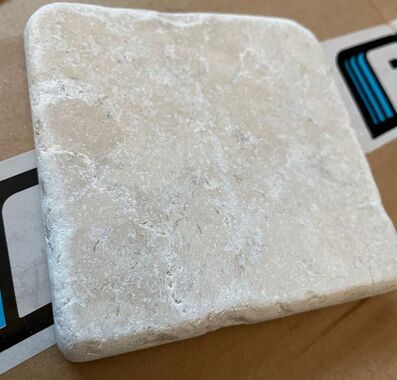 Overall, these did work the same way, but the paint dried a little less vibrantly on these two tiles. I think that because the tiles did not have a glossy finish, the tile might have absorbed the paint to some extent where the paint on the glossy tiles truly did just sit on top of the surface. The glossy tiles were also textured, and I liked how these looked better overall. These tiles were not a failure at all, just not my personal favorite of the bunch. 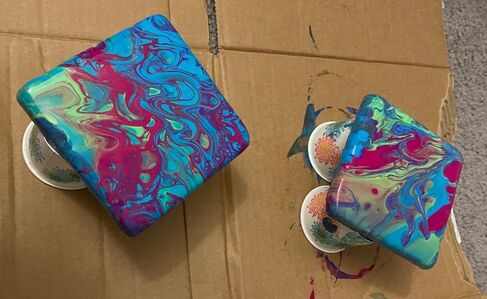 I had a lot of fun picking colors for all of the other sets. Here they are all pour painted up. I let them dry overnight and then gave all the tiles two coats of my preferred varnish. This varnish claims to be weatherproof and able to be used for outdoor projects so I figured that it would hold up for some coaster action.
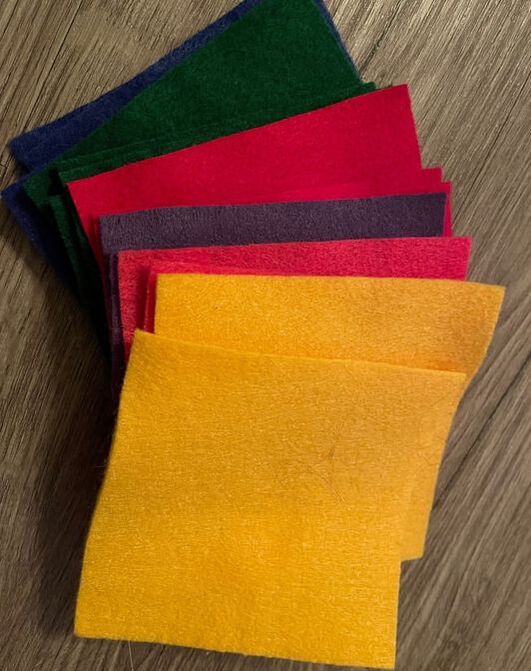
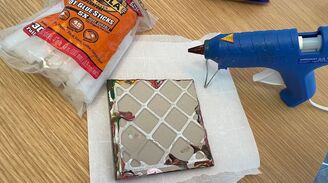
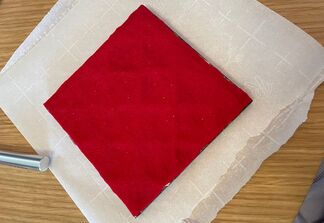
Once the varnish was dry, I cut up some squares of felt for the bottom of the coasters. I always do this as I feel like it finishes the coasters, covers any paint splatter on the bottom and makes sure that the coasters don’t scratch any surfaces when people try to use them. I attached the felt with some Gorilla Glue hot glue.
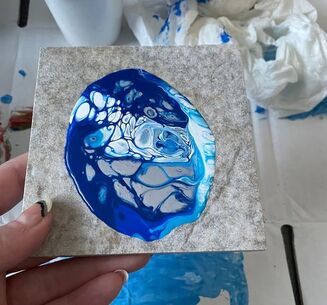
In the box of coasters my mother gave me, there were also four larger tiles that were about 6 inches square. These were an interesting combination of being somewhat glossy/shiny, but also somewhat matte with many little holes and crevices throughout. 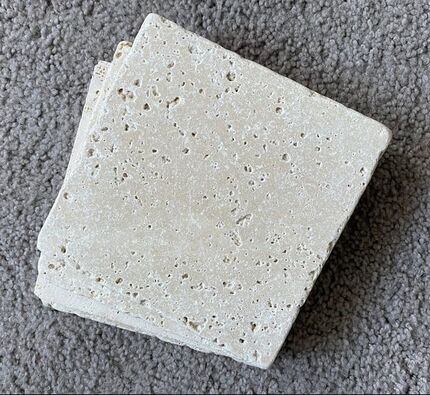 I originally did not know what to do with these, but then decided that I would try to pour paint on them as well and “market” them as oversized coasters or little trays to put under plants/vases. I had absolutely no idea how the paint would take to these but left them bare and did each a different set of colors. I just had to make sure that paint had pooled in each little hole or indent so that they would not be left empty when the paint dried. 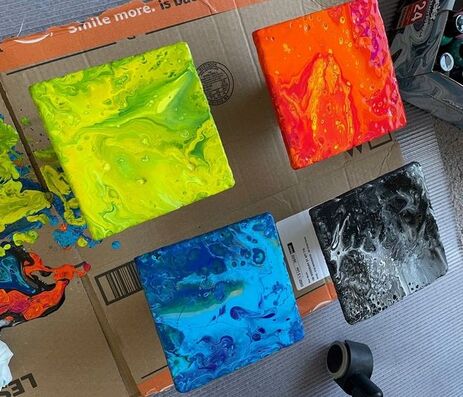 I loved how these dried! I think that the strange texture really lent itself to the pour paint look and ended up having a sort of geode effect. 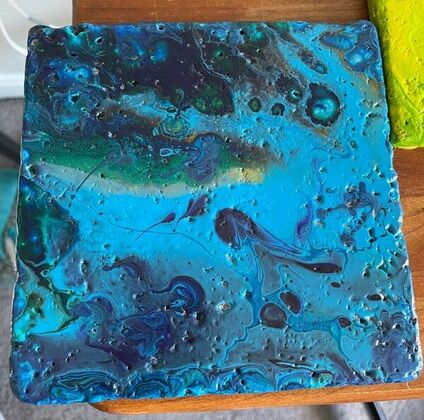 I gave those bigger tiles the exact same treatment as the smaller one and added 2 coats of varnish and felt on the bottom. The main takeaway from this project is that acrylic paint adheres surprisingly well to tiles of any sheen/texture. These are probably my favorite pour painting project I’ve ever done. It might be tied with some paintings I did for my husband and I’s bedroom a while ago which I’ve shamelessly linked below. The next blog will discuss how I used my Cricut and other tools to make some awesome tags for these coasters and how I ended up packaging them for future selling at craft fairs. What do you guys think of the coasters? Let me know in the comments below! See you in two weeks friends!
- Rebecca
3 Comments
Momma
9/26/2021 08:39:12 pm
Beautiful job! I’m so glad you gave these a makeover!
Deb
9/27/2021 05:48:20 am
So fun. Reminds me of alcohol inks!
Elaine Smith
9/27/2021 06:23:14 pm
Very cool Leave a Reply. |
AuthorI am a 27-year-old crafter and baker from New Hampshire! Archives
July 2024
Categories |
 RSS Feed
Proudly powered by Weebly