|
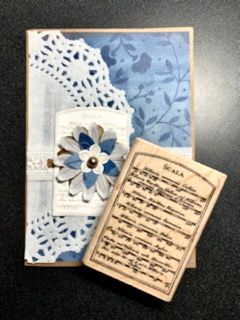
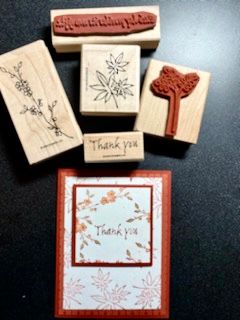
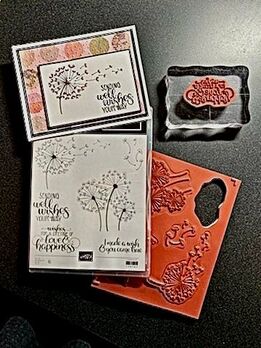
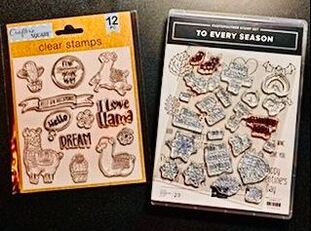
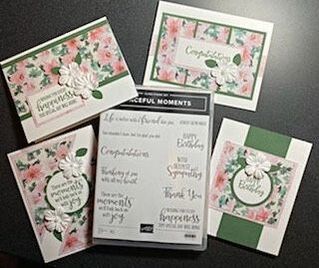
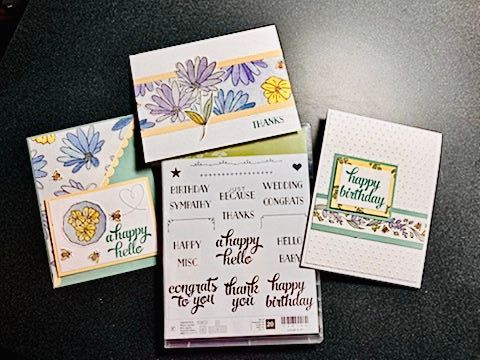
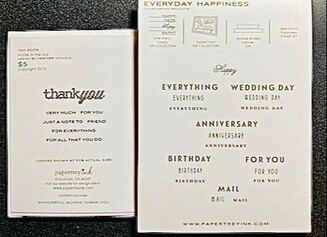
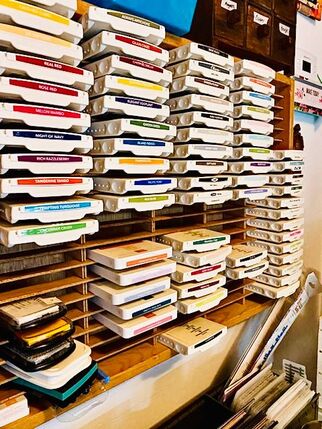
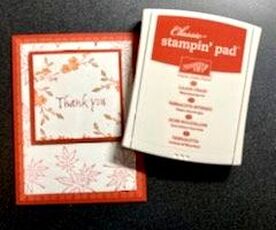
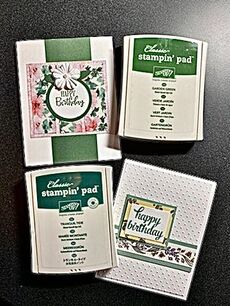
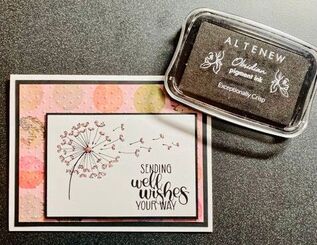
Hello Friends! It’s Suzanne, Rebecca’s Momma, and I’m happy to be back with you on the PPP with the next installment of Card Making Basics. In December, we talked about the most basic of supplies – paper, adhesive, a paper cutter and a paper scorer: www.thepatternedpaperplate.com/blog/cardmaking-101. In February’s part two, I showed you what you can do with just some pretty paper and sentiments printed out with your printer: www.thepatternedpaperplate.com/blog/cardmaking-102. Today we are going to take it up a notch and add stamps and ink to our growing list of supplies. With these, we’ll be able to really personalize our cards and make unique works of art. Let’s start with stamps. The OG variety are rubber stamps, usually made of red rubber though some companies use purple or green rubber. These stamps give a clear, true image and last a long, long time. They are usually mounted to a wooden block with the image of the stamp on the top of the block. You can buy these individually or in sets from companies like Stampin’ Up!, Simon Says Stamp and Hero Arts -- even the “cheapo” bins at the big box craft stores. Here are some examples – a beautiful Scala stamp from a company called Hampton Arts that I used on Rebecca’s high school graduation ceremony and party invitation. The other is a set from Stampin Up!. This set is typical of many companies where several stamps are grouped together with images and sentiments that coordinate together. Your project has a nice cohesive look when using these -- I used three of the stamps in this set to make a thank you card. The upside of a wood mounted stamp is that it is always ready to go. You can grab it, tap it on your ink pad, take it to paper and you are good to go. On the downside, wood mounted stamps take a lot of room to store because of the blocks. It’s also difficult to see where you are stamping, so the chances of stamping something crooked are high. If you are cutting out your image, like I did with the Scala stamp, that’s not as much of an issue. Next on the list are cling mount stamps. They are the same red rubber as wood mounted stamps but are not permanently mounted on a block. Instead, the rubber is backed by a cling foam which allows them to stick temporarily to an acrylic block. They stamp just as well as wood mounted stamps and have the advantage of storing in a much smaller space. Because the rubber is trimmed close to the image and the block is clear, you can also see where you are about to stamp much more easily and have a better shot at getting your image straight. Here’s a photo of a set from Stampin’ Up! that I used to make a card that could be used for birthdays or get well wishes. You can also get cling mounted stamps from companies like Tim Holtz and Fun Stampers Journey. Finally, there are “clear” stamps. These come in two varieties – photopolymer and acrylic. Both have several benefits. They are thin, making storage easy. They are clear so you can see exactly where you are stamping, which makes placement practically perfect every time. You will need acrylic blocks with these stamps as well since they are not permanently affixed to a wood block. Clear stamps will stain, which is OK and doesn’t affect their ability to stamp a clean image. What is the difference between the two? Photopolymer stamps are made from a higher-quality material and are more durable to repeated use and repeated cleaning over time. Acrylic stamps are typically less expensive, but not as durable as photopolymer. Neither is quite as durable as the OG rubber but depending on the quality of the stamp you buy; photopolymer stamps will last a good long time. Here are a couple of examples – again, my company of choice, Stampin’ Up! and some from the good old Dollar Store. The SU! sets are photopolymer and while the packaging doesn’t list it, I’m sure for $1, the others are acrylic. You’ll notice that many of my stamp sets are from Stampin’ Up! (SU!). Full disclosure here – I was, for some time, a hobby demonstrator. That means that I was my own best customer and did not actively pursue sales with anyone but myself. I am not currently, nor do Rebecca or I receive any compensation from any items you may chose to buy. In the time I was a hobby demo with SU!, I was able to amass quite a collection of stamp sets in that time. Many of them have great images but my favorites are those with a wide variety of sentiments. In fact, when choosing your first stamp sets, I suggest a set just like that. Choose something that includes a ‘happy birthday’, ‘thank you’, ‘hello’, ‘get well soon’ and other greetings. Sets like the ones shown have a great variety and are very versatile. These are the ones that you will use repeatedly in conjunction with your pretty papers. You can also choose sets that focus on one sentiment, with different variations in a variety of fonts. See these examples from a company called Papertrey Ink – in one, the Happy can be paired with all the other words to make up a number of greetings. Same goes for the Thank You in the other set – Thank You Friend, Thank You For Everything, Thank You Very Much and Just A Note to Thank You are all options. With different papers, these sentiments will carry you a long way. Now let’s talk about some ink to use with those stamps. Dye Inks are the most common inks used for card making. You can find them in every color of the rainbow and in both full size and mini cubes. The pads come in a variety of surfaces – linen, felt and sponge. The two most common kinds of dye inks are water based and distress inks. Water based inks have transparent colors. These are easy to clean off your stamps and dry instantly when stamped onto paper. They work best on white and light color paper and most colors won’t show up on dark colors. Because they are water based, they will “bleed” if you try to color over them. They are also not lightfast, so could fade after a period of time if exposed to light. While these inks are great for stamping on card stock, they won’t work well on other surfaces. Most companies that make stamps also make inks -- SU!, of course, Catherine Pooler, AlteNew, Gina K, Papertrey all have a line of ink pads that coordinate with their lines of paper. Sticking with one company assures that your ink and paper match perfectly, which gives a nice look to your card. Here you can see that I used an SU! color called Cajun Craze throughout this card – the cardstock for the base layer and in the decorative paper and for the ink. It gives the card a cohesive look. On Rebecca’s invitation above, I used an ink color called Crumb Cake from SU!, which is a perfect match to the craft card stock used for the base of the card. You’ll see that I used two shades of green ink on the cards with the sentiment sets above. In each instance, the green ink is a perfect match to the green paper or the green in the floral print. Distress Inks are water-based dye inks but are unique and different. They dry a lot slower and react with water, so they blend well with each other and with water to produce effects that you can’t get with regular dye inks. Ranger Tim Holtz Distress Oxide inks are THE ones in this category. I have not dipped my toe into this particular ink pool, but I have a dear friend (Hi Deb!) who does beautiful work with Distress Oxide inks. Pigment inks are a lot thicker than dye inks and are opaquer. That makes them great for stamping on dark card stock. Because they are thicker, they take longer to dry and are generally fade-resistant. ColorBox and Hero Arts make two of the best pigment ink pads. One pigment ink pad I will call out especially is AlteNew’s Obsidian Exceptionally Crisp pad. It takes some time to dry, but it gives a sharp, true image that holds up well to coloring or other wet techniques. I used that pad here and the black ink stayed nice and sharp under the Stickles glitter glue. There are also several specialty inks that work for various techniques that we’ll talk about on future card making entries on the PPP.
Cling mount and clear stamp sometimes lose their “stick” and won’t adhere to the clear acrylic blocks anymore from being handled. A quick wash with the tiniest bit of a gentle soap and a thorough rinse will return that stickiness and they’ll be as good as new. Remember, staining on the stamps themselves is OK and does not transfer to your ink pads or effect the quality of the image you’ll get when using the stamp.
Get your stamp on, friends! It’s a great hobby!
1 Comment
Debbie
4/11/2021 05:28:07 pm
Wow, very informative!! Nice job Suzanne :)
Reply
Leave a Reply. |
AuthorI am a 27-year-old crafter and baker from New Hampshire! Archives
July 2024
Categories |
 RSS Feed