|
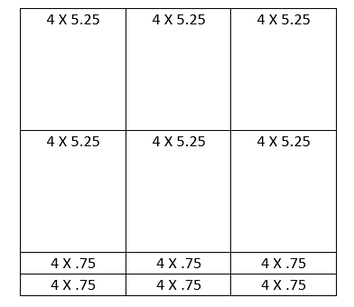
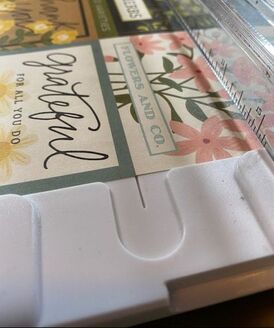
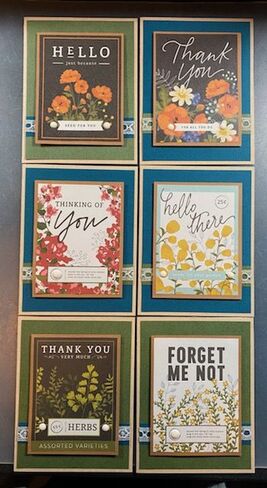
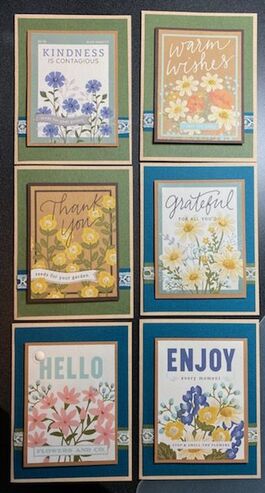
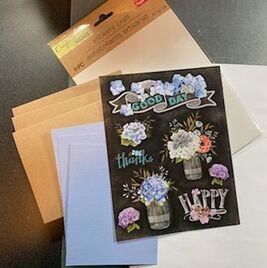
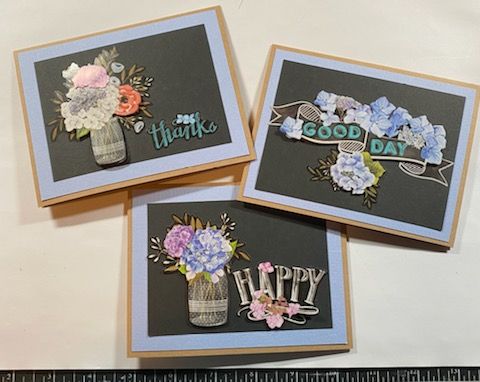
Quick interruption from Rebecca before the blog: my apologies that this week's pictures are a little blurry! They came from my mom's phone, to my phone, to my computer and something went a bit wonky in the process. Also, Happy Valentine's Day! Whether you are celebrating with a special someone or with friends or by yourself, stay safe and feel the love! Now that that's out of the way, enjoy! Hello Friends – It’s Suzanne, Rebecca’s Momma, back with the second in a series of card making posts. You might remember in Part 1 back in December (www.thepatternedpaperplate.com/blog/cardmaking-101) we talked about some basic concepts and essential supplies -- paper, adhesive, a paper trimmer and a paper scorer. Before talking about more specific stamping items, I wanted to share what you can do with some additional pretty paper and stickers to make cards that you would be proud to send to friends and family. First, are cut-apart sheets. These sheets, typically 12 by 12 inches, are made up of several images that can be cut apart. Each piece can then act on its own as the focal image of a card. The one I am using today was bought as a stand-alone sheet, but these also often come as part of a paper collection, like the “Hot Buy” pads that are available at Michael’s. 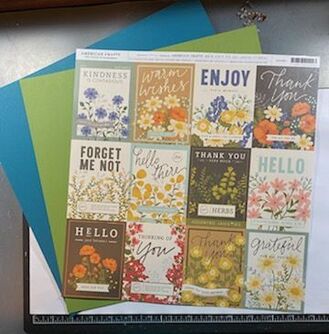 For this set of cards, I started with six sheets of sturdy 8.5 by 11-inch paper. For each sheet, I scored it at 4.25 inches, folded it in half, and then cut it in half across the fold at 5.5 inches, making twelve A2 sized card bases. That’s a card base that measures 4.25 by 5.5 inches. (Pro-tip: Scoring and folding your 8.5 by 11-inch paper first saves time.) Then I selected two 12 by 12-inch pieces that complimented the colors in the cut-apart sheet and got to cutting. 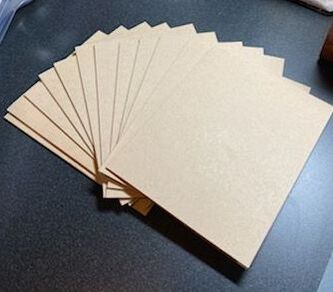 For the cut-apart, I made sure the line between each image was lined up perfectly on the groove in the paper cutter where the blade would travel. Cutting this sheet resulted in twelve 3 by 4-inch images. To give them a little frame, I cut some dark brown (for the lighter images) or tan (for the brown images) sized at 3.25 by 4.25 inches and glued the image to framing piece. Then, I cut the coordinating 12 by 12 pieces into 4 by 5.25 inch pieces. Each 12 by 12 sheet yields six of these pieces, with six additional small strips to use on the opposite color for contract (see the chart below).
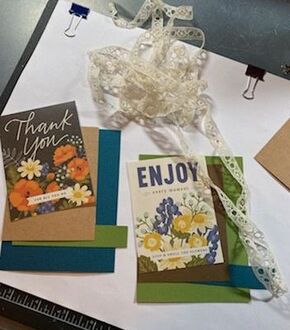
 I layered everything up on the bases and, boom, twelve really cute cards. I did use some vintage lace from my stash (I believe it was a gift from my lovely sister-in-law, Dottie) as well as some enamel dots and glitter glue, because I have a hard time leaving well enough alone, but really, the cards would be nice without the extra stuff.
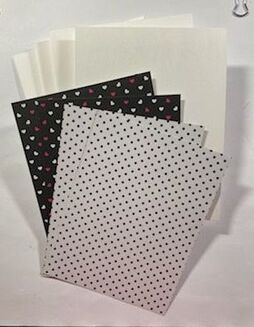
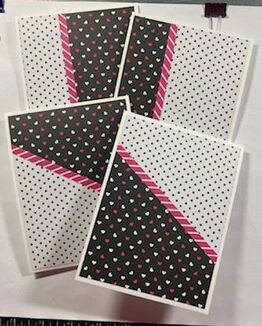
For the next set, it’s stickers stepping to the forefront. If you still think stickers are just for kiddos, think again – there are so many available now, from cute all the way to elegant. These pretty ones came from The Dollar Tree. I again started with sturdy 8.5 by 11-inch paper, scored it at 4.25 inches, folded it in half, and then cut it in half across the fold at 5.5 inches to make my A2 sized card bases. I chose kraft to pick up on the color of the leaves in the stickers. This time I flipped the bases to be top fold instead of side fold. I again cut a 4 by 5.25-inch coordinating layer (lavender) then decided on a black layer (3.25 X 4.5 inches on two of them and 3.5 X 4.75 inches on the one with the banner sticker) so the outline of the stickers would blend into the background. I stuck down the stickers, integrating the small ones in so they looked like they were part of the larger ones and the cards were done. These were so easy, it felt like cheating!
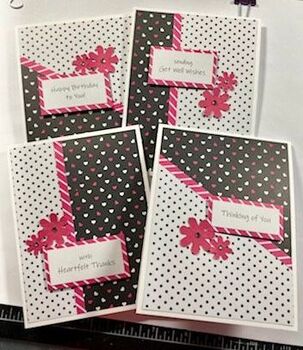
Finally, we are going to use pretty paper and a little secret trick for the card sentiments. For these bases, I mixed things up by scoring my paper at 5.5 inches and after folding it in half, cut it at the 4.25 mark. That gave me a tall, slim card with the fold at the top. Then I took a sheet of 8.5 by 11-inch double sided paper and cut it into four 4 by 5.25-inch pieces. I stacked two pieces, one of each side of the paper facing up, and sliced them in half, positioning the stack a little differently for each pair. I matched one of each side of the paper to make a full by 5.25-inch card front and mounted that on the base. I shaved a thin .25-inch slice of coordinating paper to cover the seam and give the card front a unified look. This technique lets the paper do the work.
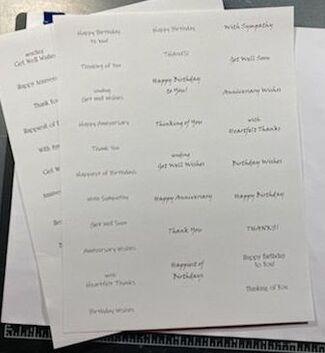
The cards do need sentiments, though. Perhaps you have prodigious calligraphy skills and can hand letter a sentiment, but I can’t. What’s the alternative? PRINT! If you have a device (which you do, if you are reading this blog!) and a printer, you can print a page of sentiments to use on your cards. I opened a Microsoft word document, selected a few different fonts and printed several sentiments to use on my cards. Mine are printed in black because we don’t have a color printer, but if you do, the possibilities are endless. Cut those babies up, mount them on a little coordinating cardstock to give them some prominence and you have an easy way to finish up a card. I did use some little precut flowers to add embellishment to these cards (see my earlier comment about being unable to leave well enough alone) but again, this isn’t strictly necessary.
Next time it is my turn on the bloggo, we’ll delve into ink and stamps, but I hope today’s work shows you how much you can do with just some pretty paper. As a parting gift, here is a chart that you may find help helpful for cutting layers for your cards. These are the proportional measurements for an A2 card, from that first layer, down to a little piece in the center. 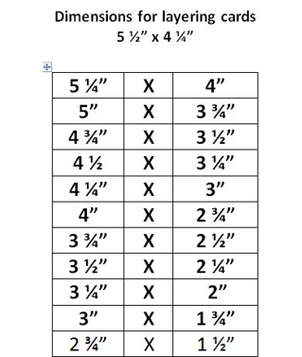 Especially right now, when so many of us are staying safely at home, a homemade card sent to family and friends could really brighten someone’s day. Happy crafting!
1 Comment
Debbie
2/14/2021 09:58:35 pm
Wow, you gals have been busy making beautiful cards!! Leave a Reply. |
AuthorI am a 27-year-old crafter and baker from New Hampshire! Archives
July 2024
Categories |
 RSS Feed
Proudly powered by Weebly