|
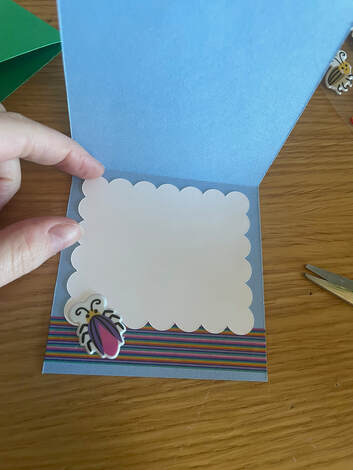
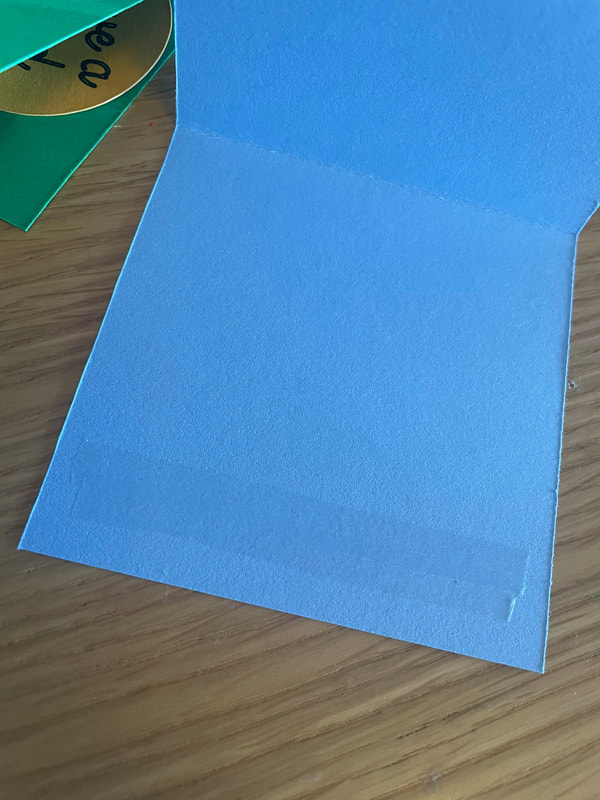
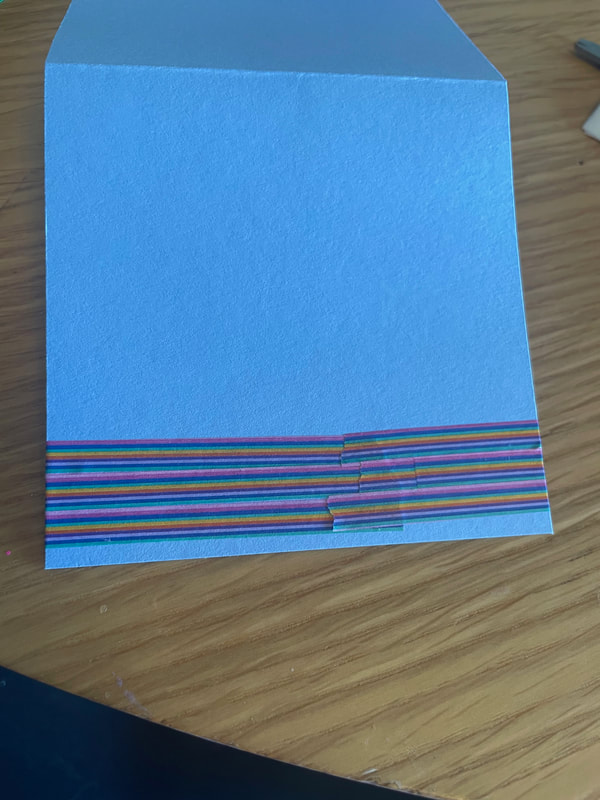
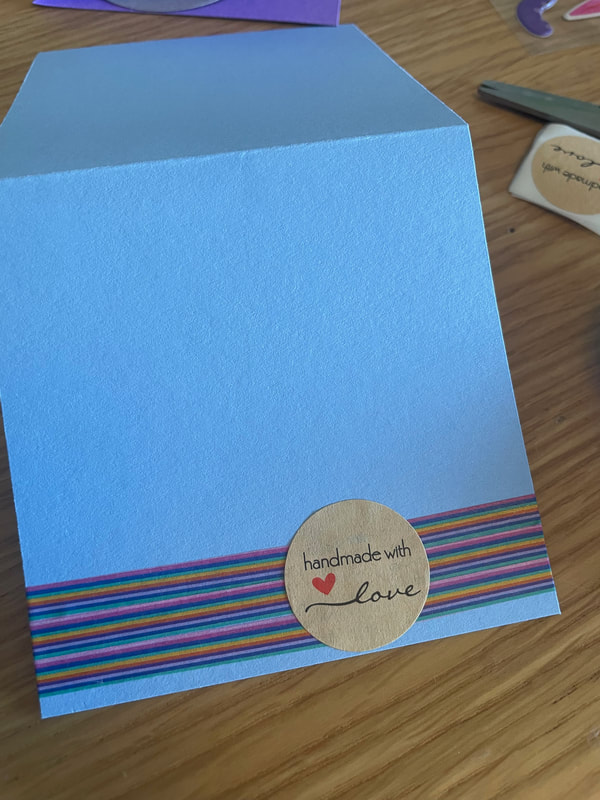
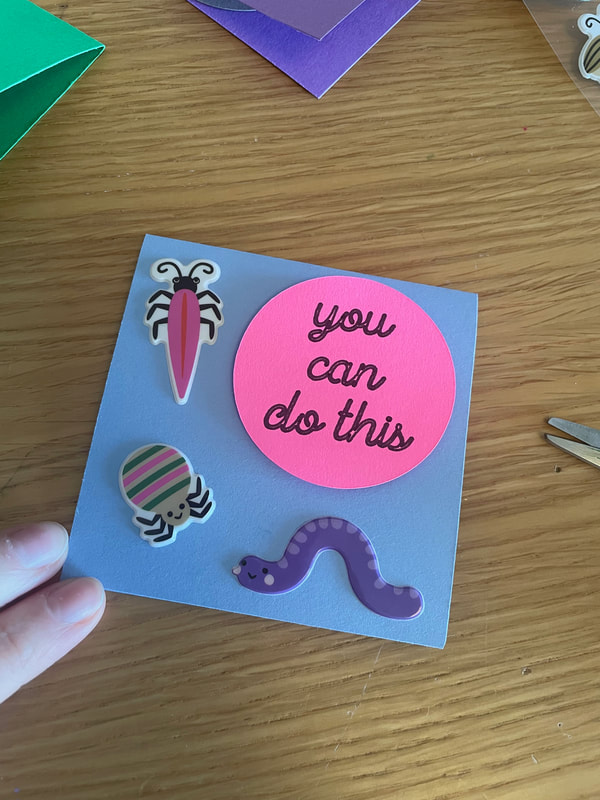
Happy 2024 everyone! I hope that you had a wonderful holiday season and a great start to the New Year. Today we have a cute little card project I worked on recently. It all started when I saw these adorable puffy stickers in the crafty aisle at Target: 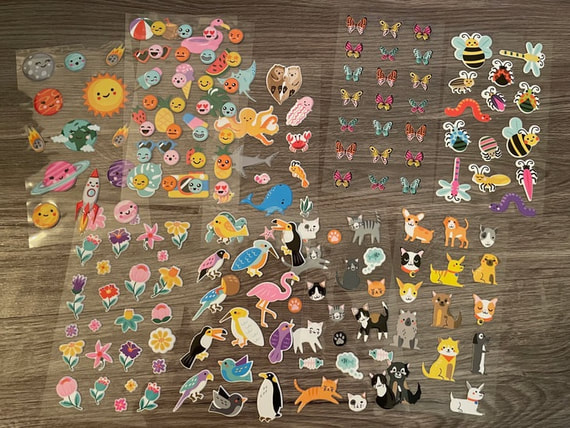 I thought these would look really cute on some cards but, for those of you who don't know, I really don't enjoy making cards so I decided on making smaller, lunchbox cards to make the project a little less overwhelming. I used a variety of colored cardstock and cut out some 3 1/2 by 3 1/2 inch square cards. 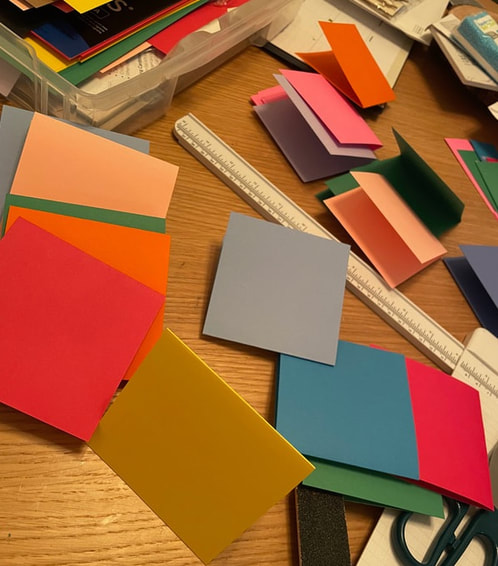 I then used my Cricut to cut out some scalloped rectangles from white paper to put inside each card. I thought that this would not only ensure that these cards were easy to write in no matter the color of the card itself, but would also be a fun detail. 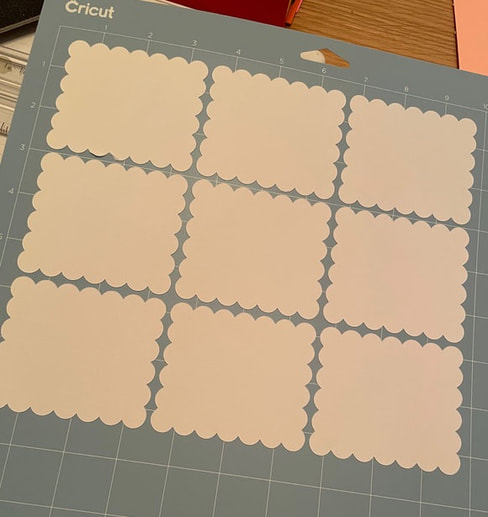 I also used the Cricut to write and cut out some sentiments for the front of the cards. I finally figured out how to do this properly so that in one pass through the Cricut, it first wrote out the sentiment and then cut it out correctly. 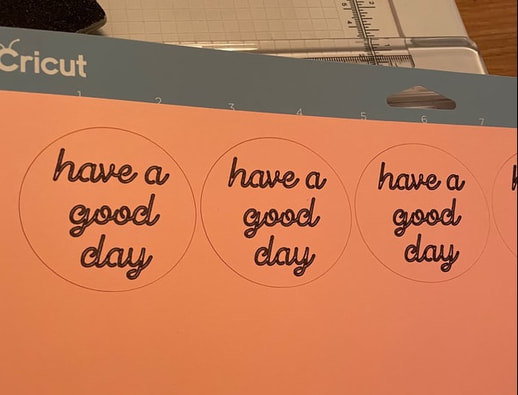 I added some washi tape to the inside of each card and then stuck down the white scalloped rectangles. Washi tape is not super adhesive so I did end up using a line of another type of adhesive first to ensure that the washi tape stuck well. I then brought the tape over the edges onto the back of the card and used a small Handmade with Love sticker to cover up the place where the tape met. Finally, I added a small puffy sticker that matched whatever was on the front of the card to finish off the inside.
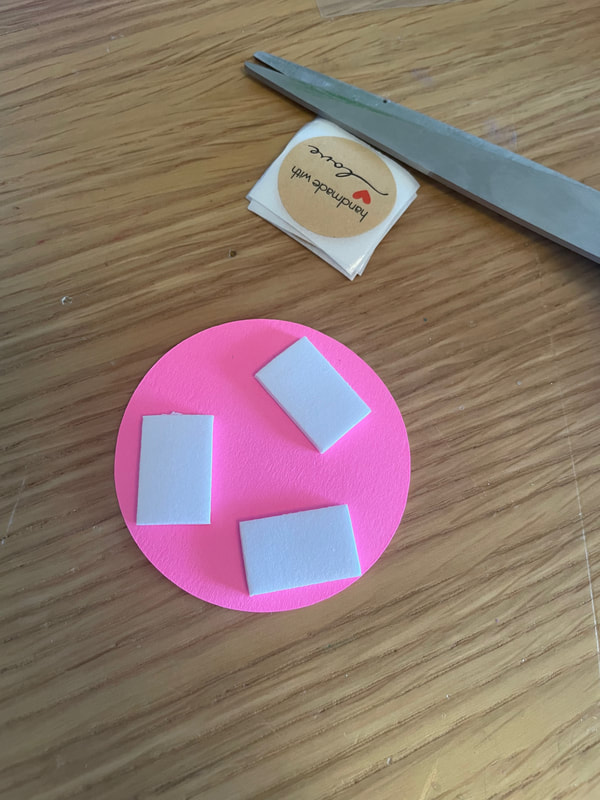
 For the fronts of the cards, I popped up the circle sentiment with some dimensionals and then added 3 or more stickers that I liked from the puffy sticker pack. I also used some liquid glue in addition to the adhesive on the stickers themselves to ensure they were stuck very well.
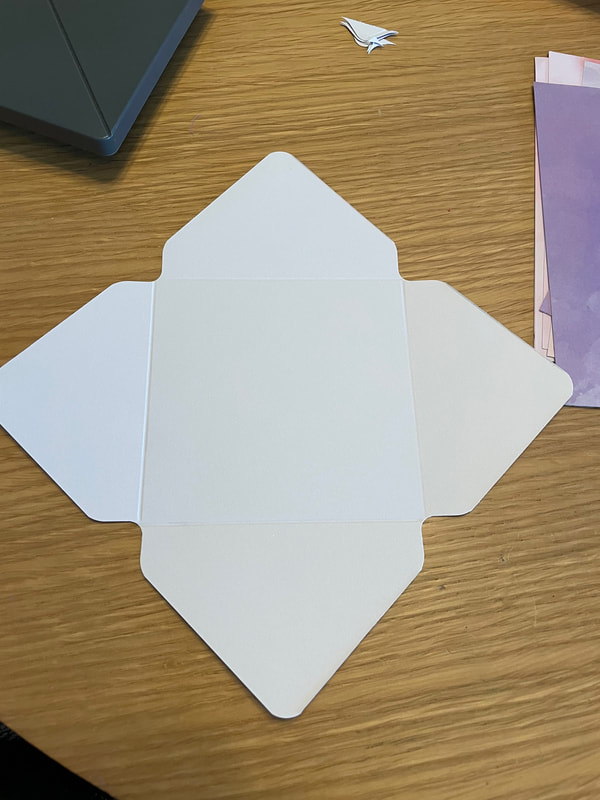
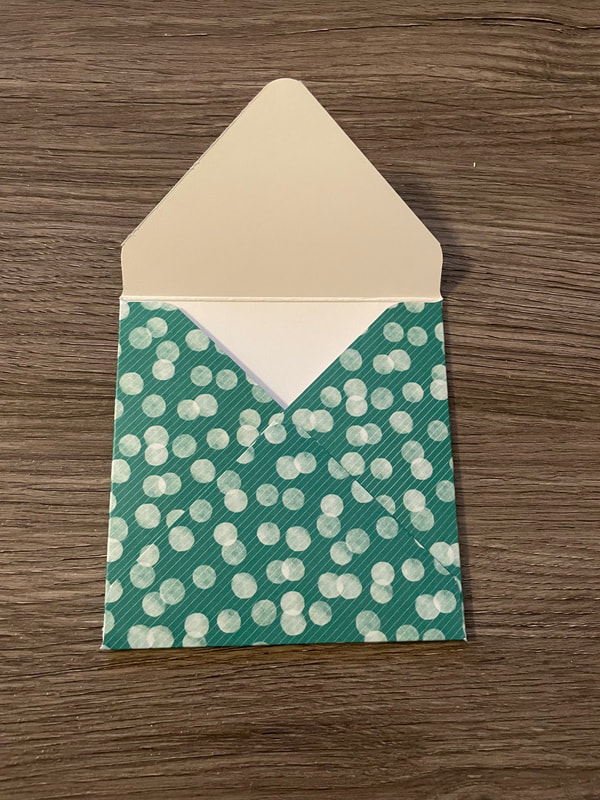
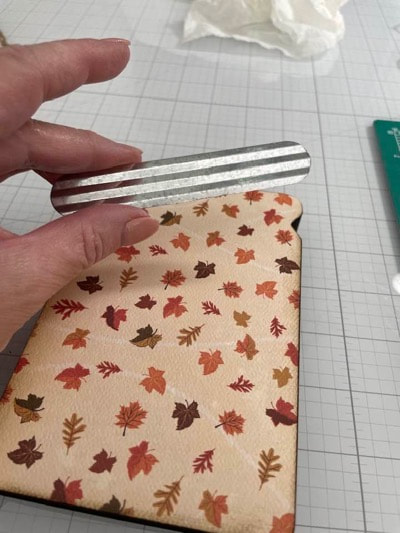
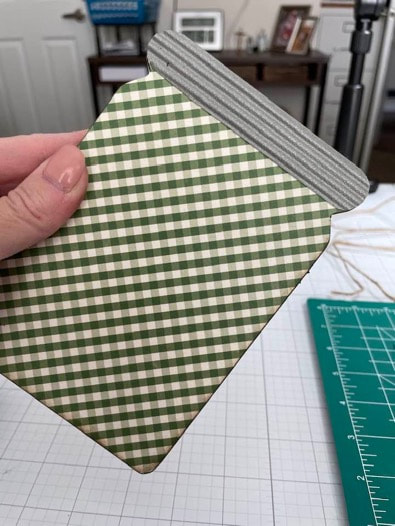
Here is what the fronts of all 5 sets I made look like! 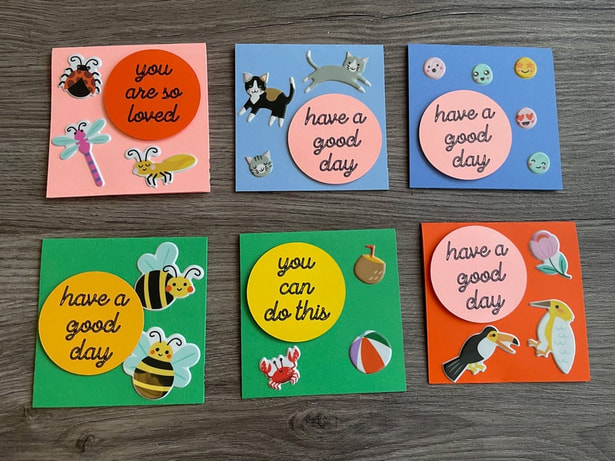 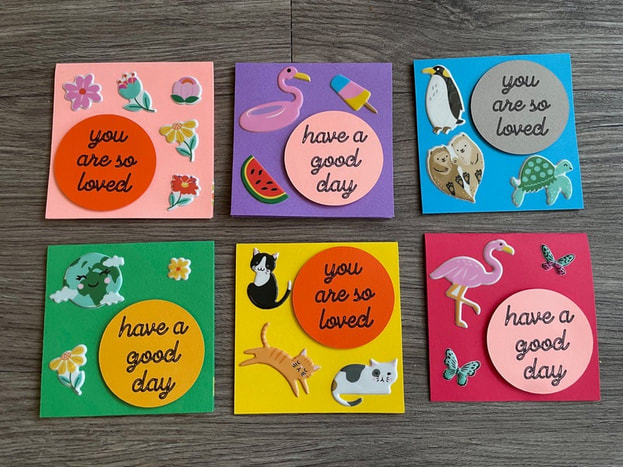 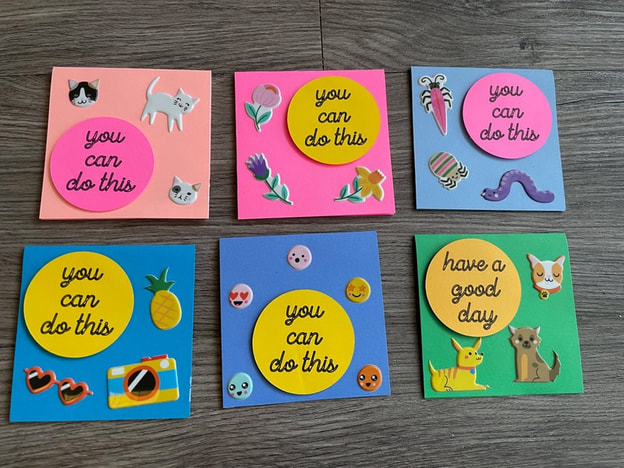 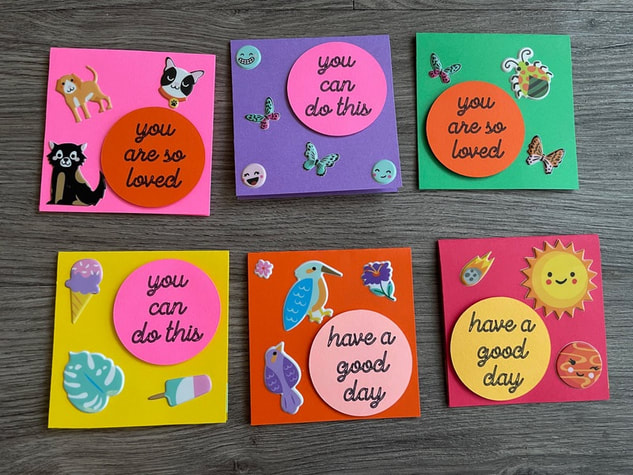 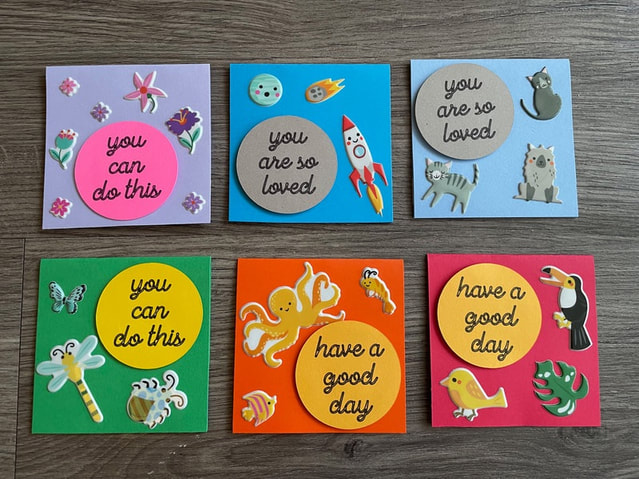 I thought it would be fun to make some custom envelopes to go along with these cards and my mother has this handy envelope maker I was able to use.  The way this envelope maker works is first you cut out the appropriate sized square of paper, then you use the punching and scoring feature to make notches and score lines that will allow you to fold up the paper into an envelope shape. I used patterned paper that had one fun side and one blank white side to make the envelopes.
I had so much fun making these envelopes! I used a fabulous glue that I got for Christmas to adhere all the flaps of the envelopes down. It is called "Art Glitter - Designer Dries Clear Adhesive" if anyone is interested!
This project was a nice way for me to use some fun stickers and make cards on a smaller scale. I have the 5 sets of 6 cards I showed above on the Etsy shop. Each set comes with 6 cards, 6 patterned envelopes and 6 clear stickers to close the envelope flaps. Go take a look if you are interested! I also added a bunch of new things to the shop in addition to the cards so if the cards don't speak to you, something else might. Here is the link to my shop if you need it: www.etsy.com/shop/patternedpaperplate Have a great day everyone! - Rebecca P.S. Today's photo on the homepage is from Pexels user Antoni Shkraba: www.pexels.com/photo/healthy-lunchbox-with-fruits-and-vege-5852329/
1 Comment
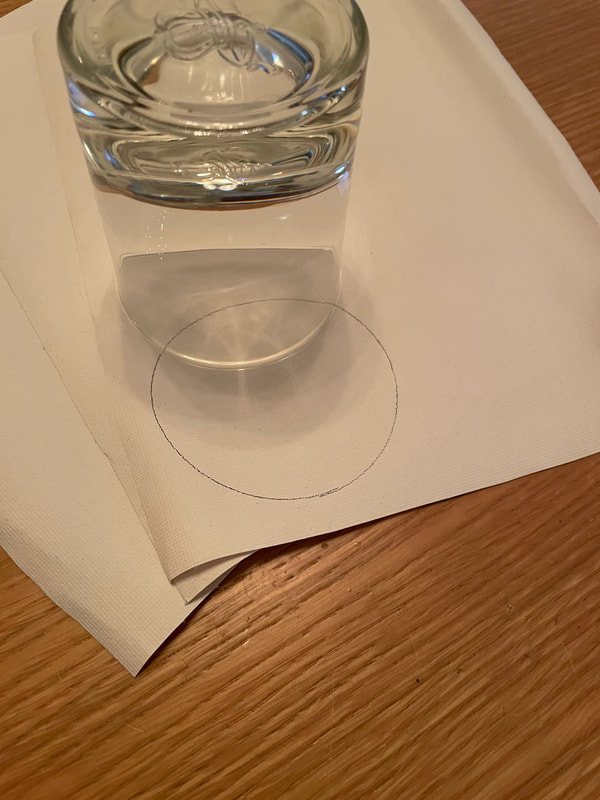
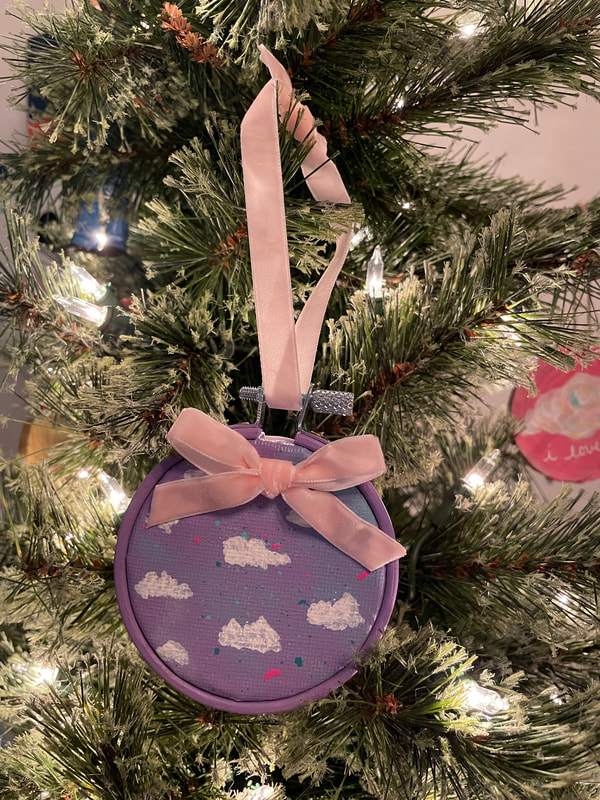
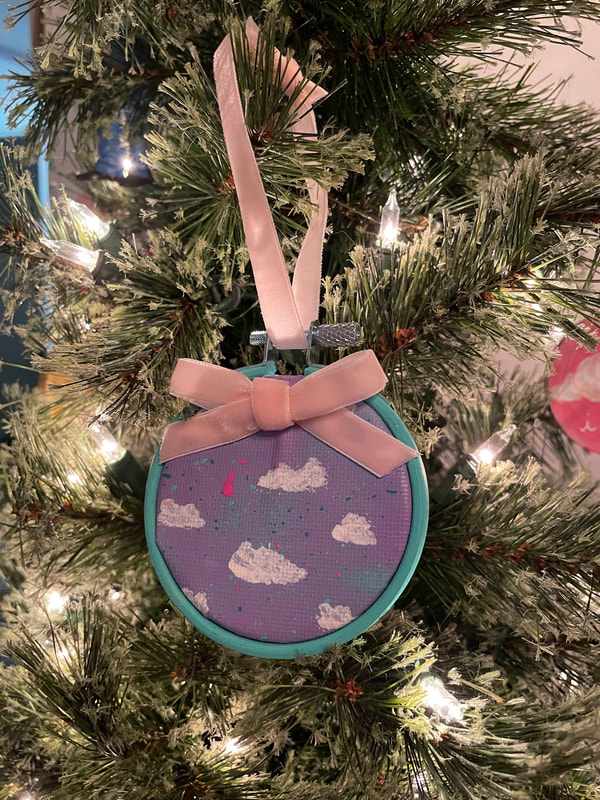
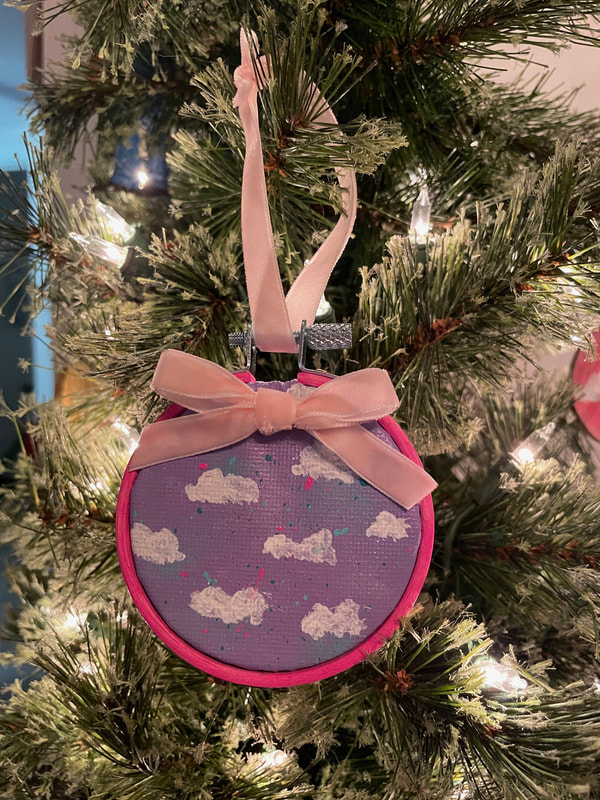
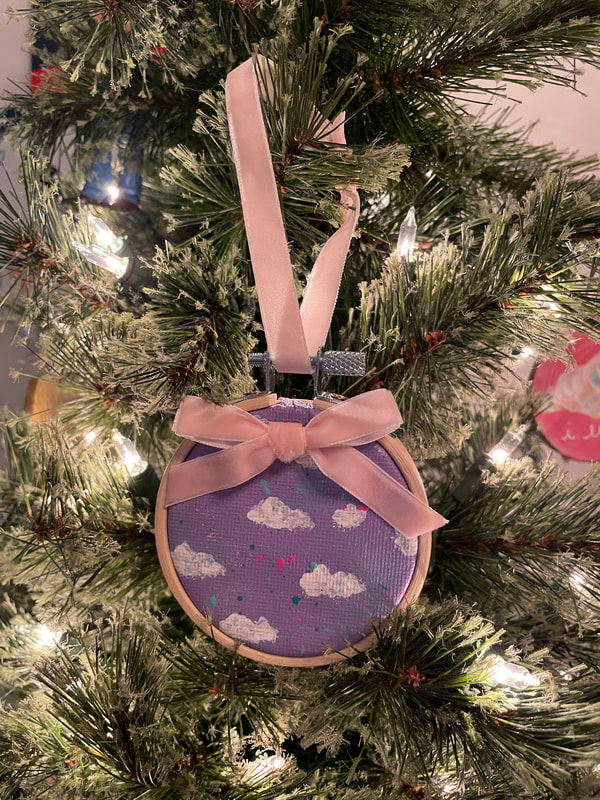
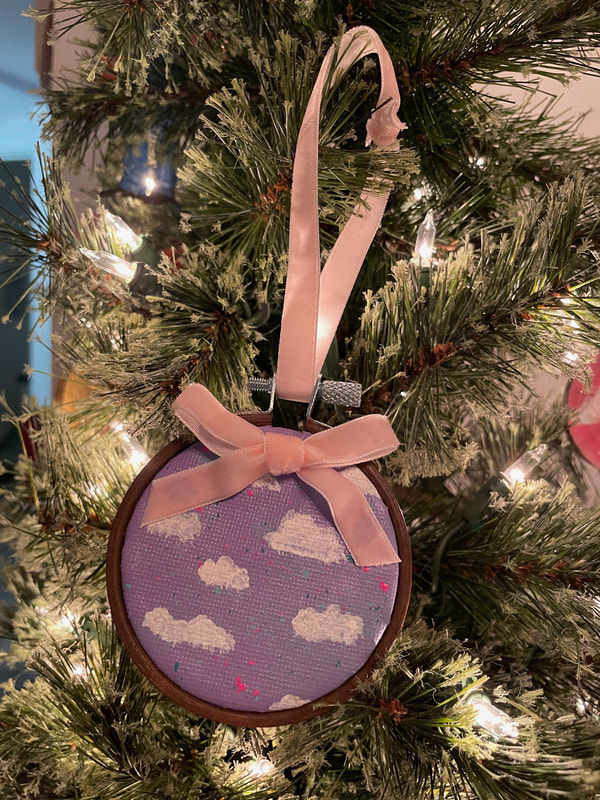
Hello everyone! This weekend I have a very fun craft to show you all. I have recently been obsessed with the idea of tiny little embroidery hoops and wanted to make a craft using them. My mother had some scrap pieces of canvas that she gave me from a project she had done previously and I thought I could put the 2 together into something fun. I ordered a pack of 10 2.5 inch embroidery hoops from Amazon. 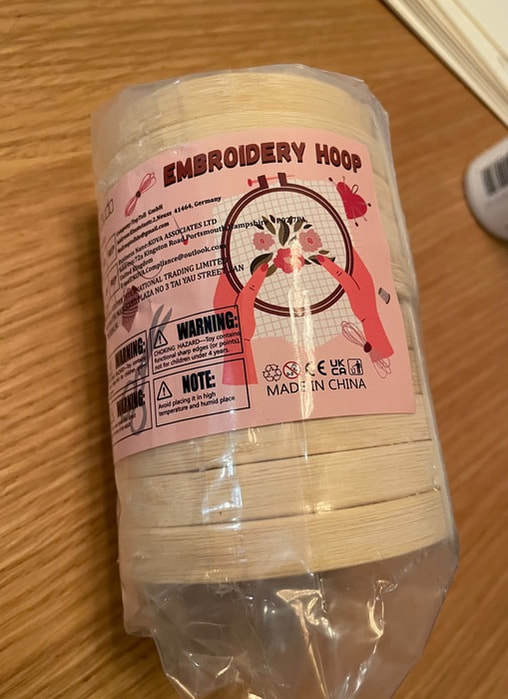 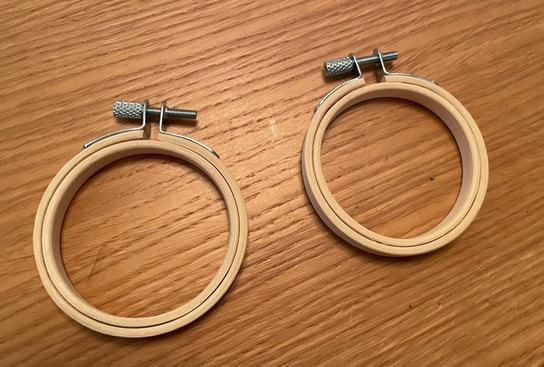 I started off by taking the canvas pieces and using a cup to draw some circles that were slightly larger than the inner hoop of the embroidery hoop. These ended up being about a quarter to a third of an inch larger than the inner hoop and I did have a bit of a hard time working with them when it was time to put everything together so I would recommend going even larger if you try something like this.
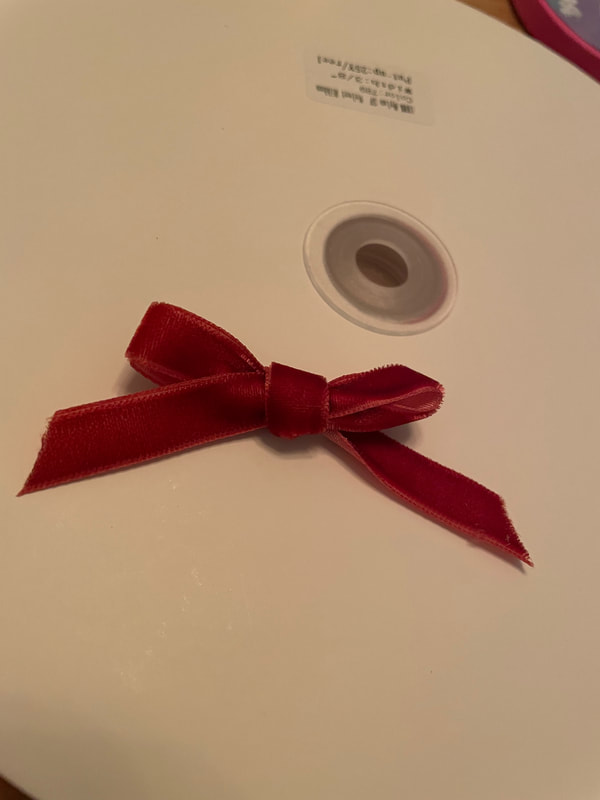
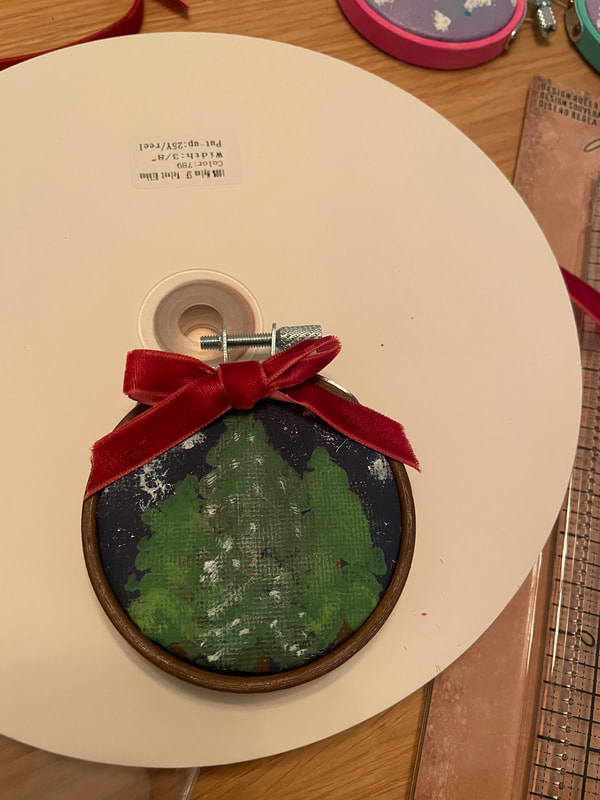
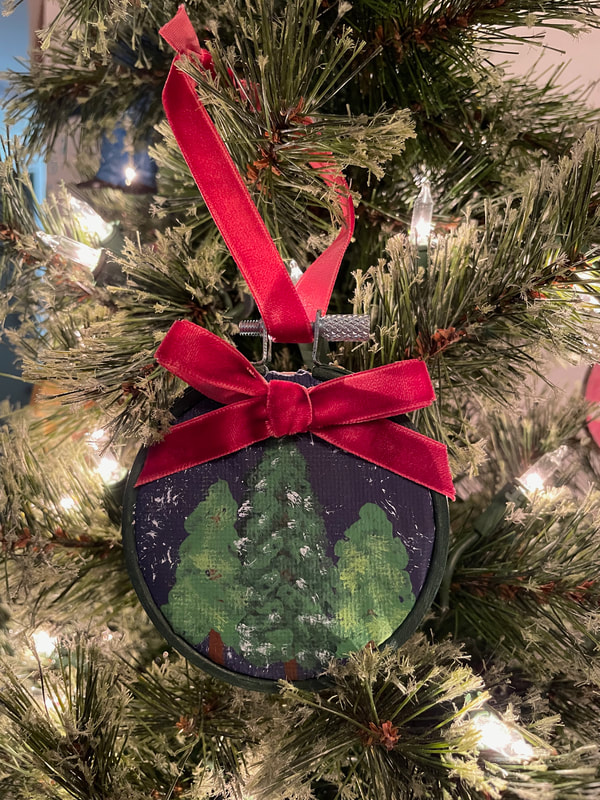
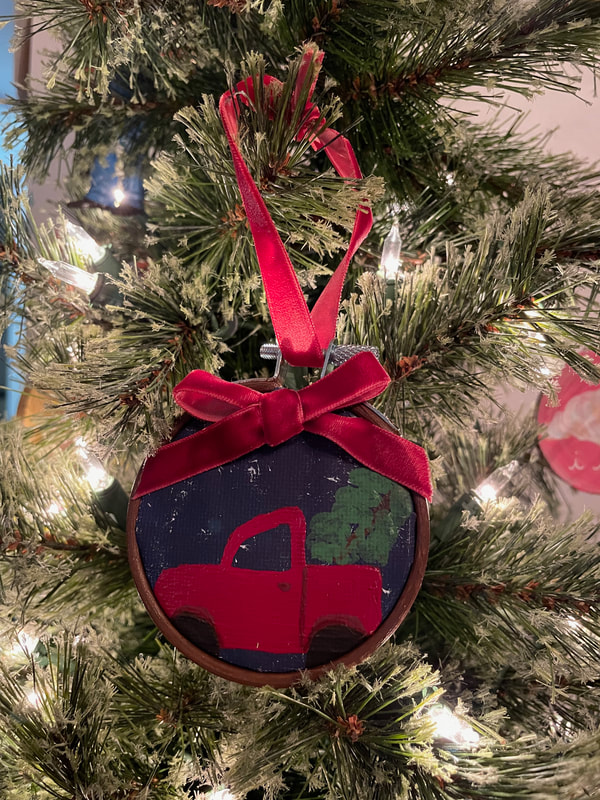
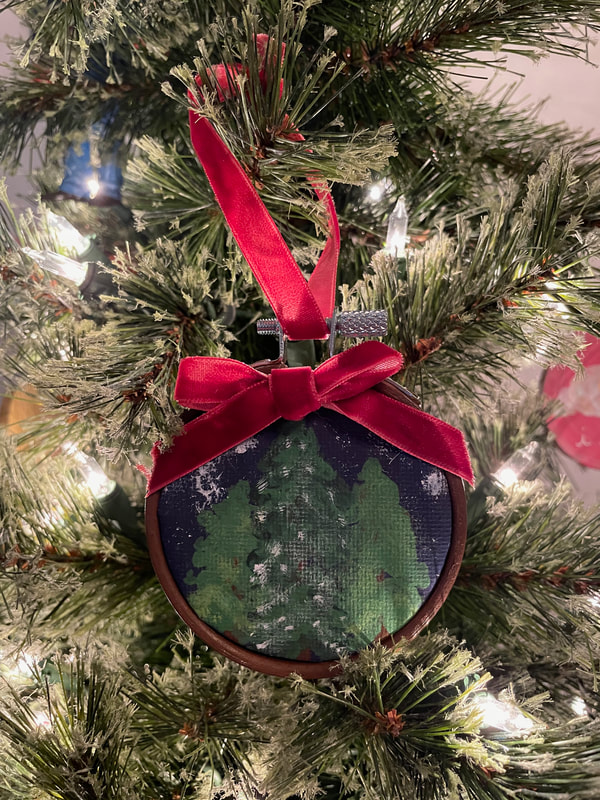
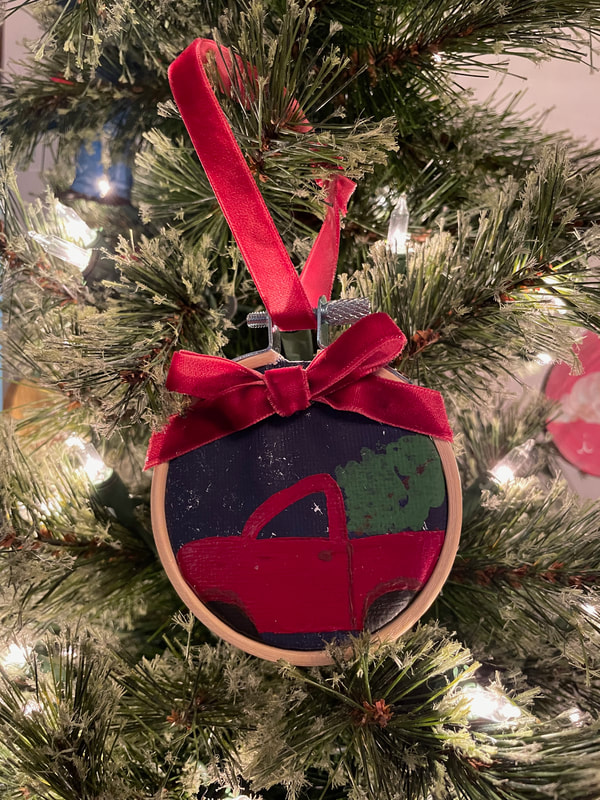
I decided to make 5 of the ornaments a purple cloudy sky design and the other half a Christmas-y design. I painted 5 of the circles I had traced out with a pretty purple color and then went in with a small sponge brush to add some additional pastel colors. I also added some paint splatters of the same color and then went in to add some white clouds once the base was dry. 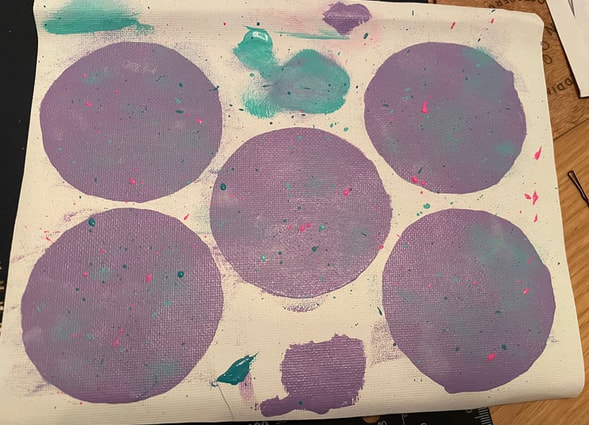 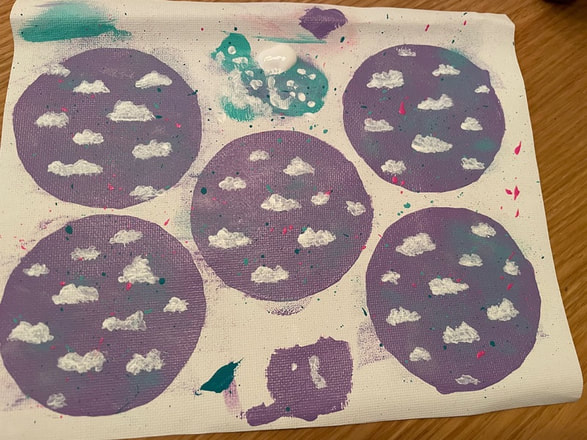 For the holiday ones, I painted them a navy blue and added some white splatters to look like snow or stars. I added some trees to 3 of the 5 and did a little red truck hauling a Christmas tree for the other 2. That was an idea from my husband and I think those came out pretty cute! 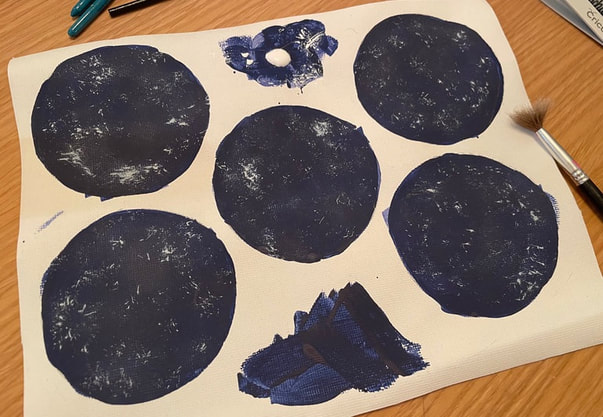 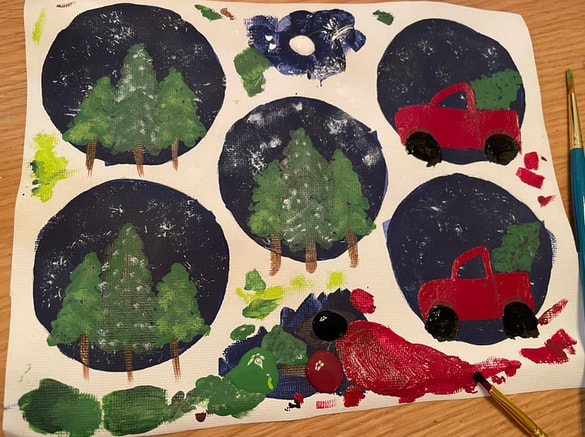 While the canvases were drying, I painted the embroidery hoops. I left a few the natural wood color, but then painted the others to match the look of the painting going inside. Once the canvases were dry, I cut each circle out and started getting them inside each hoop. As I mentioned, the circles were a bit small and hard to work with so I ended up using some glue to stick the edges of the canvas circles onto the outer edges of the inner hoop. I know that's a little hard to follow, so I hope the picture below helps! 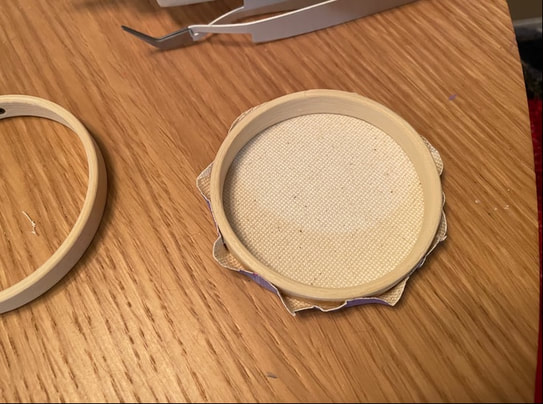 I then cut a small cardboard circle from an empty Cheezit box and glued it to the back of the canvas to give it a little more stability. 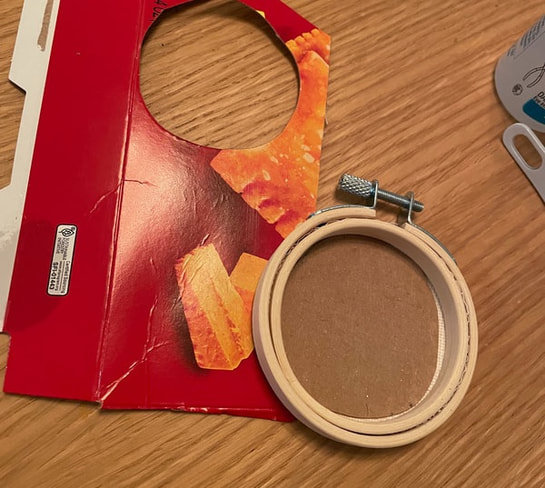 I then glued a backing to each ornament to cover up the back of the canvas and the cardboard circle. For the purple sky ones, I cut out a circle of a pink shiny cardboard and for the Christmas ones I used some tan colored cork or thick cardstock. 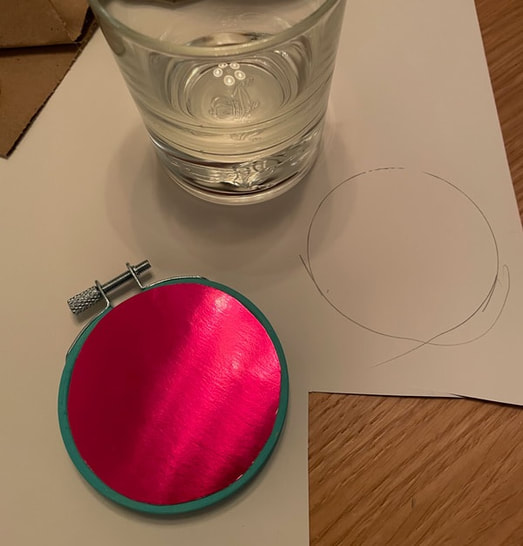 I had a vision of velvet ribbon looking good with these so I bought some red and pink velvet ribbon. This ribbon only had one "good" side so I watched a tutorial on how to make a bow where only the good side of the ribbon was showing. I did red ribbons on top of all of the Christmas ones and pink on the sky ones. These bows were also helpful as they covered up any small imperfections at the top of the ornaments near the hardware where you tighten the hoop. Since canvas is thicker than the kind of fabric you might normally put in a hoop, it did buckle slightly at the top of the hoop. I then used a piece of the same ribbon as a hanger for the ornament by putting it through the tightening piece at the top and just making a knot.
 And here they are all done!
I am so happy with how these came out and I really think I executed the vision I had in my head pretty well! These, as well as some other new things I've been working on, will be on the Etsy shop in the new year. I'll be sure to let you all know when that happens! This may be my last blog of 2023 as well; I'm still debating if I'll post one more this year. I'll let you all know, but if I don't, happy holidays and have a great new year!
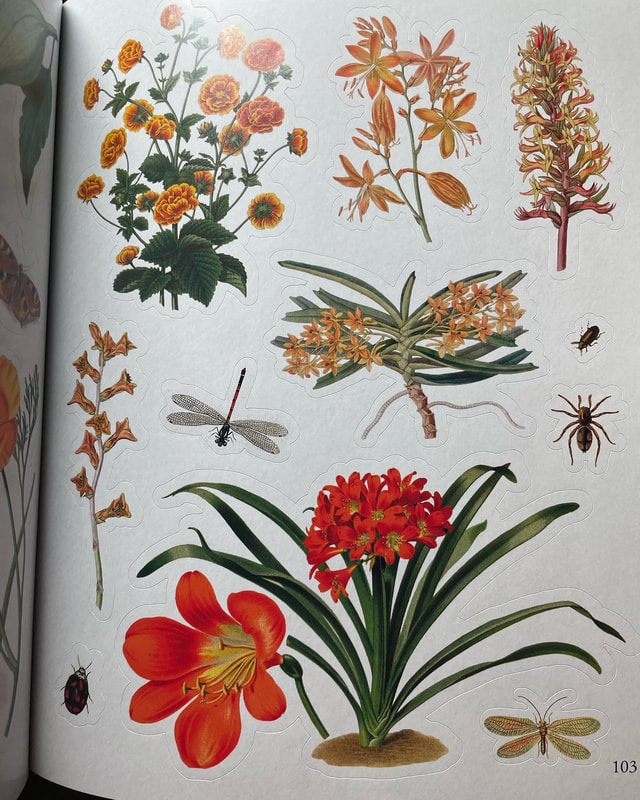
- Rebecca P.S. Today's photo on the homepage is from Pexels user cottonbro studio: www.pexels.com/photo/close-up-of-a-person-doing-embroidery-work-on-black-fabric-3838686/ iHello everyone! As we reach the end of 2023, I wanted to share a simple little calendar project I am working on. This year, my husband and I found that it works really well for us to have a written calendar that we use to plan things out for the whole year and then to keep track of the current month on a larger whiteboard near our door. However, we did discover that having a traditional planner that also has space to plan each week is a bit of a waste for us as we only ended up using the larger month view. I absolutely love the idea of a bullet journal and think its so fun to watch people spend so much time on them, but I simply don't have the patience for that myself. I wanted to try to make a pretty monthly calendar system for next year that dipped a toe into the world of bullet-journaling but wasn't quite so intense. To start off, I found a downloadable calendar template from Etsy. You could also find free images online that you could print, but I liked the style of these calendars and how they were perfectly scaled to fit on an 8 1/2 by 11 piece of paper. Here is an example of what one month looks like!  I wanted to spice up the top of each page a little so I used an embossing label maker to make labels for the days of the week.  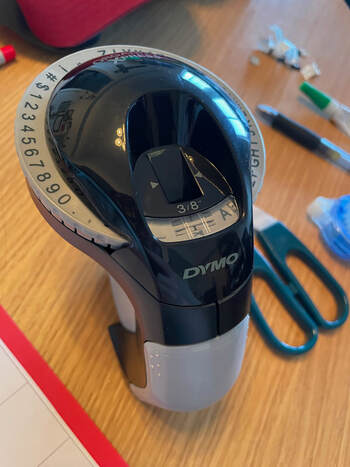 I then thought it would be fun to make a rainbow throughout the year so I picked 12 colors of 8 1/2 by 11 cardstock. 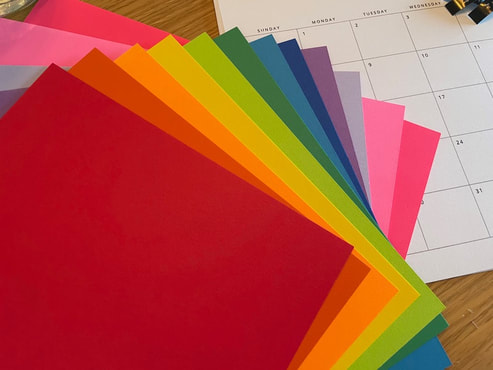 I trimmed the edges of each calendar page and then stuck them down to the cardstock. 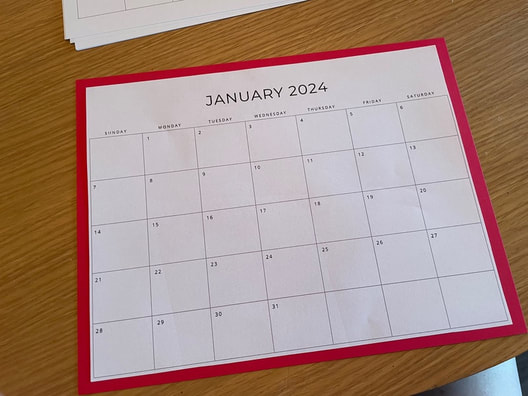 I then took a Sharpie that matched the color of the paper and used it to outline the days of the month. I also went ahead and marked down any holiday that I wanted to keep track of as these calendars were completely blank. The nice thing about having a blank calendar to work with is that you can pick and choose which holidays you want to mark off. 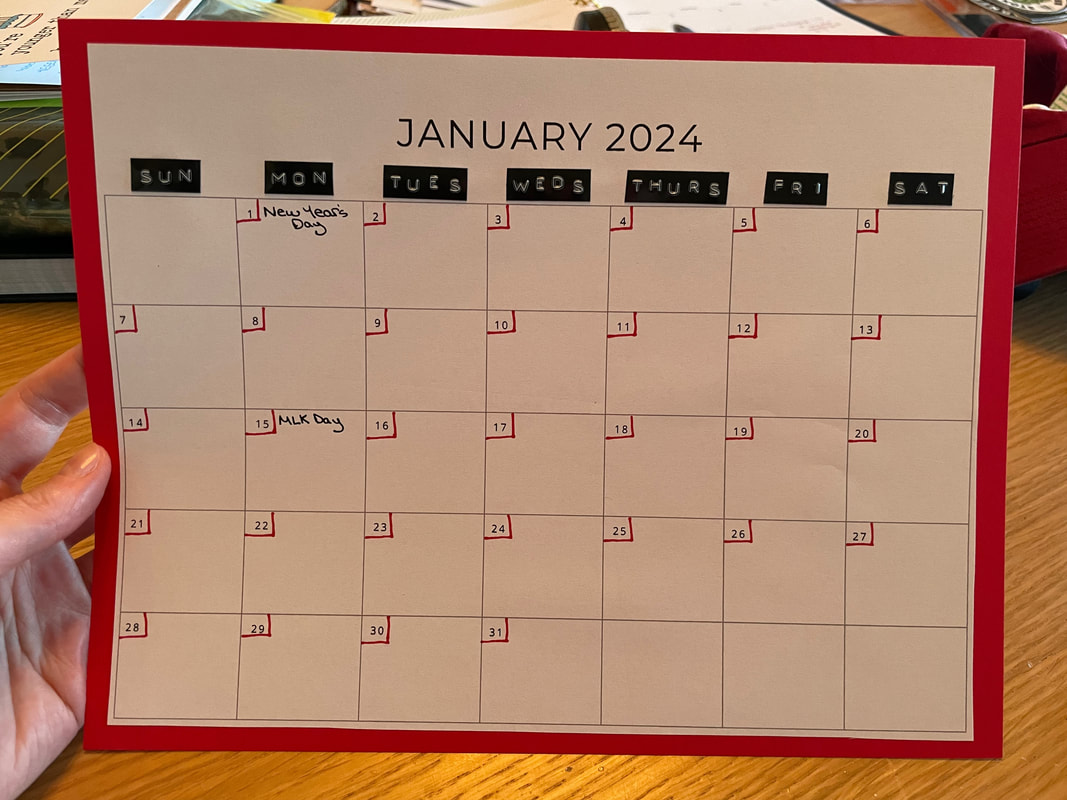 I then used some stickers from a book I have shown a few times on the blog to add some style to the pages. Here is an example of the style of stickers I used.
I haven't made it all the way through the year yet, but here are what the first 4 months of the year look like! 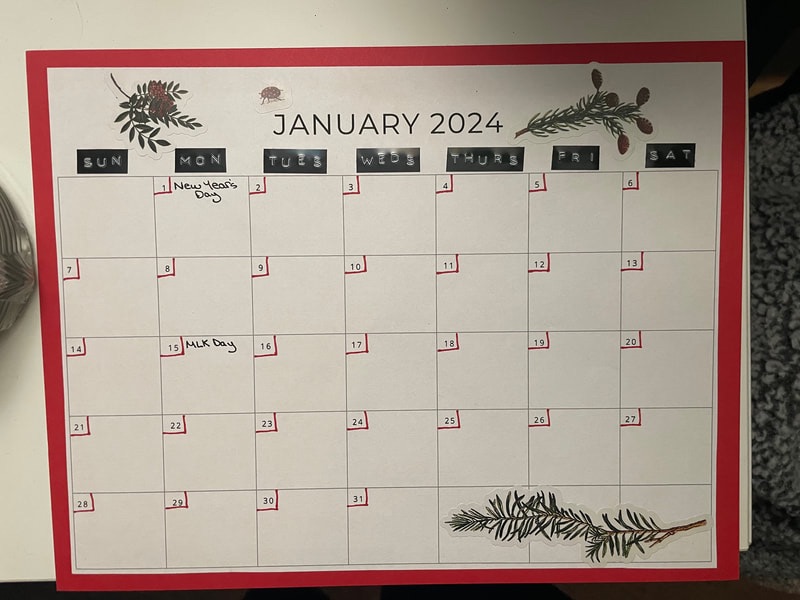 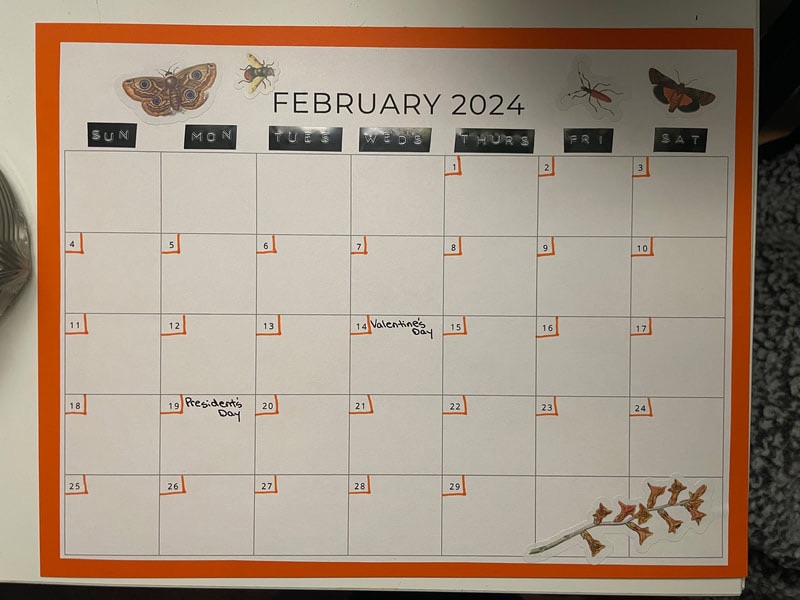 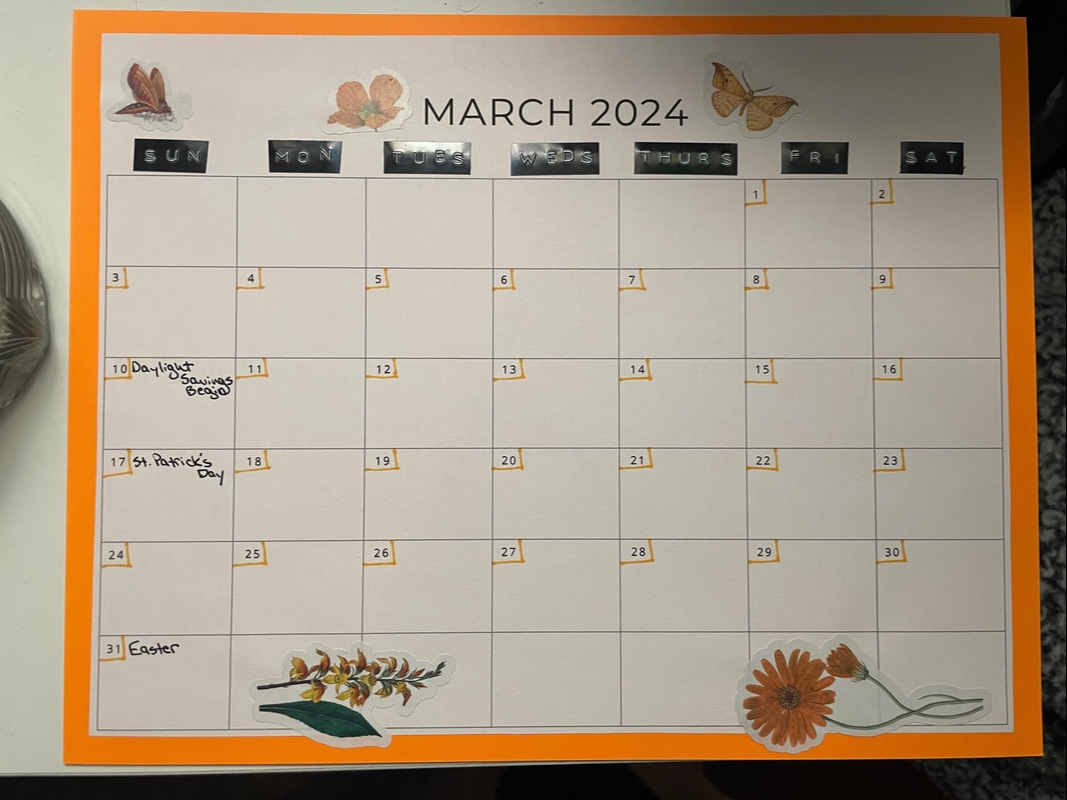 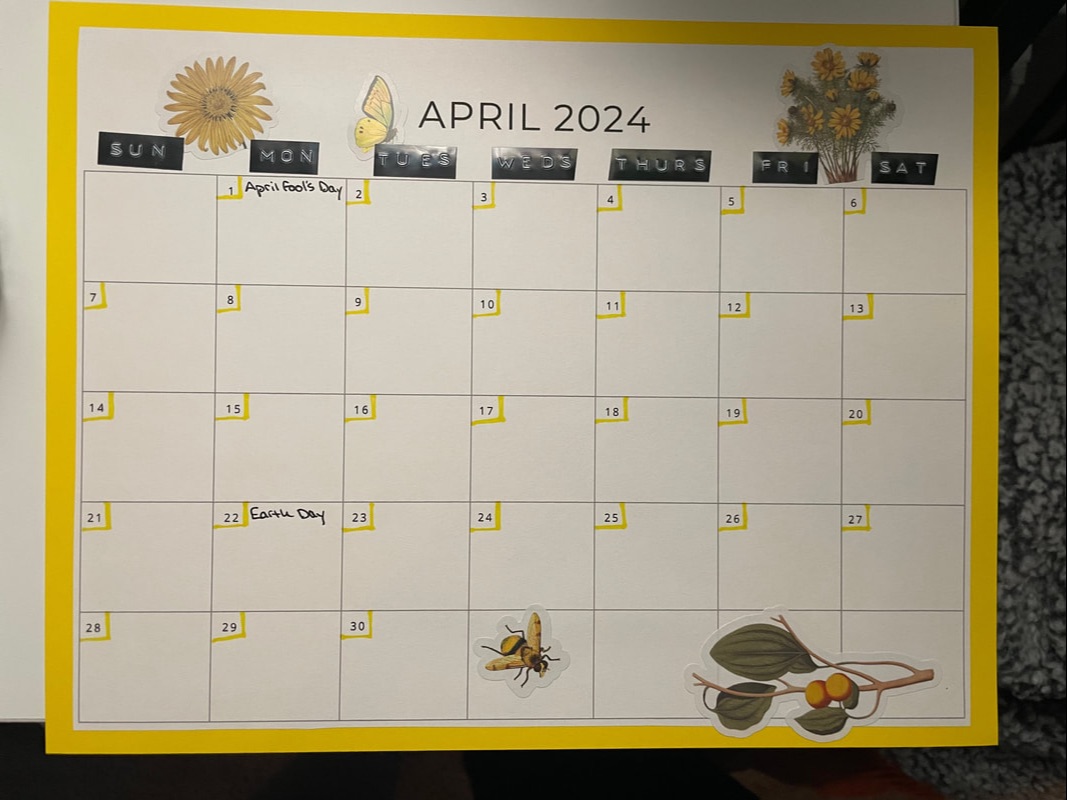 I know this was a simple blog but I hope it helps you all see how easy it is to make yourself some pretty calendars. If you are like me and like the idea of bullet-journaling, but know that its a bit much for you, I feel like this is a nice little project that allows some customization while also not being so unstructured as bullet-journaling. To store this, I will be sliding the sheets into page protectors. I went for that as opposed to trying to bind them together into a book as I liked being able to see a bunch of them at once for planning purposes.
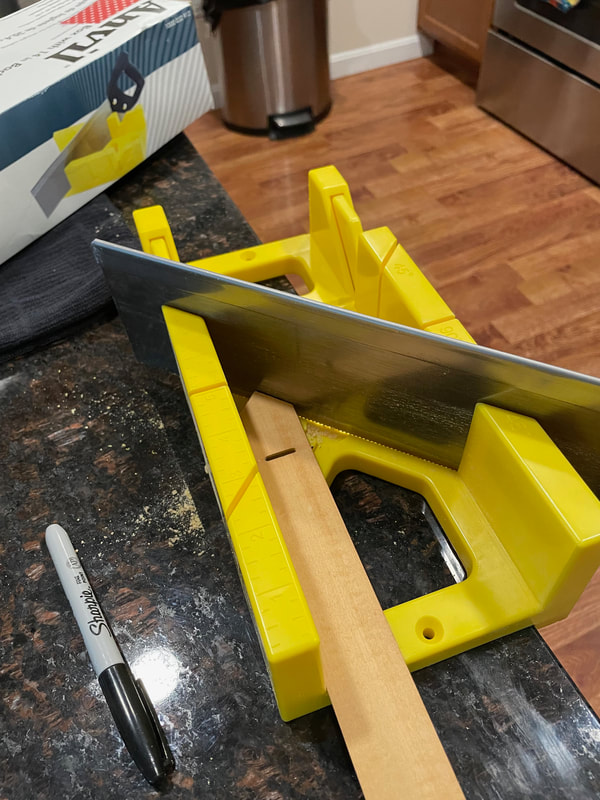
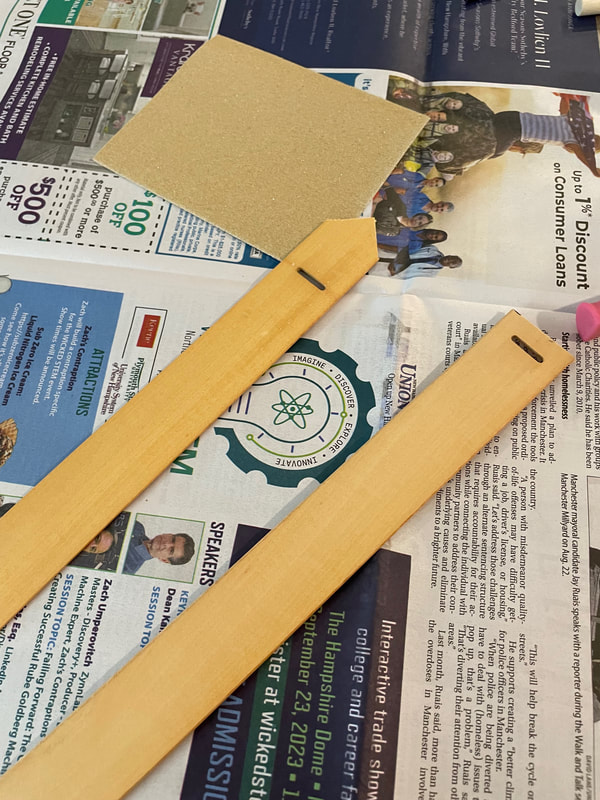
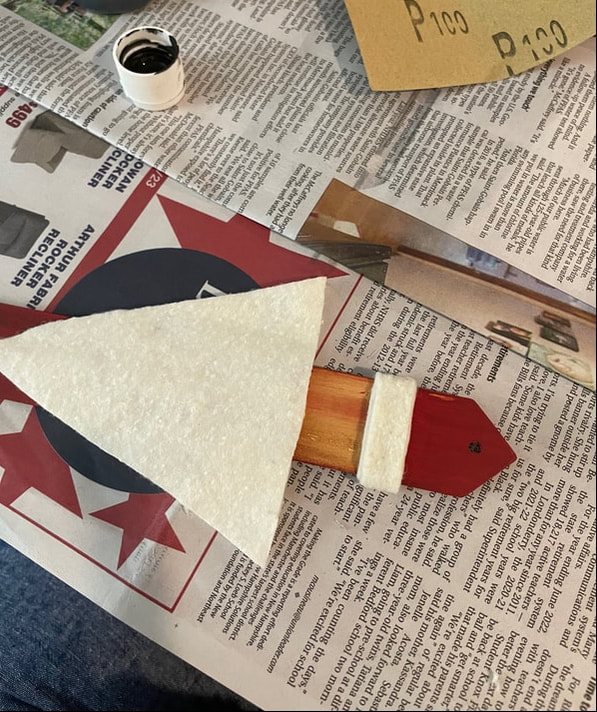
Let me know if you have ever tried something like this in the comments below! - Rebecca P.S. Today's photo on the homepage is from Pexels user Anete Lusina: www.pexels.com/photo/crop-woman-writing-in-calendar-5239916/ Hello friends! It is Suzanne, Rebecca’s Mama, happy to be back with you on the Patterned Paper Plate to share another cute upcycle project. My brother recently texted me and asked if I was interested in some wooden slats from the mini blinds he and my sister-in-law were switching out in their home. Since I am never one to say no to a potential craft supply, I of course went right over to pick them up and started thinking about what I could make. 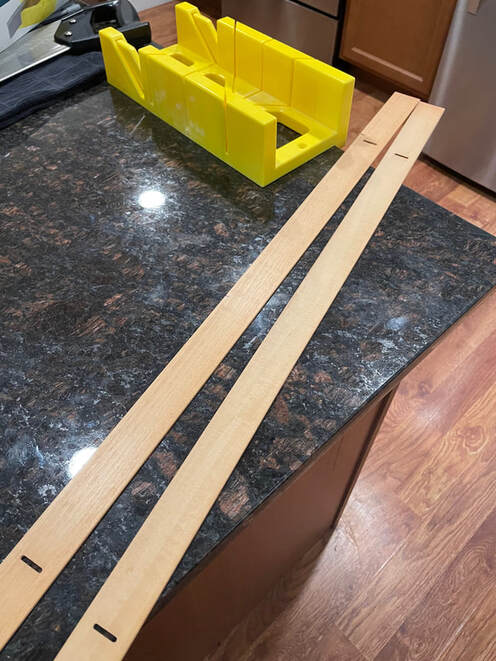 Since I was preparing for several craft fairs, I decided that Santas and snowmen were the thing to make. I started by cutting down the slats to twelve inches long. For the snowmen, I trimmed just above the hole (where the string to raise and lower the blind would be) because I knew it would be a perfect place to run a hanger through. For the Santas, in addition to cutting the length, I also cut the top into a point to mimic the top of Santa's hat. I also left the hole in these because I knew I could cover it with the fur on Santa’s hat. All these cuts were super easy to do using a miter box and saw because the blind slats are quite thin.
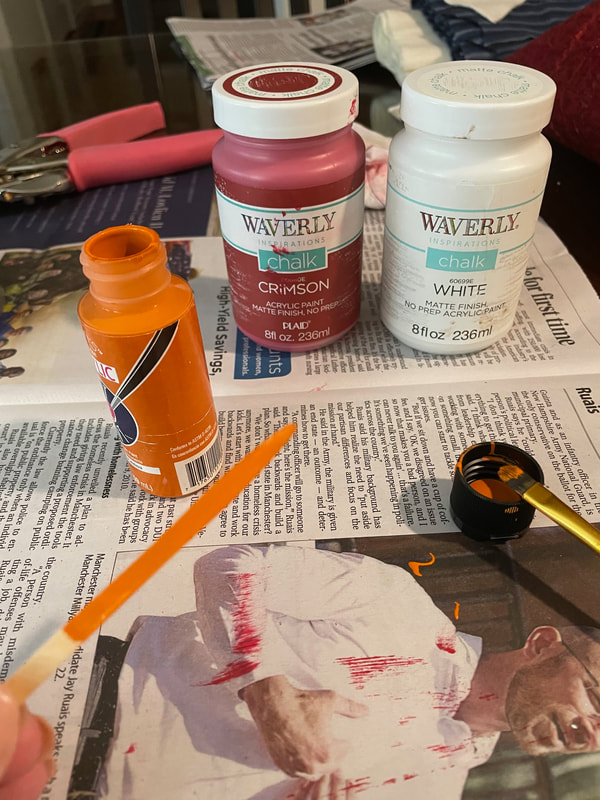
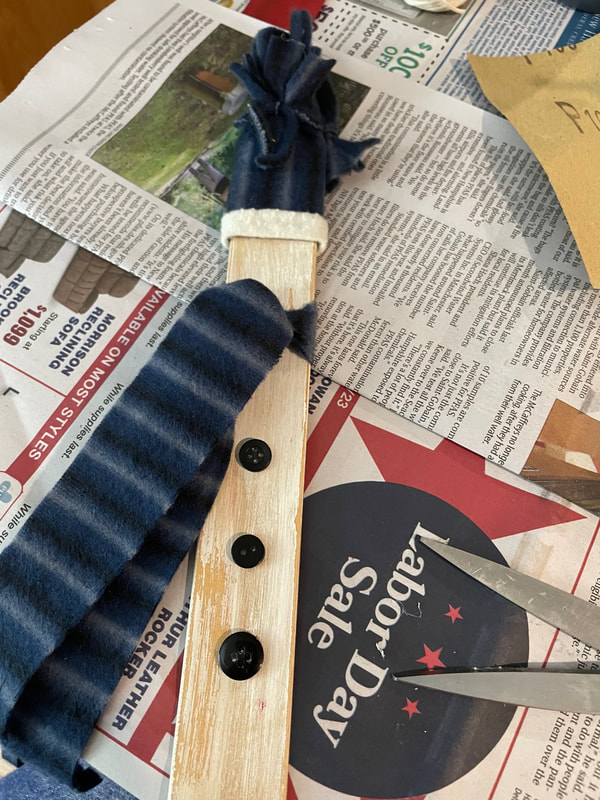
Once everything was cut down, I gave the pieces a quick sanding and got to painting. First, for the snowmen, I used white paint over the entire piece, except for the very top, which I knew would be covered by a hat. 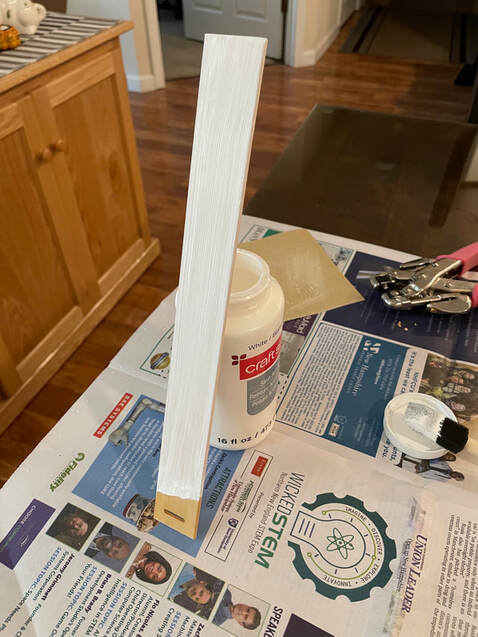 Using a fleece scarf, I had picked up at the Dollar Store, I cut log a long, thin piece to function as a hanger, another long but wider piece to be a scarf and a rectangle and smaller strip to make the hat. 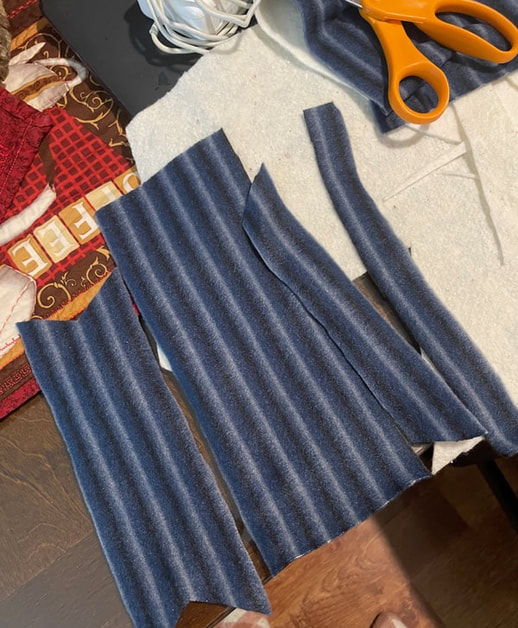 I pulled the long thin strip to make it curl over onto itself and then ran it through the hole in the piece and tied it off. I also used my favorite antiquing wax to “grubby-up” the white. 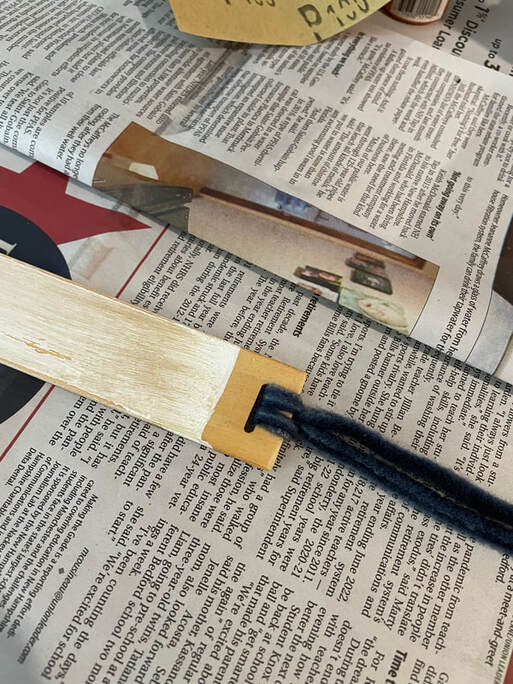 Next, it was time to hot glue the rectangle to the top of the piece, with the hanger coming out of the top. I cut into the top of the “hat” to make a pompom and tied the smallest piece of fleece around the fringe and the hanger to close it up. 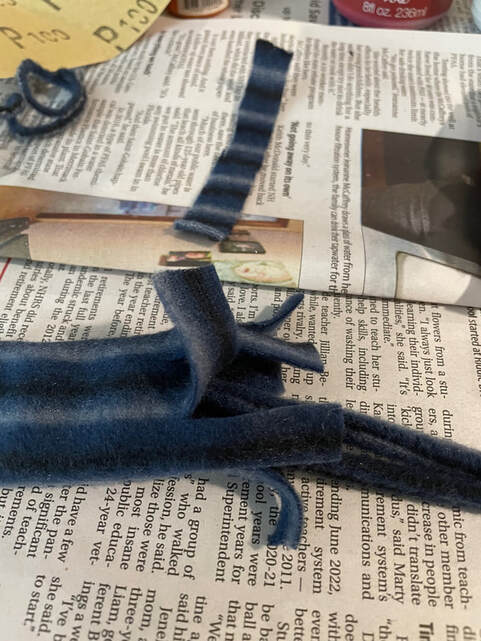 With a little orange paint onto a toothpick shaped piece of wood, I had a carrot nose. Two tiny black dots (with an even tinier white dot for a pupil) for eyes – for some reason, I just love the look of a big, long nose, some tiny eyes, and no mouth on my snowmen – and his face was done. I tied the longest strip around the “neck” of my little guy, added three few buttons down his front and put some glitter glue in the buttons for a bit of sparkle.
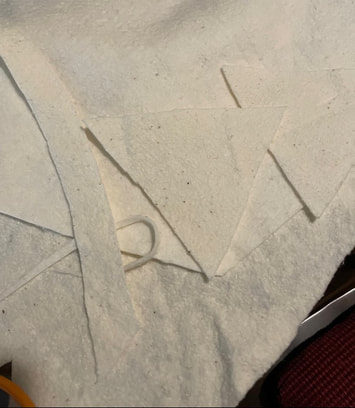
Santa is just as easy. To start, I used a strong punch (something called a “crop-a-dile,” though a small drill would work as well) to put a hole in the point of his hat. The entire piece was painted in red, except for an approximately 1.5-inch swath just under the hole in the piece, where the face will be. 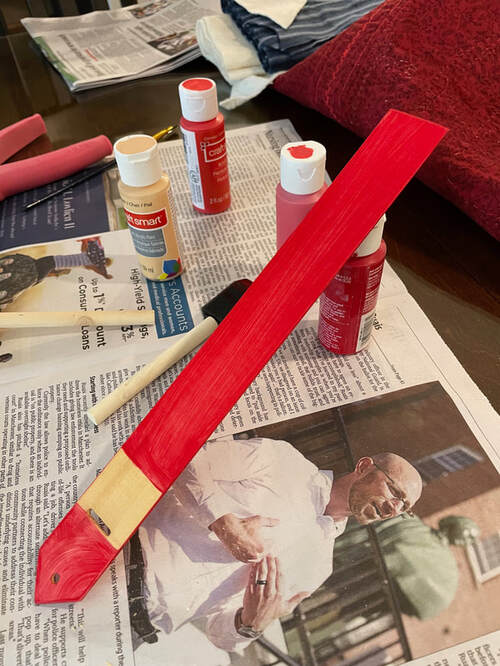 Santa also got a coat of antiquing wax before adding his decorations. For the fur on his hat and his beard, I cut pieces of batting (like you would use in quilting). The fur on the hat is just a long thin strip that got wrapped around several times. The beard is a long thin triangle that was glued to the base of the face and wrapped to the back of the piece.
Santa also needed a moustache, so I wrapped cream colored twine around my hand about twenty times, tied it off in the middle and cut the loops apart. The moustache was glued right above the beard. Santa also got some tiny black dot eyes, with the even more tiny white pupil. To hang him, I passed a length of rusty wire in through the back of the hole in the peak of his hat and curled the ends on the front. 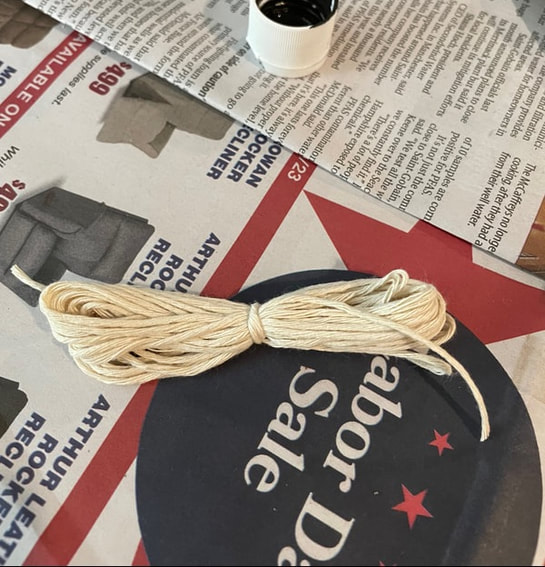 And with that, you have two adorable decorations. They could go on the Christmas tree, if you like big ornaments, but at a foot tall, they are perfect for adding a touch of holiday spirit to any small spot in your home. 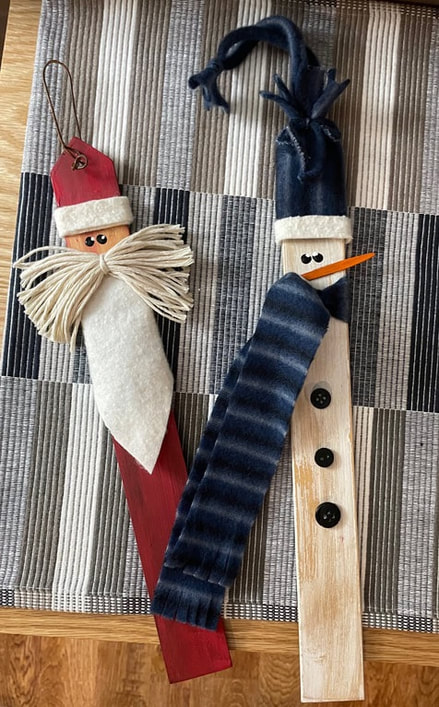 If you want to recreate these pieces (but do not have an amazing brother who saves things for you), you could use a paint stir stick, a ruler or even a piece of foam core board cut to size. Any scrap of brightly colored fabric could be used to make the snowman’s clothing. Cotton, gauze or even an old face cloth could be cut for Santa’s beard and hat fur. No paint? A marker would get the job done for the face features. Use your imagination and personalize your decorations any way you wish.
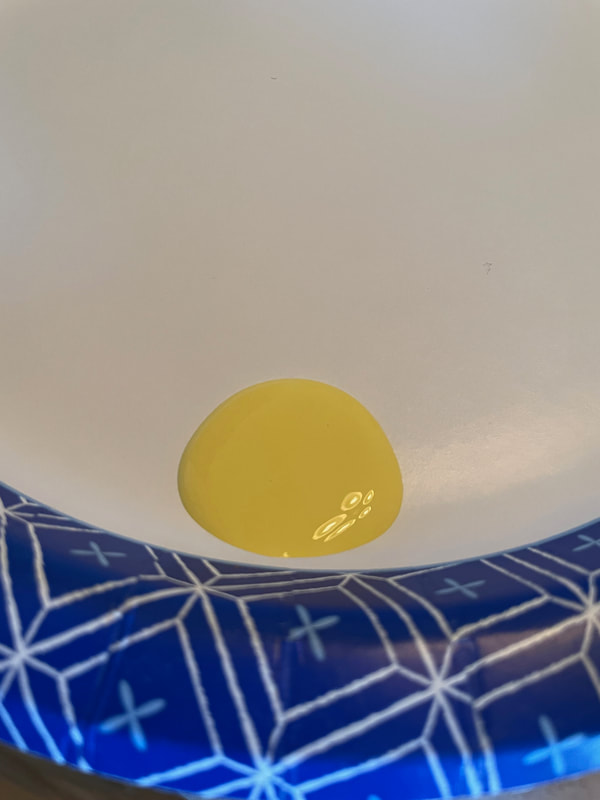
Happy Holiday Season! Thanks to my mother for this fun holiday craft! As we head into the holiday season, it's probably more likely that blogs will be off schedule for a while, but I'll always keep you all updated! - Rebecca P.S. Today's photo on the homepage is from Pexels user Bryan Geraldo: www.pexels.com/photo/low-light-photography-of-brown-window-blinds-586414/ Hello everyone! Today we have the first part of a random little project I started not long ago. I have been very interested in the idea of abstract textured paintings lately and wanted to try my hand at it. In case you don't know what I am talking about, here are a few examples I found on Etsy to give you an idea. Just FYI, I don't know these people, I just liked their art as an example of what I am talking about! www.etsy.com/listing/52607940/blue-white-water-flowers-original www.etsy.com/listing/1022859063/small-texture-paintings-variety-wall-art To start off, I took a few canvases and gave them a coat of white gesso. This just helps to seal the canvases and give a nice base for paint to stick onto. 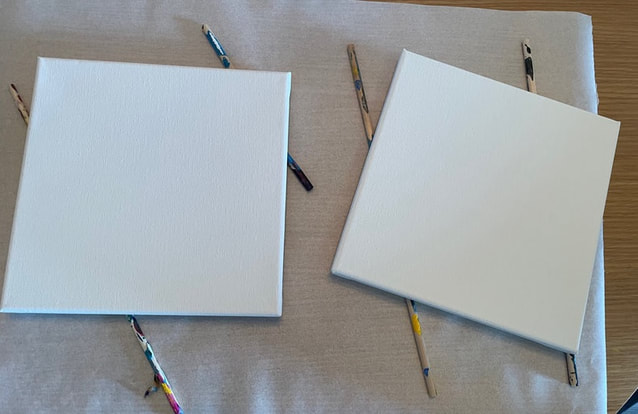 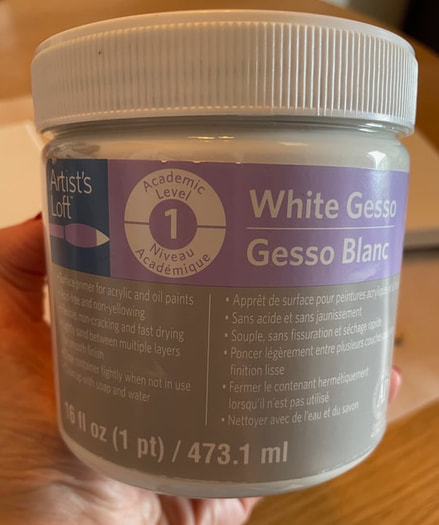 My first attempt was with some oil paint. I had a small set of oil paints I had left over from an at home date my husband and I had done a few years ago. I tried pushing out little dollops of oil paint and then spreading them out slightly using the back of a plastic spoon. After covering about half of the canvas, I started having a hard time doing anything without messing up the paint already on the canvas so I decided to wait and let what I had already done dry. It was at this point that I started to consciously remember that oil paint takes a VERY long time to dry and that these extremely large globs of oil paint were likely to take weeks, even months to fully dry. Here is a picture of this canvas I took just today after it had been sitting over a week. That little smudge you can see on the bottom is from me touching some of the paint to see that it had not really dried at all yet .... 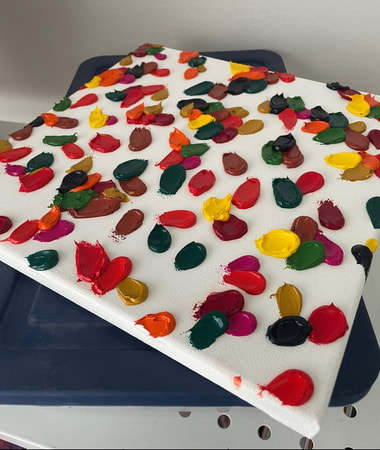 So although I am excited to keep working on this and see how it turns out, I feel like it's not a very sustainable approach for me if I decide to keep doing art like this in the future. I don't have a lot of spaces where I can leave canvases like this for months at a time without them being disturbed. I then decided to try the age-old baking soda in acrylic paint technique . I am sure I have talked about this before on the blog, but in case you are not aware, if you add some baking soda to acrylic paint it gives it a thicker and grittier texture that is similar to chalk paint. The great thing about acrylic paint is that it dries much faster than oil paint and is generally a bit easier to work with. Here is an example of some acrylic paint straight out of the bottle versus some mixed with baking soda:
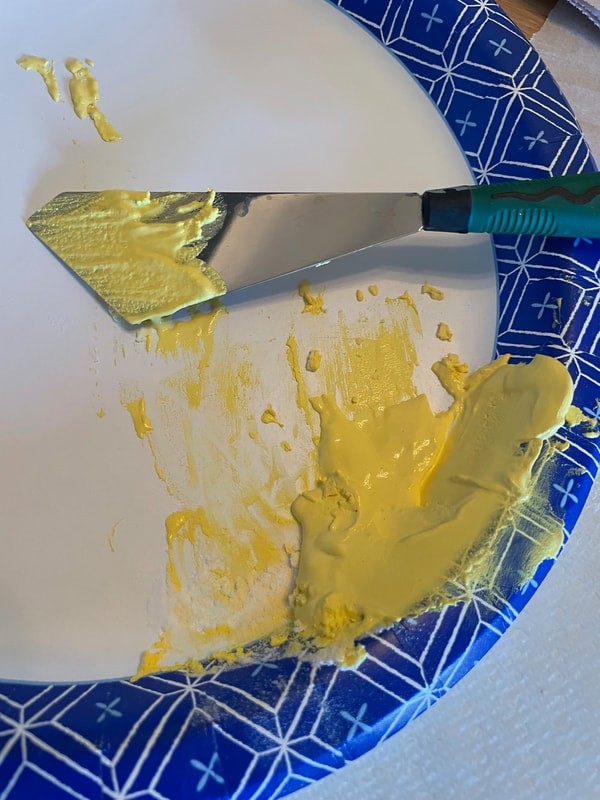
I decided that for these DIY chalk paint attempts I was going to do a gradient effect as opposed to the random splashes of color all over. For one canvas I went for a light yellow to turquoise gradient. I used a paper plate to keep mixing different colors and adding baking soda as needed. 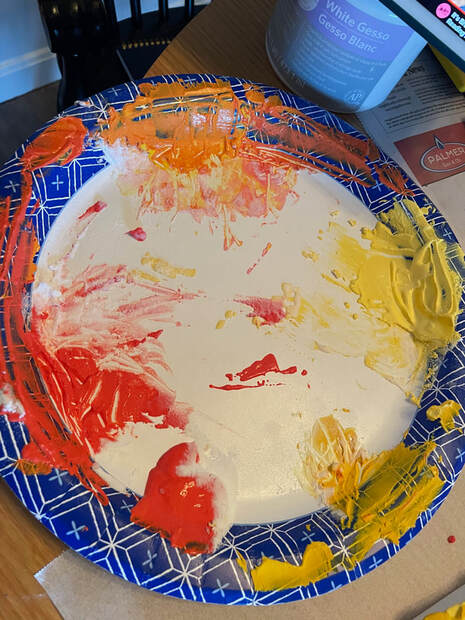 I used a palette knife to mix the paints and to apply them to the canvas and this is how the first attempt ended up. I like the overall effect of this a lot but think I need to be better at creating a softer gradient. I think at times I jumped from one color to another that was not close enough so it's not a smooth transition. 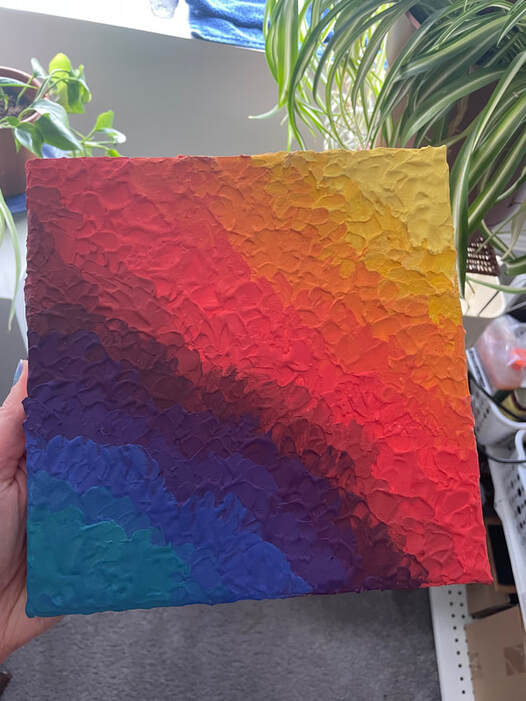 This painting was dry enough to the touch to handle in a few hours and fully dry after a few days. I also tried another attempt where I stuck within one color family and did larger splotches of each color. Again, I think I need to work on my transitions from one color to the next so it's smoother. 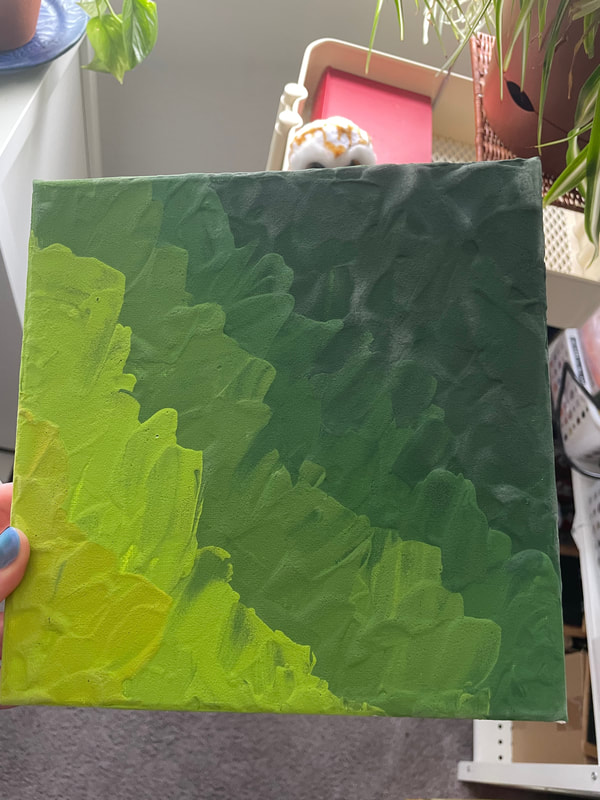 I think the next step is going to be trying to use some sealer on these canvases to see how it reacts with the chalk paint. I also think they would benefit from some wooden frames added to the canvases so I may give that a try as well. I am not quite sure where this little project is going but I wanted to do some different and take you all along for the ride!
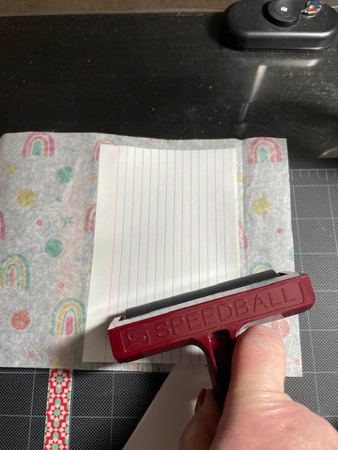
Let me know if you have ever tried any unique painting styles in the comments below! - Rebecca P.S. Today's photo on the homepage is from Pexels user Ulrich Scharwächter: www.pexels.com/photo/assorted-color-artist-color-soft-tubes-1327716/ Hello Friends! It’s Suzanne, Rebecca’s mama, happy to be back with you on the Patterned Paper Plate. I’m returning to my roots for this week’s card making idea. I periodically use pretty paper napkins in place of decorative paper for card making and got to wondering if tissue paper could be used in the same way. When I saw this super cute tissue rainbow paper, I decided to give it a try. 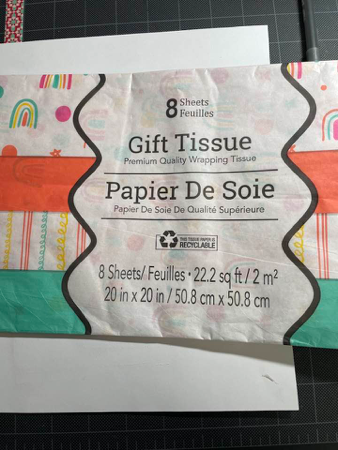 Step 1: Cut a strip of the tissue paper and gather four 4 X 6 inch index cards. 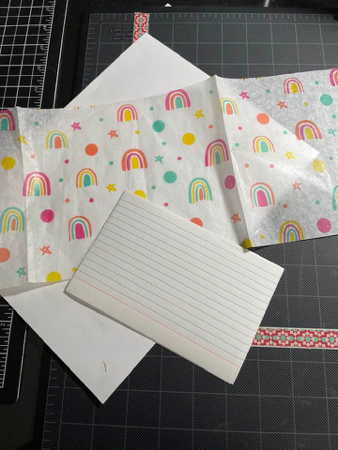 Step 2: Use a large glue stick to completely cover the index card and glue it to the back of the tissue paper. 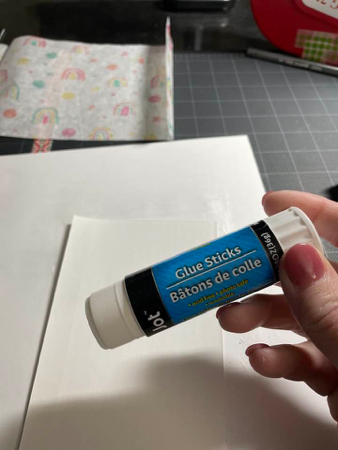 Step 3: Use a brayer, rolling pin or expired gift card to ensure that the index card is well adhered to the tissue paper. Trim the tissue paper that extends beyond the edge of the index card.
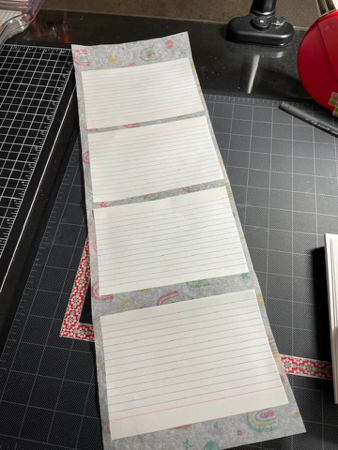
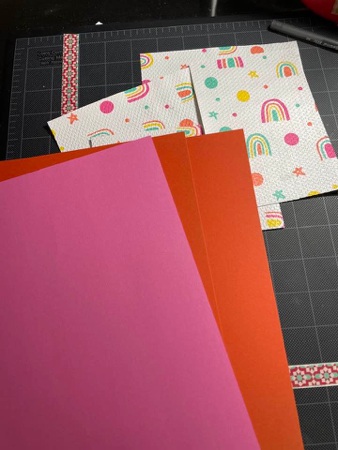
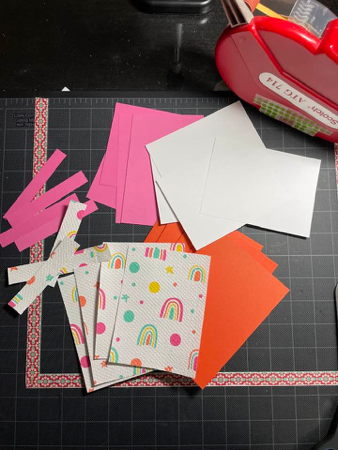
Step 4 is optional, but adds a nice touch. Run the index card with the tissue paper adhered through an embossing machine to add texture. Once the index card is embossed, trim it down to 3.75 X 5 inches. 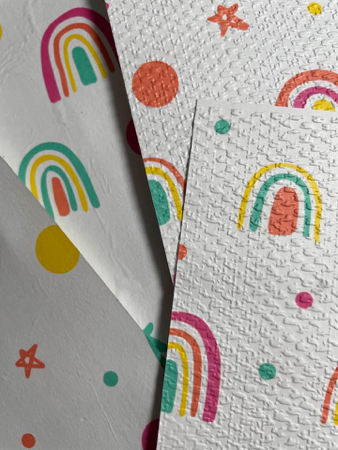 You now have great piececs to use as card fronts. The tissue paper gives a soft, almost cloth-like feel when embossed. For the cards I made with these pieces, I picked orange for the card bases and pink for the mat layer, to pick up on those colors in the paper. I cut the orange sheets in half to 8.25 X 5.5 inches and folded the resulting pieces in half to make standard A-2 sized card bases (4.25 X 5.5 inches). I then cut the pink sheet into four 4 X 5.25 inch pieces to layer the tissue paper fronts on. I also cut a white sheet into four 4 X 5.25 inch pieces to layer inside the card. I also gathered the strips left from trimming the tissue paper pieces and the mat layer to decorate the inside of the cards.
Before beginning to adhere all the layers together, I punched out a shape from the pink mat layer to use with the sentiment piece. This is a great paper-saving technique and ensures that all layers match. 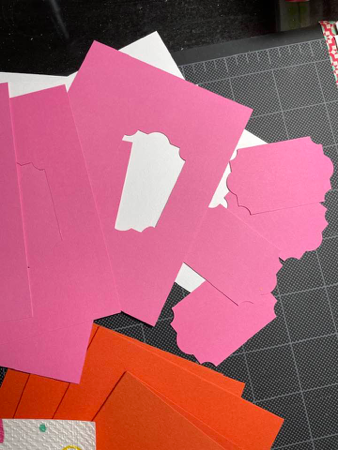 I adhered the tissue paper pieces to their pink mats and decorated the inside liner pieces with the leftover strips. 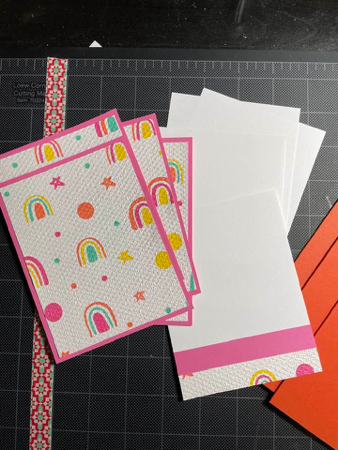 Next came the stamping – a sentiment for the front of the card, an inside sentiment and my “Made By” stamp on the back of the card. 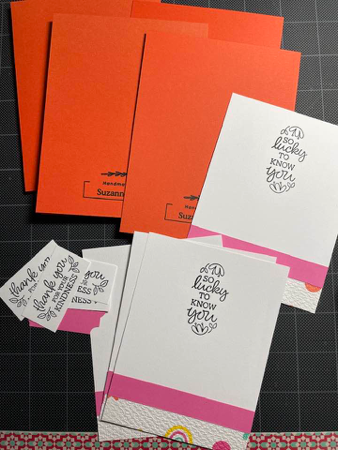 Since there were some small images in the stamped sentiments, I added a little color using markers. 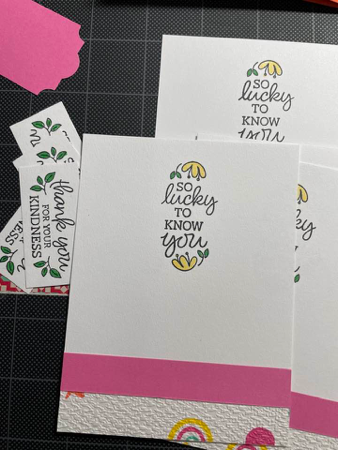 It was finally time to put everything together, including a little orange rick-rack ribbon to add some dimension. I adhered the liner to the inside of the card, the layered card front on the outside and the outside sentiment to the layer piece I punched earlier. I popped the sentiment up on some dimensional foam so it fit nicely over the top of the rick-rack. 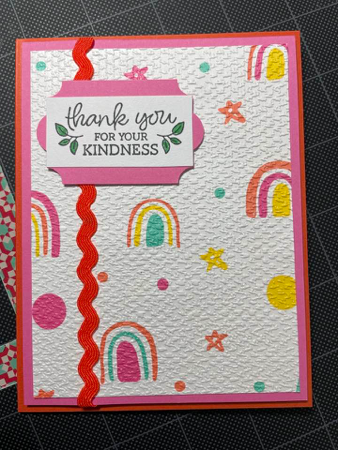 The result is a set of four thank you cards ready to go. 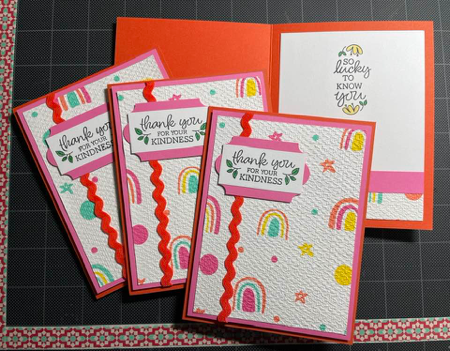 Thanks for coming along on this card making journey! I hope it got your wheels turning!
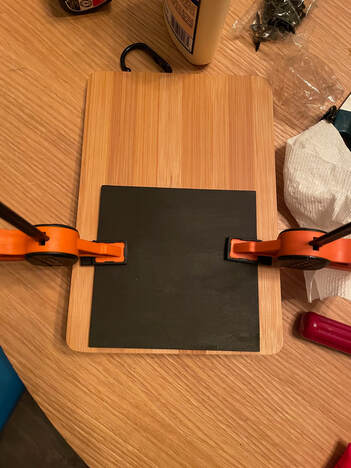
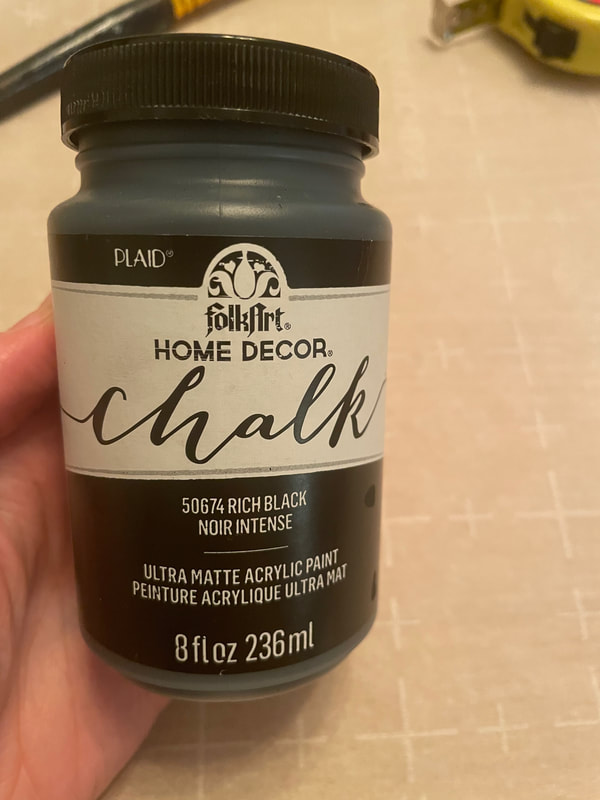
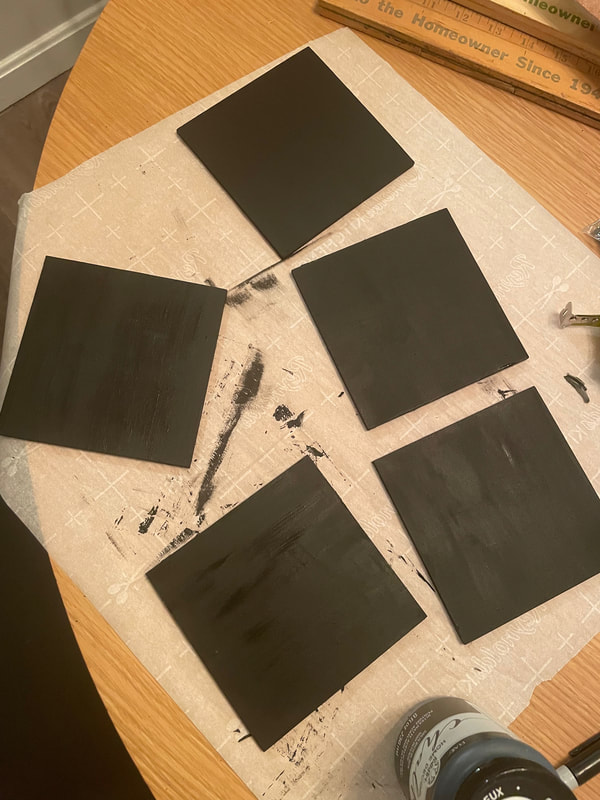
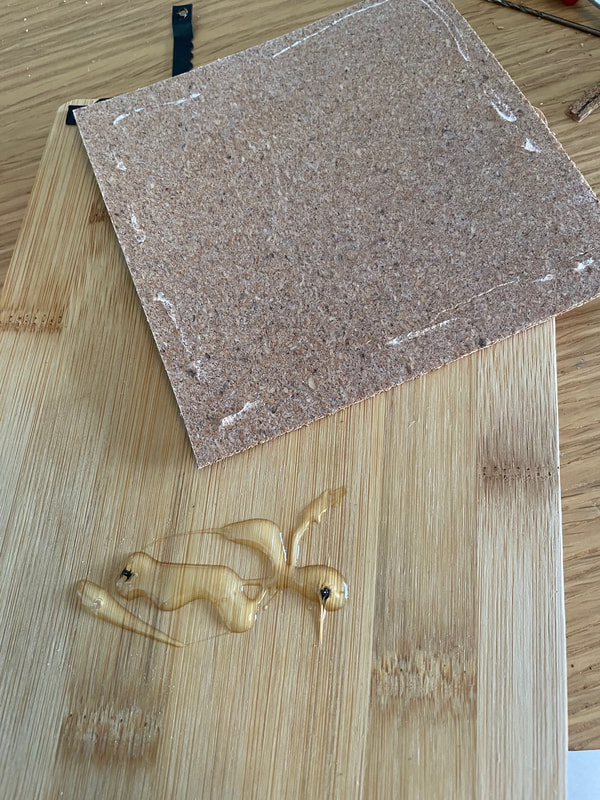
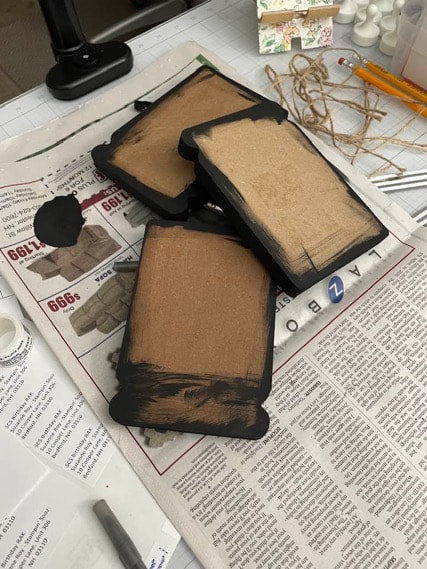
Note from Rebecca: Thank you to my mother for sharing her clever card idea! P.S. Today's photo on the homepage os from Pexels user Anni Roenkae: www.pexels.com/photo/multi-color-painting-2457278/ Hello everyone and Happy Sunday! Today we have another Dollar Tree DIY. I was hanging out with my mother recently and she gave me some pieces that she had from the Dollar Tree that she did not end up using. She had a project in mind for these, leash holders, and I ran with her vision! What we were working with was some bamboo cutting boards, some thin wooden pieces and some metal tool hooks.  The cutting boards were a little thinner than the screws that came with the tool hooks so the plan was to add the additional wood pieces to make a thicker surface to screw into. I painted one side of the wooden planks with some black chalk paint.
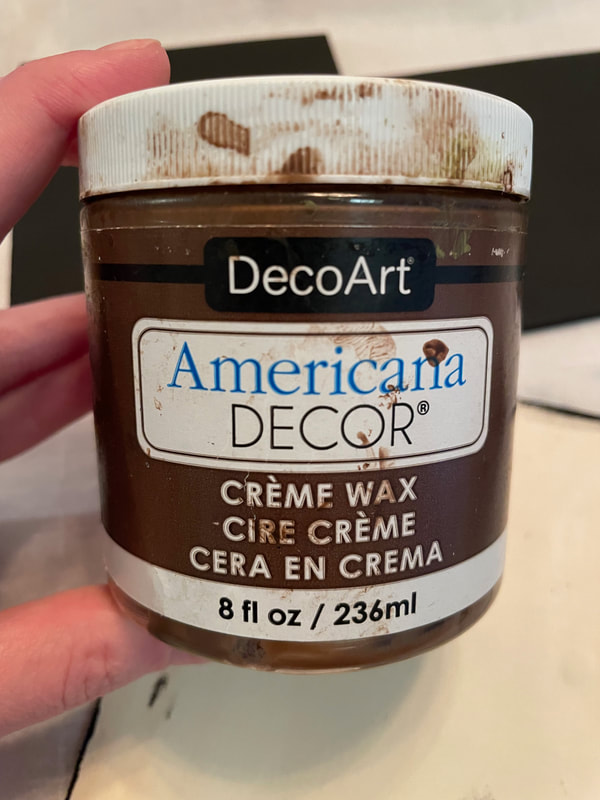
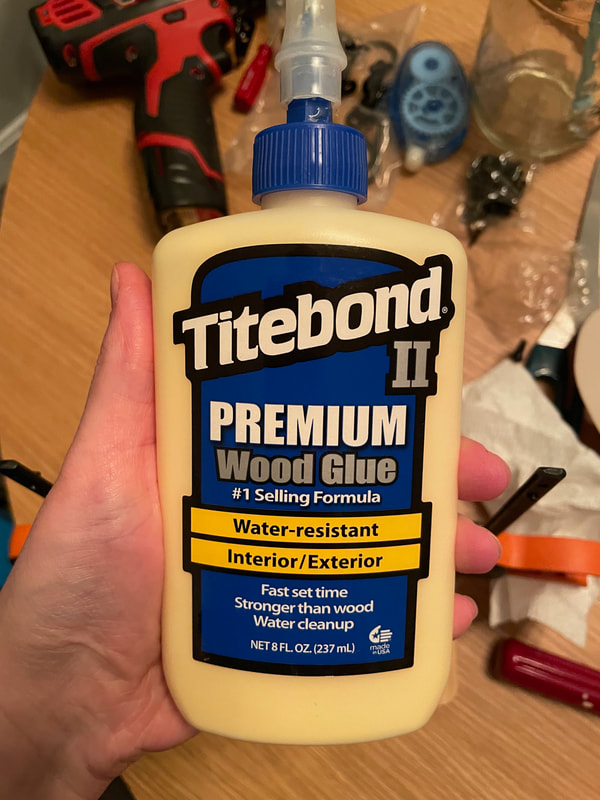
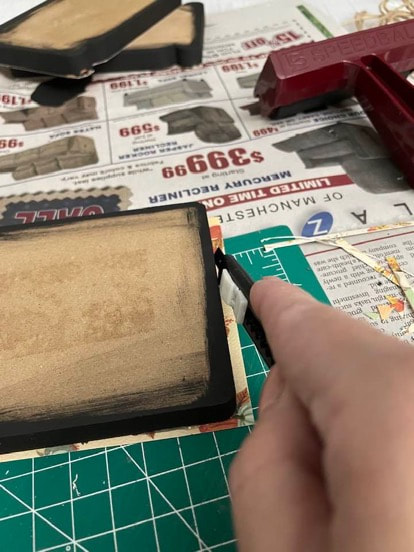
I then used some brown wax to seal the chalk paint and used some wood glue and clamps to adhere the wood pieces to the cutting boards.
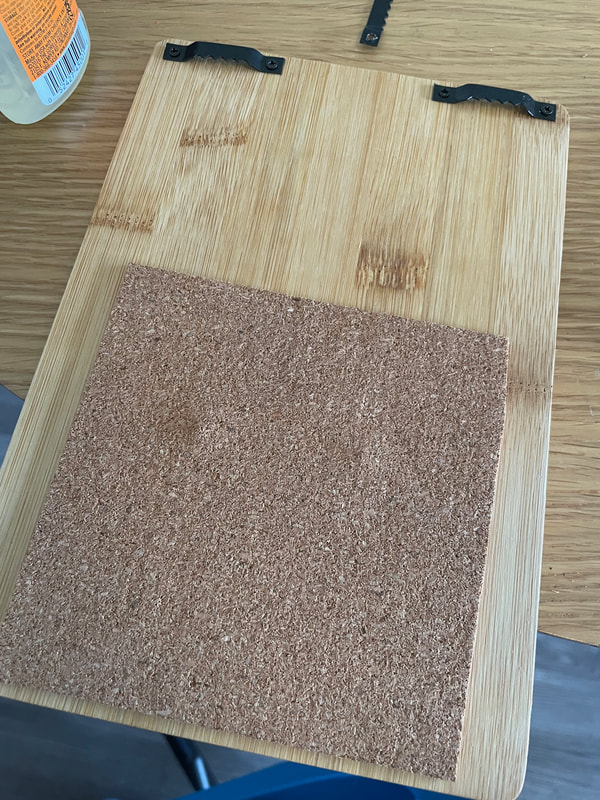
 Once the wood glue had dried, it was time to start drilling into the bamboo and this is where things started to go awry with this project! I learned through this project that bamboo is fairly difficult to drill through and is a pretty tough wood overall. I had a few instances where I needed to make new holes as I tried drilling screws into my pilot holes and the screws ended up breaking, with the top snapping off and the bottom being left in the wood. I originally had 5 cutting boards, but ended up having to scrap one completely that simply would not cooperate with me. What I learned was that I had to use a larger pilot hole than I was used to for the size of screw I was using. To give a visual, the drill bit on the right is what I typically use for the screw size I had, but the drill bit on the left is what I ended up having to use. 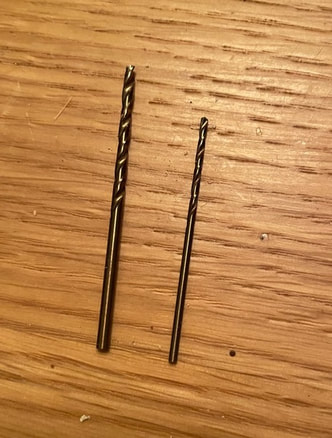 Once I got the hooks screwed in on the front, I added some sawtooth hangers on the back. These also fought back a little and for a few I had to try several attempts at making holes. The backs of the cutting boards all had some visible holes or screws poking through from my debacle with the screws on the front. 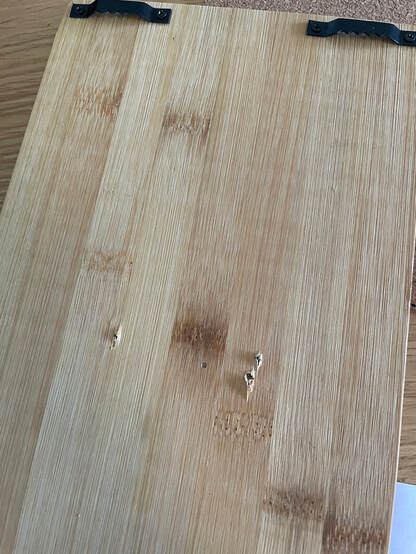 To help cover this up and to finish off the backs, I used some adhesive cork. I added some Gorilla Glue in the holes to help seal the screws in and added some Super Glue on the back of the cork to really keep it in place.
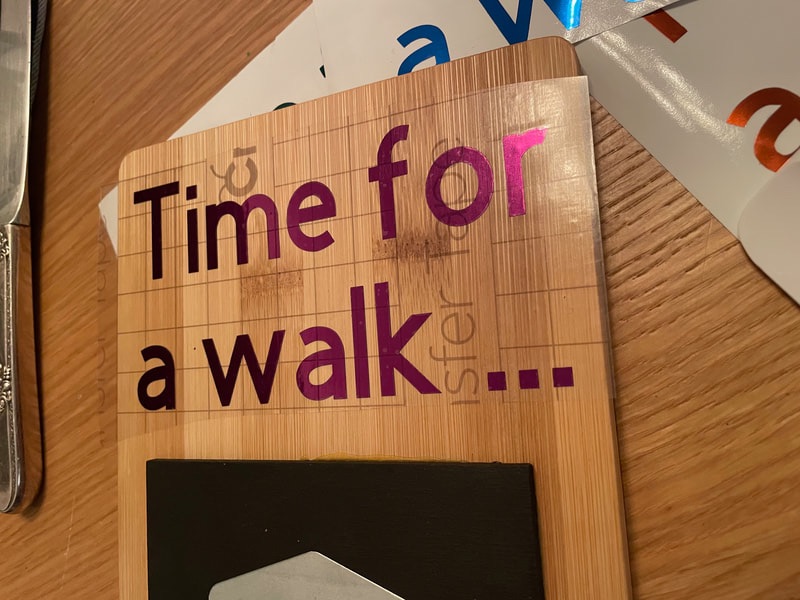
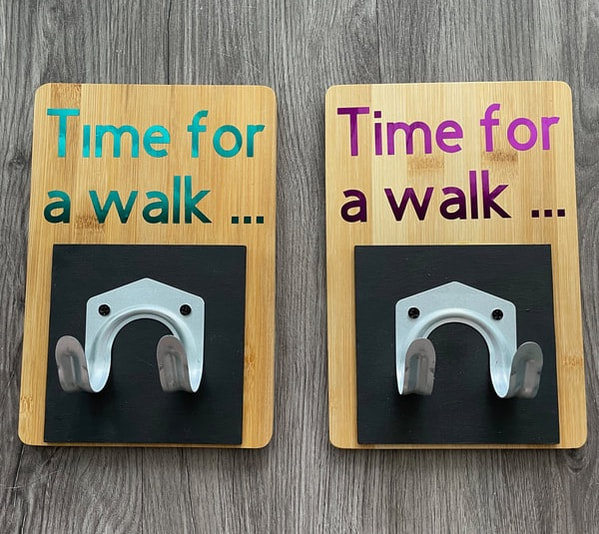
Finally it was time for the finishing touch. As I mentioned above, my mother's original plan for these was leash holders so I thought it would be cute to cut out a little phrase to put on the front of each with the Cricut. I used some fun shiny vinyl I had on hand and cut out the phrase "Time for a walk ..." in 4 colors.
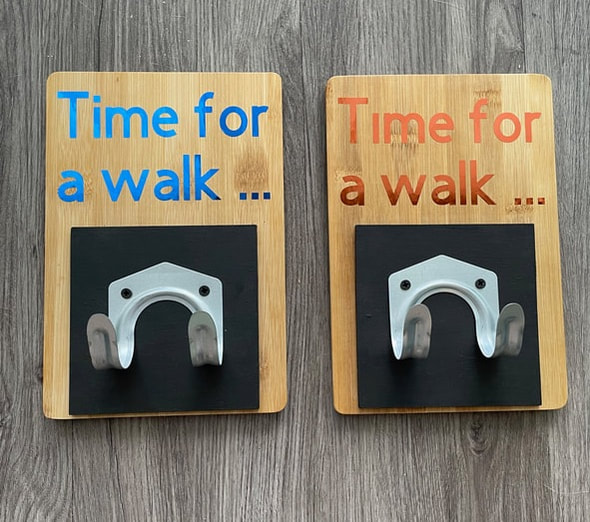
And here are the final products! I'll be honest, I can't decide if I like how these came out or not. There are some things that I like and some that I don't and I'm still figuring out how I feel overall. The plan is to take these to some craft fairs and maybe they will end up on the Etsy shop as well. If they do I will let you guys know!
Let me know what you think about these in the comments below!
- Rebecca P.S. Today's photo on the homepage is from Pexels user Blue Bird: www.pexels.com/search/dog/?orientation=landscape Hello Friends! It’s Suzanne, Rebecca's mama, happy to be back with you today on the Patterned Paper Plate. Today I have a quick and easy dollar store redo to share with you. I’ve been trying to work through my stash of items and found these three fall-themed Mason jar decor pieces I picked up a while ago (probably last fall!) from the dollar store. I wasn't particularly enamored of them in their current state, but I did like the Mason jar shape. I decided that they would be perfect candidates for individualized makeovers. 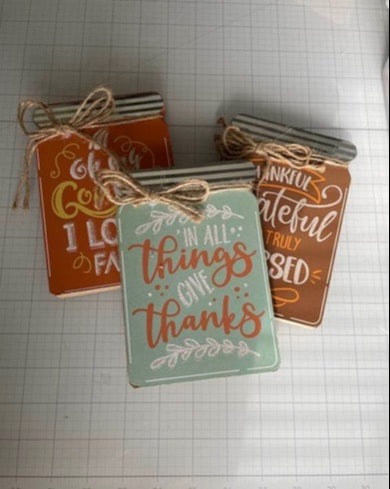 I started by removing the twine and metal pieces at the top of each jar, then peeled away the top layer of paper that was decorating each one. Part of the reason I didn't particularly like these pieces as they were because the metal piece at the top of each one was not well aligned with the edge of the “lid” of the Mason jar and the paper decorating them was not well adhered. I'm also not that big a fan of glitter so the glittered letters weren't my cup of tea. 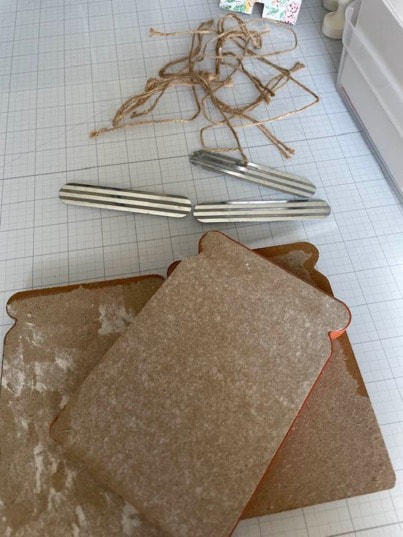 After peeling off the top layer of paper, I used a tried-and-true method to remove the rest of the paper left on the piece. I wet a piece of paper towel with some warm water and laid it over the piece. 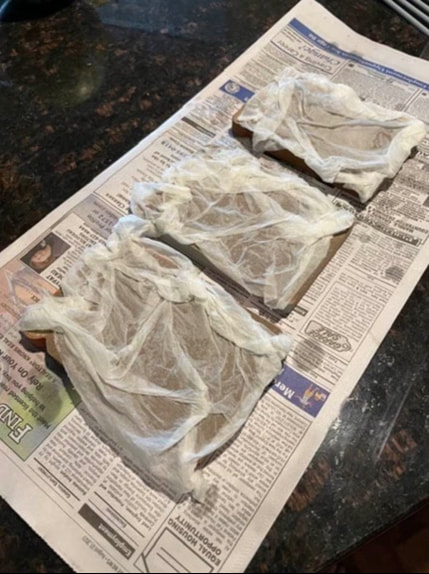 After just a few minutes, the water and the heat activated the glue holding the paper on and I was able to scrape it off very easily. This method must be done quickly and carefully because these pieces are not wood but pressed paper and if you leave the wetness on them too long they will warp.  After quick sanding on both sides, I was ready to begin their transformation. The first thing I did was paint the edges and just a little bit onto the piece itself with black paint. These were various colors depending on their original decoration and I wanted them to be black.
I knew that I wanted one side of them to be fall themed and I wanted to use this coffee themed paper on the other side. Unfortunately, I found that the images were too small to be impactful. I decided then to make the backside a more all occasion type of piece, using more general papers and images to decorate the backside. 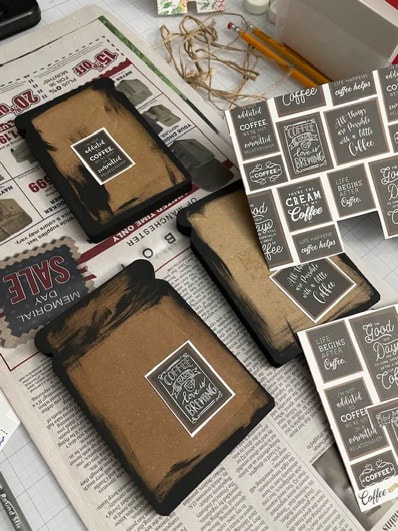 To begin, I cut three pieces of fall themed paper and three fall themed images from a coordinated paper pack and used a liquid adhesive to adhere the paper to one side of the Mason jar shape. I used a brayer to make sure the paper was well adhered. 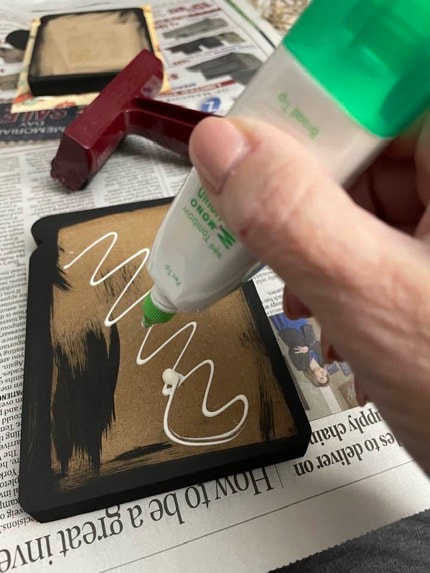 Once the glue was dry I went around with a pen knife and trimmed the paper flush with the edge of the shape. I also used a little sandpaper to ensure the edges of the paper were not overlapping the edges of the shapes. I repeated this process on the reverse with a more any occasion type of paper.
Once everything was trimmed, I checked my edges and added a touch more glue to any edge where the paper was not fully adhered. I then took a small amount of black paint on a tiny paintbrush and touched up the edges where my trimming and sanding removed some of the original black paint.  While the paint was drying, I cut three pieces of a shimmery silver paper in the same shape as the metal “lids” and ran those through a paper crimper so that I would have an additional set of “lids” for the reverse of my piece. 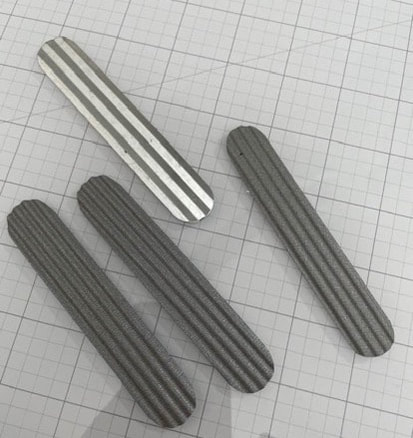 There was just one more step to preparing these for decoration. I used a small sponge with a light brown ink pad to go around the edges of the paper and knock down the whiteness of the cuts. This made the end of the paper blend in with the black sides and softened the edges of each piece. 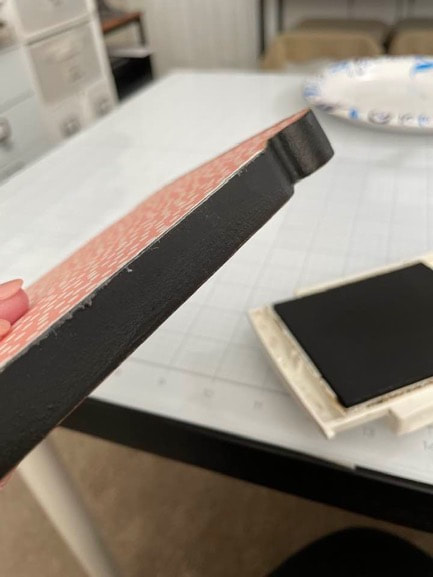 Finally, it was time to get to the most fun part of any project, which is actually decorating these pieces. I started by gluing the metal lids back on the fall themed side (which I considered my primary side). I was careful to ensure that the edges were well lined up with the edges of the Mason jar piece. I then used my new lids made from the paper on the reverse side. I also put the twine that was originally on these pieces back around the “neck” of the Mason jar.
While that glue was settling I took each of my focal images and cut either black or brown card stock to back them up before adding them to the Mason jars. I added some dimensional foam tape to the back of my focal images so they would sit just a bit away from the Mason jar itself. After exposing the adhesive on the dimensional foam tape, I added a touch of hot glue and centered each focal image on the Mason jar. I raided my stash of embellishments and added a little touch to each of the jars - leaves and pumpkins and sunflowers to the fall side and flowers and butterflies to the reverse side. 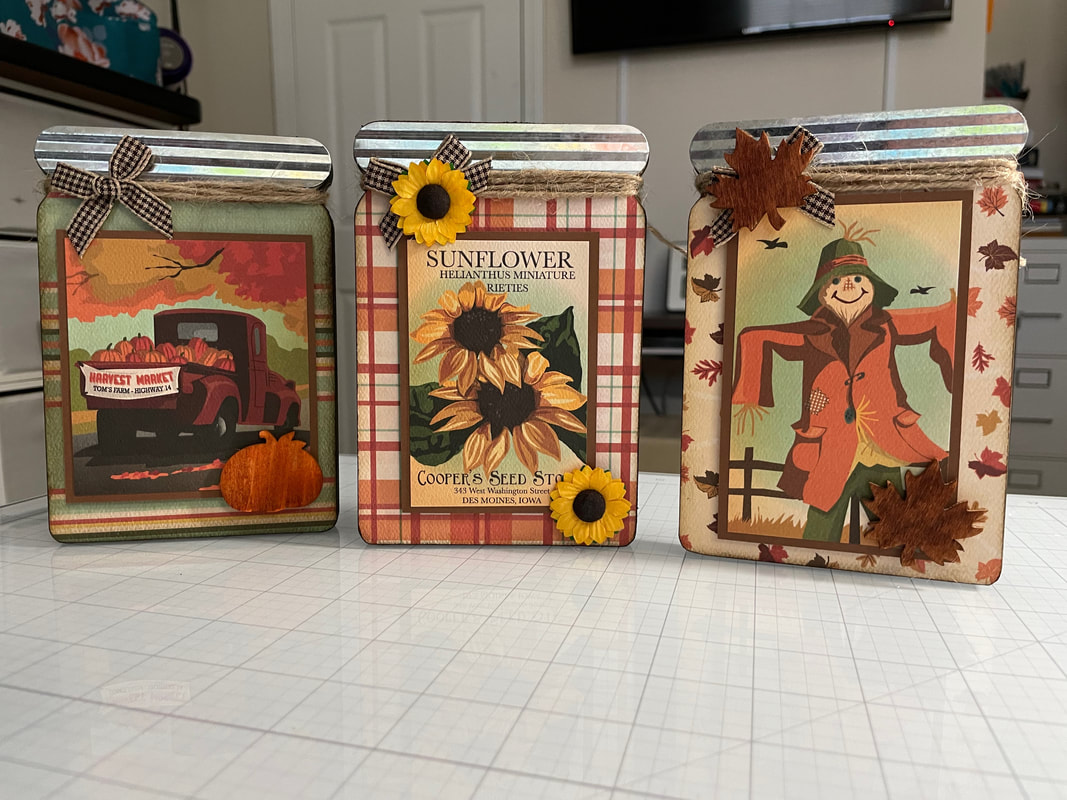 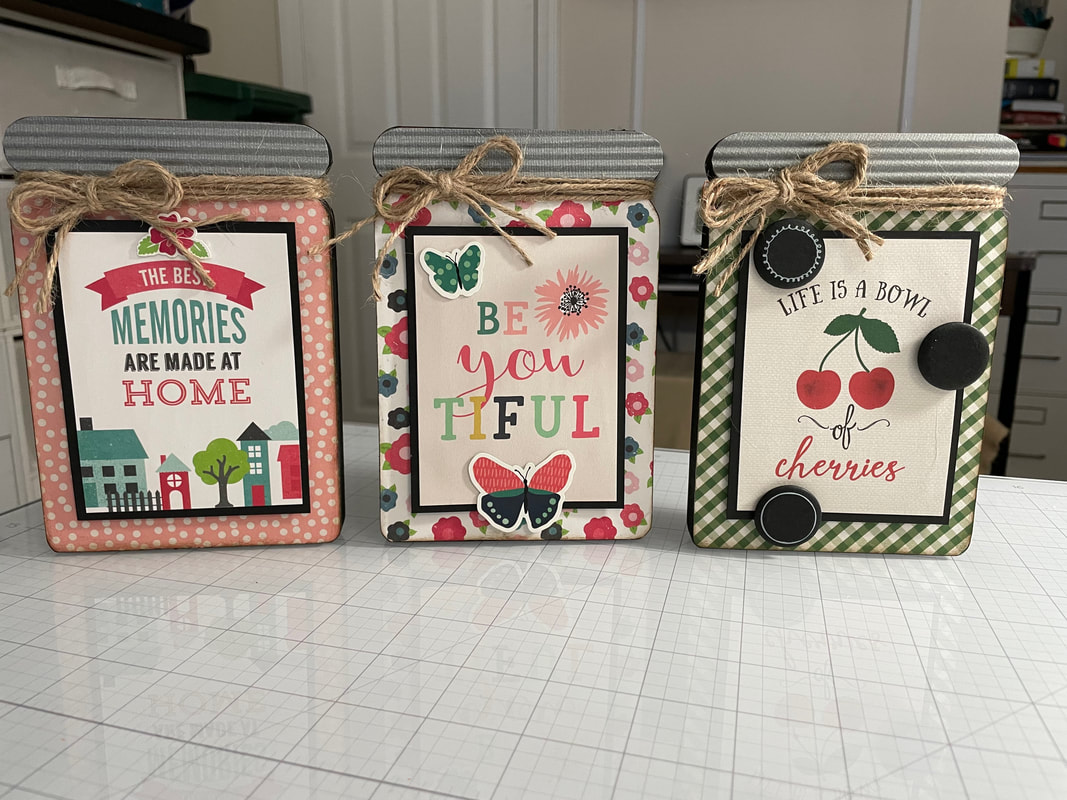 Taking a boring piece from the dollar store and turning it into something much cuter and one-of-a-kind is pretty easy with beautiful papers and a few small embellishments. I hope I’ve inspired you to give something that is not quite your style a second look and turn it into something that is your own. I also wanted to share one quick photo with you to show you how I updated the faux rust pocket I made several months ago. I removed the greenery that had been inside of it and added some silk mums, bittersweet and a few small pumpkins. I also switched out the vintage lace for a fall themed ribbon. I'm still really happy with this piece and I'm looking forward to giving it another makeover for the winter holidays. 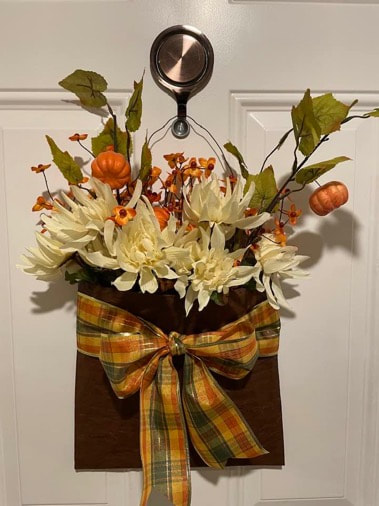 Happy Fall, y’all!
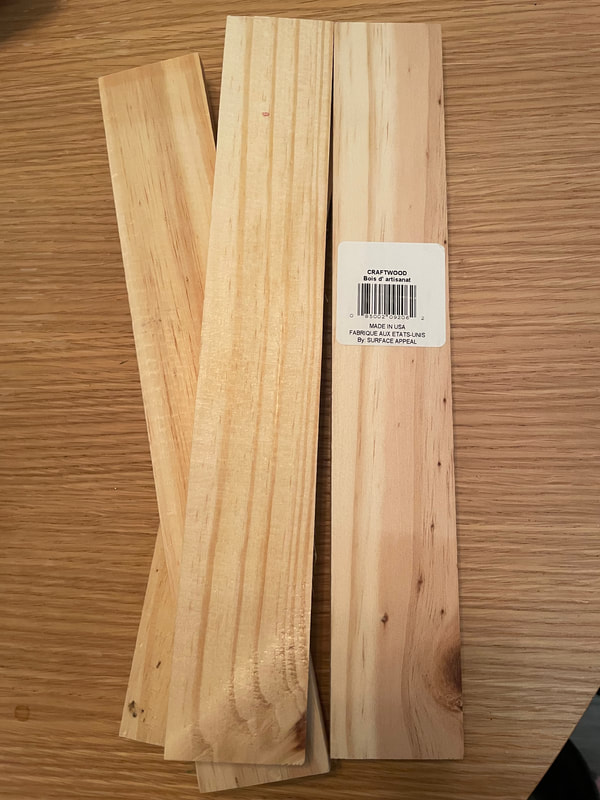
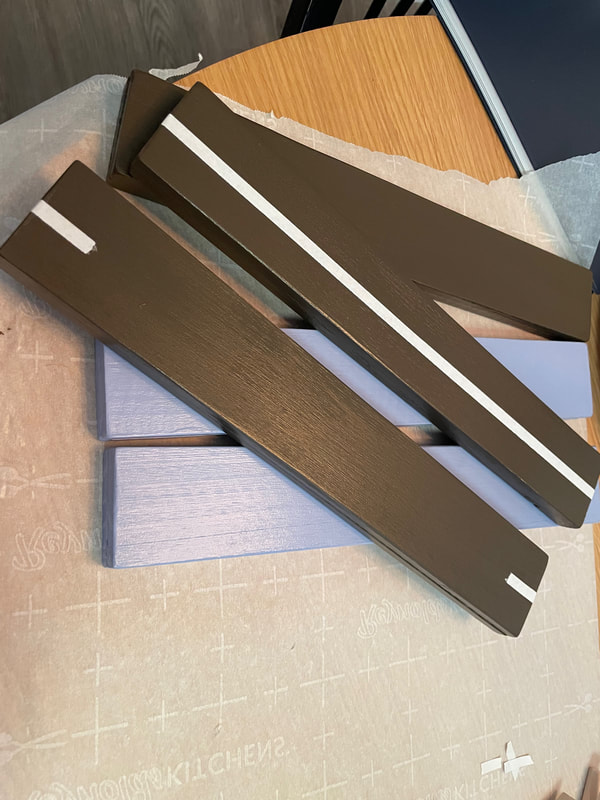
Thank you to my mom for her craftiness this week! Talk to you all soon! - Rebecca P.S. Today's photo on the homepage is from Pexels user Brett Sayles: www.pexels.com/search/mason%20jar/?orientation=landscape Happy Sunday everyone! Today we are back with a new DIY project: some DIY key/hat holders! This is an idea that I have had in my head for a while and was excited to actually make it happen! The beginnings of this idea came from some thin craft wood planks I had picked up from the Dollar Tree:
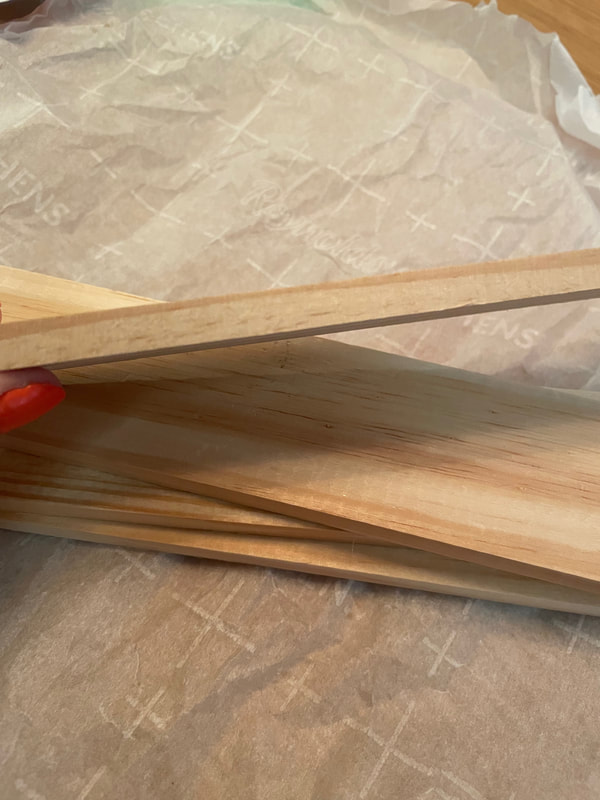
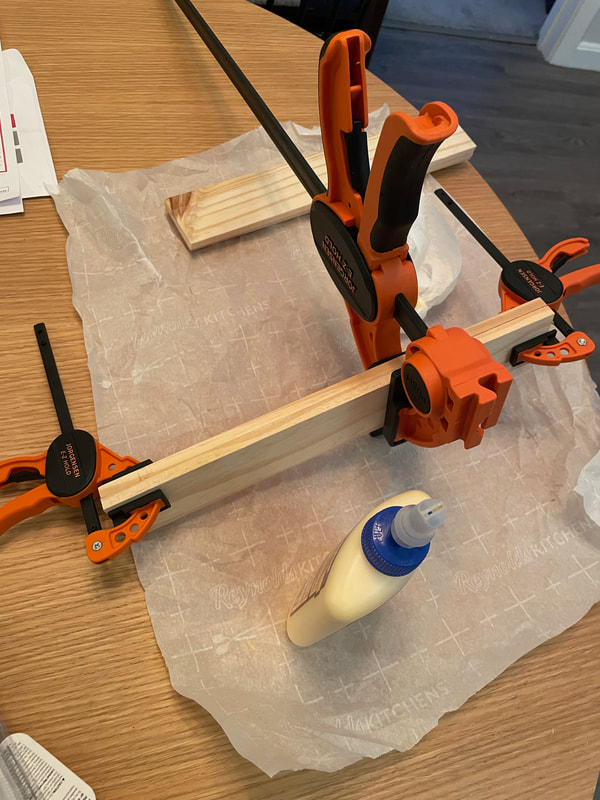
These planks were about 12 inches long by 2 inches wide and maybe 1/2 inch thick. I wanted the base of these key holders to be a bit more substantial so I started by gluing 2 of the wood planks together using some wood glue and some clamps.
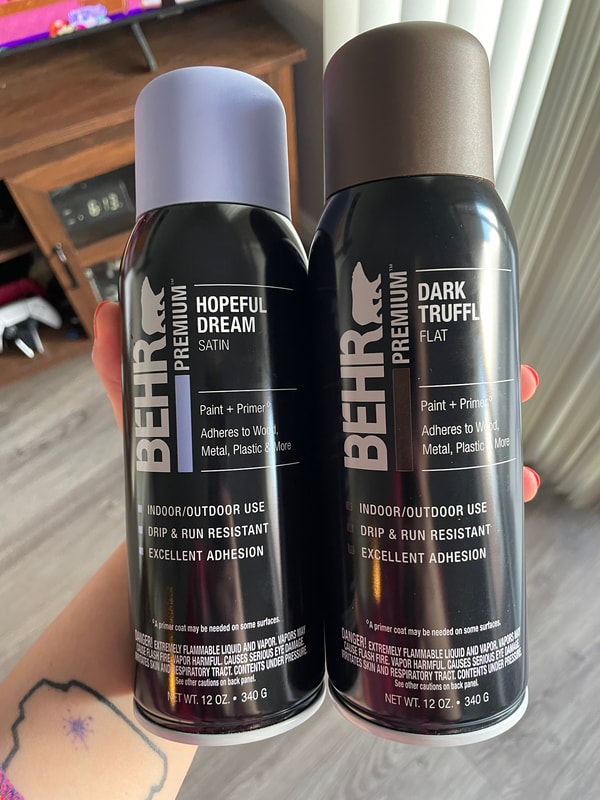
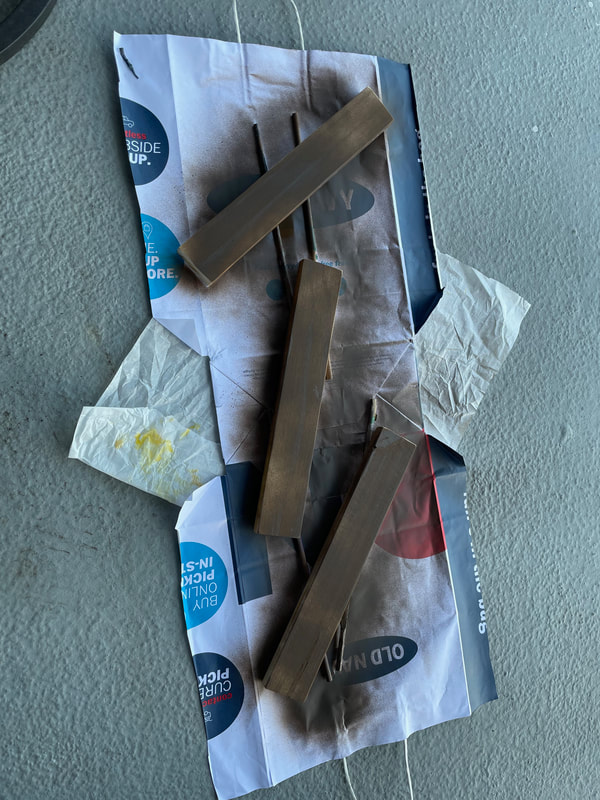
Once the planks were glued together and dried I went ahead and sanded them down. In addition to sanding away some wood glue that had seeped out, I also sanded the edges to give a slightly rounded edge as opposed to the sharp corners. Once the wood had been sanded, it was time to paint. I thought that spray paint would work well for these so I picked up 2 colors of a Behr spray paint. It was cheaper than Rustoleum spray paint and also seemed to be made to stick to many surfaces, including wood. I ended up with three wood pieces, so I did 3 in the brown and 2 in the grayish blue. All sides and edges of the wooden planks got three coats of the spray paint. As wood is a very porous surface, the spray paint dried very quickly in between coats
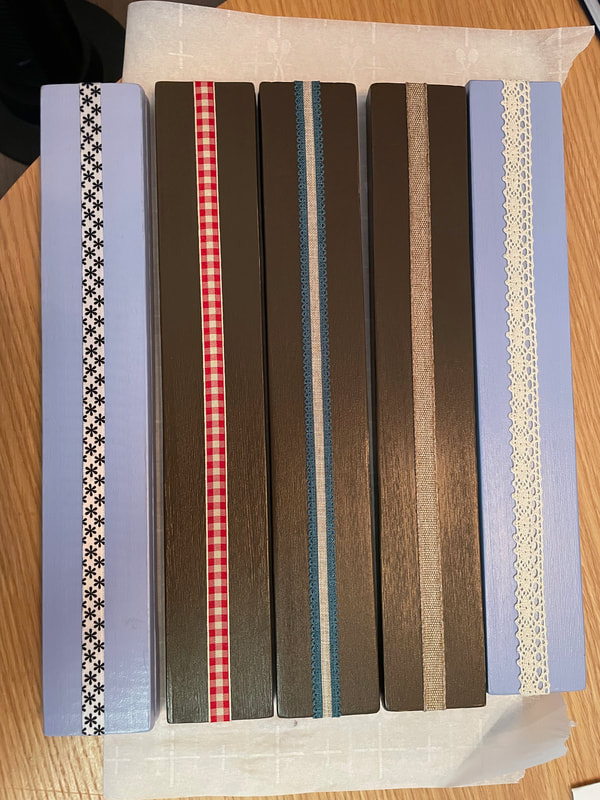
Once the paint had set for a day or so, I went over the planks with 2 coats of a varnish I already had on. This helped to give them some shine and would keep them protected from scratches. 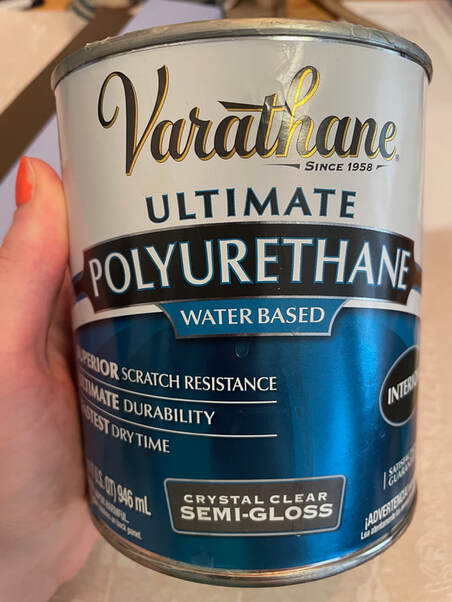 I wanted to keep these fairly simple, but did think that a strip of ribbon across would add a fun little touch. After raiding my own (very small) ribbon stash and my mother's (much larger) ribbon stash I found a good variety of ribbons. To stick the ribbon to the planks, I used some double-sided permanent tape that I placed across the center of the planks. I would love to tell you that I measured where the exact center line of these was but that would simply be a lie, I just eyeballed it. I also wrapped the tape over the edges and onto the back so the ribbon would carry over the edges as well.
Here's a fun little tip I learned from my mother specifically about lacey ribbon, As you can see, the fifth plank in the photo above has a lace ribbon that has some holes throughout it. Since it was stuck down onto a strip of adhesive, some of the adhesive is left accessible through the holes of the lace. This creates the opportunity for dust or other debris to settle in the uncovered adhesive and mess up your work! To help prevent this, take a small paintbrush and some type of powder and gently brush a light amount of powder onto the adhesive. This will help get rid of the remaining stick and make it so that no debris finds its way onto your project. I used a makeup setting powder as it had a slightly off-white shade that matched the ribbon color well. Now I had to deal with the edges of the ribbon on the backside of the planks. I decided that a good solution would be using a small piece of adhesive cork. This would not only seal in the edge of the ribbon, but also would provide a soft surface on the back of the holders. I planned to add some sawtooth hangers to the backs of these and the cork would ensure that the wood itself would not touch the wall and potentially scratch it; only the cork and the wall would come into contact. I cut small squares of the cork and although it had an adhesive backing I also added a few dots of SuperGlue for some added support. 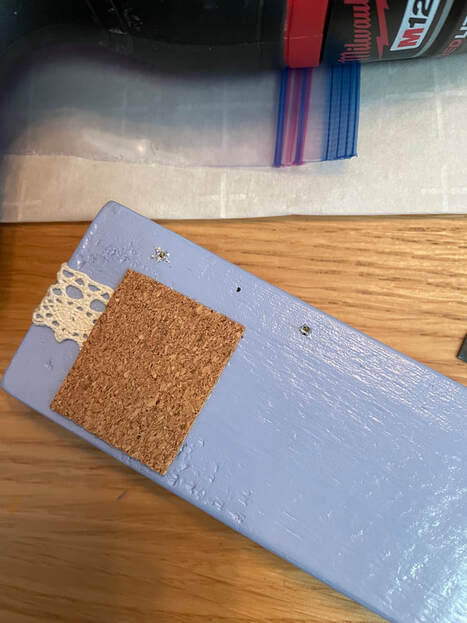 As I mentioned, I added some sawtooth hangers to the back of these so that they could be hung on the wall. I measured an equal distance from the edges and added 2 hangers so that the holder would be level when hung. I also bought some small black metal hooks from Amazon for the front of the planks. 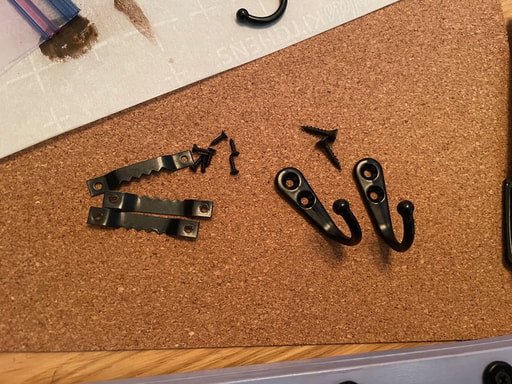 For the hooks on the front, I ended up using 4 per plank. As these had more substantial screws than the sawtooth hangers, I drilled a small pilot hole for each of the holes in the hooks before using a screwdriver to screw them in. I was able to easily drill through the ribbon, adhesive and wood to get the hooks secure. And here are the 5 key holders all done! As these are fairly lightweight, I do think they would be best suited for smaller items such as keys, sunglasses or hats/mittens.   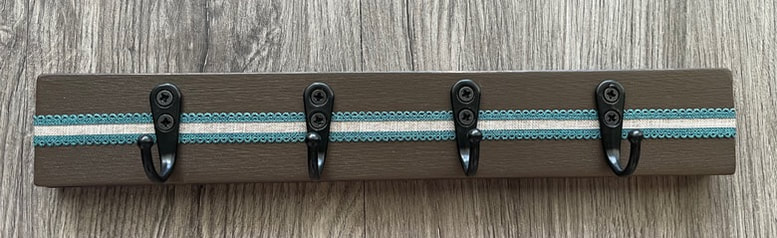 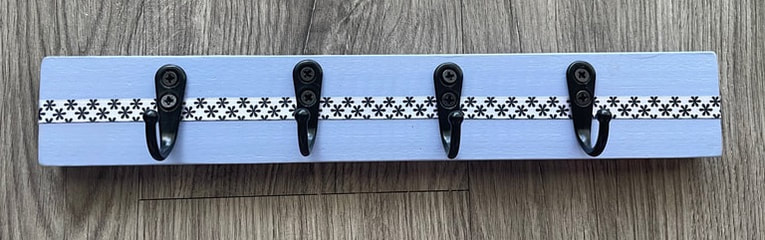 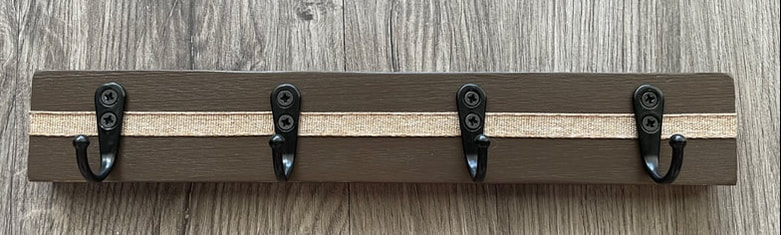 What do you guys think about these? They are available for purchase on my Etsy shop so give it a peek if you are interested:
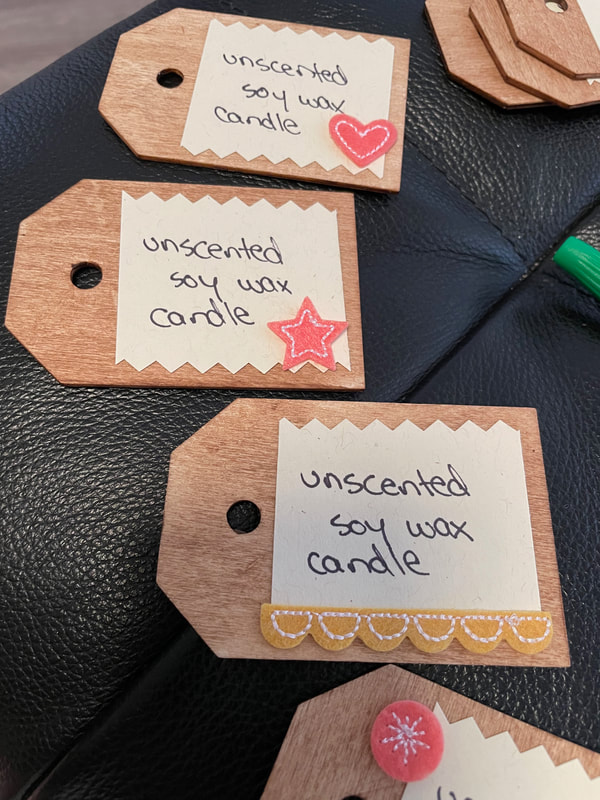
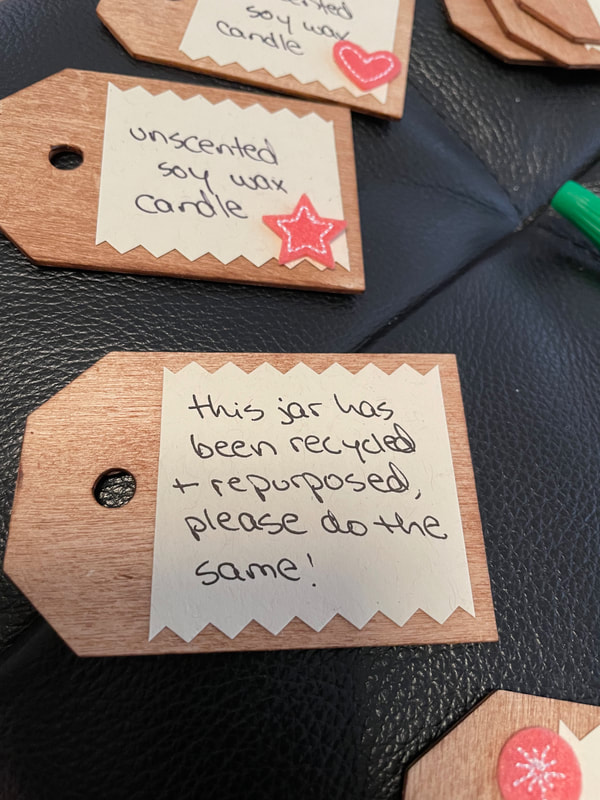
www.etsy.com/shop/patternedpaperplate?ref=shop_sugg - Rebecca P.S. Today's photo on the homepage is from Pexels user George Becker: www.pexels.com/photo/close-up-of-keys-333837/ Hello friends! So today we are back with the finale of the candle project! So we are going to jump right into it but if you need to catch up here are parts 1 and 2: Part 1: recycled-rustic-candles-part-1.html Part 2: recycled-rustic-candles-part-2.html So where I last left you, I had to get some additional wax to finish off the vanilla-scented candles. I got one more 5 lb bag of wax and got those poured. One thing I did notice that I thought was worth sharing is that for the scented candles where I had added in the fragrance oil, the wax seemed a little bit softer overall once it had cooled. I suppose that makes sense as there was additional liquid added to the wax. Because the wax was a little softer, it took a few additional pours on the top to smooth everything out, but otherwise the process was very similar! I wanted to make some tags for these candles so used some wooden tags as a base. I had a surplus of these and I'm pretty sure you guys have seen me use these before! I used some brown wax to give these a lightly stained look on each side: 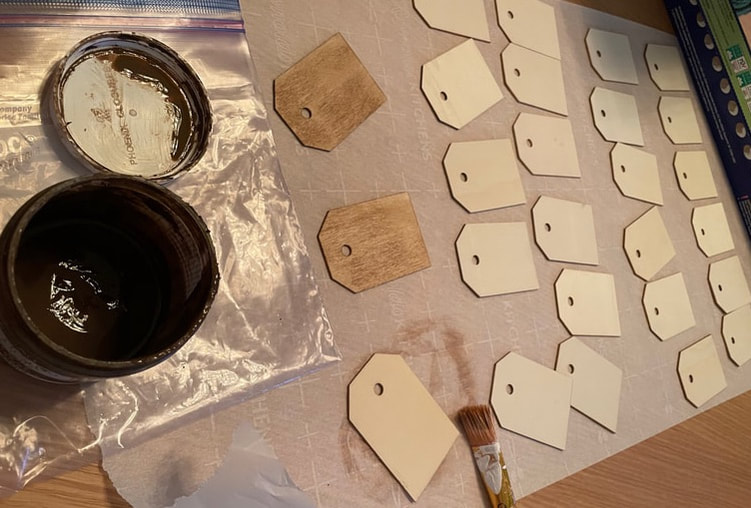 I cut out some pieces of cream-colored paper and used a fun pair of scissors to give an interesting edge. I then used a little felt accent on each tag; these were not adhesive so I glued them down with a small bit of SuperGlue. On the backside of the tag I added a little note encouraging people to reuse their glass jars once their candles were used up.
So now its time to see all the candles! Here is the batch of unscented ones. For these, I am showing you them without the tags attached so you can see the crocheting better. They will have tags on them when I am selling them though, don't worry! 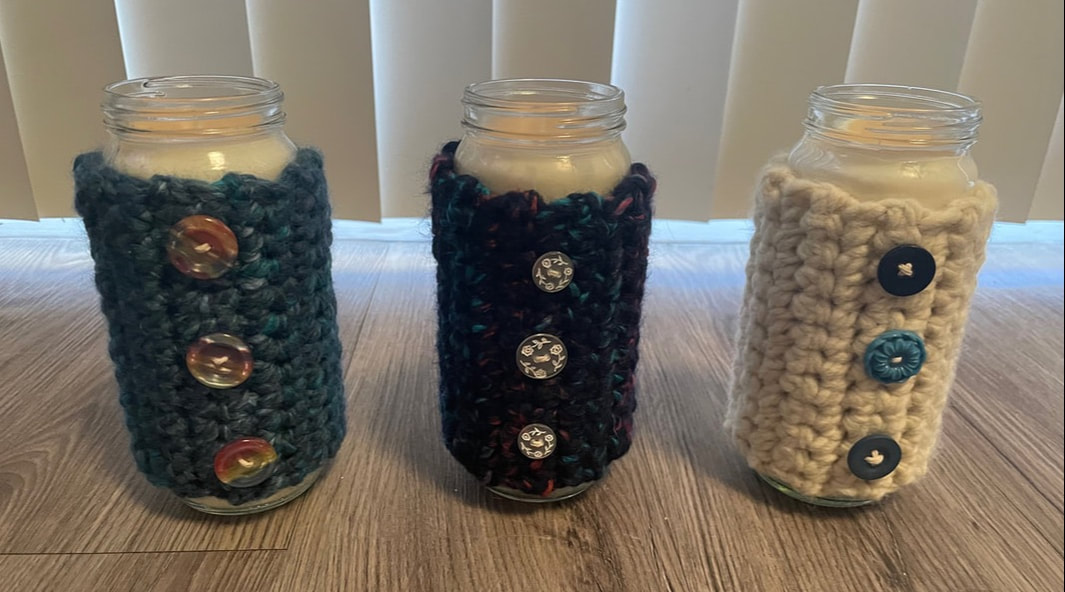 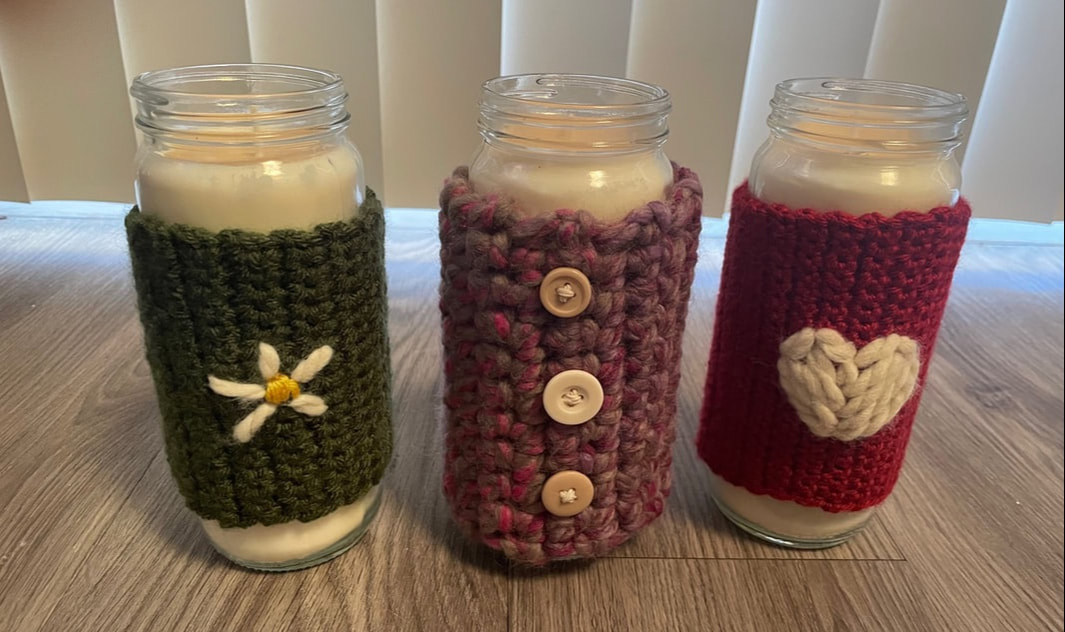 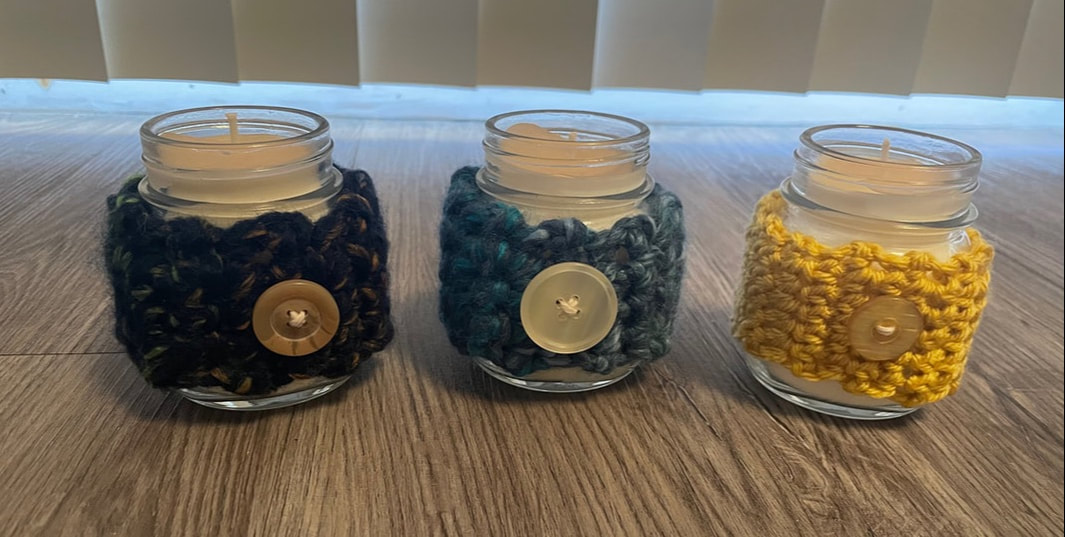 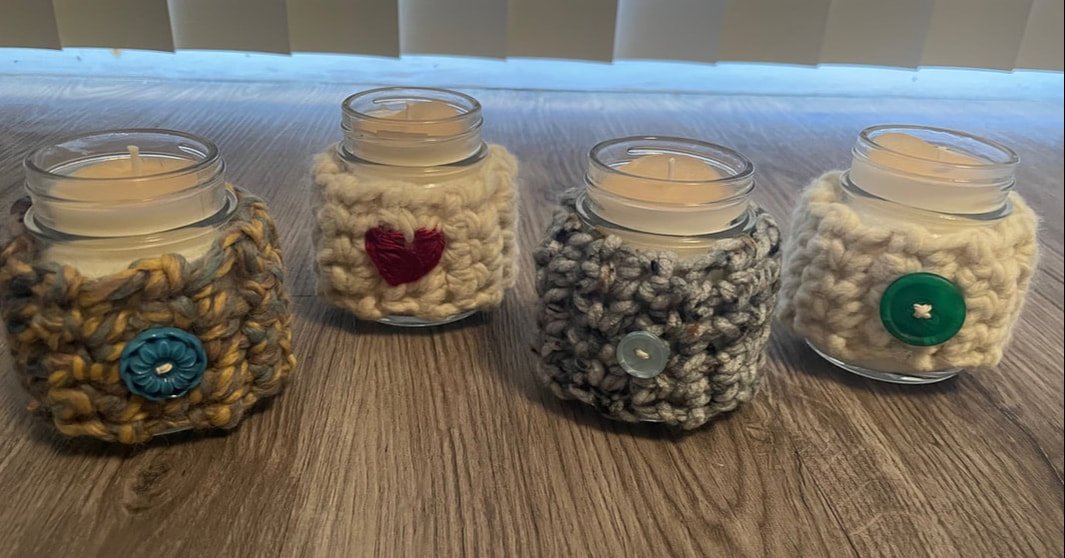 And here are the vanilla-scented ones with the tags! I used a small clothespin to attach the tag to the crocheted koozie as I thought this would make it nice and easy for people to remove them if they would like to. 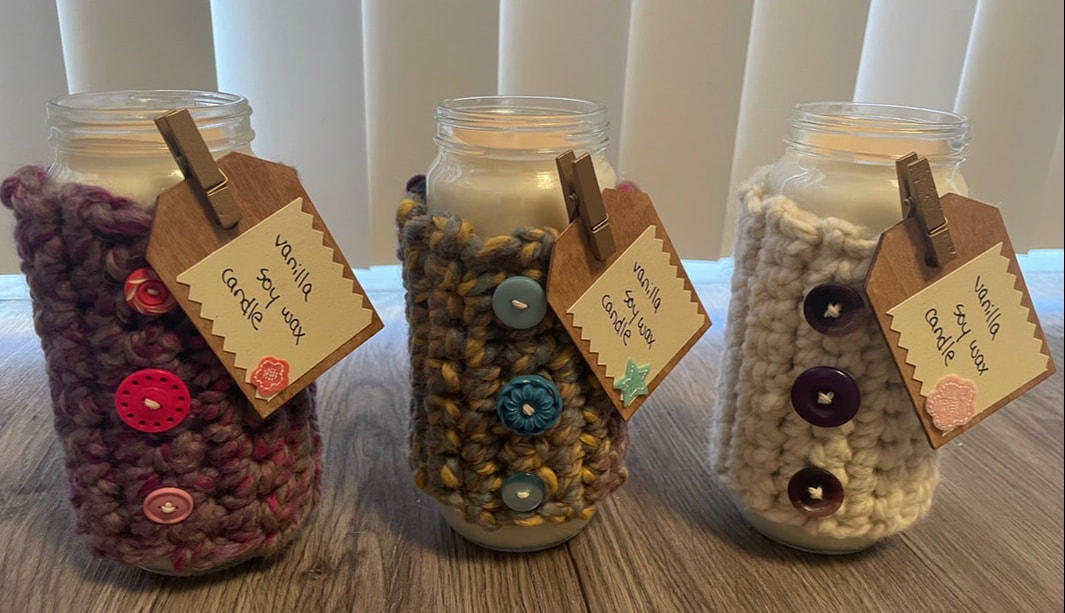 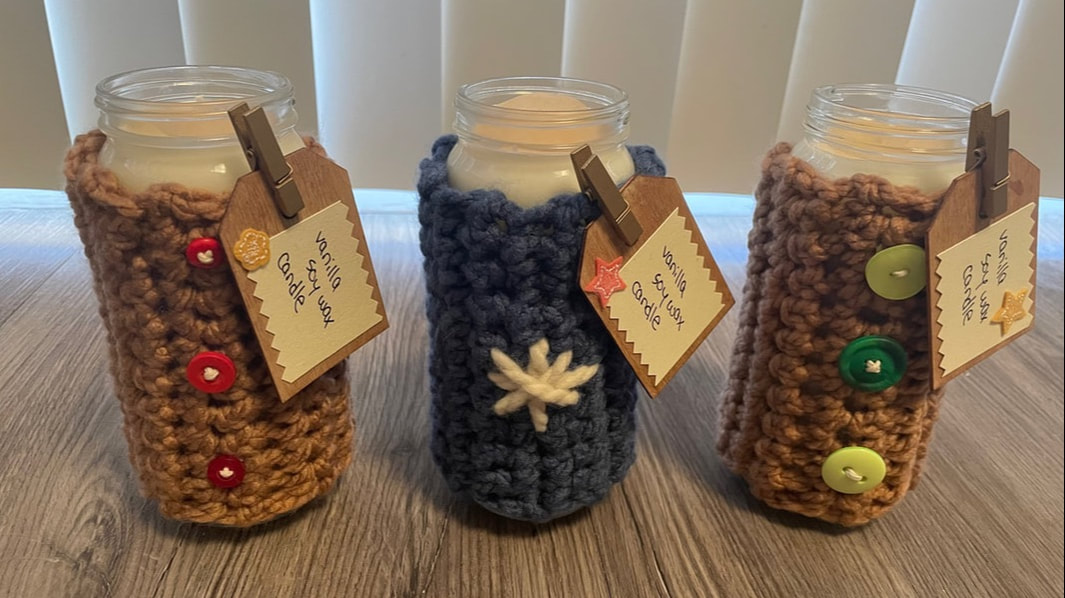 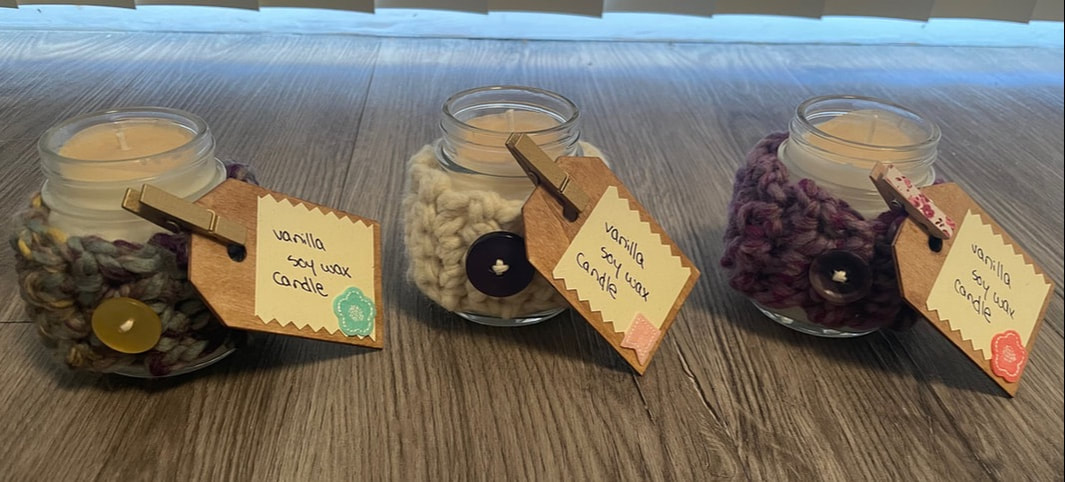 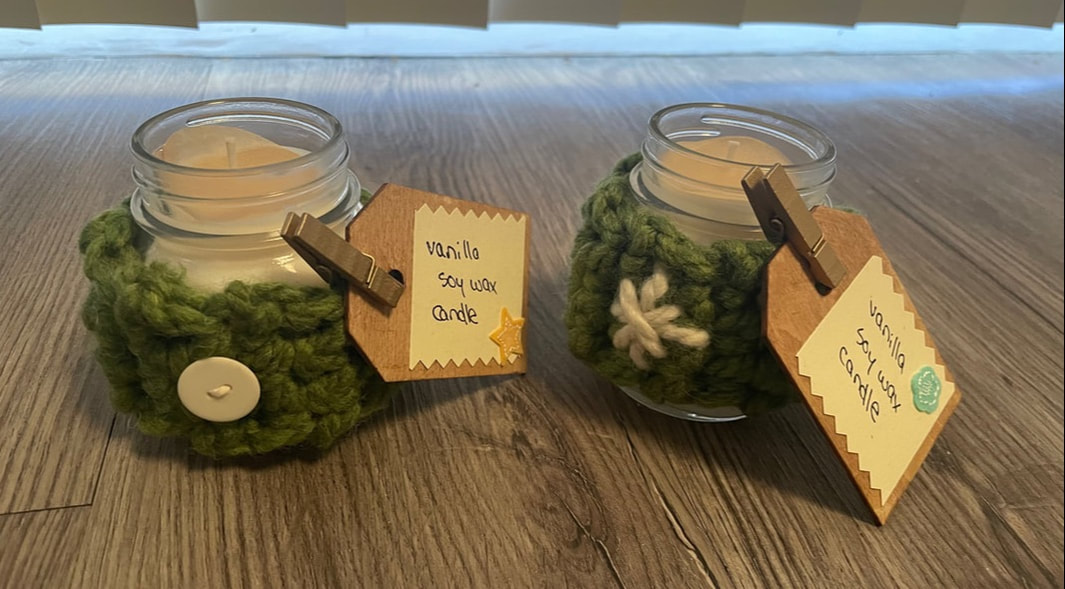 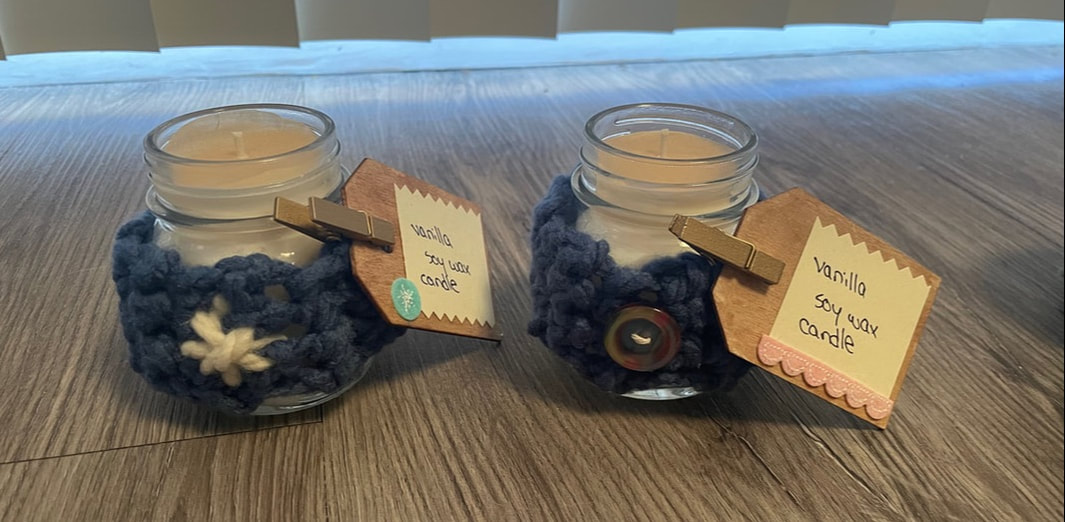 And there they are! I am so happy with how these turned out. They ended up being a little more work than I expected but I feel like I learned a lot about soy wax and about crocheting in the process! As of right now, these will not be on the Etsy shop and will only be available at craft fairs as I'm not really set up to ship candles at the moment. Let me know what you think about these in the comments below!
- Rebecca P.S. Today's photo on the homepage is from Pexels user Pixabay: www.pexels.com/search/candles/?orientation=landscape |
AuthorI am a 27-year-old crafter and baker from New Hampshire! Archives
July 2024
Categories |


 RSS Feed
Proudly powered by Weebly