|
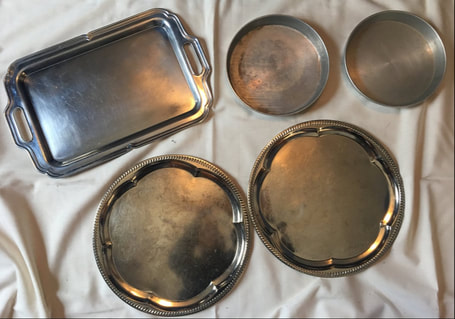
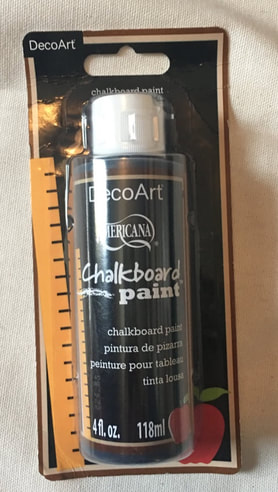
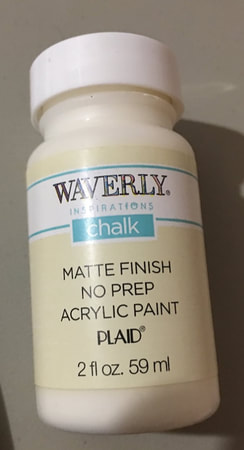
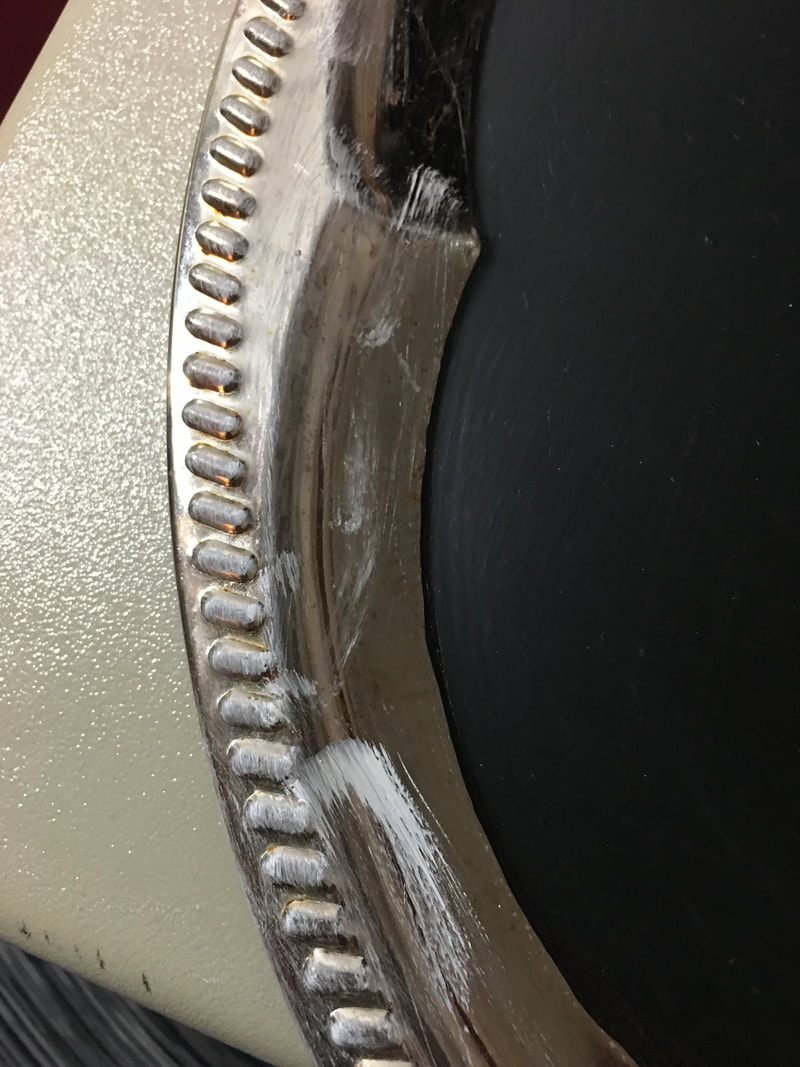
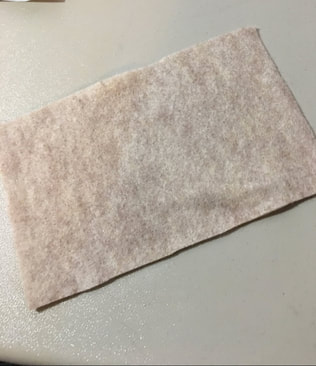
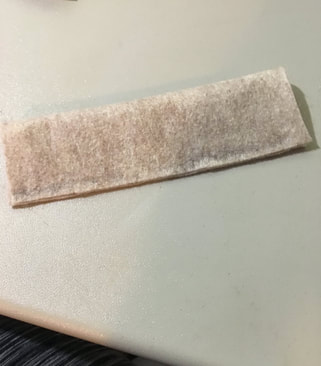
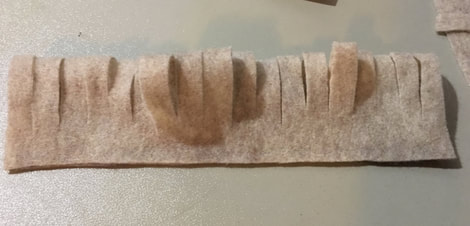
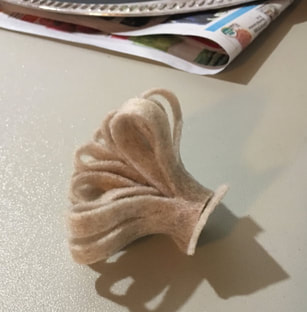
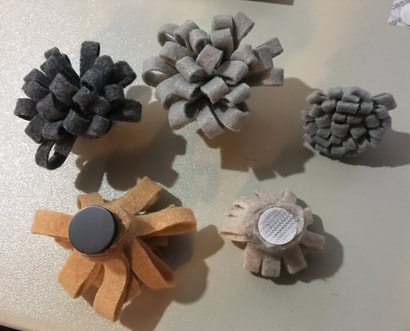
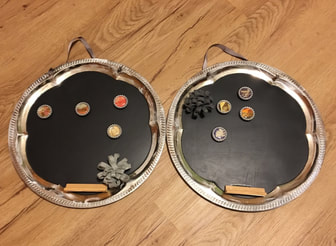
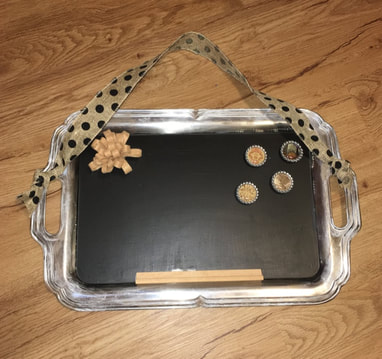
Hello friends! Thank you all for bearing with me for the past few weeks while I gave you some updates and more general posts. We are back to a craft project today! I love how these chalkboards turned out and can't wait to explain how to make them! So the first step in making these chalkboards is getting some old metal baking pans and platters. I got the two smaller pans at a large indoor yard sale and the three bigger platters at a local Habitat for Humanity ReStore. I think buying second-hand pieces is a great way to reuse something and having a piece of somewhat scuffed and aged metal gives the entire project more character as well! I scrubbed at these pieces a little to clean them up and then got started with the chalkboard paint (you should be able to find black chalkboard paint at any craft store). I followed the basic directions on the bottle, but did end up adding a few more coats because I wanted to make sure everything was adequately covered. After you paint the chalkboard and let it dry, you also have to "season" the chalkboard which i did as per the directions on the bottle. This just means covering the entire surface with a thin layer of chalk and then wiping it off. I'm not 100% sure the science behind this, but I think the basic idea is that covering the entire board with a thin layer of chalk ensures that all of the future writing will be able to wipe off cleanly. Once again, I am not a chalkboard expert so don't quote me on that. After seasoning these boards, it was then time to add some detail to metal that was still exposed. For this I used some chalk paint (courtesy of my mother). Chalk paint has a somewhat thicker formula than typical craft paint and dries down very matte and sticks well to materials that other paint may rub off of such as metal. I used some cream, grey and brown paint and some paintbrushes just to dab small amounts of the paint around the edges of boards to highlight any details in the metal and to just enhance the aged look of the metal. if you want to try and make something like this yourself, don't confuse chalkboard paint and chalk paint. I almost did when I was in the craft store! Chalkboard paint is used to cover a surface and make it into a chalkboard while chalk paint is a heavy duty paint that can cover all of the things. Next was making the erasers for the board. I used a technique for these eraser's that my mother had to make erasers for a similar project that she had done. All you need for these erasers is felt, scissors, hot glue and then something to attach it to the board itself like a magnet or Velcro tabs. Cut a rectangular piece of felt whatever size you would like, just keeping in mind that the bigger you make your rectangle, the larger and more unwieldy your eraser will be. Put a line of hot glue along one of the long edges of your felt rectangle and then fold it in half the long way, securing it in with the hot glue. Once the hot glue is dry, make small cuts in the felt on the side without the glue. You want to keep the felt in one piece, but have small cuts about 1/4 inch apart that go almost all of the way through the piece. ALMOST. Do not cut all the way through! Next, you are going to wrap the piece of felt onto itself, attaching it with hot glue along the uncut edge as you roll. This will leave you with something that looks like a flower. Attach one more circular piece of felt to the bottom of the roll with hot glue to make a flat surface for the magnet or Velcro tab. I realized the hard way that my two smaller baking pans were not magnetic so I had to attach those erasers to the board with the Velcro. On the other three, I was able to use magnets! As I type this, I'm realizing that it's somewhat difficult to explain how to make these erasers. They are very easy, I swear! If you have any questions about my wording or need further clarification about the steps, please leave a comment below and I will be happy to help! I was then trying to think of something that I could use as a ledge to hold chalk and my mother had a fantastic idea: Scrabble tile holders! And, of course, she happened to have some spare ones lying around. In case you haven't noticed the common theme in this post, my mother helped a lot with the inspiration for these chalkboards! My father cut a few Scrabble tile holders in half to be a better size and then I was able to attach them to the front of the board with hot glue. The large rectangular platter is the only one that I used a full scrabble tile holder on. I've mentioned hot glue a few times in this post and would like to clarify that I used Gorilla Glue sticks for this project as I wanted to ensure an extra strong hold for everything that I glued down. The final step for these boards was making them hangable. I'm not sure if that is a real word but I'm using it. Hangable: able to be hung. For the largest board it was easy as I was just able to loop some thick ribbon through the handles, but for the other 4 pieces I had to get slightly dangerous and bang a large nail through the metal with a hammer to get some holes. I am fairly certain there are at least 15 safer way to get holes in metal, but I went with big nail and hammer. Use the hole-making process that seems right for you. I strung some ribbon through these holes and we were done! As an extra added bonus, I put some magnets (made by my crafty mother) on the magnetic board to show that they could be used for a chalkboard or memo board. At craft fairs later this year I will be trying to sell these boards. Due to the size and the magnetic-ness (there I go making up words again) of the larger boards I will be selling them for more than the two smaller boards, but all will be sold with chalk as well. Here they are! I'm really happy with how these came out and am so happy to be able to write a post again about an actual craft project!
- Rebecca
3 Comments
Momma
2/27/2019 07:46:46 pm
Always happy to share the crafty stash and confab ideas with you! ❤️
Reply
Elaine
3/5/2019 07:39:25 pm
Rebecca - I am loving the chalkboard. Tonight, I bought all I need to make one. I’m making it this weekend. I’ll take a picture and share it to you if there’s a way to attach to your blog.
Reply
Rebecca
3/6/2019 11:01:07 am
That's awesome! Once you finish your project, you can definitely send me the picture through Facebook and I will be happy to attach it to the blog post. :) Leave a Reply. |
AuthorI am a 27-year-old crafter and baker from New Hampshire! Archives
July 2024
Categories |
 RSS Feed