|
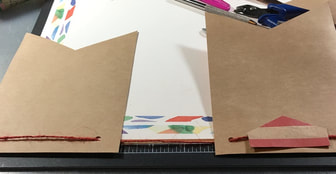
Hello, bloggy friends. It’s Suzanne, Rebecca’s Momma, here today with a cute, quick and simple Valentine ideas to dress up your home for February. Today’s craft is a swag, or garland, or banner, or bunting – they go by many names, but whatever you call them, they add a fun pop of color wherever they hang. For this item, you will need three small gift bags. I found these at The Dollar Tree (also known as “one of my favorite places to buy cheap crafting supplies”). These are lunch bag size bags, about 5 inches wide by 9 inches tall. I like the size of and craft look of these bags and purchasing the set ensures that there is a cohesive look, but this idea is easily scalable to any size bag, or to any decorative paper you might have in your stash. 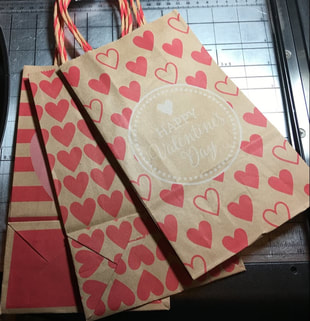 You will also need a few items from your stash -- scissors; a glue gun and glue sticks; a pencil or paper piercer; and some twine, string, or jute. I also used a paper cutter, an iron and some cardstock, but those are not required. The first thing I did was cut down one side of the gusset of the bag, then remove the bottom. That will leave you with one long flat piece. 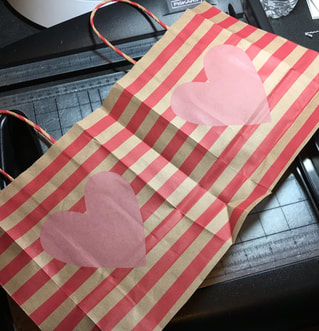 Next, I carefully removed the handles of the bag by prying up the extra piece of paper inside that holds down the ends of the handles. I did this gently, so I didn’t tear through the front of the bag. I saved those handles because I had an idea to use them later. 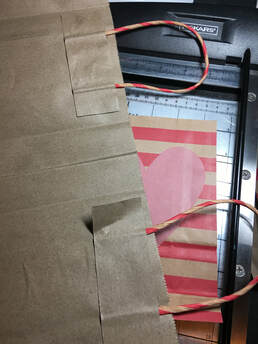 Next, I cut down both sides of the bags to get the full front and back panels to be the same size. I decided to use five panels because odd numbers are generally more appealing to the eye than even numbers. One bag said “Happy Valentine’s Day” on it, so that became my centerpiece, with the repeating hearts and large pink heart panels on each side. I then ironed the panels to get rid of the crease left on the back side of the bag where it was folded, but that’s not necessary if you aren’t bothered by the crease. 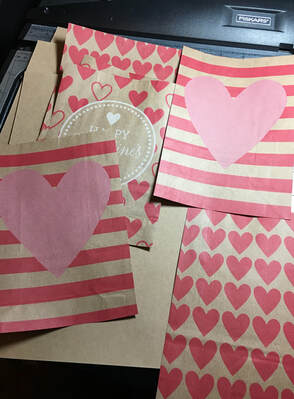 At this point, I decided to back up my bag panels with some cardstock, to make them a little sturdier. This is also not necessary, especially if you think you’ll only display this banner for one season. If you don’t have cardstock and want to do this step, you could recycle the boxes from crackers or cereal. After gluing the panels to cardstock, I trimmed one more time to get the pieces to my final size of 4 ¾ wide by 6 ¾ tall. I did all my trimming with a guillotine paper cutter, but you can simply use scissors if you don’t have a paper cutter. I wanted the panels to have a fishtail bottom, so I made myself a quick template to cut that out evenly. I decided how deep I wanted the tail to be (I didn’t want to nip off the end of the large pink hearts). I decided just under two inches was the right depth, so I cut a piece of cardstock 4 ¾ inches wide (the width of the banner) and about 2 inches wide. I folded it in half, then cut up from the corner to the fold, leaving some of the fold intact. I placed the template over the bottom of the panel, used a paper piercer to make a hole in the panel and cut up from the corner to the center hole. You could also just mark the spot with a pencil. I saved those little triangles, because they will be repurposed in a minute. 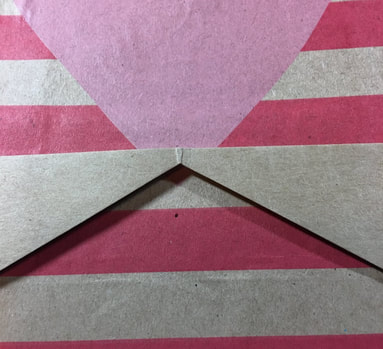 I then stacked the panels together and made two holes at the top of them, an equal distance down from the top and in from the sides. These holes will be to string the panels together. I have a tool called a Cropodile, which allowed me to punch through all five panels at ones, but with a regular paper punch, you can punch one panel and use it as the template for punching all the rest. Next, I used some twine to string the panels together. I like the look of the twine going in from the front of the panel and having the twine behind, but you can string it any way you like. I also like the panels to be stationary, instead of loose on the twine, so I decided to glue them in place. This is where I repurposed the triangles made from cutting the fishtail bottoms on the panels. I trimmed down each side of the triangle so it fit between the two holes. I measured an even distance between the panels and used some hot glue to glue the triangle over the twine, holding it in place.
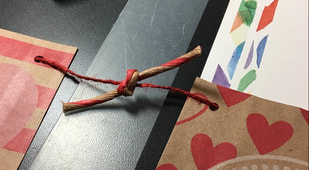
Finally, I tied the bag handles between each panel to add a little extra touch and Rebecca hung this cutie up on her back porch. 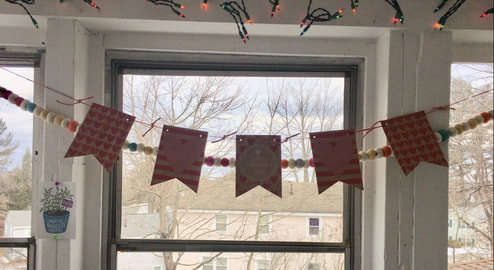 I hope today’s craft gets your wheels turning for other holidays where you could use this same idea. See you soon!
1 Comment
Elaine
2/17/2019 09:43:22 pm
Susan how smart! Cutest Leave a Reply. |
AuthorI am a 27-year-old crafter and baker from New Hampshire! Archives
July 2024
Categories |
 RSS Feed
Proudly powered by Weebly