|
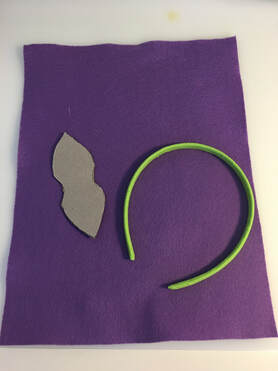
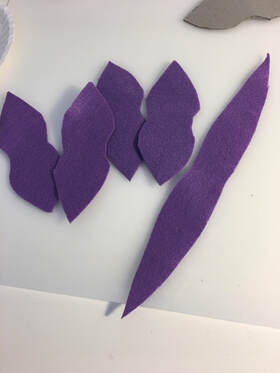
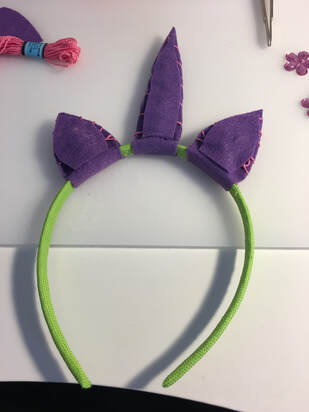
Why hello there everyone! I am SO excited about today's craft because I think they are completely adorable. If you think unicorns are no longer cute and relevant, you are incorrect. Unicorns will forever be relevant. I am trying to stock up for craft fairs later this year and wanted a craft that might appeal to younger boys and girls. I got the inspiration for these types of unicorn headbands from several blogs and images on the internet (I don't claim AT ALL to be the first person to have ever made these). The blog that I drew the most inspiration from is called Life Is Made and here is the link to her post: http://www.lifeismade.com/diy/unicorn-headband-tutorial-with-free-pattern. So the basic supplies for these headbands are headbands (DUH), felt, high quality glue sticks and a glue gun to put those glue sticks in, thread/string/ribbon of some sort, tulle in various colors, stuffing/Polyester filling and then a variety of decorations such as buttons, beads, gems, patterned fabric etc. The most important pieces are clearly the felt, headbands, stuffing and hot glue. The extra added pieces like thread, decorations and tulle can be mixed and matched to meet your style and how you want your headbands to look. I used headbands from the Dollar Store which came in packs of 6 for one dollar. 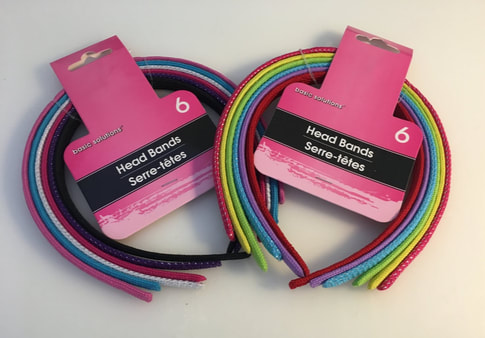 So I started off each headband by picking the headband color I wanted to use and then finding a piece of felt that I thought would go nicely. I had a large store of felt before starting this project but did go out and buy a few pieces of sparkly felt which I though were fun (77 cents a piece at Hobby Lobby!). I then used a template to cut out the ear and horn pieces. I used the ear template provided on Life is Made's blog and then improvised a little when cutting out the horn. Life is Made provided a template for the horn that had you roll the felt onto itself to get a cone shape, which looked awesome on her headbands, but I had such a hard time getting the felt to do what I wanted so I went a different route. I cut out a long piece of felt that was essentially two thin triangles connected at the base by a thin piece of felt. You can see below what the shapes looked like when I cut them out. In the picture below I have four ear pieces cut out, but you only need two ear cutouts per headband as each piece folds over to create one ear.
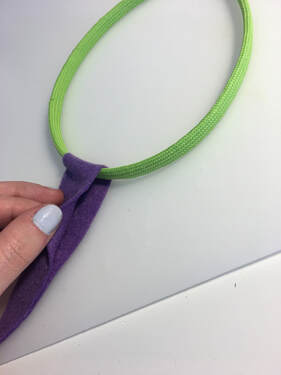
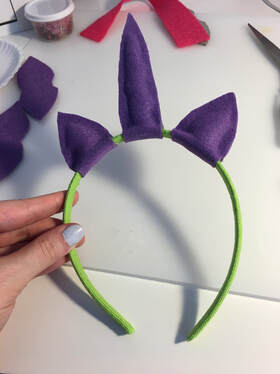
Once I had the pieces cut out, I began to glue them to the headband. I started with the horn piece each time as it was easiest to center it on the headband first. Once you have the horn in the middle of the headband apply some glue to the underside of the band and attach the horn at that point. Having the extra little piece of felt connecting the two halves of the horn allows you to attach it from the underneath and secure it firmly to the headband. Once that glue dried, I began gluing the edges of each side of the horn together. Keep the glue close to the edge as you will want room to add the stuffing. I glued all the way up one side of the horn and then about halfway down the other side, leaving a small space to push in stuffing with my finger. Once I got the horn full of as much stuffing as I wanted, I closed up the hole on the edge of the horn with more hot glue. Do the exact same process for each of the ears. With the combination of the stuffing, the hot glue and the fact that the pieces are essentially wrapped around the headband itself, the horns and ears should be fairly rigid and should easily stand up straight. If any of your pieces seem floppy or bend in half, then you may need to cut open a small hole and add more stuffing to stiffen it up.
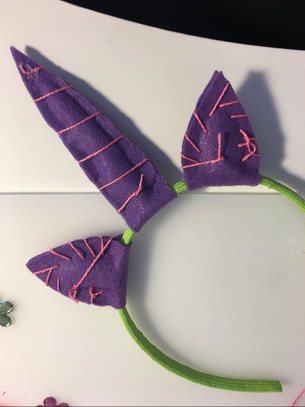
This is the basic structure of your headband all done! Now is really moving on to the decoration side of things. I will show you the steps that I took to decorate one particular headband and then at the end will show you the variety that I have made so far so that you can get an idea of the many different ways that you could decorate these. For this particular headband, I used some pink embroidery thread to give the ears a stitched detail and to add a spiral effect to the horn. I used a thick, long needle to allow me to push through felt that may have some hot glue on it. Once I got the effect that I wanted, I cut out small pieces of felt and glued them to the back of the horn and ears to cover up the messy looking string.
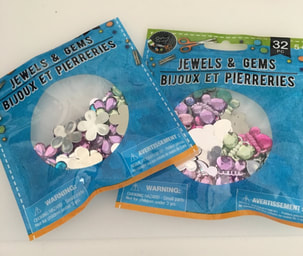
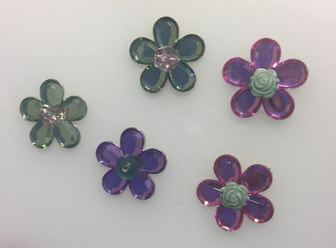
.The decorations I used for this headband were some small shiny gems from the Dollar Store and some beads I had on hand.
I attached the gems across the front of the headband to give a sort of flower crown effect. Here is the headband all done! 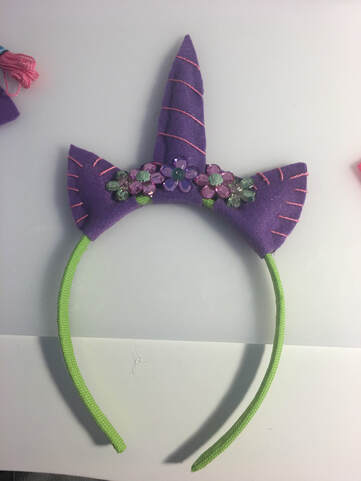 As I mentioned, I did not make all headbands the exact same way, so I will show you below others that I made to give you some ideas! For some I used fabric pieces in the middle of the ears, or buttons rather than gems or added some tulle to look like the unicorn had a crazy colorful mane. There are endless possibilities! 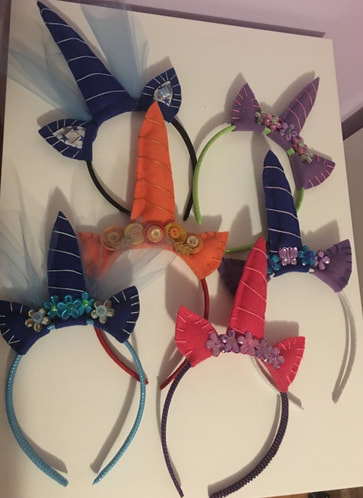 Let me know which is your favorite headband I've made so far in the comments below!
- Rebecca
0 Comments
Leave a Reply. |
AuthorI am a 27-year-old crafter and baker from New Hampshire! Archives
July 2024
Categories |
 RSS Feed
Proudly powered by Weebly