|
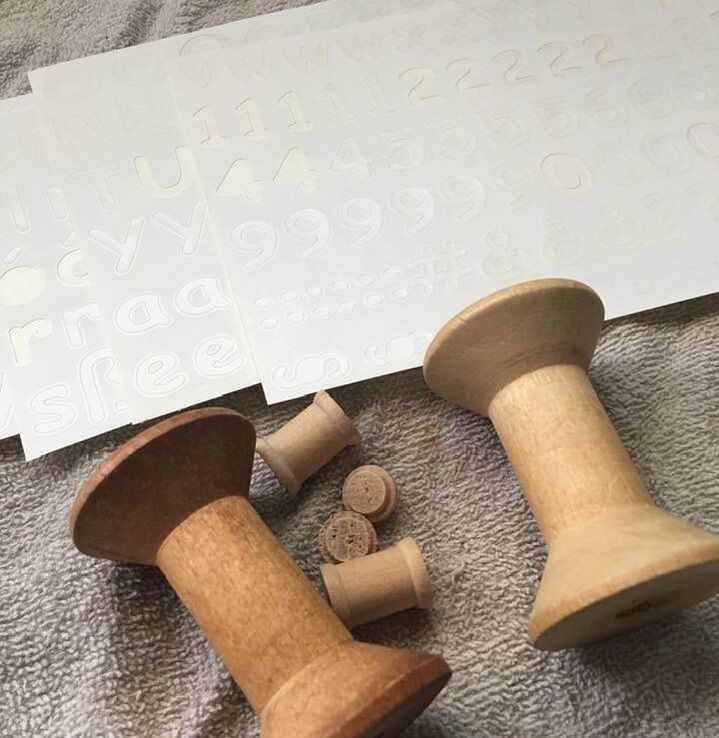
Hi All! Welcome to Guest Blogger: Quarantine Edition. It’s Suzanne, Rebecca’s Momma, here with some springy decor. Since craft shopping is a no-no right now, this project was definitely a “Trash and Stash” project. Even if you don’t have a big stash of crafting supplies, these projects could easily be made with items that might otherwise end up in your recycling bin. To start, I had two blocks of wood (4 x 5.5 inches) and two tin cans (3.5 inches tall). In addition, I used some paint, a glue gun, some twine, fabric and greenery. A little later, I also grabbed some stickers, flowers and some wooden spools.
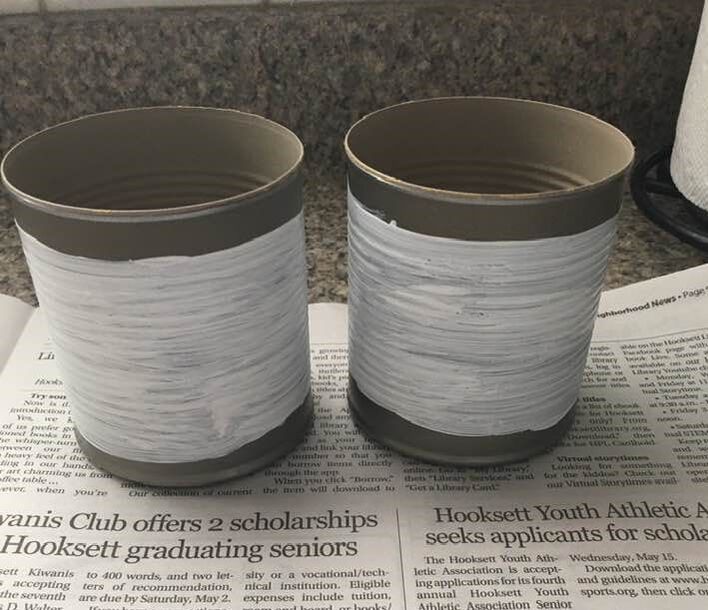
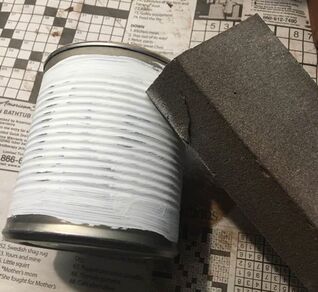
First, we’ll tackle the cans. Mine are from corn, but any would do. Just wash then out carefully and you’ll be all set. I painted the middle portion with some white chalk paint. I wasn’t worried about the very top or the very bottom, because I knew I was going to cover them. After the paint was dry, I sanded the ridges in the center to make it look a little distressed and then dry brushed a little black paint on to add to the distressed look.
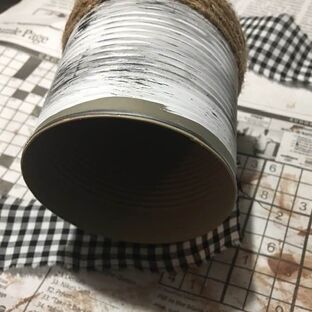
I then wrapped the bottom of the can with some twine, starting with a drop of hot glue to hold the beginning in place. A little hot glue was added here and there to keep the twine in place (especially around the bottom of the can, so the twine would not fall off the edge) and I finished with another small spot of glue to hold the end in place. 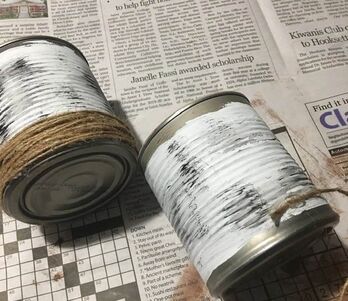 For the top of the can, I ripped a small piece of black and white gingham fabric (so that the ends were frayed) about two inches wide and long enough to wrap around the can, with a little overlap. With the tiniest line of glue around the rim of the can, the fabric was glued on. I then put a little glue on the inside of the can and folded the fabric in to make it look like the can was lined with the fabric. With no floral foam in my stash, I cut up a few paper towel rolls and placed then down in the can, to hold the ends of the greenery in place. I tucked a little faux greenery in the can and called it done.
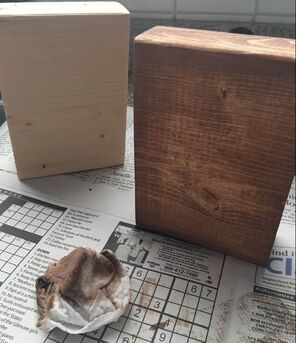
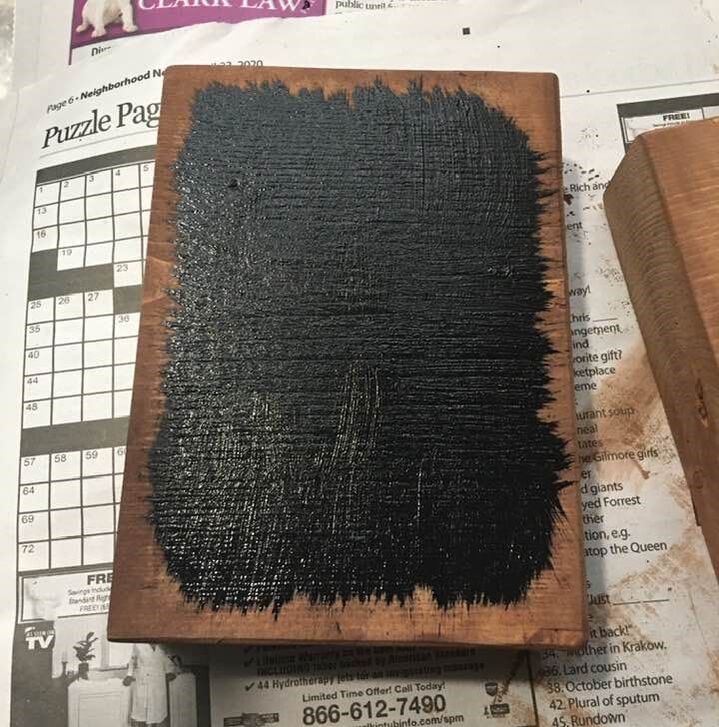
Let’s talk a little about alternatives. No twine or fabric in your stash? How about yarn or ribbon? Or, if you have one and not the other, you could use the same embellishment at the top and the bottom. You could also paint all the way to the top or all the way to the bottom and use something only on the opposite side. Or, paint the whole thing and add nothing to the top and the bottom. Your can planters will be a cute addition to a little vignette any way you finish them off. I had some faux greenery in my craft room, but everything is starting to grow. You could easily add some natural greens into your planters. Now it’s time to pretty up those wood pieces. First, using a baby wipe, I wiped on some brown paint. Using a baby wipe instead of a paint brush gives more of a stained look. Once the paint was dry, I painted just the middle of one side, leaving the edges of the black paint a little jagged, so that the pieces looked a little like a chalkboard.
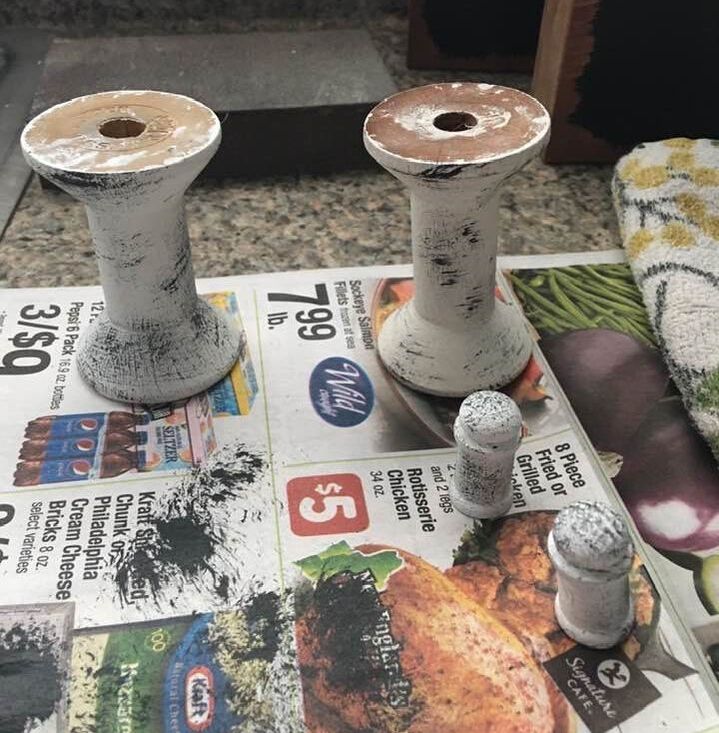
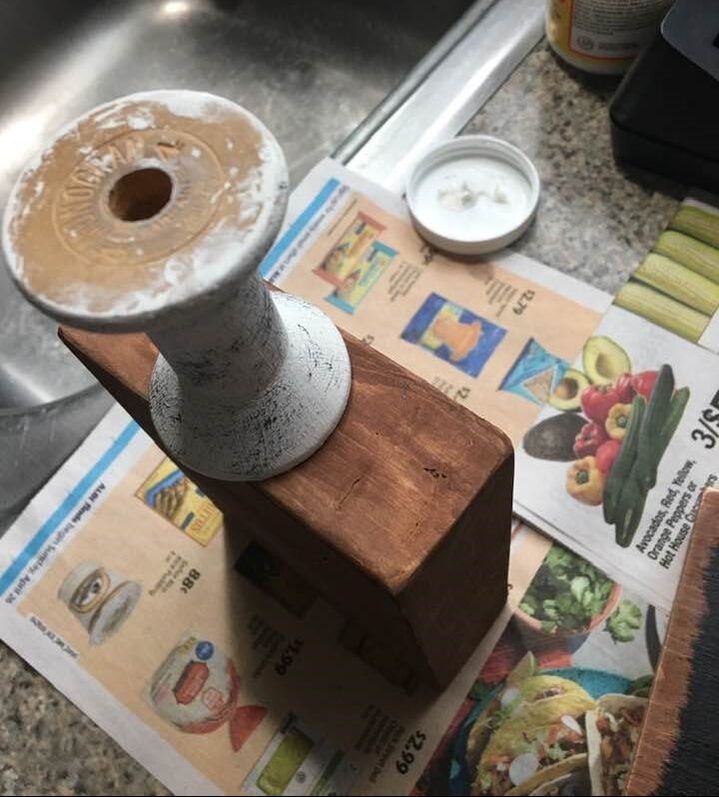
I wanted more height differentiation between the can planters and the wood pieces, so I dug out a couple of wooden spools to make pedestals. Pedestals seemed to call for little finials for the top of the pieces, so I also grabbed two smaller spools and two screw plugs (little pieces of wood that would be tapped into a screw that’s been countersunk). The screw plugs were glued to the little spools and everything was painted with the same white chalk paint used on the cans, then distressed with a little more black paint.
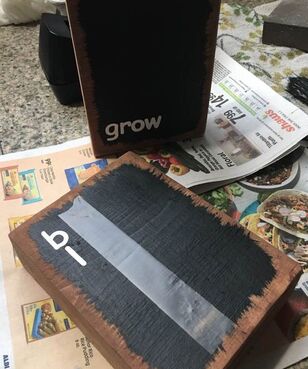
It was time to add some words to my chalkboards. I don’t care for my handwriting, so I found some white letter stickers. Using a piece of tape to make sure the letters stayed straight, I spelled out ‘grow’ and ‘bloom’ then added a thin coat of Mod Podge over the stickers to be sure they didn’t lift up. I hot glued the pedestals and finials on and it was time for decoration. I wrapped some twine around the blocks and added a knotted piece of the gingham fabric. A leaf and a couple of buds was glued on the ‘grow’ block and a leaf and larger flower was glued on the ‘bloom’ block.
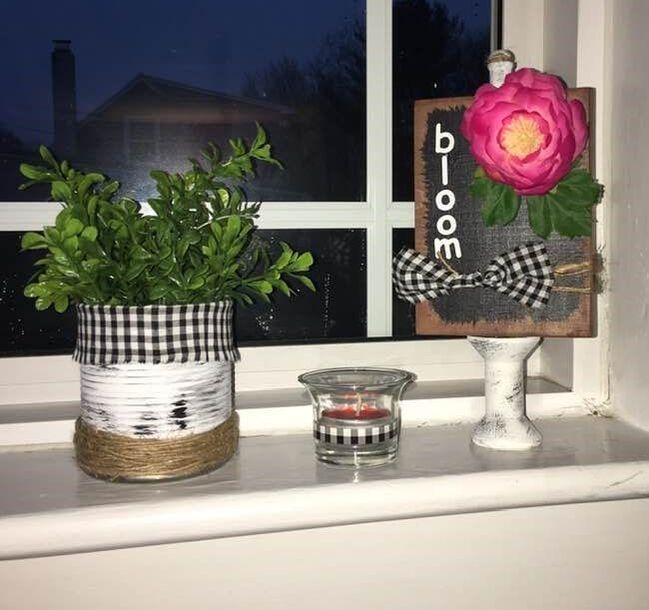
What are the alternatives here? If you have no wood pieces available, you could use a box. My wood pieces are about the size of a box of Pop-Tarts. You could also layer several pieces cut from a larger corrugated cardboard box and wrap the stack in decorative paper or even a paper grocery bag. Small jars (like for spices) could act as your pedestals and any small cover could be a finial. These could also be left off, depending on the scale of your “chalkboard” piece. Flowers and leaves can be cut from paper. These pretty flowers are actually just a number of circles, layered on top of each other with the edges curled up. Decorative paper or magazine pictures with bright colors would make lovely flowers. Here’s the finished product, styled with a couple of small votive holders. I added a tiny piece of fabric around the votive holders to tie everything in together. We have two small, high windows in our living room and these pieces add a nice spot of color there.
I hope today’s post has helped you to look at your “trash” in a new light! Happy crafting!
1 Comment
Elaine Smith
5/7/2020 06:12:38 am
Happy Crafting Susan! Leave a Reply. |
AuthorI am a 27-year-old crafter and baker from New Hampshire! Archives
July 2024
Categories |


 RSS Feed
Proudly powered by Weebly