|
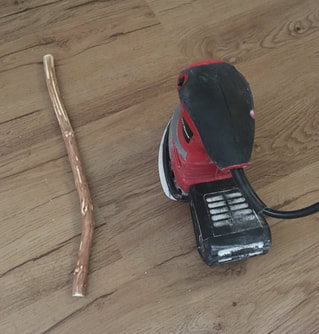
Hello crafty friends! Today I will be giving a run-down of how I go about one of my favorite crafts: magic wands. I'm sure I've mentioned this in other blogs before, but, in case you didn't know, I am an avid fan of Harry Potter. I love the books, which are better than the movies (it's the truth, don't come for me), and have quite a collection of wands. Whenever I have a Harry Potter movie marathon with my parents (I do love the movies, the books are just better), my father insists that we all have our wands out during the movie to add to the experience. Quite a few years ago, I had made my dad a wand, but it was starting to fall apart and, if I do say so myself, my skills have vastly improved since then so it was time to make him another. Here is his old wand alongside the stick I planned to make his new one out of. I usually collect any good sticks I find in the yard (like a weirdo) so I had a few in my stock already and picked the one I thought suited him the best. 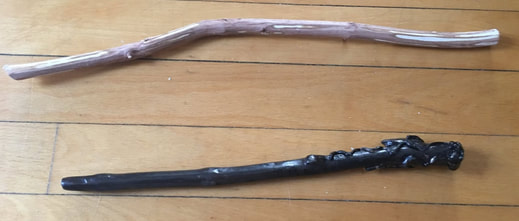 So the first step was to cut down the wand a little and sand it to shape. I used both a small electric sander and some pieces of sandpaper to get the shape that I wanted. The electric sander helped shape the tip of the wand which I wanted to be slightly pointed, while the sandpaper allowed me to smooth out any sharp edges on the wand. I destroyed several pieces of sandpaper during this step.
After getting the wand the shape I wanted it, it was time to paint it. My dad mentioned several times that he wanted a "manly" wand so I decided to go for a deep blackish brown as the base color and then took a dry brush and added some accents in a lighter shade of brown to highlight any natural creases or bumps in the wood. It is hard to see the lighter brown highlights in the wood in photos, but here is the wand painted the dark brown and then with some of the highlights added. 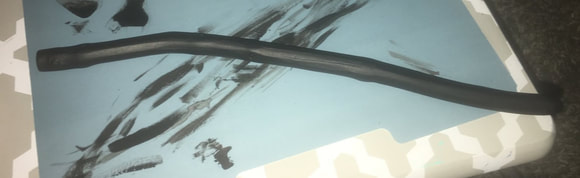  The next step was to decide what I wanted to do to for the special accent on the wand. Previously I have added twine to wands or have added swirls or other designs with hot glue and then painted over them, but for this wand I wanted to try some air dry clay. The wand has a natural bend which creates a sort of handle so I decided I wanted to accentuate that handle and add some clay to that part to bulk it up. I shaped the clay around the wand and wasn't too worried about it being perfectly smooth as I would be able to sand it later once it dried. 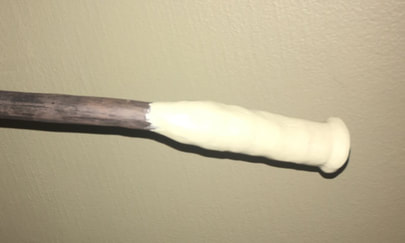 I let the wand dry for about 24 hours and it had cracked slightly as it dried which air dry clay is prone to do. 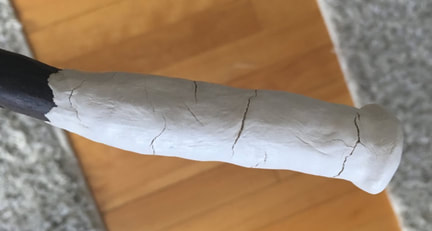 I filled in these cracks with Superglue and then sanded the handle down to make it a smoother surface. I wasn't looking for perfect smoothness as I wanted it to make sense with the more natural texture of the wand, but I wanted to make sure that any traces of the cracks were gone. 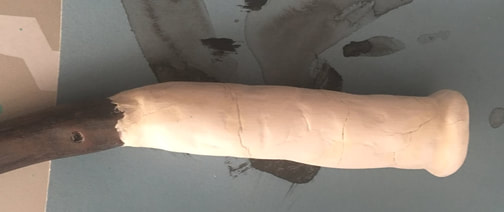 After this I painted the handle a light shade of brown and let that dry. I then covered the entire wand in several coats of clear varnish. I highly recommend DecoArt DuraClear Satin Varnish. I bought this product based off of a recommendation from a YouTube video (I forget which one so sadly I can't credit them) that I had watched before I made a custom Funko Pop for my boyfriend. This is the varnish that the person in that video said to use for sealing in the Funko Pop and I have used it for several projects since then. Many clear sealants leave things tacky and cloudy, but this varnish dries clear and smooth and protects from scratching and fading. I have even gone back and added the varnish to several wands that I had made before using this product. See how shiny the wand is? 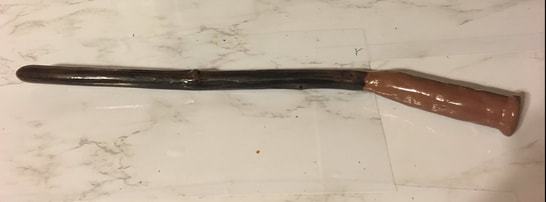 The next step was to package up the wand for my dad to give him the real Harry Potter experience. I have wand boxes already made, which I did using a template that my mom created for me. I was going to show how to make the box, which is made out of black, thin cardstock, as well, but to be honest with you I didn't feel like it because the template has to be tweaked slightly to match the length of the wand and that seemed like a whole lot of math for my brain. So here is the box all completed! Inside is just some paper filling that you can pick up at the Dollar Tree in the section with all the gift bags and tissue paper. 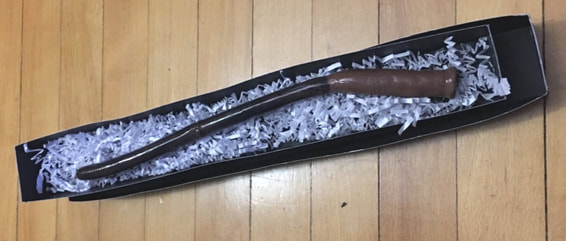 The absolute final step was to make a little sheet of paper to go into the wand box, explaining the qualities of the wand. This is a completely unnecessary step that I did because I'm a little crazy, but it adds to the experience. I went on Pottermore and looked up the descriptions of wand woods and wands cores that JK Rowling provides and picked out the ones I though best suited my dad. Then I wrote a little note stating that this wand was an "authentic" wand, 13 inches long, made of dogwood and containing a unicorn hair core. Like I said, I'm a big Harry Potter nerd, as are my parents and now my boyfriend (mwahaha I've pulled him into the web). I will slide this note into the wand box and present him his new wand this evening. What do you guys think about the wand? There are so many different variations you could do on this craft and it is so easy to customize to what you want. For example, if you or someone you love is into fairies rather than witches and wizards, these can just as easily be painted a bright color and given a sparkly, shiny accent to fit that aesthetic. Let me know if you are a crazy Harry Potter fan too in the comments below!
- Rebecca
1 Comment
Momma
7/31/2019 07:21:28 pm
Happy birthday Harry Potter! Leave a Reply. |
AuthorI am a 27-year-old crafter and baker from New Hampshire! Archives
July 2024
Categories |

 RSS Feed
Proudly powered by Weebly