|
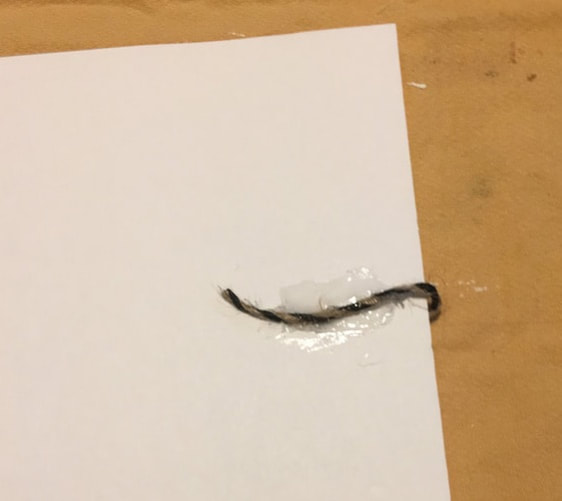
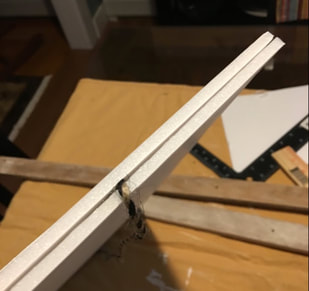
Hello, crafty friends. It’s Suzanne, Rebecca’s Momma, back today with a craft that’s a little bit Dollar Store, a little bit Recycled and a whole lot of Cute. Not long ago, I saw this sweet placemat at my local dollar store. It’s made to look like a chalkboard, complete with doodles and the shadow of “erased” chalk on it. I thought it would be the basis of a great décor piece in the farmhouse style that’s so popular right now, but it definitely needed a little sprucing up to make it display worthy. To do that, I decided to use some foam core board and old laths. Let’s talk about those first. 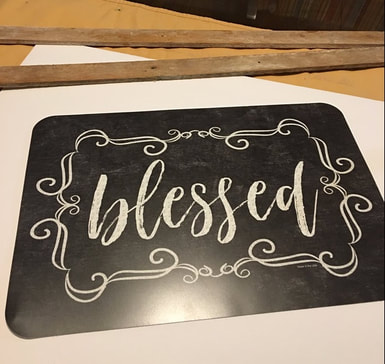 Foam core is available at the dollar store, but this would also be a great way to recycle some of those shipping boxes you might have. The foam core or cardboard was added to the back of the placemat to give it some stability and weight. Laths are narrow and thin pieces of wood that are used to hold plaster in place. They can also be used to make lattice. My nephew (Hi, Nathan!) works with a general contractor and salvaged some for me when tearing out a wall in an old house. You can certainly purchase new at a home improvement store, but I liked the raw look of this old stuff, with its rough edges and nail holes (not to mention that it was free!). The laths were used to make a frame. Let’s talk process now. First, I cut two pieces of foam core about one inch wider and the same height as my placemat. I made the foam core a little wider because the image on the placemat had a little more room top and bottom than it did side to side and I knew that I’d glue the wood pieces in such a way as to make the image centered equally in my frame. Using strong hot glue (Gorilla brand is excellent and a good choice for long term hold), I started by gluing a piece of twine to one piece of foam core and then sandwiched the ends between the two pieces when I glued them together. This is going to make a hanger. I didn’t want the twine to show, so the piece is only slightly longer than the width of the foam core board, but you can make it longer if you’d like it to show.
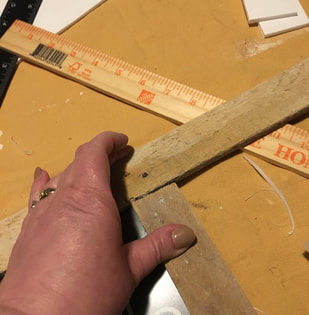
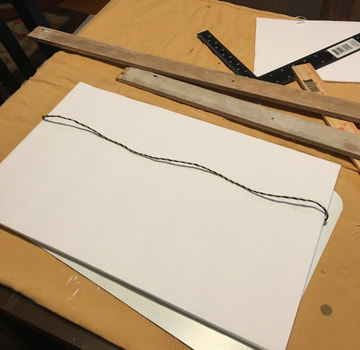 Using some wet glue to give myself a little wiggle room, I glued the placemat, centered, on the stack. I opted to use a wet glue here because I was afraid hot glue would melt the plastic placemat. In the end, I did add a line of hot glue around the edge of the placemat to hold it in place. I was glad I didn’t get more aggressive with the hot glue because though it didn’t melt the placement, I could see a “bump” from the line of glue. While that was drying, I worked on the frame made of the laths. First, I had to decide how long my pieces needed to be. Using the super scientific “eyeballing” method, I laid one piece of lath on the edge of the placement and lined up the top piece with the outside edge. I moved the edge piece to the other side and marked the top piece at the outside edge. That was my cutting line.
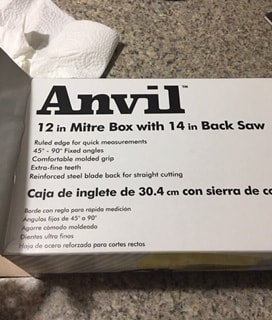
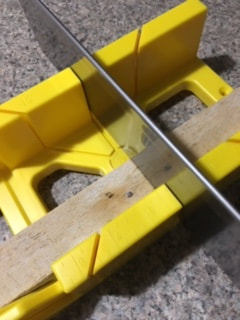
To cut, I used a handy dandy new tool I just bought called a miter box. This is a great little hand tool to use for crafting. It makes cutting small cuts easy and guides the saw in a groove to ensure the cuts are straight.
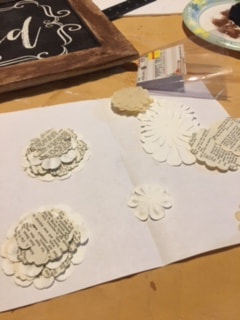
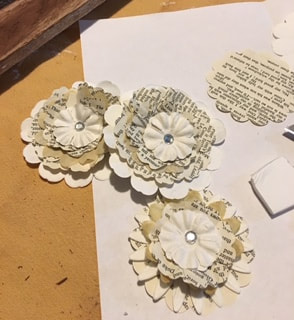
After gluing the top and bottom pieces in place, I measured the sides, cut two pieces to fit and glued those on as well. 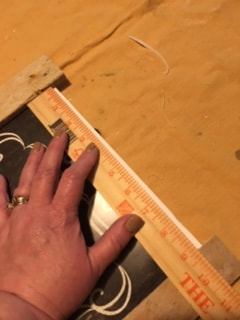 My basic frame was done! 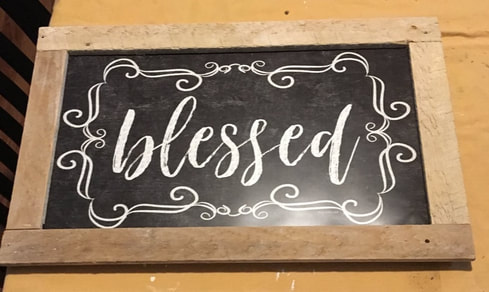 At this point, I decided that the frame was a little light, so using a dark brown craft paint and a stiff brush, I dry brushed on some paint. I wasn’t going to neatness or full coverage, so I just did a quick swipe, leaving some areas unpainted. It would certainly have been easier to paint before gluing, but sometimes things just evolve in the process. 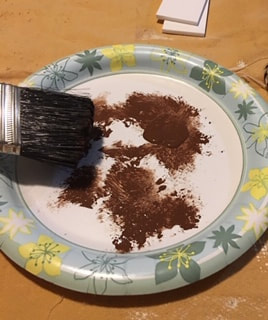 I thought the piece needed a little something more to jazz it up, so I made some stacked paper flowers. Using some paper flowers I’d picked up DEEPLY discounted at a craft store, some punched shapes made from old book pages and a little flower embellishment with a rhinestone at the center, I stacked the pieces up and used a brad to hold everything together. I scrunched up the book page layers to give the flowers some dimension.
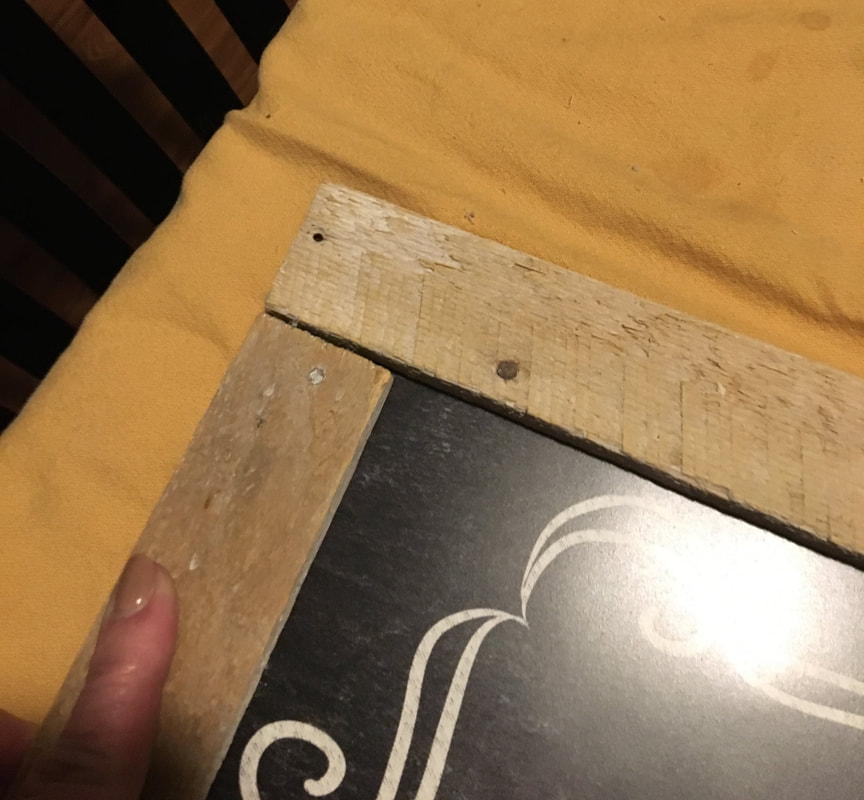
I glued these to the bottom left corner of the frame, using a small square of foam core board to pop one up a bit higher. 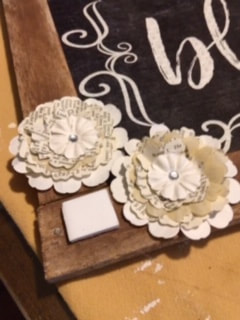 Here’s a view of the back of the piece. You can see that the lath frame is a little larger than the foam core board, which gives it a finished look when viewed from the side. 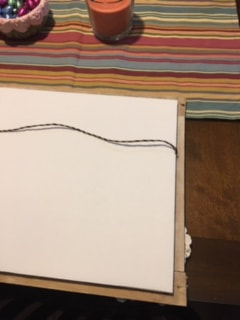 And here’s the finished piece hanging in my dining room. I’m quite proud of how it turned out and will be happy to display it in my home. 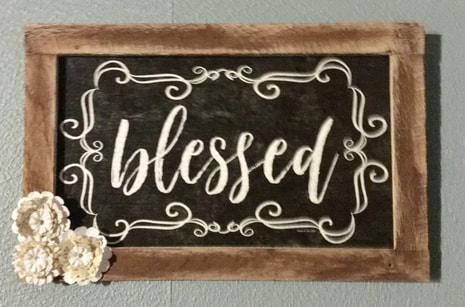 I think it looks like something you’d pay upwards of $20 for at a home décor store but cost just $2 ($1 for the placemat and $1 for the foam core board) to make. I haven’t counted the cost of the items from my stash or the cost of the miter box, because those get used over and over again and are negligible.
I hope you’ve enjoyed today’s project and it inspires you to look at everyday items in a different way. Until next time!
0 Comments
Leave a Reply. |
AuthorI am a 27-year-old crafter and baker from New Hampshire! Archives
July 2024
Categories |
 RSS Feed
Proudly powered by Weebly